WendyMay
Member
- Joined
- May 11, 2021
- Messages
- 142
- Reaction Score
- 0
- Points
- 21
- #1
I can remember way back to the early part of this century, before I knew how to use any of the more advanced selection tools, all the different types of things I would select. Most of the time, it was either round/oval objects or square/rectangle ones. I never got into clipping out people or things with random and complex edges. And honestly, the only reason I would ever select anything was to copy/paste it somewhere else or to crop the areas of the photo that weren’t selected, out. Things were very straightforward.
I guess you can call what I was doing the basics. As with in many other areas, the basics are critical to understand because they are taken advantage of so frequently. They are an absolute must if you plan on working in Photoshop for any extended period of time.
In today’s post, I’m going to show you two really fast and easy tricks that will help immensely when it comes to making basic selections in Adobe Photoshop. For my example down below, I’ll be using the Elliptical Marquee Tool to select the top ring of a cup of hot cocoa. To make an accurate selection, I’ll use two additional tools; guides and the Free Transform Tool. I know I alluded to both of these techniques in previous posts, but I feel it’s a good idea to write about them in their own post today. I oftentimes look back and refer to these types of posts and something like this will make it easier to do so.

To create a guide, we’ve got two options. We can simply pull a guide in from the ruler that surrounds the work area or we can use a menu item to take care of it. I’ll show you how to use the ruler pull method now.
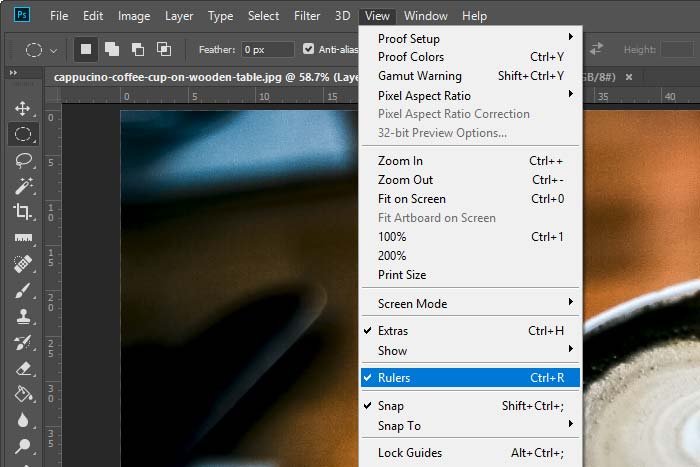
First, make sure your rulers are showing. To do that, head up to the View > Rulers menu item and make sure that option has a check next to it. If it doesn’t, click it to set it.
After that, to create a guide, you can simply click inside one of the rulers, hold down and drag out into the work area somewhere. If you click on the horizontal ruler, you’ll create a horizontal guide. If you click on the vertical one, you’ll create a vertical guide. Check this out.
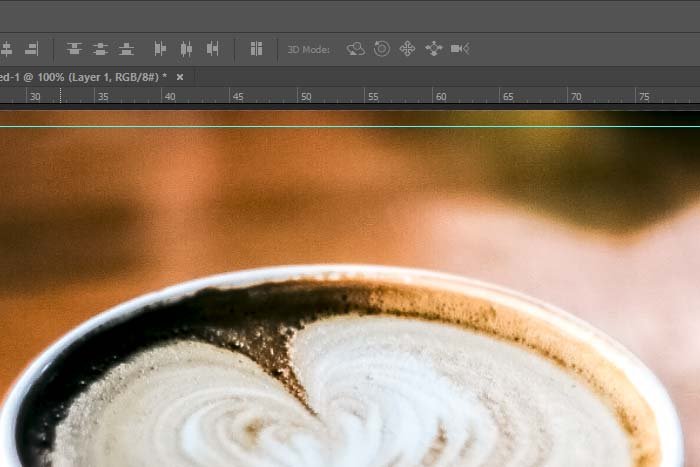
That blue line is a guide. It’s basically an invisible tool that assists with design that doesn’t appear in the final product.
Tips For Tabs & Guides in Adobe Photoshop
The other method we can take advantage of is generally used when precise guides are needed. We can set guides anywhere we want on the photo by filling in a value. To do this, head up to the View > New Guide menu item and click.
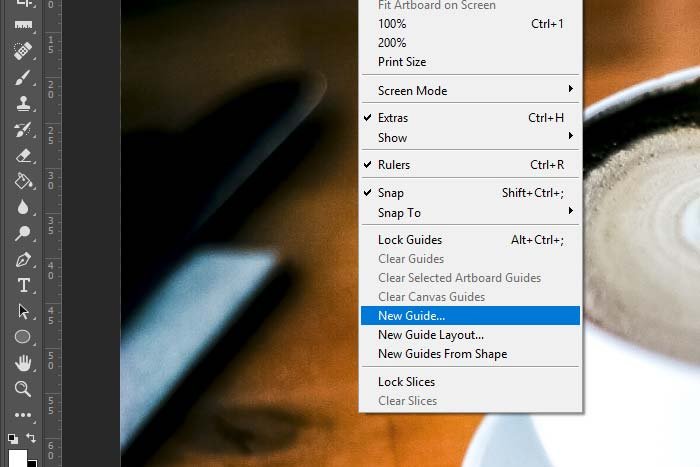
Then, once the New Guide dialog box appears, you can choose whether you want your guide to be created in a horizontal or vertical fashion and the position in which it should reside.
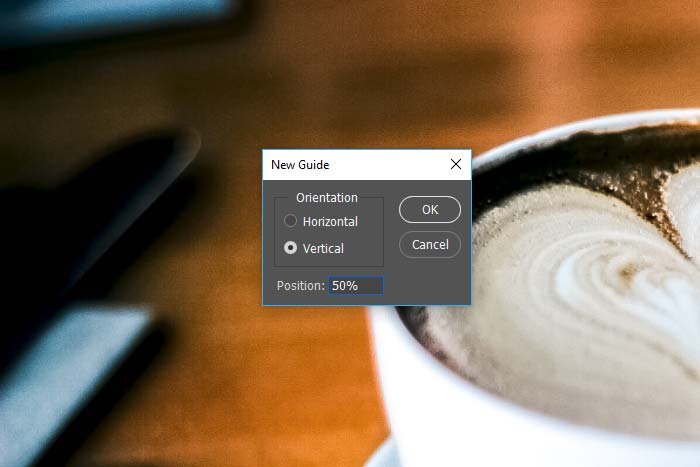
After that, click OK and the guide will be placed in the work area somewhere. For this project, I’ll just pull four guides in using the ruler method and set them around the rim of the mug.

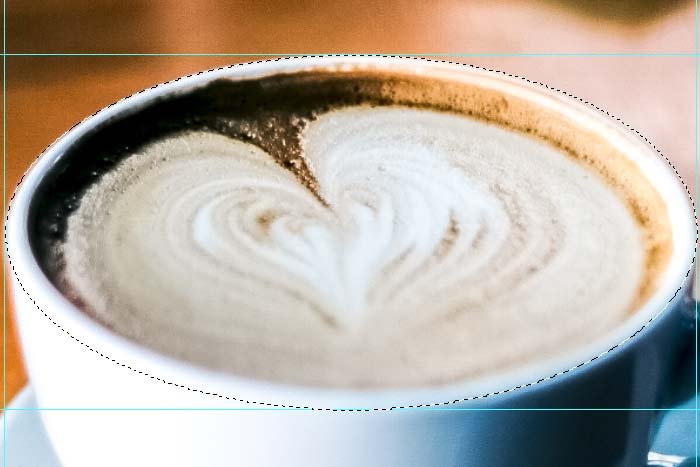
I’d say that’s not bad for my first try. I would never had gotten so close without those guides.
To transform a selection to resize or distort it, we’ll need to visit the Select > Transform Selection menu item and click.
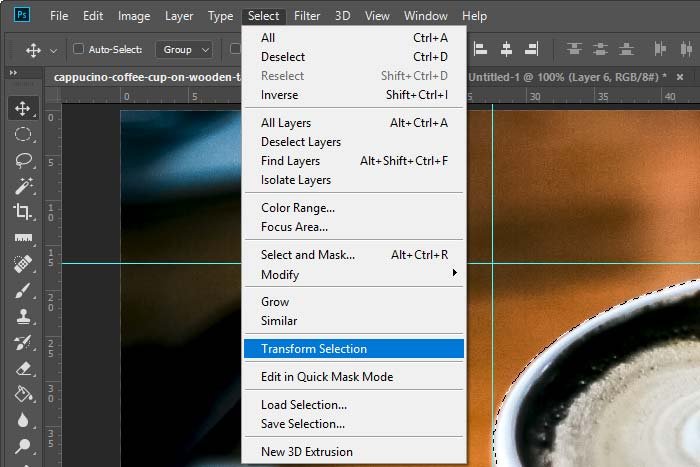
Once we activate the Transform tool, we can decide what to do with it. If I wanted to rotate the selection, I could place my pointer just outside of the bounding box. When the cursor turns into a curved arrow, I could click and drag. That would rotate it.
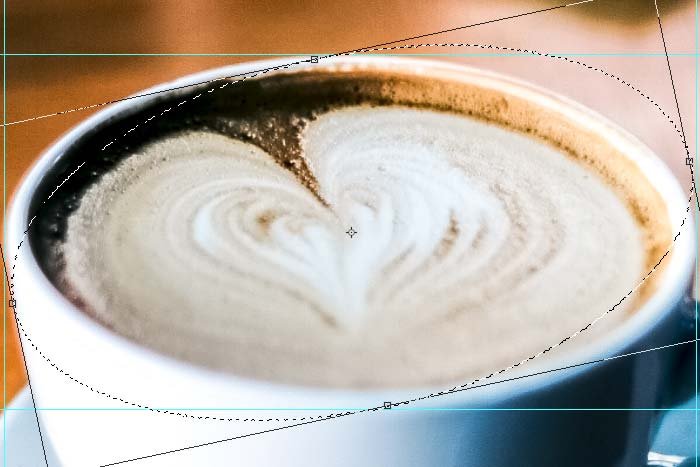
If I wanted to simply resize the selection, I could click and drag one of the corners and push towards the center or pull away from it. Remember, to constrain the selection’s proportions, hold down the Shift key while dragging.
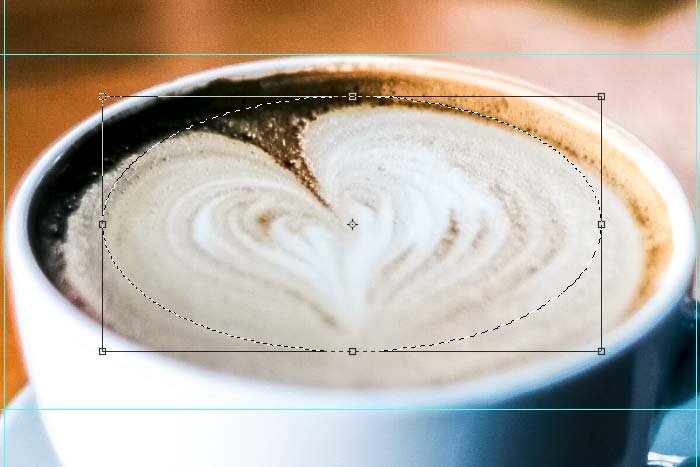
Really though, we most often need to distort the selection. This is because the objects we oftentimes need to select are crooked or warped.
To distort a selection, hold down the Ctrl key on your keyboard while dragging one of the bounding box handles.
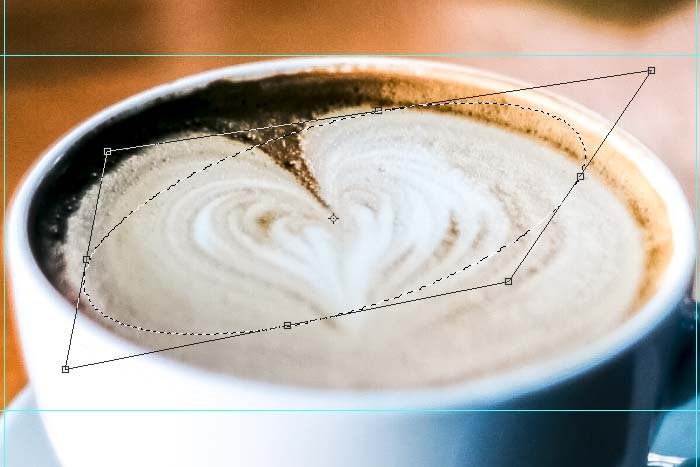
Obviously, I didn’t select the rim of the mug like I intended to earlier. I merely wanted to show you how I could do so. With this knowledge, I should be able to select almost anything with a regular shape with either the Elliptical Marquee Tool or the Rectangular Marquee Tool.
Remember, when transforming a selection, the transform tools follow the same rules the regular transform tools do, so if you are knowledgeable about them, you should have no issues.
——
I hope I clearly explained how to set up guides for easier selections in Adobe Photoshop as well as how to transform selections in the same application. If you have any questions or concerns regarding this post, please leave them in the comment section below. Thanks for reading!
I guess you can call what I was doing the basics. As with in many other areas, the basics are critical to understand because they are taken advantage of so frequently. They are an absolute must if you plan on working in Photoshop for any extended period of time.
In today’s post, I’m going to show you two really fast and easy tricks that will help immensely when it comes to making basic selections in Adobe Photoshop. For my example down below, I’ll be using the Elliptical Marquee Tool to select the top ring of a cup of hot cocoa. To make an accurate selection, I’ll use two additional tools; guides and the Free Transform Tool. I know I alluded to both of these techniques in previous posts, but I feel it’s a good idea to write about them in their own post today. I oftentimes look back and refer to these types of posts and something like this will make it easier to do so.
Demo Photo
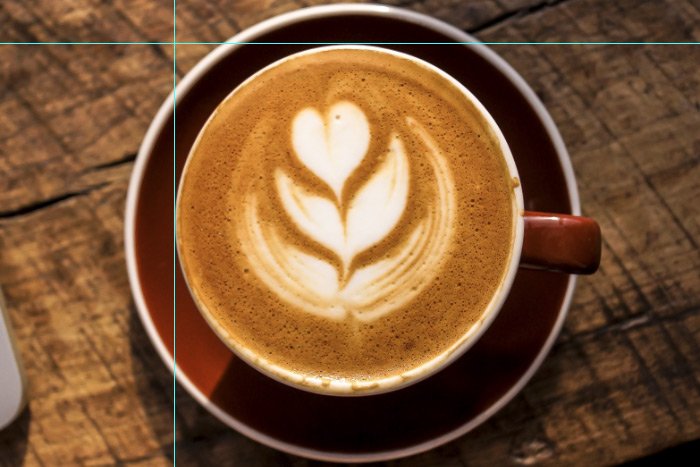
As I mentioned above, I’ll be attempting to select the top ring of the mug in the photo below. I don’t need to do this for any particular reason other then to show you how to do it. And to let you know, the concepts I’ll demonstrate below can be translated and used with any type of a shape. Squares, rectangles, etc…
Setting Up Guides
Circles and ovals are notoriously difficult to accurately select the first time around. I almost never get them right. As for squares, they’re relatively easy. All I need to do is to place my pointer on one of the corners and pull until the selection is made. When it comes to circles or anything with rounded edges, there’s no corner to place the pointer on. That’s where guides come into play. We need to create a corner.To create a guide, we’ve got two options. We can simply pull a guide in from the ruler that surrounds the work area or we can use a menu item to take care of it. I’ll show you how to use the ruler pull method now.
First, make sure your rulers are showing. To do that, head up to the View > Rulers menu item and make sure that option has a check next to it. If it doesn’t, click it to set it.

After that, to create a guide, you can simply click inside one of the rulers, hold down and drag out into the work area somewhere. If you click on the horizontal ruler, you’ll create a horizontal guide. If you click on the vertical one, you’ll create a vertical guide. Check this out.

That blue line is a guide. It’s basically an invisible tool that assists with design that doesn’t appear in the final product.
Tips For Tabs & Guides in Adobe Photoshop
The other method we can take advantage of is generally used when precise guides are needed. We can set guides anywhere we want on the photo by filling in a value. To do this, head up to the View > New Guide menu item and click.

Then, once the New Guide dialog box appears, you can choose whether you want your guide to be created in a horizontal or vertical fashion and the position in which it should reside.

After that, click OK and the guide will be placed in the work area somewhere. For this project, I’ll just pull four guides in using the ruler method and set them around the rim of the mug.

Making a Guided Selection
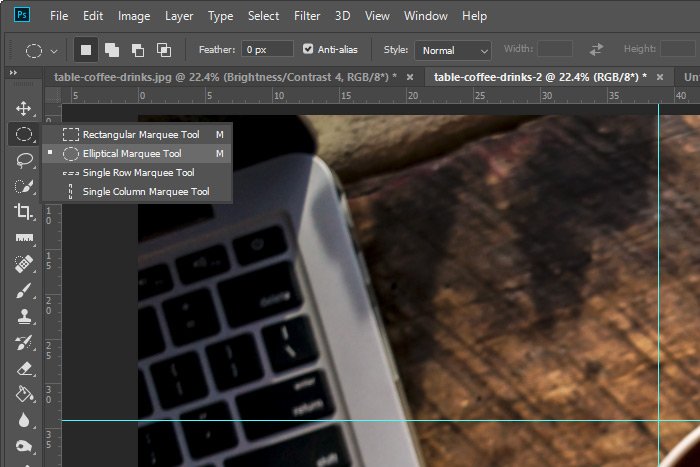
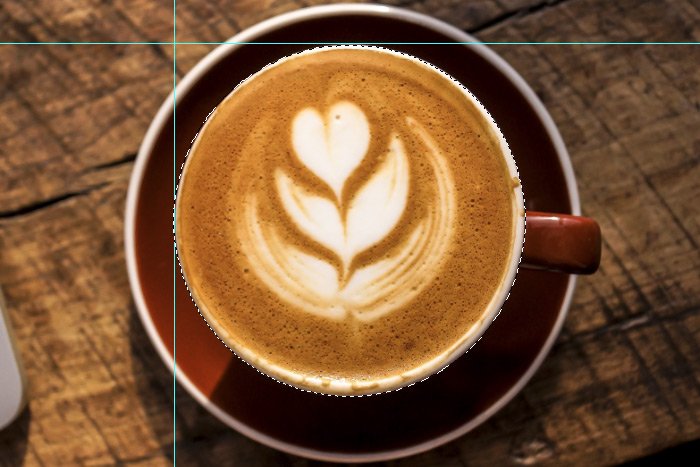
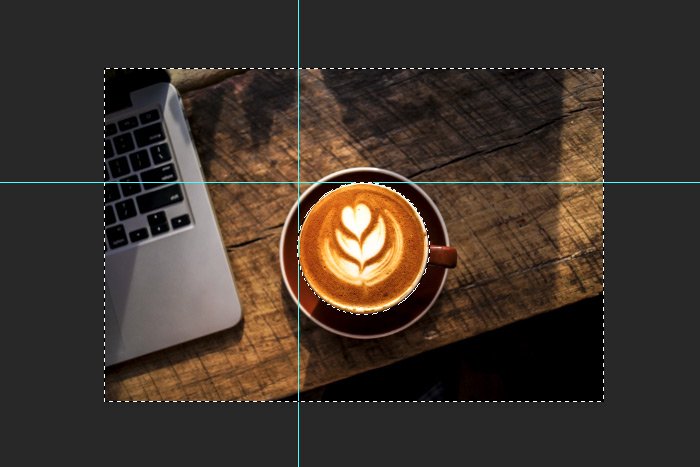
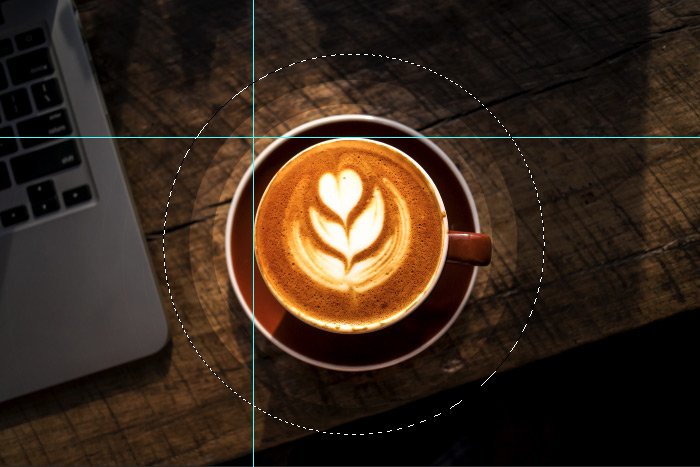
After the guides have been set up, I can activate the Elliptical Marquee Tool and then click on the guides’ upper left corner and drag down to their lower right corner. This is what I’ll end up with.
I’d say that’s not bad for my first try. I would never had gotten so close without those guides.
Transforming a Selection
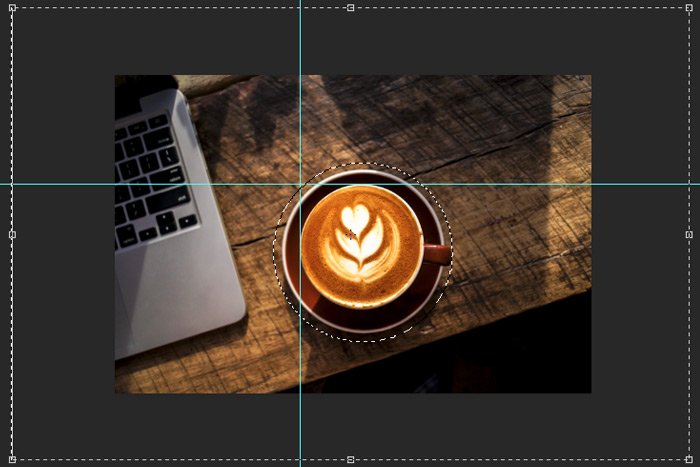
Okay, so we all probably know that selecting something is rarely so easy. I mean, how often do we have mugs on a table that are sitting absolutely level or plates that are straight? I’m sure you get the idea here. It’s not every day that we stumble across items in photos that are set up so wonderfully. This isn’t an issue though because we can easily transform a selection once it’s made.To transform a selection to resize or distort it, we’ll need to visit the Select > Transform Selection menu item and click.

Once we activate the Transform tool, we can decide what to do with it. If I wanted to rotate the selection, I could place my pointer just outside of the bounding box. When the cursor turns into a curved arrow, I could click and drag. That would rotate it.

If I wanted to simply resize the selection, I could click and drag one of the corners and push towards the center or pull away from it. Remember, to constrain the selection’s proportions, hold down the Shift key while dragging.

Really though, we most often need to distort the selection. This is because the objects we oftentimes need to select are crooked or warped.
To distort a selection, hold down the Ctrl key on your keyboard while dragging one of the bounding box handles.

Obviously, I didn’t select the rim of the mug like I intended to earlier. I merely wanted to show you how I could do so. With this knowledge, I should be able to select almost anything with a regular shape with either the Elliptical Marquee Tool or the Rectangular Marquee Tool.
Remember, when transforming a selection, the transform tools follow the same rules the regular transform tools do, so if you are knowledgeable about them, you should have no issues.
——
I hope I clearly explained how to set up guides for easier selections in Adobe Photoshop as well as how to transform selections in the same application. If you have any questions or concerns regarding this post, please leave them in the comment section below. Thanks for reading!


