JodyBuchanan
Member
- Joined
- May 10, 2021
- Messages
- 138
- Reaction Score
- 0
- Points
- 21
- #1
I know I’ve covered selections in Adobe Photoshop about a hundred times on this blog, but it really is an endless topic. I bet someone could create an entire website and limit their content to just selections. It’d be a fairly large site too. The whole thing is almost infinite and since it revolves around creativity, it becomes exponentially almost infinte.
I’m going to keep things easy today. I merely want to discuss one area of selections that has to do with expansion and contraction. Basically, after you make a selection in Photoshop and see the marching ants doing their things, you have the ability to grow the entire selection a specific number of pixels that you designate. You can also shrink the selection the same way. Now, I understand that many of you might ask, “Why in the world would I want to do that?,” so I’m going to walk through a quick project today that should give you some idea of how creative you can get with this type of thing. The project might not be realistic in a sense that anyone would ever want to replicate it, but my hope is that it will get the gears in your head turning.
My plan is to make a selection of some silhouettes at a music concert. After I have that all squared away, I’ll both shrink and expand that selection and do a few interesting things to it. The end result should add a creative touch to the original and I’m hoping that it will look like something that might be used on a CD/vinyl cover or something like that.

Reusing Selections & Masks in Adobe Photoshop

As I did in the post I just linked to, I’ll click the Select and Mask button up in the options bar, refine my selection and output it to a mask. This will be the result. I’ll show you the layer and mask in the Layers panel as well as the image itself.
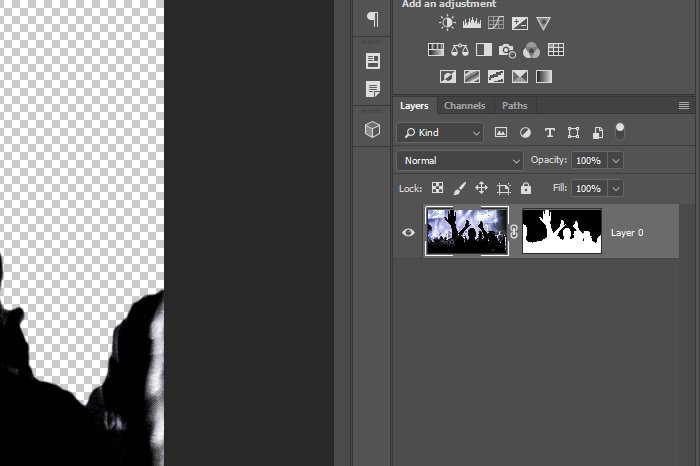
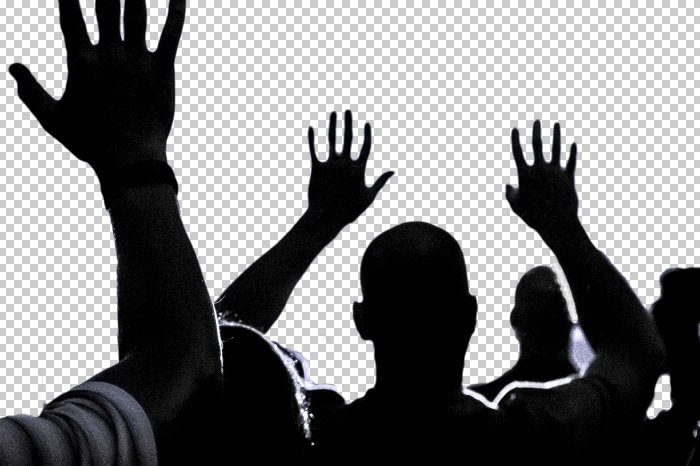
The reason I created a mask like this was so I could easily reselect the same portion of the image over and over again. I’ll want to do that at least a few times in the sections below. This will be my template of sorts.
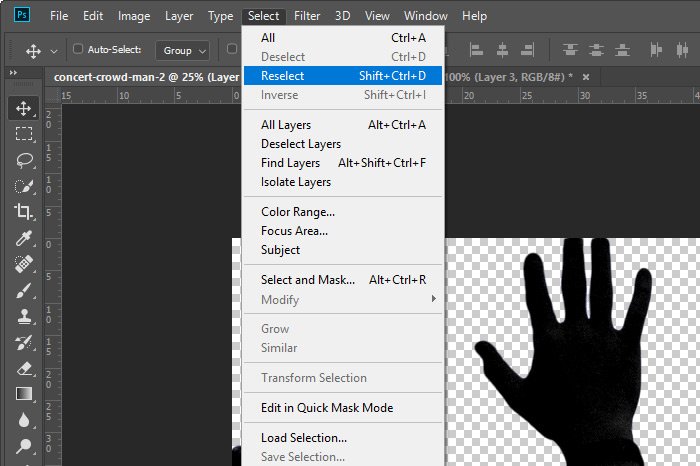
After that, I’ll go back to the Layers panel and click on the actual image thumbnail as opposed to the mask thumbnail. I want to activate the regular thumbnail now. Then, I’ll use the keyboard shortcut of Ctrl+C to copy and then Ctrl+V to paste. This will copy the selected area and place it in its own layer.
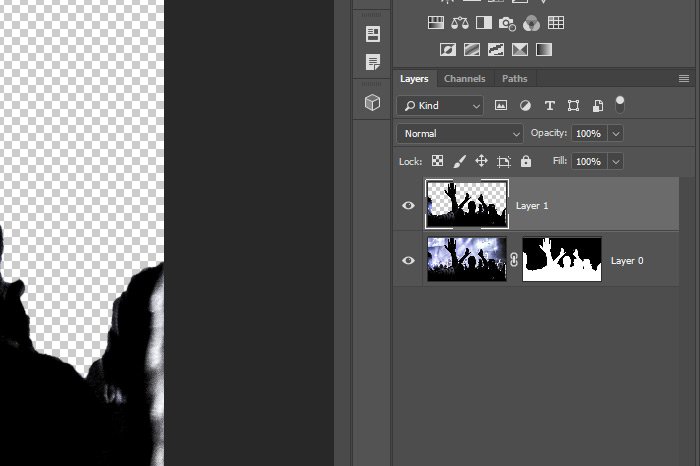
That’s perfect. Now, I’ll double-click on the new layer’s thumbnail (the copied crowd) and by doing that, the Layer Style palette will appear.
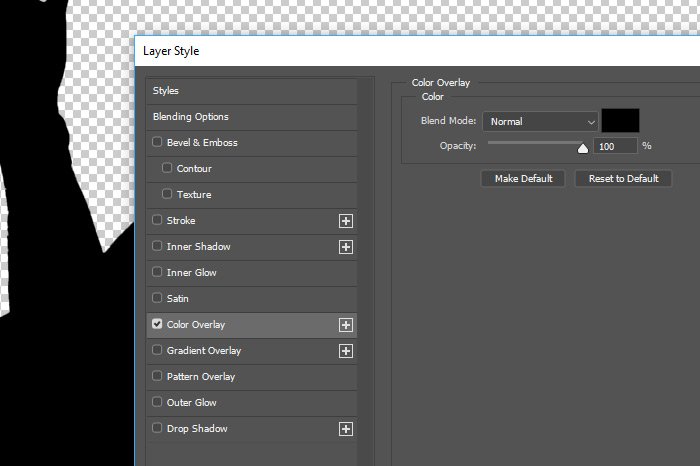
I’ll click on the Color Overlay option in the left column and once I’m in that area, I’ll choose the color Black. I’ll then click the OK button to exit out of the palette. This will be my result.
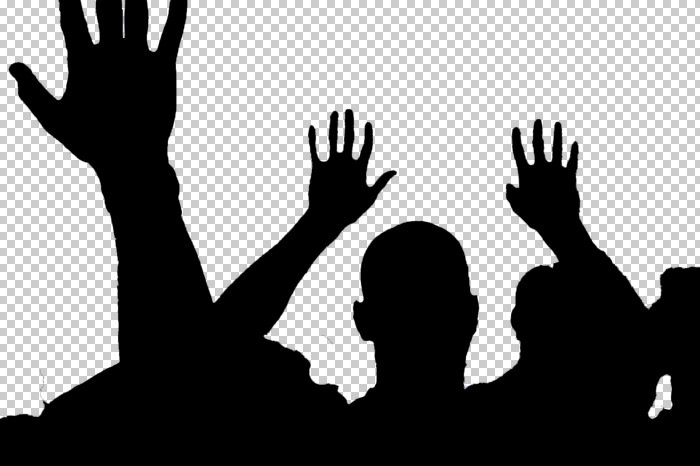
Now I’ve got a true solid black silhouette.
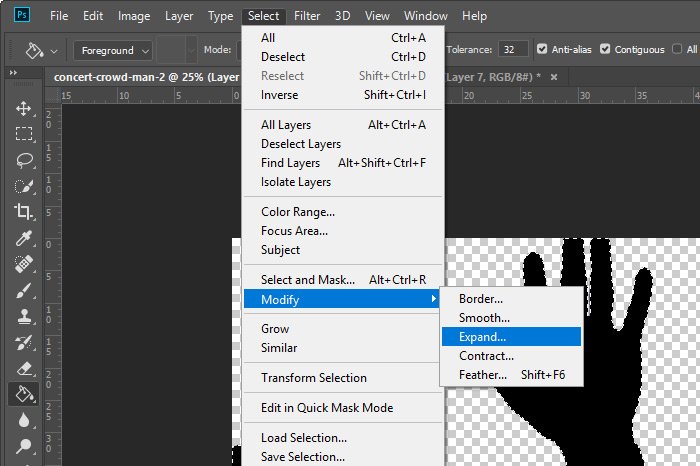
If you’ll notice, the Contract menu option is directly below the Expand one. Whatever the Expand option does, the Contract one does the opposite.
After I click that menu item, the Expand Selection dialog will appear. I’ll type in 30 to grow the current selection by 30 pixels all around it. Doing this sort of acts like blowing up a balloon does.
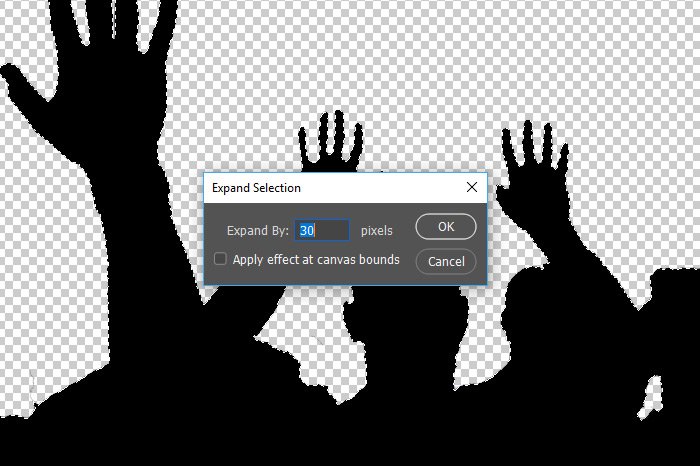
When I’m finished, I’ll click OK to grow the selection. Let’s look at the result.
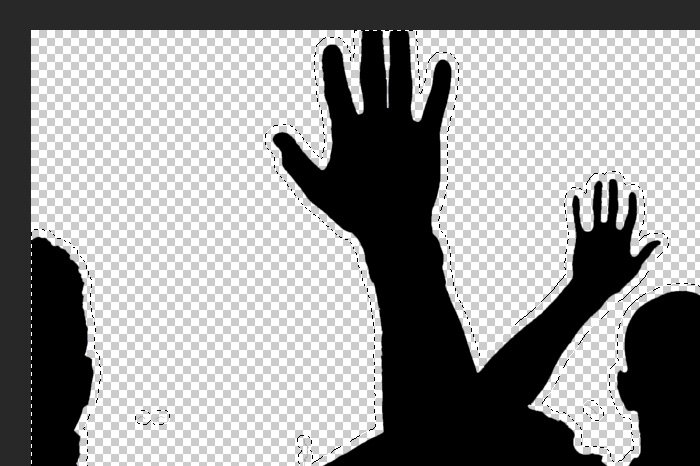
I’m not sure if you can see that or not, but the selection has been expanded. Look closely at the marching ants. Also, if there are any artifacts that were unknowingly selected, I can always get rid of those with the Eraser Tool later on. That’s not a big deal.
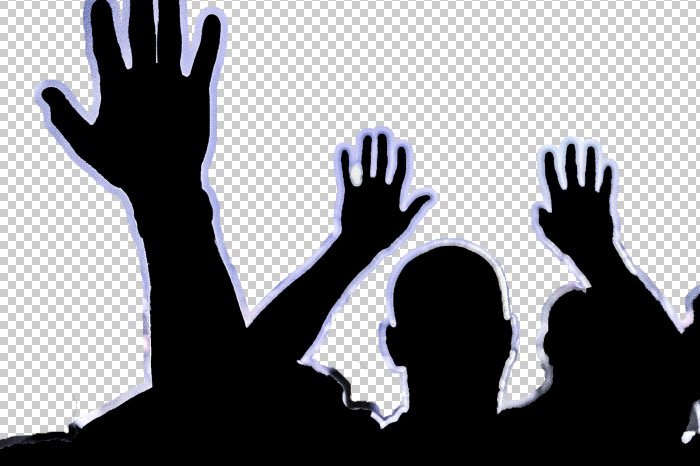
Do you see that outline? That’s all I was after. That’s why I needed to use the expand selection feature. Again, I could just as easily have contracted the selection. The only reason I didn’t was because I had no use for it this time.
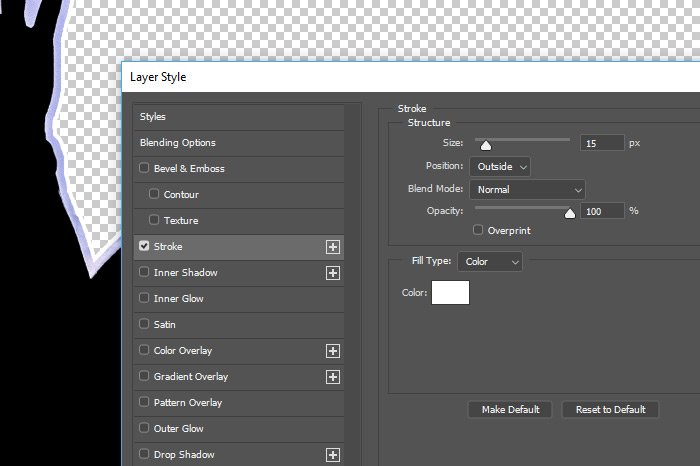
Okay, now I’m just being silly. I figure that an stroke might look interesting along the edge of the outline, so I’ll double-click on the layer thumbnail that was created with the outline in it. Doing this will pop open that Layer Style palette again. Once open, I’ll click Stroke in the left column and then I’ll change the size to 15. That should do it. I’ll also be sure to change the color to White and then click the OK button to apply the change.
After all this work, I’ll have the silhouette that has an outline of the original image and a stroke around that outline. If I added a new layer all the way at the bottom of the stack in the Layers panel and filled that layer with black, this is what I’d have:

And if I imported the original image and placed it right above the bottom black layer and reduced the opacity of the image to 50%, I’d have this final image.

It’s just a quirky little idea I thought up today as an example of what the Expand selection feature might be used for. It’s interesting, to say the least.
I hope I clearly explained how to use the expand and contract selection features in Adobe Photoshop. If you have any questions or concerns regarding this post, please leave them in the comments section below. Thanks for reading!
I’m going to keep things easy today. I merely want to discuss one area of selections that has to do with expansion and contraction. Basically, after you make a selection in Photoshop and see the marching ants doing their things, you have the ability to grow the entire selection a specific number of pixels that you designate. You can also shrink the selection the same way. Now, I understand that many of you might ask, “Why in the world would I want to do that?,” so I’m going to walk through a quick project today that should give you some idea of how creative you can get with this type of thing. The project might not be realistic in a sense that anyone would ever want to replicate it, but my hope is that it will get the gears in your head turning.
My plan is to make a selection of some silhouettes at a music concert. After I have that all squared away, I’ll both shrink and expand that selection and do a few interesting things to it. The end result should add a creative touch to the original and I’m hoping that it will look like something that might be used on a CD/vinyl cover or something like that.
Demo Photo
This is the photo I’ll be using. I chose it because there are some distinct lines that will be fairly easy to select. Since this isn’t a post about how to effectively make a selection, per se, I didn’t want to spend a lot of time doing that.
Making the Selection
I’ll start off by using the Quick Selection Tool to outline the darker parts of the people in the audience. I don’t want to get everyone, just the people in the darker shadows. To learn how to make an effective and accurate selection, please read to beginning part of this post:Reusing Selections & Masks in Adobe Photoshop

As I did in the post I just linked to, I’ll click the Select and Mask button up in the options bar, refine my selection and output it to a mask. This will be the result. I’ll show you the layer and mask in the Layers panel as well as the image itself.


The reason I created a mask like this was so I could easily reselect the same portion of the image over and over again. I’ll want to do that at least a few times in the sections below. This will be my template of sorts.
Copying & Filling In the Crowd
Okay, let’s get creative. To start out, I’m going to click the layer mask in the Layers panel to activate it. Then, I’m going to press the Ctrl+Shift+D keys on my keyboard to reselect the area the mask is keeping visible. Basically, this is the same area I initially selected. If I didn’t want to use that keyboard shortcut, I could head up to the Select > Reselect menu item and click. That will accomplish the same task.
After that, I’ll go back to the Layers panel and click on the actual image thumbnail as opposed to the mask thumbnail. I want to activate the regular thumbnail now. Then, I’ll use the keyboard shortcut of Ctrl+C to copy and then Ctrl+V to paste. This will copy the selected area and place it in its own layer.

That’s perfect. Now, I’ll double-click on the new layer’s thumbnail (the copied crowd) and by doing that, the Layer Style palette will appear.

I’ll click on the Color Overlay option in the left column and once I’m in that area, I’ll choose the color Black. I’ll then click the OK button to exit out of the palette. This will be my result.

Now I’ve got a true solid black silhouette.
Expanding & Contracting the Selection
The next thing I’m going to do is to go back to the original mask thumbnail and click on it. Then, I’ll reselect it once again and then after the selection is active, I’ll go up to the Select > Modify > Expand menu item and click.
If you’ll notice, the Contract menu option is directly below the Expand one. Whatever the Expand option does, the Contract one does the opposite.
After I click that menu item, the Expand Selection dialog will appear. I’ll type in 30 to grow the current selection by 30 pixels all around it. Doing this sort of acts like blowing up a balloon does.

When I’m finished, I’ll click OK to grow the selection. Let’s look at the result.

I’m not sure if you can see that or not, but the selection has been expanded. Look closely at the marching ants. Also, if there are any artifacts that were unknowingly selected, I can always get rid of those with the Eraser Tool later on. That’s not a big deal.
Making an Outline
What I really want to accomplish today is an outline of the silhouette I created earlier. Since I already have the original selection expanded, all I have to do is make sure the original layer thumbnail is clicked on and then copy and paste again. Doing this will result in the screenshot below.
Do you see that outline? That’s all I was after. That’s why I needed to use the expand selection feature. Again, I could just as easily have contracted the selection. The only reason I didn’t was because I had no use for it this time.
Okay, now I’m just being silly. I figure that an stroke might look interesting along the edge of the outline, so I’ll double-click on the layer thumbnail that was created with the outline in it. Doing this will pop open that Layer Style palette again. Once open, I’ll click Stroke in the left column and then I’ll change the size to 15. That should do it. I’ll also be sure to change the color to White and then click the OK button to apply the change.

After all this work, I’ll have the silhouette that has an outline of the original image and a stroke around that outline. If I added a new layer all the way at the bottom of the stack in the Layers panel and filled that layer with black, this is what I’d have:

And if I imported the original image and placed it right above the bottom black layer and reduced the opacity of the image to 50%, I’d have this final image.

It’s just a quirky little idea I thought up today as an example of what the Expand selection feature might be used for. It’s interesting, to say the least.
I hope I clearly explained how to use the expand and contract selection features in Adobe Photoshop. If you have any questions or concerns regarding this post, please leave them in the comments section below. Thanks for reading!
