Cameron
Member
- Joined
- May 10, 2021
- Messages
- 108
- Reaction Score
- 3
- Points
- 23
- #1
If you’re a photo editor for any type of publication, you have likely come across a situation where you needed to add hair to an area that didn’t have any. Of course, you wouldn’t want to add any old hair, you’d want to add the hair that belongs to the person in the photo. This type of task isn’t uncommon at all.
In today’s post, I’m going to walk through the steps necessary to fill in an empty area with adjacent available hair inside of Adobe Photoshop. Now, I’ll be the first to admit that it wasn’t the easiest thing in the world to locate a demo photo to use for this post. Please work with me here. What I’m going to do is use the Lasso Tool to surround the hair that I’d like to fill in the empty area with, but because of the photo, things aren’t going to be perfect. You may need to use your imagination for some of what should happen. I can get you through the steps though. They include selecting the replacement hair, duplicating that selection and then working with layer masks to blend the replacement in with the background. It’s actually a simple process and it’s one that I think you’ll find useful.

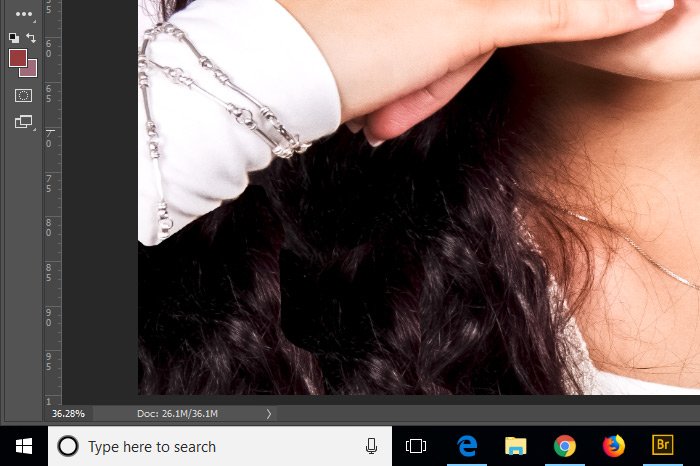
I simply want to make the hair look more full in that lower area.
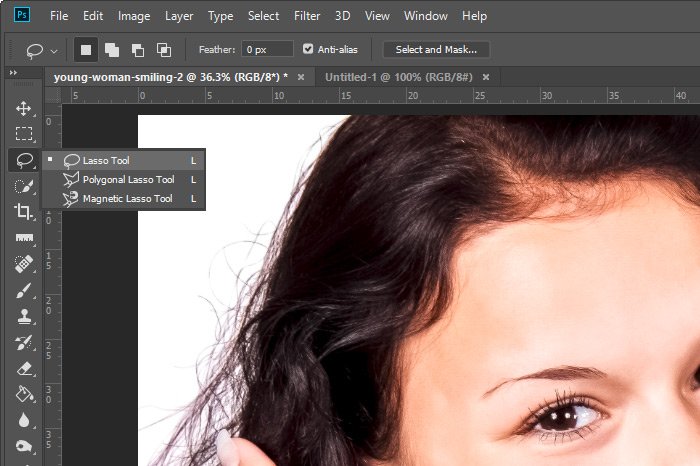
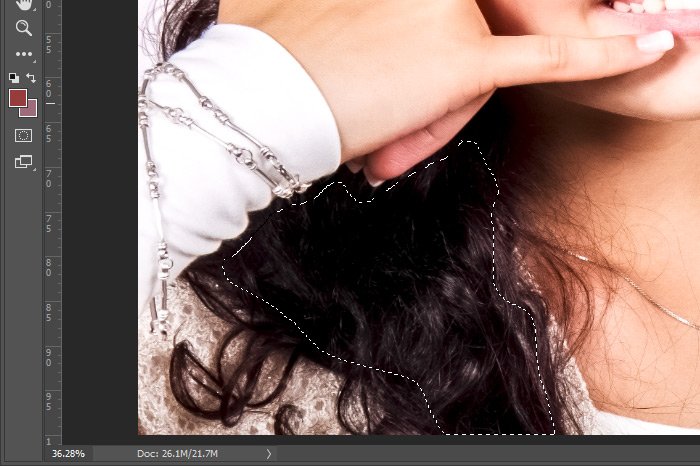
Next, I’ll locate the closest and largest area of hair and I’ll select as much of it as I can with the Lasso Tool.
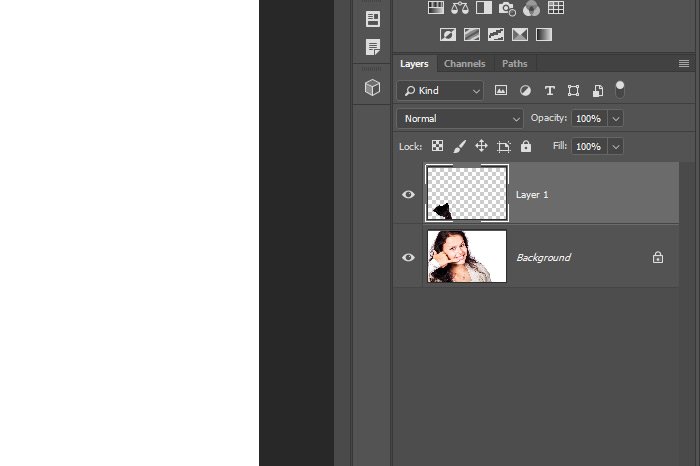
Once I finish this, the Layers panel will have two layers in it. The photo and the selected hair.
Okay, since I already toyed around with this project before I began writing this post, I know that I’ll need more hair to fill in the empty area. To create more hair, I’ll simply duplicate the duplicate. To do this, I’ll make sure the hair layer is active and then I’ll press the Ctrl+J keys on my keyboard again. Now, I’ll have the background layer and two hair layers.
What are Layer Masks in Adobe Photoshop?
Here’s how this is going to go; I’m going to add a layer mask to each of the hair layers. The thing is, since it’s easier to add the hair to the empty area as opposed to remove the hair from the empty area, I’d like those masks to hide the contents of the layer. By default, a layer mask appears white and doesn’t hide the contents of the layer. To create a mask that’s black and that does hide the layer’s contents, all I need to do is hold down the Alt key as I click on the layer mask icon at the bottom of the Layers panel. I’ll do that now.
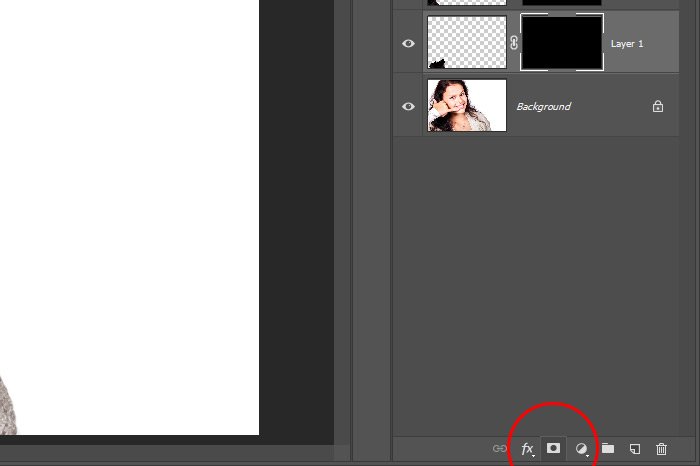
In the above screenshot, you can see the Add Layer Mask button as well as the black layer masks that have been applied to the hair layers.
Also, even though the hair is covering the empty spot, it’s being hidden because of those masks.
To make the hair reappear again, I’ll use the Brush Tool set to white.
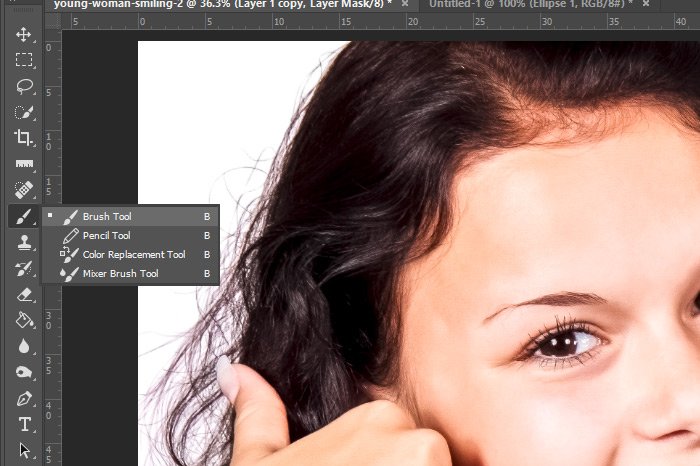
I’ll use a hard edge as I add the hair back near the girl’s sleeve.
How to Adjust the Brush Tool Settings in Adobe Photoshop
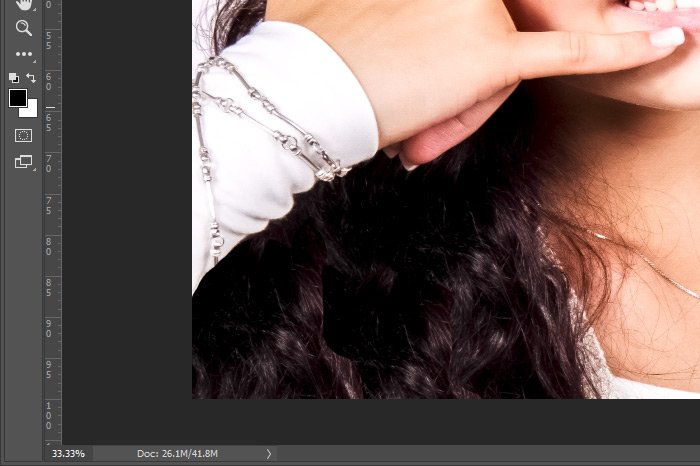
And then, I’ll swap the colors and make it so the Brush Tool is using black instead of white. I’ll also soften the brush to about 25% and then lightly run along the hard edges of the hair layers to soften them.
Do you see how the added hair is completely integrated now?
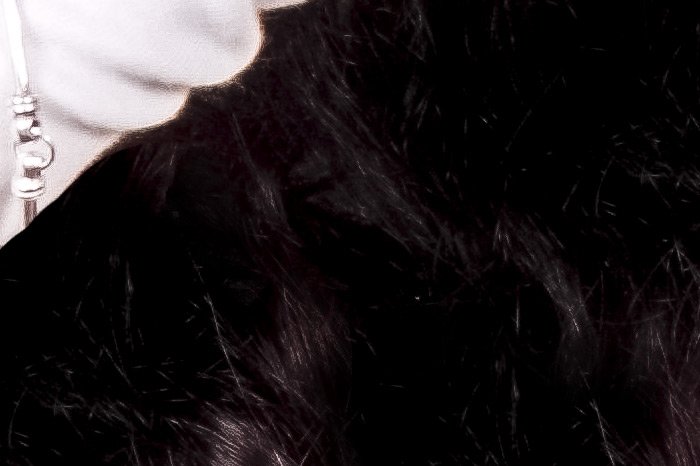
Let’s take a look at the final photo.
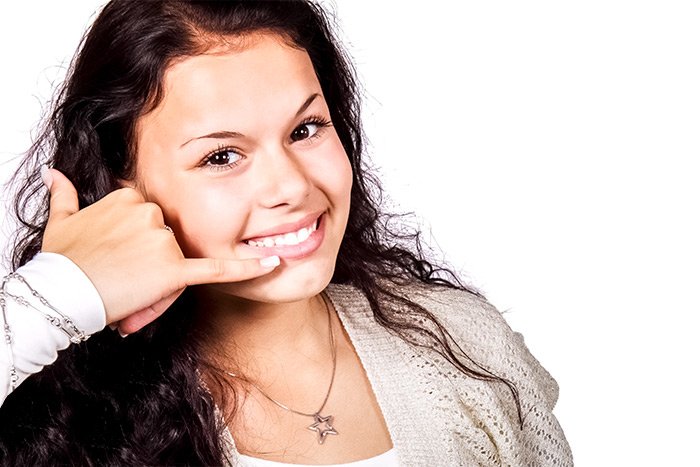
That looks very good. If you asked anyone where the added hair was, I’m sure that no one would be able to guess.
——
I hope I clearly explained how to add hair to empty areas of a photo in Adobe Photoshop. If you have any questions regarding this post, please leave them in the comment section below. Thanks for reading!
COMMENT: Hey, have you used this technique for covering areas in a fringe before? I’m wanting to cover up the areas you can see through to my skin under my sweaty fringe in my wedding photos! Thank you.
In today’s post, I’m going to walk through the steps necessary to fill in an empty area with adjacent available hair inside of Adobe Photoshop. Now, I’ll be the first to admit that it wasn’t the easiest thing in the world to locate a demo photo to use for this post. Please work with me here. What I’m going to do is use the Lasso Tool to surround the hair that I’d like to fill in the empty area with, but because of the photo, things aren’t going to be perfect. You may need to use your imagination for some of what should happen. I can get you through the steps though. They include selecting the replacement hair, duplicating that selection and then working with layer masks to blend the replacement in with the background. It’s actually a simple process and it’s one that I think you’ll find useful.
Demo Photo
This is the photo I’ll be using in this post. The area I’d like to fill in is the empty spot in the lower left corner.
I simply want to make the hair look more full in that lower area.
Selecting with the Lasso Tool
I already have this photo opened up in Photoshop. To start things off, I’ll head over to the left toolbar and select the Lasso Tool.
Next, I’ll locate the closest and largest area of hair and I’ll select as much of it as I can with the Lasso Tool.

Duplicating the Layer
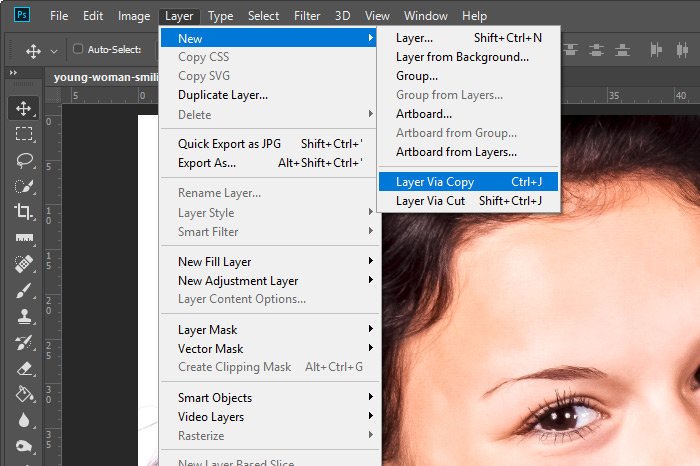
The next step is to duplicate the selected area so that part of the hair sits in its own layer. To do this, I have two options. I can either use the toolbar menu item or the keyboard shortcut. The keyboard shortcut to duplicate a layer is Ctrl+J and to do this via the toolbar, you’ll need to select Layer > New > Layer Via Copy.
Once I finish this, the Layers panel will have two layers in it. The photo and the selected hair.

Okay, since I already toyed around with this project before I began writing this post, I know that I’ll need more hair to fill in the empty area. To create more hair, I’ll simply duplicate the duplicate. To do this, I’ll make sure the hair layer is active and then I’ll press the Ctrl+J keys on my keyboard again. Now, I’ll have the background layer and two hair layers.
Arranging the Hair Over the Empty Area
The goal with this step is to completely cover the empty area in the photo layer with the hair layers. So, I’ll use the Move Tool to pull those pieces of hair down until the empty is gone.
Softening the Edges
To the untrained eye, what I’ve already done may seem sufficient. But to me, I know the project isn’t finished yet. I still have to clean up the edge near the sleeve and soften the edges of the copied hair layers. I need those edges to blend in nicely.Using Layer Masks
The best way to take care of the issue I’m facing is to make use of layer masks. If you aren’t sure what these are, please read through this post I wrote a while back:What are Layer Masks in Adobe Photoshop?
Here’s how this is going to go; I’m going to add a layer mask to each of the hair layers. The thing is, since it’s easier to add the hair to the empty area as opposed to remove the hair from the empty area, I’d like those masks to hide the contents of the layer. By default, a layer mask appears white and doesn’t hide the contents of the layer. To create a mask that’s black and that does hide the layer’s contents, all I need to do is hold down the Alt key as I click on the layer mask icon at the bottom of the Layers panel. I’ll do that now.

In the above screenshot, you can see the Add Layer Mask button as well as the black layer masks that have been applied to the hair layers.
Also, even though the hair is covering the empty spot, it’s being hidden because of those masks.
To make the hair reappear again, I’ll use the Brush Tool set to white.

I’ll use a hard edge as I add the hair back near the girl’s sleeve.
How to Adjust the Brush Tool Settings in Adobe Photoshop

And then, I’ll swap the colors and make it so the Brush Tool is using black instead of white. I’ll also soften the brush to about 25% and then lightly run along the hard edges of the hair layers to soften them.
Do you see how the added hair is completely integrated now?

Let’s take a look at the final photo.

That looks very good. If you asked anyone where the added hair was, I’m sure that no one would be able to guess.
——
I hope I clearly explained how to add hair to empty areas of a photo in Adobe Photoshop. If you have any questions regarding this post, please leave them in the comment section below. Thanks for reading!
COMMENT: Hey, have you used this technique for covering areas in a fringe before? I’m wanting to cover up the areas you can see through to my skin under my sweaty fringe in my wedding photos! Thank you.
