JodyBuchanan
Member
- Joined
- May 10, 2021
- Messages
- 138
- Reaction Score
- 0
- Points
- 21
- #1
There is so much in Adobe Photoshop that revolves around making all sorts of selections. I’ve written about many instances on this blog and I’m sure I’ll continue that trend well into the future. Making selections can range from extremely simple to extremely challenging. Things can get complicated quickly, but Adobe has done a fairly incredible job of simplifying our lives over the years. They’ve added some really great tools to assist in this regard.
In today’s post, I’d like to talk about some of the tools available that can help us modify a selection once it’s made in Adobe Photoshop. Now, I’m not talking about how to clean up a selection or how do do any of the available tasks that can be handled in the Select & Mask workspace. I’ve already written about some of them in previous posts. What I’d like to cover today has to do with the options found under the Select > Modify menu. More specifically, the Border, Smooth, Expand, Contract and Feather options.

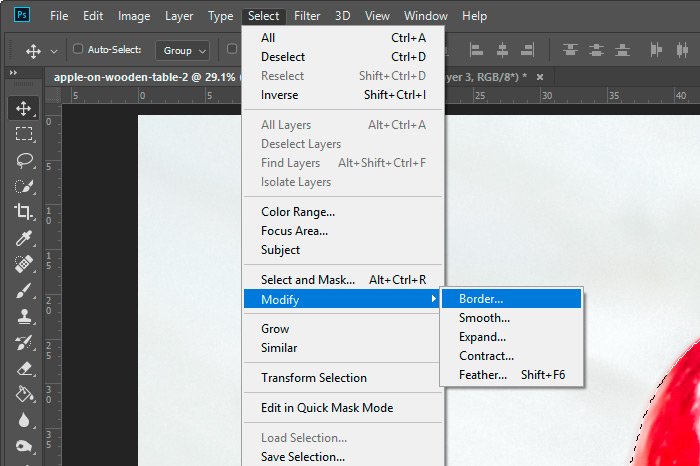
Now that I have the apple selected, I’ll head up to the Select > Modify > Border menu item and click.
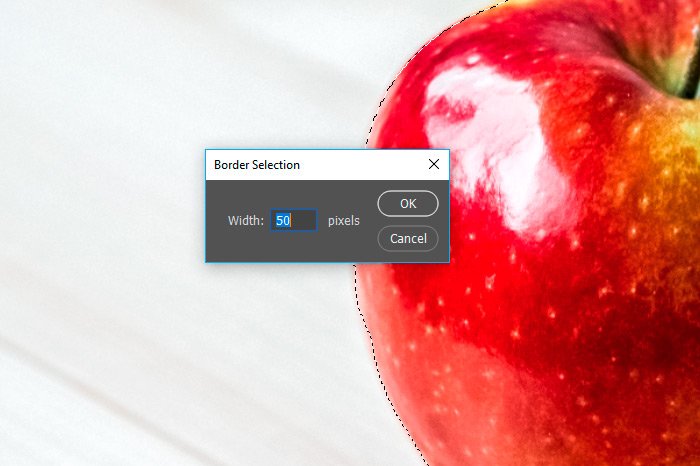
When I do this, the Border Selection dialog box will appear, where I can tell Photoshop how thick I’d like the border to actually be. In this case, I think I’ll choose 100 pixels, just so things are obvious and clear to see. When finished, I’ll click on the OK button.
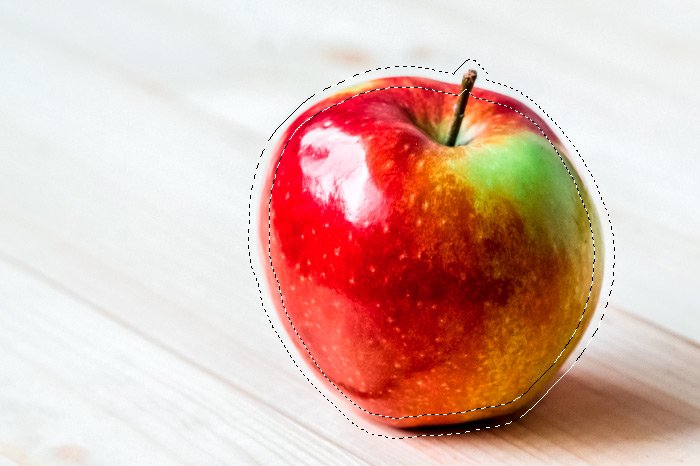
How’s that? Can you think of a case where you might need to use something like this? I’ll admit that I haven’t used this very often, but if I wanted the outer edge of something I selected, I’d know how to get that done.
Let’s say you used the Magic Wand Tool or another tool that might give you some jagged edges of your marching ants. If you wanted to smooth those edges out, you could do so based on a specified number of pixels. After clicking on that menu item, you’ll be presented with Smooth Selection dialog, where you can specify how smooth you’d like to make things. The higher the number of pixels, the smoother your selection will become.
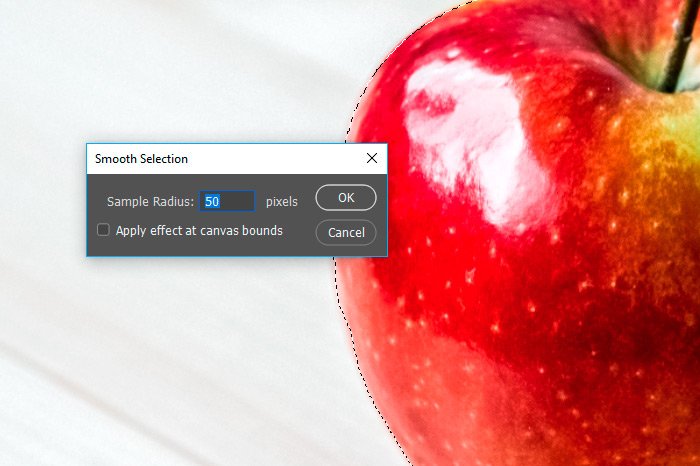
Just be careful when using this feature because it will also smooth out the selection around any areas you’d like to keep more defined, such as the stem at the top of the apple in my example. If you do use this feature, go ahead and do it, but then reselect any areas you’d like to be defined again.
Here are two screenshots. I am showing you the resulting expansion and contraction as well as the dialog boxes for both.
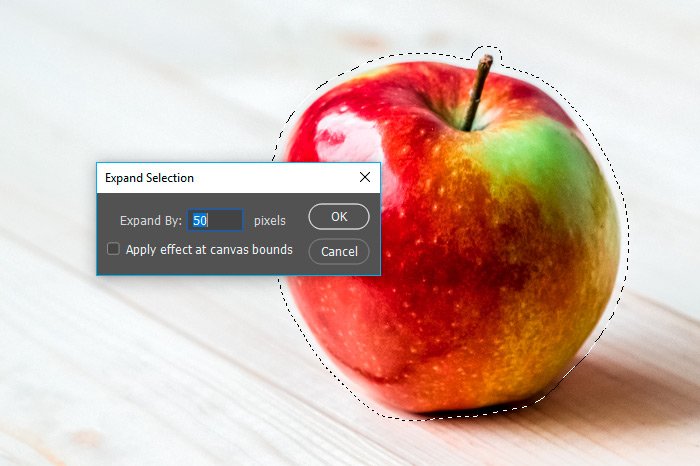
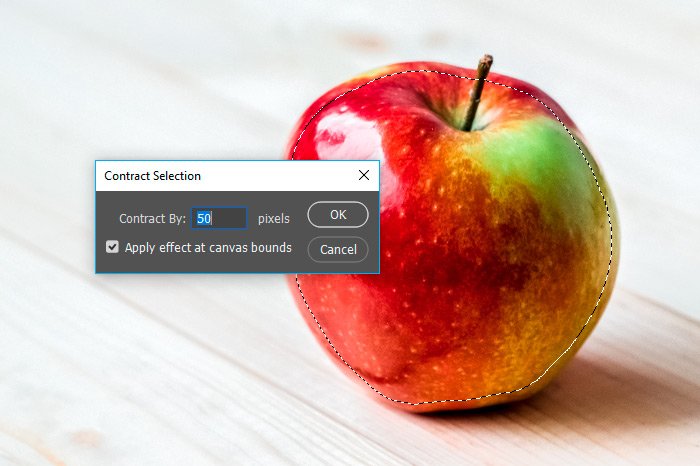
Notice the placement of the marching ants in both.
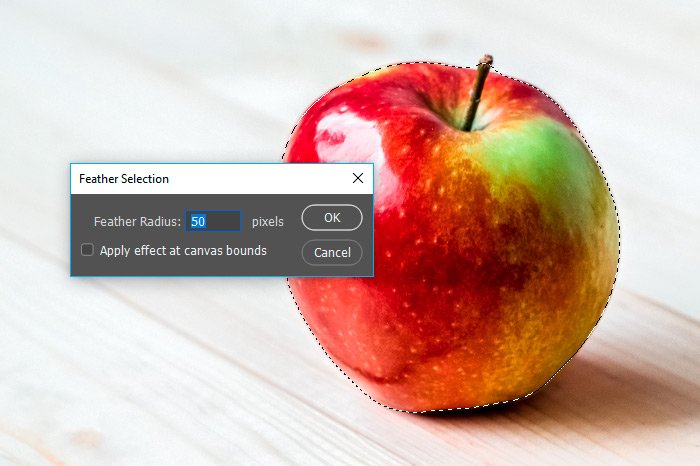
If I specified a number and then clicked the OK button, I wouldn’t see anything change in regards to the marching ants. It’s only when I did something with the selection, such as copy/paste (Ctrl+C and Ctrl+V) that I would see what exactly happened. Let’s take a look at the apple after I copied it and pasted it on a transparent background.
I think we can all agree that the apple is feathered.
The goal here is to realize that these additional selection options are available and then to use them when the time arises. You may also want to push things along by thinking of what you might be able to accomplish with a certain type of tool first and then build a project around that.
I hope I clearly explained how easy it is to modify a selection in Adobe Photoshop after it’s been made. If you have any questions or concerns regarding this post, please leave them in the comment section below. Thanks for reading!
In today’s post, I’d like to talk about some of the tools available that can help us modify a selection once it’s made in Adobe Photoshop. Now, I’m not talking about how to clean up a selection or how do do any of the available tasks that can be handled in the Select & Mask workspace. I’ve already written about some of them in previous posts. What I’d like to cover today has to do with the options found under the Select > Modify menu. More specifically, the Border, Smooth, Expand, Contract and Feather options.
A Quick Note
My goal for this post is to merely introduce you to a few options you might not know exist. I’m going to try to avoid anything too complex here. I also want you to know that while I may be making straightforward selections down below with the Quick Selection Tool, you can use these same options with any type of selection you make with any selection tool. As long as you see those marching ants, you should have the ability to modify what those marching ants look like and how they behave. Just because I’m only selecting an apple and the selection I happen to be making looks clean and easily workable, know that you can use these options just as easily after making a selection using the Color Range or the Focus Area tools (or any other selection tool). Again, as long as you see those marching ants, you should be good to go.Demo Photo
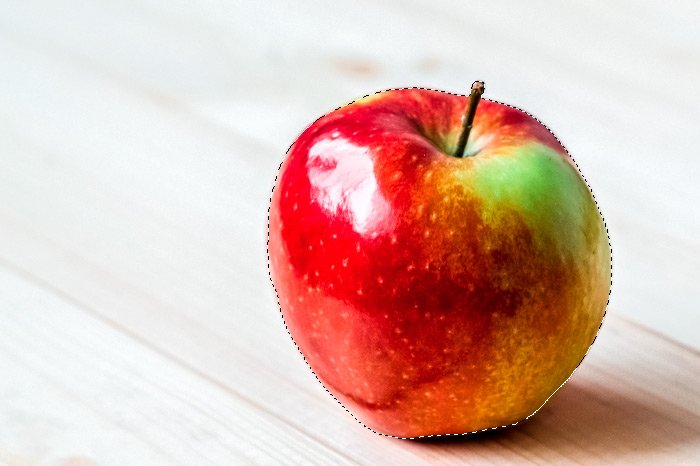
For today’s post, I’ll be selecting an apple. The reason I chose this particular photo is because it doesn’t seem to include any sort of a curve ball. I think I can get a nice selection without any drama. That’s all I want right now.
Making the Selection
Since the image is already opened up inside of Photoshop, I’ll go ahead and make my selection. I’ll use the Quick Selection Tool, resize it appropriately and trace around the edges of the apple. If I select too much, I’ll hold down the Alt key on my keyboard and brush over the parts of the selection I’d like to remove. Here’s the output of my efforts. I hope you can see the marching ants in the screenshot below.
Creating a Border
Let’s say you selected an object in a photo, but didn’t really want to capture the entire thing. All you wanted was the outer edge of it. Well, Photoshop has a really handy feature that will allow you to grab just that part of whatever object you select. It’s called the Border option and I’ll show you how it works.Now that I have the apple selected, I’ll head up to the Select > Modify > Border menu item and click.

When I do this, the Border Selection dialog box will appear, where I can tell Photoshop how thick I’d like the border to actually be. In this case, I think I’ll choose 100 pixels, just so things are obvious and clear to see. When finished, I’ll click on the OK button.


How’s that? Can you think of a case where you might need to use something like this? I’ll admit that I haven’t used this very often, but if I wanted the outer edge of something I selected, I’d know how to get that done.
Smoothing a Selection
There are other areas to smooth out a selection, but by using the Select > Modify > Smooth menu item, you’re probably taking advantage of the easiest method.Let’s say you used the Magic Wand Tool or another tool that might give you some jagged edges of your marching ants. If you wanted to smooth those edges out, you could do so based on a specified number of pixels. After clicking on that menu item, you’ll be presented with Smooth Selection dialog, where you can specify how smooth you’d like to make things. The higher the number of pixels, the smoother your selection will become.

Just be careful when using this feature because it will also smooth out the selection around any areas you’d like to keep more defined, such as the stem at the top of the apple in my example. If you do use this feature, go ahead and do it, but then reselect any areas you’d like to be defined again.
Expand & Contract a Selection
These options are very straightforward. By clicking on the Select > Modify > Expand or the Select > Modify > Contract menu items, you can either expand or contract the existing selection by a specified number of pixels. When you choose those options, you’ll be presented with the Expand Selection dialog or the Contract Selection dialog. In both, just like the other options above, you’ll have the opportunity to input how many pixels you’d like your change to affect.Here are two screenshots. I am showing you the resulting expansion and contraction as well as the dialog boxes for both.


Notice the placement of the marching ants in both.
Feathering a Selection
The last option I’ll show you today is the Feather option. By clicking the Select > Modify > Feather menu item, you’ll have the ability to set how soft the edges of the selection will be. By choosing a larger number, you’ll soften the edges more than if you chose a smaller number. When you click that menu item, you’ll be presented the Feather Selection dialog box.
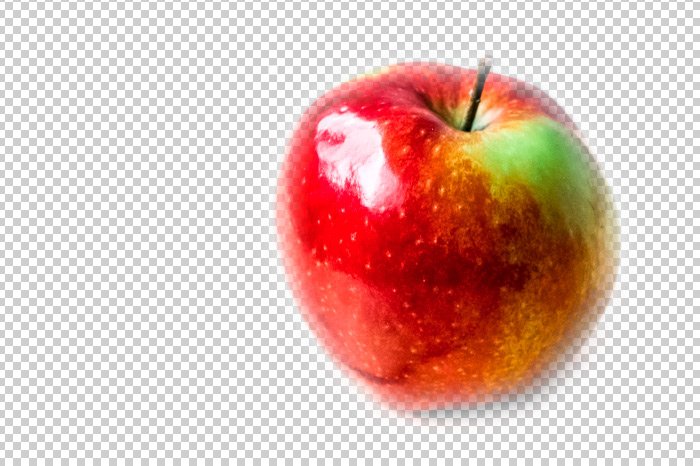
If I specified a number and then clicked the OK button, I wouldn’t see anything change in regards to the marching ants. It’s only when I did something with the selection, such as copy/paste (Ctrl+C and Ctrl+V) that I would see what exactly happened. Let’s take a look at the apple after I copied it and pasted it on a transparent background.

I think we can all agree that the apple is feathered.
The goal here is to realize that these additional selection options are available and then to use them when the time arises. You may also want to push things along by thinking of what you might be able to accomplish with a certain type of tool first and then build a project around that.
I hope I clearly explained how easy it is to modify a selection in Adobe Photoshop after it’s been made. If you have any questions or concerns regarding this post, please leave them in the comment section below. Thanks for reading!
