WendyMay
Member
- Joined
- May 11, 2021
- Messages
- 142
- Reaction Score
- 0
- Points
- 21
- #1
For all of you who enjoy editing video in Adobe Photoshop, this post is going to be super cool. In it, I’m going to explain how to animate layer effects in the Timeline panel. Animating this type of thing is just as easy as animating anything else. All you need to do is to set a beginning state, add a keyframe, move the playhead and define an end state. Photoshop does the rest.
As with anything else relating to video and animation, the technical details are fairly easy to grasp. What’s more important is the creativity involved. In the past and even today, the creative side is what I struggle with the most. Oftentimes, I’ll come up with wild scenarios that require a lot of planning. The good news is that I get things to work the way I want them to (most of the time).
In today’s post, I’m going to animate four quadrants over a playing video. Each quadrant will be derived from a shape and will start off as transparent and will turn a solid color as time passes. For a few of the shapes, the colors will change as well. Each of these changes will be attributable to the actual layer effect changing. The goal I have for this post is to demonstrate how layer effects can be animated. After reading what I have to say below, you should be able to apply the same concept to any other style.
One word about layer effects and styles. In the Layers panel, these things are called Effects. In the palette where these specifications are altered, they’re called Styles. The palette is even called the Layer Style palette. I believe the trend is moving toward calling them Effects on a universal basis, so I’ll stick with that for the rest of this post.
Next, I’ll click inside the top ruler area and drag my mouse pointer down to the 50% mark of the left ruler. After that, I’ll click inside of the left ruler and drag to the right until I reach the 50% mark of the top ruler. This will give me crossing guides with the intersection at the center of the video.
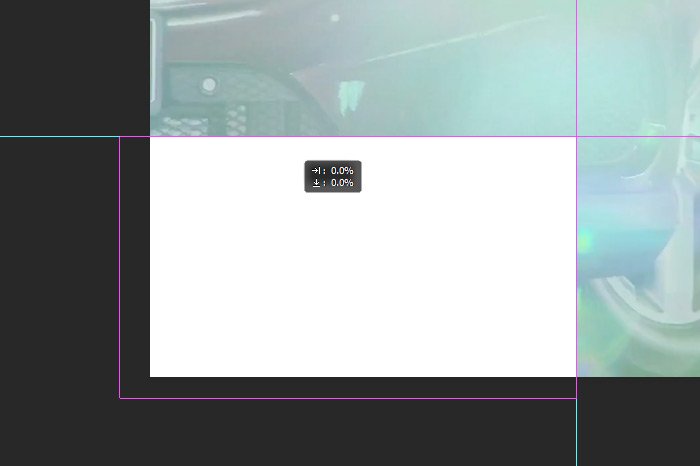
And then, I’ll click and draw a rectangle that’s just a bit larger than the lower left quadrant. I could start in any quadrant; I just chose the lower left one.
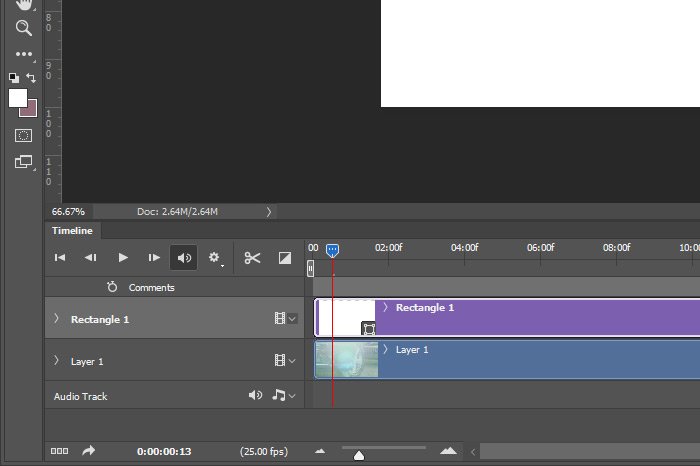
It’s important to note here that I already ungrouped the video group in the Layers panel. The way I did that was to right-click on the group layer and choose Ungroup Layers in the menu that appeared. Also, since this new shape layer began all the way at the end of the video in the Timeline panel, I clicked and dragged that layer so its start point was aligned with the video’s start point. I also clicked and dragged the end point of the shape layer so it aligned with the video’s end point.
Since the shape’s color just happens to be white, I’ll leave that as is.
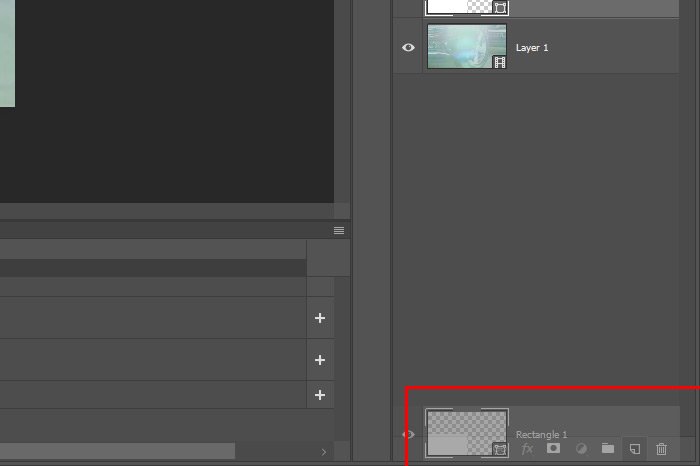
Next, since all four shapes will be the same size, I’ll simply duplicate each one by clicking and dragging the first shape layer I created down to the Create New Layer icon that sits at the bottom of the Layers panel. I’ll do this three times, for a total of four shape layers.
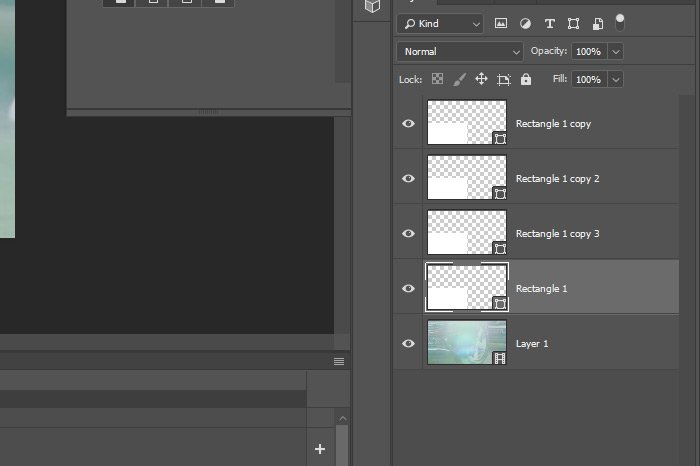
And then, I’ll activate each shape layer by clicking on it in the Layers panel and I’ll drag each one into its own position on the video.
Basically, I’ll have what looks like a white background with the guides crossing in the middle. And as a matter of fact, now that the shapes are all set, I can click and drag those guides right off the workspace to remove them.
Of course, to make each other shape layer transparent, I’ll first select that layer in the Layers panel and repeat the steps I just explained above. I did just that and now it appears that there is not a white overlay on the video. That’s exactly what I want; four empty rectangle shapes.
To start, I’ll push the playhead all the way to the zero second mark. Then, I’ll double-click on the respective layer in the Layers panel and when the Layer Style palette opens up, I’ll click the Color Overlay option in the left column. When that panel opens in the palette, I’ll push the Opacity slider to the left so the value is 0% and I’ll also make sure the Blend Mode drop-down value is set to Normal and I’ll click the color box and change that value to Black.
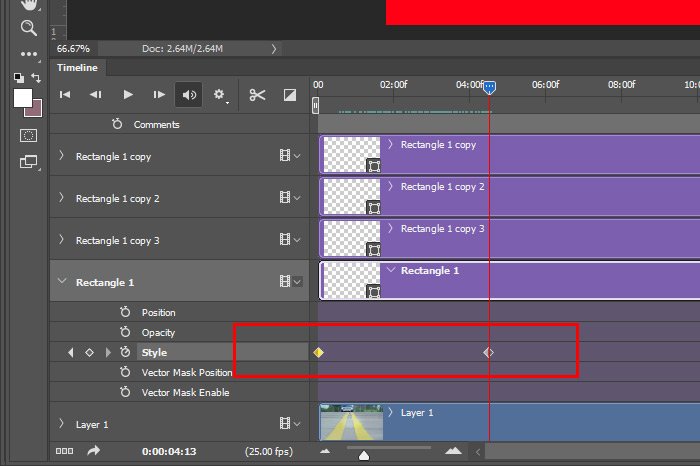
When I’m finished, I’ll click the OK button and that will be that. The first set of values are ready to go. Again, I’ll make sure the playhead is at the beginning of the video and then I’ll click the small arrow on the layer in the Timeline panel so the animation and keyframe options become exposed. Finally, I’ll click the icon in the Style row to create a new Style keyframe.
Next, I’d like to move the timeline playhead so it sits at one quarter the distance of the entire video. Since, the video is 18 seconds long, I’ll do some math here and move the playhead so it’s on the 4:30 second mark. When it’s there, I’ll go ahead and double-click on the layer in the Layers panel again and revisit the Color Overlay section. Once there, I’ll change the Opacity so its value is 100% and I’ll also change the color so it’s Red. When I click the OK button this time though, the second keyframe will be automatically created, right at the spot on the timeline where the playhead is resting.
And that, my friends, is how you animate a style or effect in Adobe Photoshop. But since I’m not done, I’ll go ahead and finish up the remaining three quadrants. Do do this, I’ll select the next layer, click on the arrow so it opens up in the Timeline panel and I’ll follow the same exact instructions that I laid out above. This time though, I’ll choose different colors and I’ll be using the time in the second quarter of the video. And then I’ll do everything again for the third rectangle and then for the fourth.
Here’s an example of what the keyframes look like:
Basically, the first rectangle transitions for the first quarter of the time, the second rectangle transitions for the second quarter of the time and so forth. It’s fairly straightforward. When the video is finished, it will look like this:
Now, I’ll go ahead and render the video and I’ll upload it to YouTube so you can see the finished product. If this were a real project, I’d most likely have some text fade in towards the end, so it looks like a commercial or something like that.
If you’re reading this post via email, you’ll need to click the link below to see the video. Videos don’t appear in the emails.
Pretty cool, right?
You can animate all types of effects in Photoshop, so it doesn’t have to be just something like what I did today. The sky’s the limit. I encourage you to head into the Layer Style palette to experiment. You’ll be amazed at what you can accomplish.
——
I hope I clearly explained how to animate a style in Adobe Photoshop using the Timeline panel. If you have any questions regarding this post, please leave them in the comments section below. Thanks for reading!
As with anything else relating to video and animation, the technical details are fairly easy to grasp. What’s more important is the creativity involved. In the past and even today, the creative side is what I struggle with the most. Oftentimes, I’ll come up with wild scenarios that require a lot of planning. The good news is that I get things to work the way I want them to (most of the time).
In today’s post, I’m going to animate four quadrants over a playing video. Each quadrant will be derived from a shape and will start off as transparent and will turn a solid color as time passes. For a few of the shapes, the colors will change as well. Each of these changes will be attributable to the actual layer effect changing. The goal I have for this post is to demonstrate how layer effects can be animated. After reading what I have to say below, you should be able to apply the same concept to any other style.
One word about layer effects and styles. In the Layers panel, these things are called Effects. In the palette where these specifications are altered, they’re called Styles. The palette is even called the Layer Style palette. I believe the trend is moving toward calling them Effects on a universal basis, so I’ll stick with that for the rest of this post.
The Demo Video
For this post, I’ll be using a random car video. The video doesn’t necessarily matter for my purposes, so I just picked this one. It’s the animations that are important. Anyway, here’s a screenshot of one frame of the video.
Setting Up the Guides
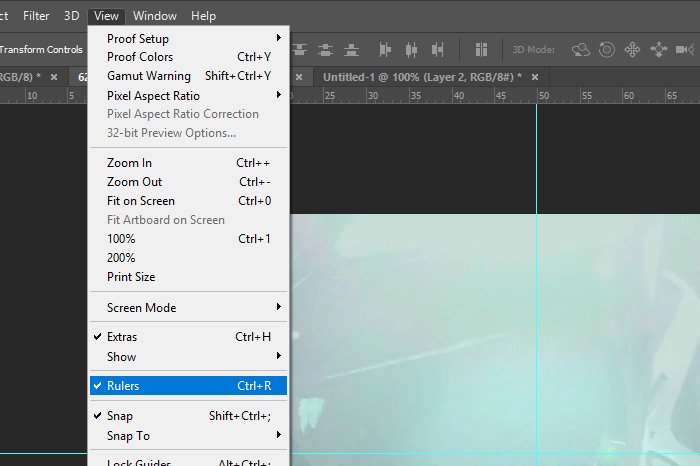
Since the shapes that will applied over this video will all be of the same dimensions and will need to be positioned with one corner at the absolute center of the video, I’ll first set up some guides. I’ll use the View > Rulers menu item to make sure the rulers are displayed on the top and left sides of my workspace. This option needs to be checked for the rulers to appear.
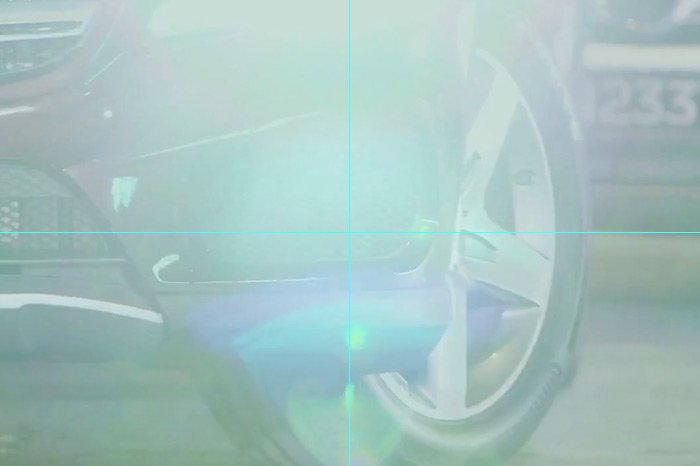
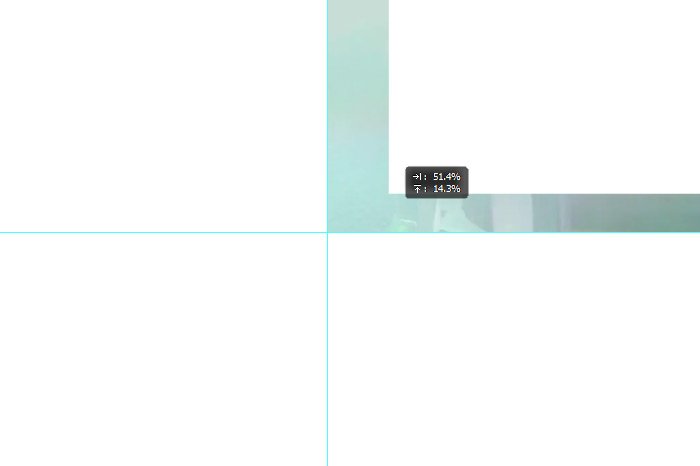
Next, I’ll click inside the top ruler area and drag my mouse pointer down to the 50% mark of the left ruler. After that, I’ll click inside of the left ruler and drag to the right until I reach the 50% mark of the top ruler. This will give me crossing guides with the intersection at the center of the video.

Creating & Applying the Shapes
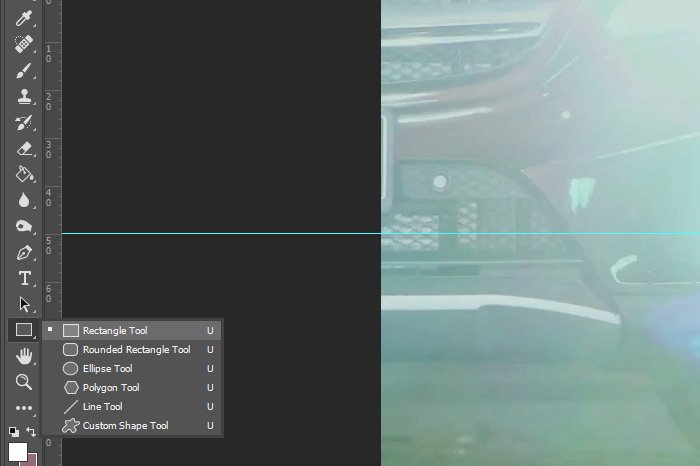
Next, I’ll head over to the Rectangle Tool in the left toolbar and make sure that it’s active.
And then, I’ll click and draw a rectangle that’s just a bit larger than the lower left quadrant. I could start in any quadrant; I just chose the lower left one.

It’s important to note here that I already ungrouped the video group in the Layers panel. The way I did that was to right-click on the group layer and choose Ungroup Layers in the menu that appeared. Also, since this new shape layer began all the way at the end of the video in the Timeline panel, I clicked and dragged that layer so its start point was aligned with the video’s start point. I also clicked and dragged the end point of the shape layer so it aligned with the video’s end point.

Since the shape’s color just happens to be white, I’ll leave that as is.
Next, since all four shapes will be the same size, I’ll simply duplicate each one by clicking and dragging the first shape layer I created down to the Create New Layer icon that sits at the bottom of the Layers panel. I’ll do this three times, for a total of four shape layers.


And then, I’ll activate each shape layer by clicking on it in the Layers panel and I’ll drag each one into its own position on the video.

Basically, I’ll have what looks like a white background with the guides crossing in the middle. And as a matter of fact, now that the shapes are all set, I can click and drag those guides right off the workspace to remove them.
Making the Shapes Transparent
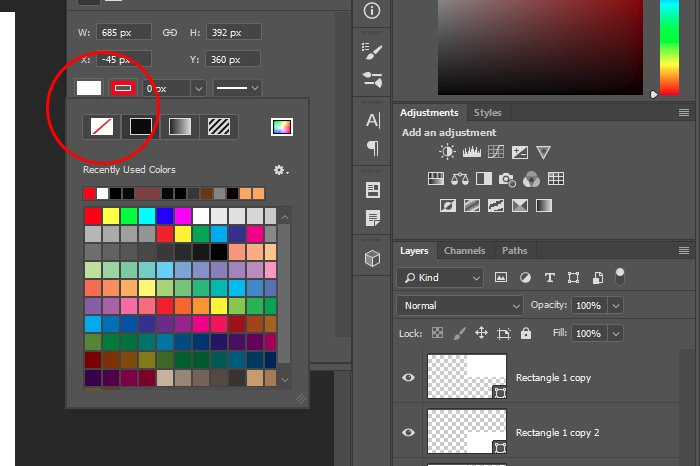
Since all the animation and change will occur via the Layer Style palette, I won’t need any sort of innate fill color in the shapes themselves. So, to make them transparent, I’ll head up to the Properties panel that opened automatically and I’ll click the white box. Then, below that, I’ll click the box with the red diagonal line through it. You can see these two boxes in the screenshot below. I circled them in red.
Of course, to make each other shape layer transparent, I’ll first select that layer in the Layers panel and repeat the steps I just explained above. I did just that and now it appears that there is not a white overlay on the video. That’s exactly what I want; four empty rectangle shapes.
Animating the Style of the First Rectangle
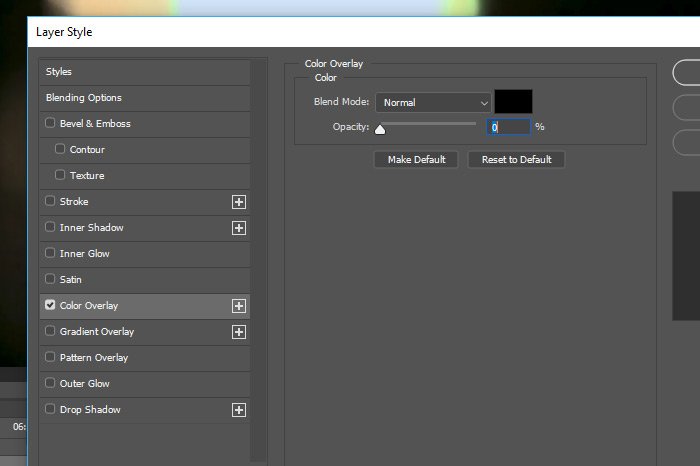
Okay, here’s how things are going to work. When the video begins, I’d like the lower left rectangle to start off transparent. Then, as the playhead progresses along the timeline for the first quarter of the video’s length, I’d like the rectangle to transition from transparent to a solid color. Also, I’d like the beginning color to be black and to turn red. So, the animation will be from clear to solid and from black to red. That’s easy. I’ll do it right now.To start, I’ll push the playhead all the way to the zero second mark. Then, I’ll double-click on the respective layer in the Layers panel and when the Layer Style palette opens up, I’ll click the Color Overlay option in the left column. When that panel opens in the palette, I’ll push the Opacity slider to the left so the value is 0% and I’ll also make sure the Blend Mode drop-down value is set to Normal and I’ll click the color box and change that value to Black.

When I’m finished, I’ll click the OK button and that will be that. The first set of values are ready to go. Again, I’ll make sure the playhead is at the beginning of the video and then I’ll click the small arrow on the layer in the Timeline panel so the animation and keyframe options become exposed. Finally, I’ll click the icon in the Style row to create a new Style keyframe.

Next, I’d like to move the timeline playhead so it sits at one quarter the distance of the entire video. Since, the video is 18 seconds long, I’ll do some math here and move the playhead so it’s on the 4:30 second mark. When it’s there, I’ll go ahead and double-click on the layer in the Layers panel again and revisit the Color Overlay section. Once there, I’ll change the Opacity so its value is 100% and I’ll also change the color so it’s Red. When I click the OK button this time though, the second keyframe will be automatically created, right at the spot on the timeline where the playhead is resting.

And that, my friends, is how you animate a style or effect in Adobe Photoshop. But since I’m not done, I’ll go ahead and finish up the remaining three quadrants. Do do this, I’ll select the next layer, click on the arrow so it opens up in the Timeline panel and I’ll follow the same exact instructions that I laid out above. This time though, I’ll choose different colors and I’ll be using the time in the second quarter of the video. And then I’ll do everything again for the third rectangle and then for the fourth.
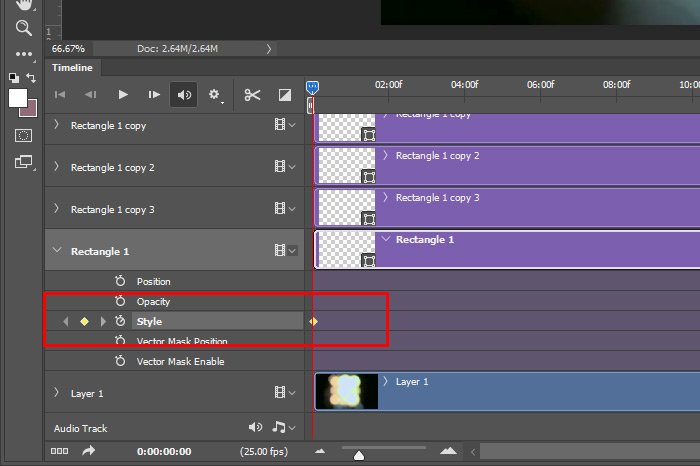
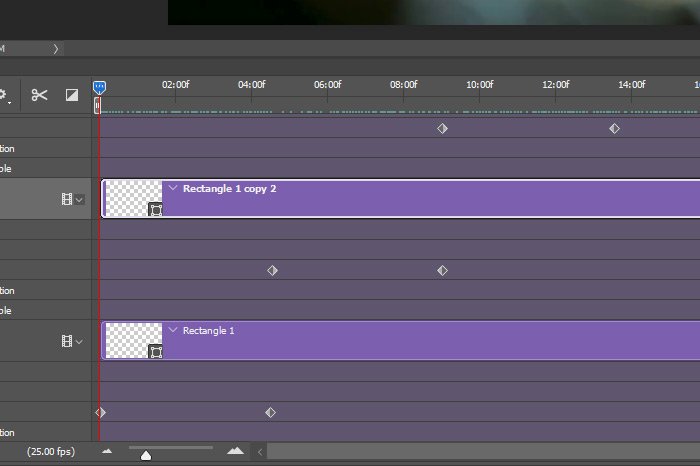
Here’s an example of what the keyframes look like:

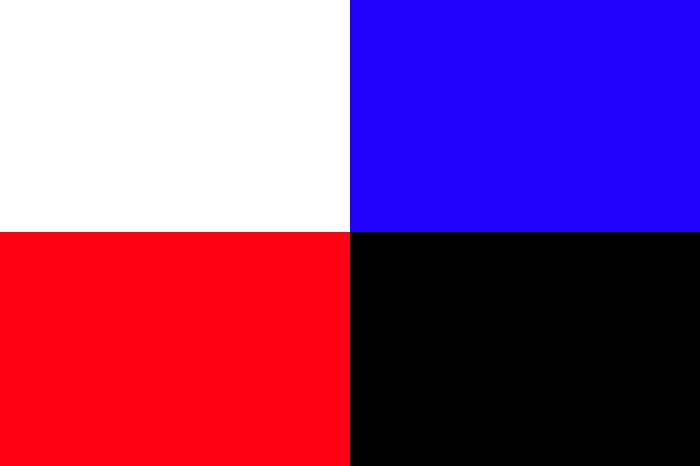
Basically, the first rectangle transitions for the first quarter of the time, the second rectangle transitions for the second quarter of the time and so forth. It’s fairly straightforward. When the video is finished, it will look like this:

Now, I’ll go ahead and render the video and I’ll upload it to YouTube so you can see the finished product. If this were a real project, I’d most likely have some text fade in towards the end, so it looks like a commercial or something like that.
If you’re reading this post via email, you’ll need to click the link below to see the video. Videos don’t appear in the emails.
Pretty cool, right?
You can animate all types of effects in Photoshop, so it doesn’t have to be just something like what I did today. The sky’s the limit. I encourage you to head into the Layer Style palette to experiment. You’ll be amazed at what you can accomplish.
——
I hope I clearly explained how to animate a style in Adobe Photoshop using the Timeline panel. If you have any questions regarding this post, please leave them in the comments section below. Thanks for reading!
