CampFireJack
Member
- Joined
- May 9, 2021
- Messages
- 118
- Reaction Score
- 1
- Points
- 16
- #1
I’ve got sort of an esoteric post for you today. What I’m learning about Adobe Photoshop is that there is really no end to what you can do with it. It’s a creative tool and it’s highly unlikely that any of us would ever run out of ways to be creative inside of it. Over the past 20 years that I’ve been working with this application, I’ll tell you that it’s grown by leaps and bounds. But it’s almost depressing to think that I’ve only begun to scratch the surface. There really is so much you can do with this program. It seriously hurts my brain to think about it.
In today’s post, I’m going to focus on a very small task that may only interest a few folks. If you’re one of those folks though, this can truly be a lifesaver. What I’d like to talk about is how to repeat a transformation inside of Adobe Photoshop.
You may be asking yourself why you’d ever want to repeat a transformation. Well, think of it this way; let’s say you’d like to spread a number of similarly sized layers like playing cards on a table. Say you want to make it look like a photo album and you want each and every layer to have the same exact rotation to it. Instead of rotating the fist layer and then manually rotating and repositioning every single layer after that one, you can simply copy the transform (rotation) and have it apply to the following layers. It gives a precise result and it saves a heck of a lot of time.
I’ll also be discussing how you can actually duplicate the previously transformed layer first and then duplicate the transform after that. If this seems difficult to understand, don’t worry about it. All will become clear down below. Just continue reading to learn something new.
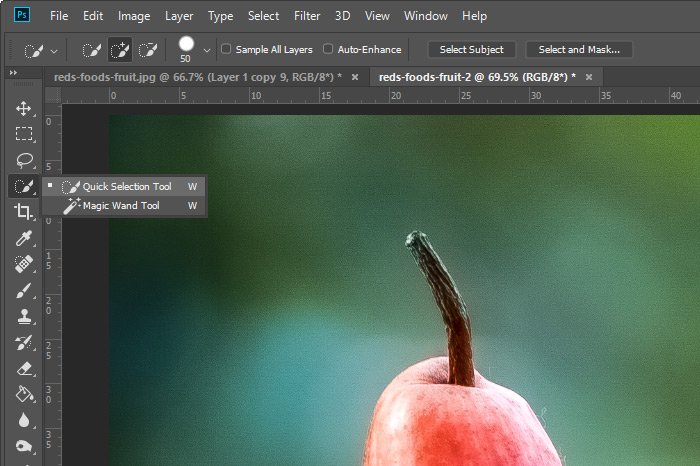
Anyway, like I said, I’ll use the Quick Selection Tool over in the left toolbar for this task.
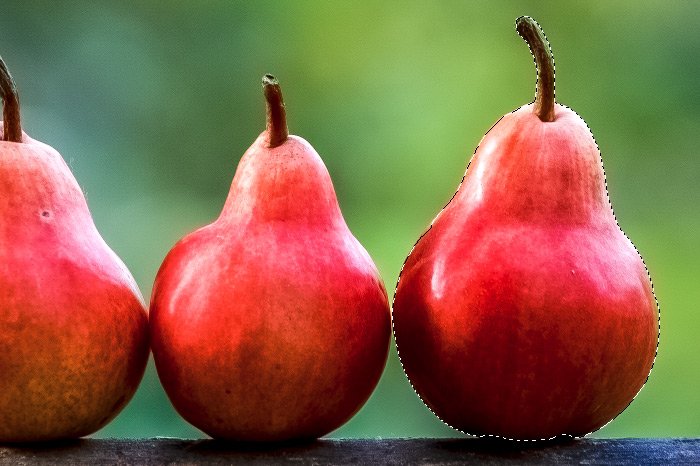
Once the tool is active, I’ll adjust the size and hardness of the brush and then I’ll click and trace the inside edges of the pear with my mouse pointer until I have what I need inside of the marching ants.
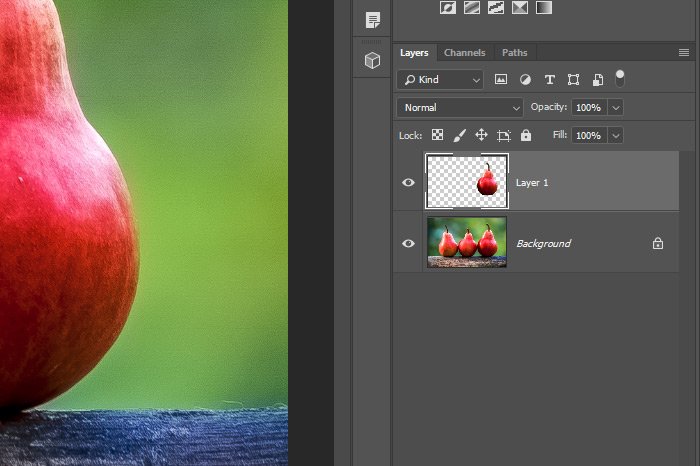
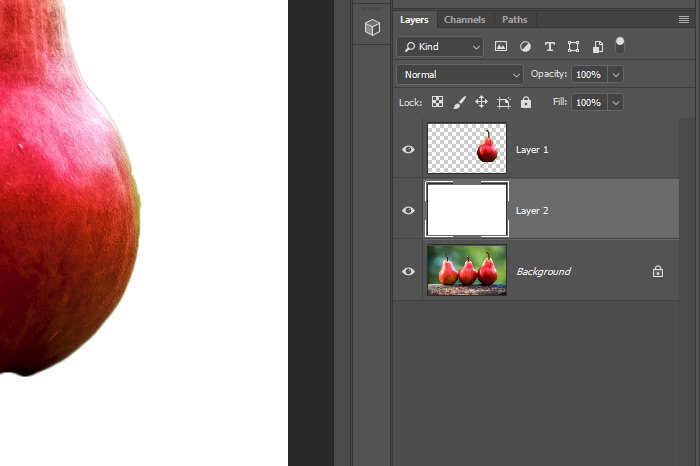
After that, I’ll click on the background layer in the Layers panel and then click on the Add New Layer button at the bottom of the same panel. This will create a new layer that sits right above the background image. Using the Paint Bucket Tool, I’ll pour the color white into the new empty layer. This is what the Layers panel will look like when I’m finished with that.
Now I’m set up to begin this tutorial.
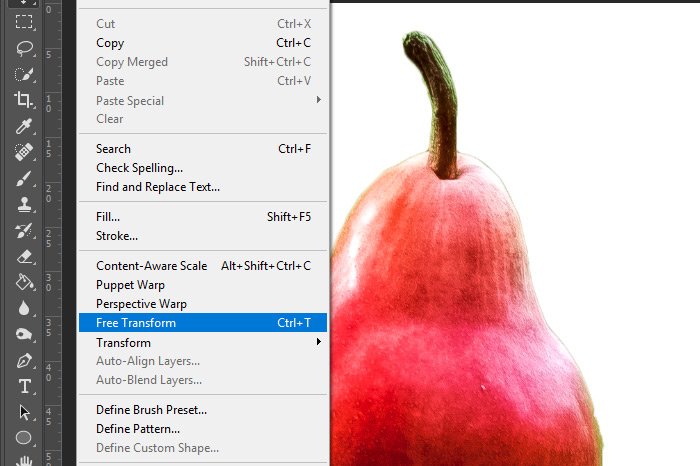
So, to get going, I’ll make sure the single pear layer in the Layers panel is selected. Then, I’ll head up to the Edit > Free Transform menu item and click (keyboard shortcut Ctrl+T).
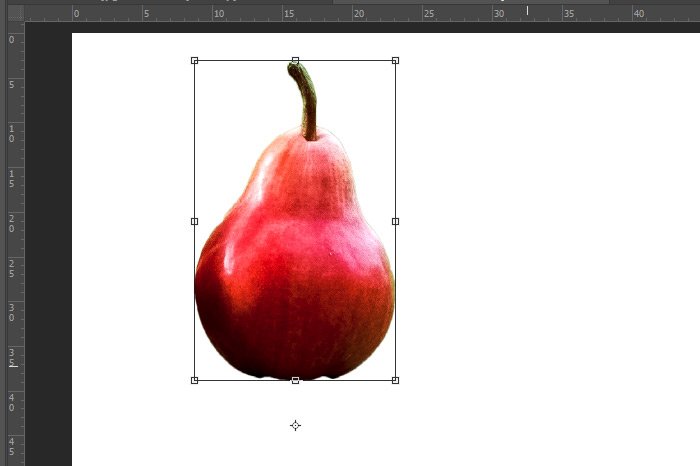
Once I see the transform bounding box outside of the pear object, I’ll click and drag, while holding the Shift key on my keyboard down, one of the corners toward the center of the box. Basically, I just want to shrink the pear a bit, while maintaining the same proportion. That’s what the Shift key does. It keeps the original proportion intact.
Then, I’ll click and drag the center point of the bounding box down below and outside of the box itself. Doing this will change the rotation point of the object. Instead of rotating around the exact center of the box, it’ll rotate around a position beneath the box.
And finally, I’ll hover my mouse pointer just outside of the box and once the pointer turns into a curved double arrow, I’ll click and drag to the right, which will rotate the pear slightly.
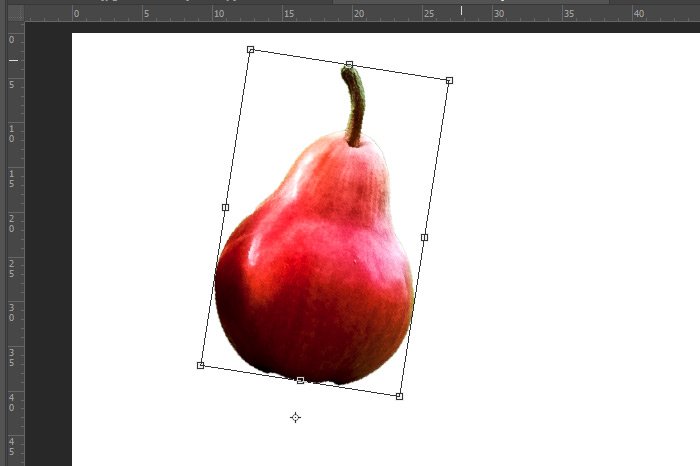
And then finally finally, I’ll press the Enter key on my keyboard to accept the change. What I’ll end up with is a pear that looks like it’s leaning over to the side just a tad.
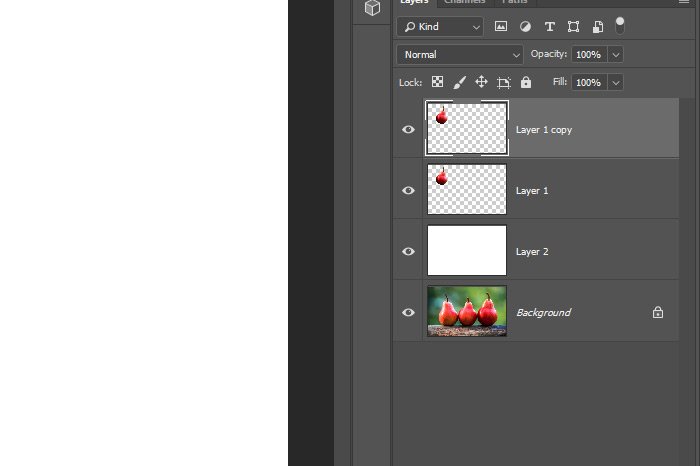
And then, if I go up to the Edit > Transform > Again menu item and click, the copied layer will have the same exact transform applied to it as the first layer has applied to it.
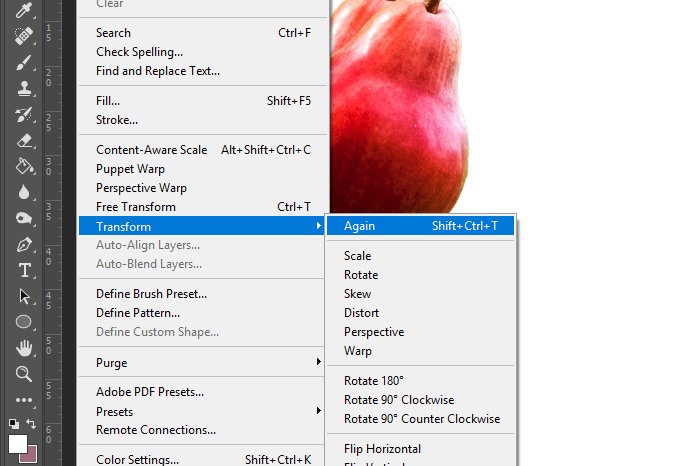
Now check this out. Look at the result.
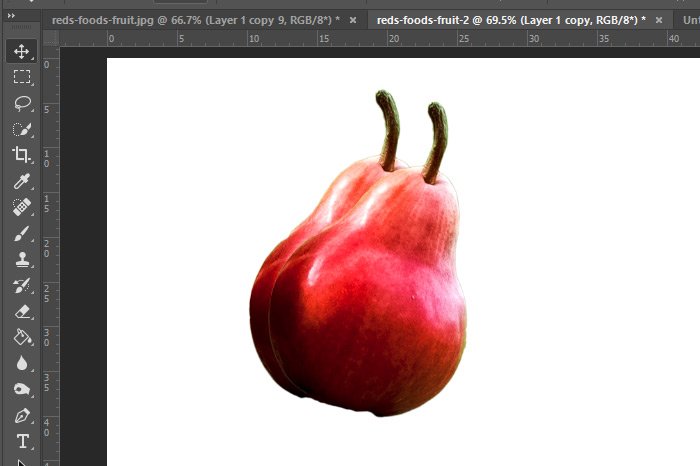
Do you see that second pear? It now has the same transformation applied to it as the first one had, but I didn’t have to do any math. Pretty cool.
In the previous step, I thought the copying of the first layer was somewhat tedious. If I had to duplicate the layer 50 times, I’d get a little tired of doing that. With this in mind, I’ll show you how you can copy the layer and then repeat the transformation, all in one step. All it takes is one slick keyboard shortcut.
The keyboard shortcut for what I did in the previous step is Shift+Ctrl+T. If I add an Alt to that, I’ll be good. So the complete keyboard shortcut to duplicate and then repeat a transformed layer is Alt+Shift+Ctrl+T. If I select the most recent transformed layer and then use this shortcut, let’s say, five times, I’ll end up with this.
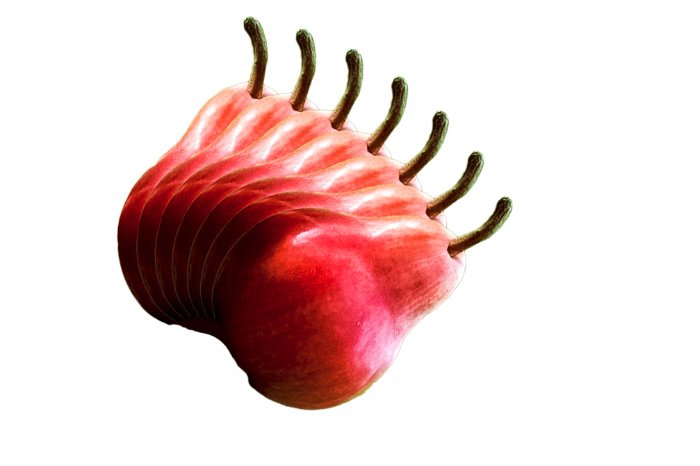
Isn’t that awesome? The only trick is trying to find a use for it. But it’s available if you can do that.
——
I hope I clearly explained how to transform an object in Adobe Photoshop and then how to repeat that transformation. Then, I explained how to copy the layer and repeat the transformation in one step. If you have any questions about this post, please leave them in the comment section below. Thanks for reading!
COMMENT: But how can I have the same transformation without copy the same layer? I just want to use the same size of a photo to other layers.
COMMENT: I’m not quite sure what you are asking. Can you please rephrase the question so I can help you?
COMMENT: Yeah, and then you do a different transform after, and later need to use the original transform again later but can’t. This tip is as useless as Photoshop is badly designed.
In today’s post, I’m going to focus on a very small task that may only interest a few folks. If you’re one of those folks though, this can truly be a lifesaver. What I’d like to talk about is how to repeat a transformation inside of Adobe Photoshop.
You may be asking yourself why you’d ever want to repeat a transformation. Well, think of it this way; let’s say you’d like to spread a number of similarly sized layers like playing cards on a table. Say you want to make it look like a photo album and you want each and every layer to have the same exact rotation to it. Instead of rotating the fist layer and then manually rotating and repositioning every single layer after that one, you can simply copy the transform (rotation) and have it apply to the following layers. It gives a precise result and it saves a heck of a lot of time.
I’ll also be discussing how you can actually duplicate the previously transformed layer first and then duplicate the transform after that. If this seems difficult to understand, don’t worry about it. All will become clear down below. Just continue reading to learn something new.
The Demo Photo
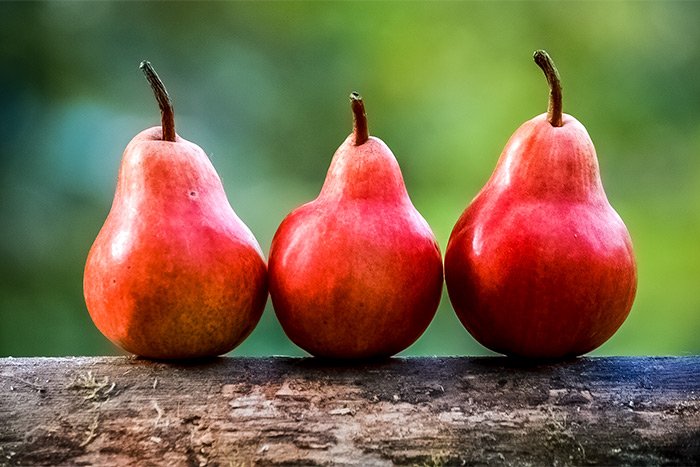
I already used this photo in one of my previous posts, but I think it will be a perfect fit for this one as well. All I really want out of this picture is one of the pears. I chose this particular photo because the pears have clean edges, which will make the selection task all that much easier.
Selecting a Pear
For this post, I’m going to try to keep things as simple as possible. I merely want to demonstrate what I discussed above. To do that, I’m going to select one of the pears with the Quick Selection Tool and then copy and paste it right back into the same file. I’ll be doing this just so I don’t have to go through the process of creating an entirely new file to specific proportions. I’ll also add a white layer in between the original image and the copied layers above. Basically, it’ll look like I created a new file, but the original will be tucked away down below.Anyway, like I said, I’ll use the Quick Selection Tool over in the left toolbar for this task.

Once the tool is active, I’ll adjust the size and hardness of the brush and then I’ll click and trace the inside edges of the pear with my mouse pointer until I have what I need inside of the marching ants.

Creating New Layers
Next, I’ll use the keyboard shortcuts of Ctrl+C to copy and Ctrl+V to paste the selected pear right into the image, which will create a new layer with only the pear on it.
After that, I’ll click on the background layer in the Layers panel and then click on the Add New Layer button at the bottom of the same panel. This will create a new layer that sits right above the background image. Using the Paint Bucket Tool, I’ll pour the color white into the new empty layer. This is what the Layers panel will look like when I’m finished with that.

Now I’m set up to begin this tutorial.
Transforming & Duplicating the Transformation
Since this whole thing isn’t about making some crazy difficult transformation, I’ll keep things simple for you. I’ll merely use the Free Transform feature to reposition the center point of the transform bounding box to an area outside and below the object (pear) and then I’ll rotate the pear to the right slightly.So, to get going, I’ll make sure the single pear layer in the Layers panel is selected. Then, I’ll head up to the Edit > Free Transform menu item and click (keyboard shortcut Ctrl+T).

Once I see the transform bounding box outside of the pear object, I’ll click and drag, while holding the Shift key on my keyboard down, one of the corners toward the center of the box. Basically, I just want to shrink the pear a bit, while maintaining the same proportion. That’s what the Shift key does. It keeps the original proportion intact.
Then, I’ll click and drag the center point of the bounding box down below and outside of the box itself. Doing this will change the rotation point of the object. Instead of rotating around the exact center of the box, it’ll rotate around a position beneath the box.

And finally, I’ll hover my mouse pointer just outside of the box and once the pointer turns into a curved double arrow, I’ll click and drag to the right, which will rotate the pear slightly.

And then finally finally, I’ll press the Enter key on my keyboard to accept the change. What I’ll end up with is a pear that looks like it’s leaning over to the side just a tad.
Repeating the Transformation
Okay, now here’s where things get pretty cool. Ask me if I remember the exact measurements of the transformation I just applied to this layer. I’ll tell you that I have no idea. No one ever does; that’s why this little trick is so helpful. If I wanted to repeat this same transformation, I can use the information that Photoshop has magically stored somewhere. It knows what I just did to the first pear, so if I click on the pear layer in the Layers panel to make sure that particular layer is selected and active, I can use the keyboard shortcut of Ctrl+J to copy that layer.
And then, if I go up to the Edit > Transform > Again menu item and click, the copied layer will have the same exact transform applied to it as the first layer has applied to it.

Now check this out. Look at the result.

Do you see that second pear? It now has the same transformation applied to it as the first one had, but I didn’t have to do any math. Pretty cool.
Duplicating & Repeating the Transformation
Do you remember when I mentioned that this type of tip would be perfect if you were trying to display evenly spaced playing cards or if you were trying to display evenly spaced and rotated photographs? Well, this is what I was talking about. I hope you can see the benefit of this.In the previous step, I thought the copying of the first layer was somewhat tedious. If I had to duplicate the layer 50 times, I’d get a little tired of doing that. With this in mind, I’ll show you how you can copy the layer and then repeat the transformation, all in one step. All it takes is one slick keyboard shortcut.
The keyboard shortcut for what I did in the previous step is Shift+Ctrl+T. If I add an Alt to that, I’ll be good. So the complete keyboard shortcut to duplicate and then repeat a transformed layer is Alt+Shift+Ctrl+T. If I select the most recent transformed layer and then use this shortcut, let’s say, five times, I’ll end up with this.

Isn’t that awesome? The only trick is trying to find a use for it. But it’s available if you can do that.
——
I hope I clearly explained how to transform an object in Adobe Photoshop and then how to repeat that transformation. Then, I explained how to copy the layer and repeat the transformation in one step. If you have any questions about this post, please leave them in the comment section below. Thanks for reading!
COMMENT: But how can I have the same transformation without copy the same layer? I just want to use the same size of a photo to other layers.
COMMENT: I’m not quite sure what you are asking. Can you please rephrase the question so I can help you?
COMMENT: Yeah, and then you do a different transform after, and later need to use the original transform again later but can’t. This tip is as useless as Photoshop is badly designed.
