CraigHardy
Member
- Joined
- May 11, 2021
- Messages
- 223
- Reaction Score
- 2
- Points
- 18
- #1
Sometimes I sit and wonder exactly how many shortcuts there actually are in applications such as Adobe Photoshop. I mean, it seems like I unearth a new one every single day. And they’re hidden in plain sight too. A tiny icon here or a click and a drag there. I guess this is what it means to perpetually learn. It just never ends.
If you work with layer effects (styles) on a regular basis, you’ll probably want to read through this post carefully. There’s nothing more tedious than taking all sorts of time to create the perfect layer effect for one layer and then taking the same amount of time to recreate the same exact effect for another layer. Or perhaps not the same exact effect, but one close to it. Wouldn’t it be nice if there was a way to simply create an effect once and then copy that over to other layers? Oh, it would be nice? Well, we’re in luck because there is such a way. And it’s totally easy. There’s also a method for moving an effect, or effects, from one layer to another or for deleting them altogether. These things are quite versatile, you know.
In today’s post, I’ll take an image, or text, or whatever, and apply a combination of effects to it via the Layer Style palette in Adobe Photoshop. Then, once those effects are in place, I’ll continue on and demonstrate how to do the things I just mentioned above. I’ll copy the effects, move them and even delete them. This is one of those topics that you’ll likely remember forever because effects in Photoshop are really popular and you’ll probably use them more often than not and also, the whole thing is super simple. A perfect situation.
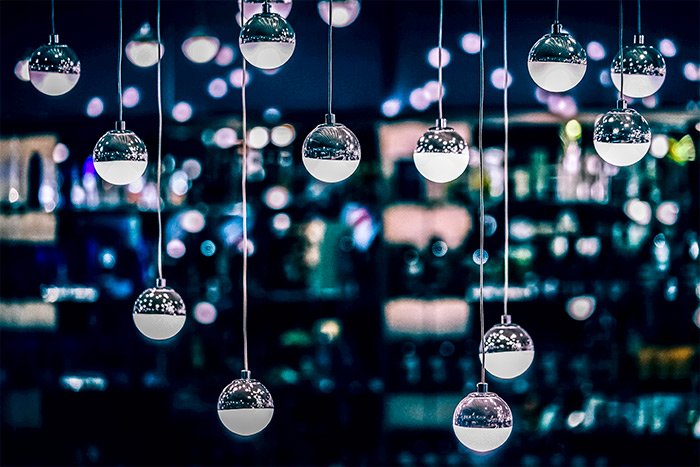
Here’s the photo I’ll be using.
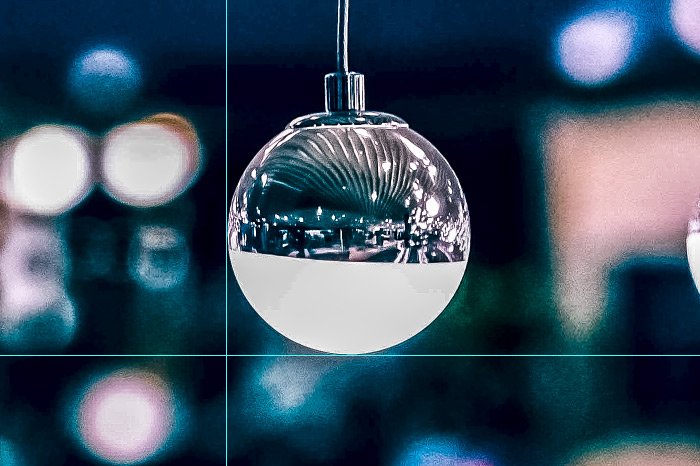
After that, I’ll find the Elliptical Marquee Tool over in the left toolbar and click to activate it.
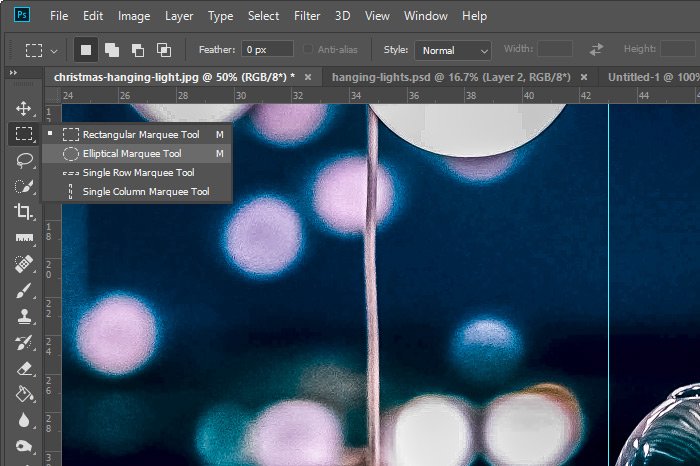
And finally, to select the bulb, I’ll place my mouse pointer right on top of the intersection of the guides, press and hold the Shift key on my keyboard and then drag up until the selection encompasses the bulb.
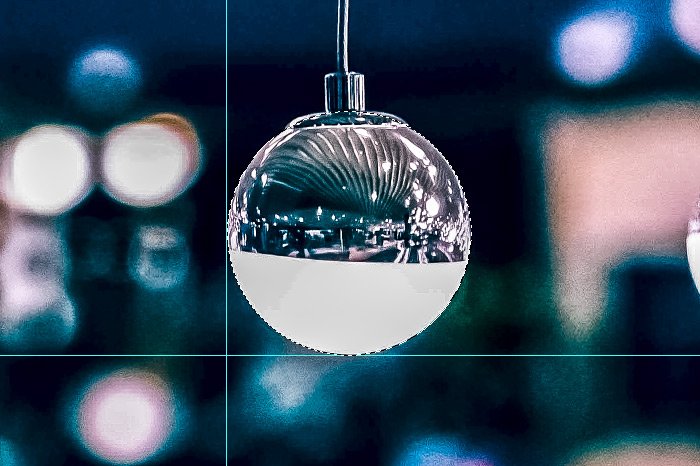
Since there’s only one layer in this file so far, I don’t need to concern myself with making that layer active. With that in mind, I’ll simply use the keyboard shortcuts of Ctrl+C to copy and Ctrl+V to paste the selected bulb into its own layer. I’m going to keep this bulb copy right on top of the original bulb, but I’ll move it over in the screenshot below, so you can see it better.
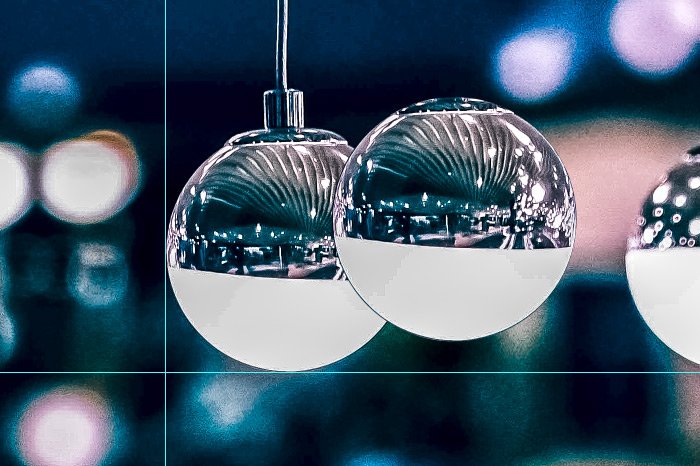
Now, you may have noticed that the bulb in question isn’t perfectly round. There’s a part on top that’s flat. Since I’m going to be applying an effect or two to this bulb, I’d like to trim the top part off, so it’s flat like it should be. To do this, I’ll activate the Rectangular Marquee Tool and then drag it out so it covers the top part of the area I want to remove.
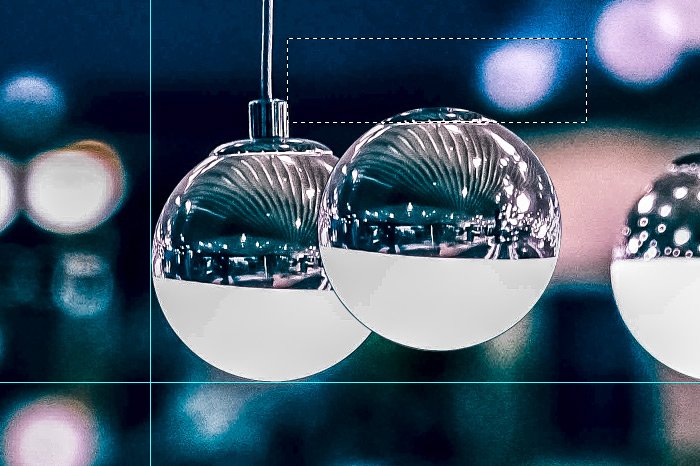
Making sure the bulb copy layer is active in the Layers panel, I’ll press the Delete key on my keyboard to remove that small area.
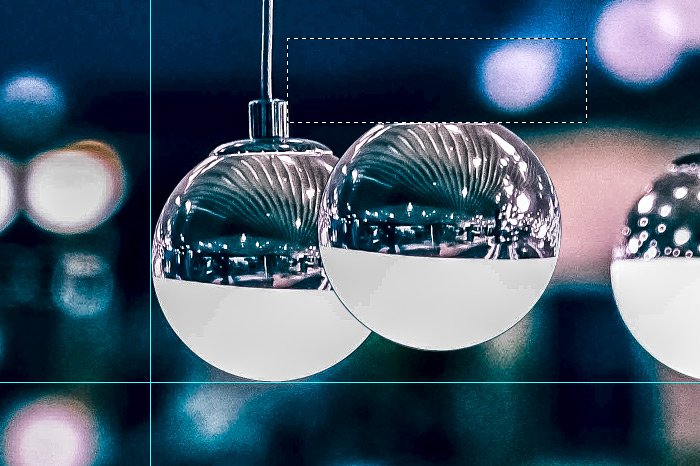
Ah, that’s better. Now I’ll use the Select > Deselect menu item to get rid of the marching ants and the selection.

Now I’ll move that copied bulb back so it’s sitting perfectly on top of the original one.
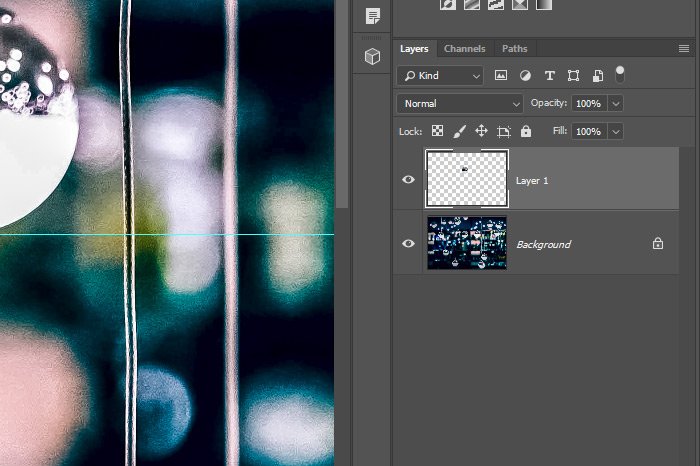
As you can see, I have the background layer and then the layer with the copied light bulb in it. To add an effect or effects, I’ll double-click on the empty gray part of the top layer. That will open up the Layer Style palette. I could have also just as easily clicked on the Fx icon located at the bottom of the Layers panel or used the Layer > Layer Style menu item. Really though, double-clicking the layer is the fastest, so that’s what I normally do.
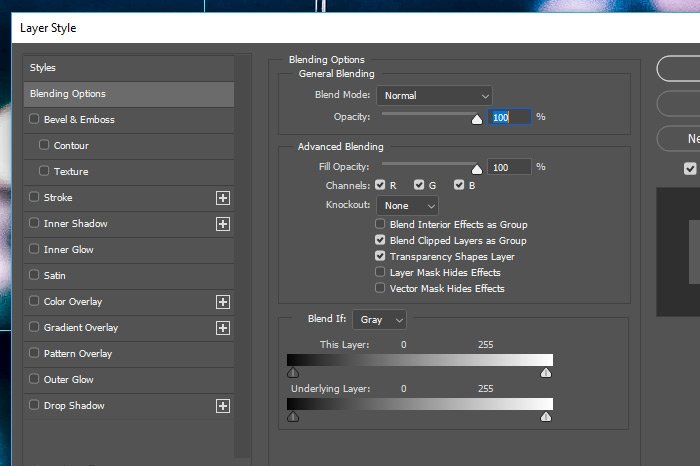
I’m going to go ahead and apply some random styles. Don’t worry about which ones I apply. Remember, this is merely for demonstration. If you’d like to learn how to apply different effects, please read through this post:
Layer Effects & Styles in Adobe Photoshop
When I’m finished applying the different effects, I’ll click on the OK button to close out of the Layer Style palette and return to the original image, but this time, with a different look going on. I also removed the guides by dragging them off screen.
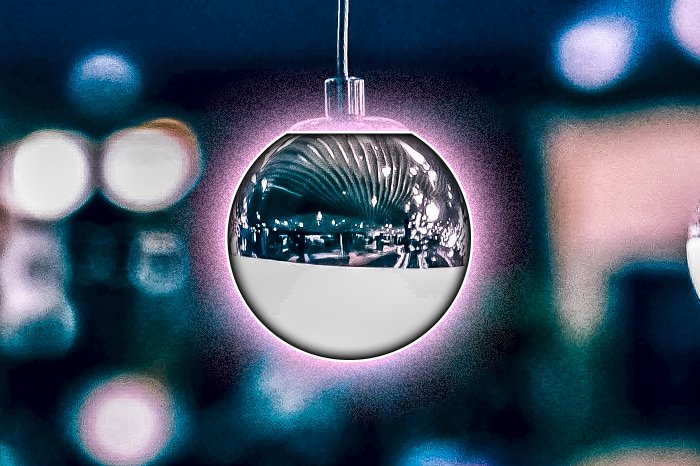
Lastly, I’ll write some text into a new layer, so I have something to copy these effect to. Here’s the image so far.
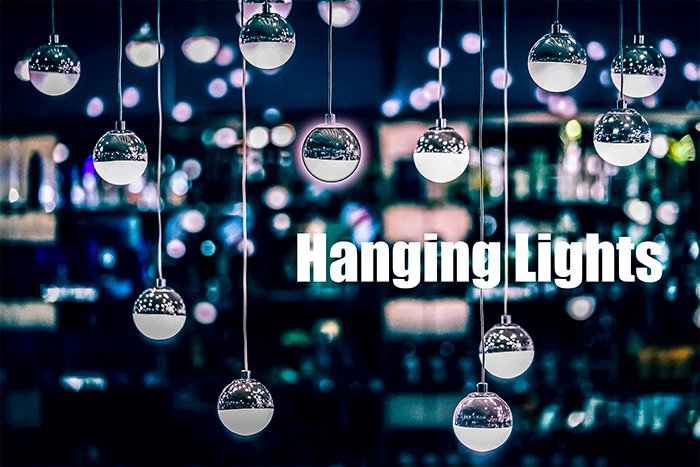
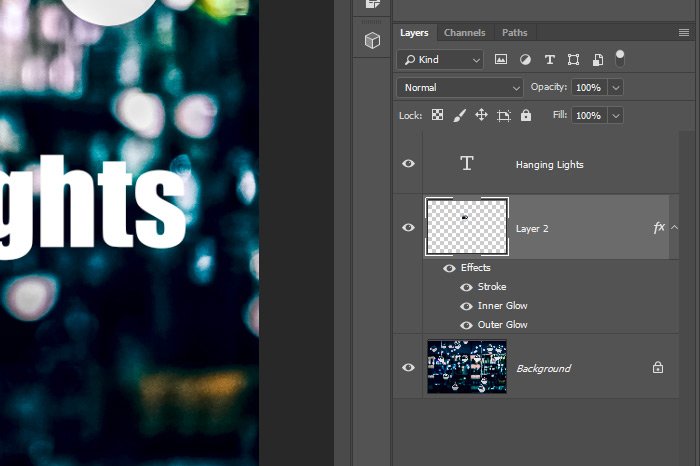
Basically, I would like to move the effects that I applied to the bulb layer to the text layer. Let me show you just how easy this is.
To move effects from one layer to another, all you need to do is click and drag. If I want to move all of the effects at the same time, I can either click the word Effects in the Layers panel or the Fx letters to the right of the layer that I want to drag from.
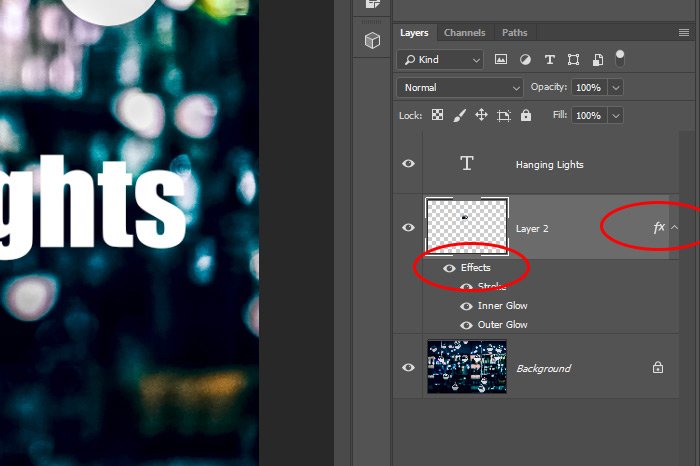
All I would need to do is drag either of these things to the layer I’d like to move the effects to. So in this case, I would drag them to the text layer, right there in the Layers panel.
If I wanted to move just one of the effects I applied to the bulb layer up to the text layer, I would click on just that individual effect and drag it up and let go. That would remove that particular effect from the bulb layer and apply it to the text one.

What’s particularly helpful when doing this is how easy it is to edit an effect once it’s been copied to another layer. To do so, simply double-click on the effect you’d like to modify (in the Layers panel) and edit it in the Layer Style palette. When finished, click OK to apply the change. These effects aren’t linked to each other in any way, so you don’t need to concern yourself with any change you make affecting anything other than that effect.
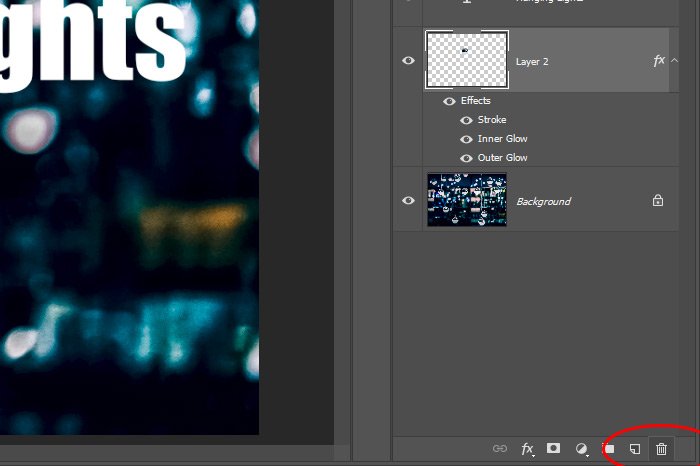
You can delete one effect at a time or you can delete all effects at once by dragging the word Effect down to the trash can.
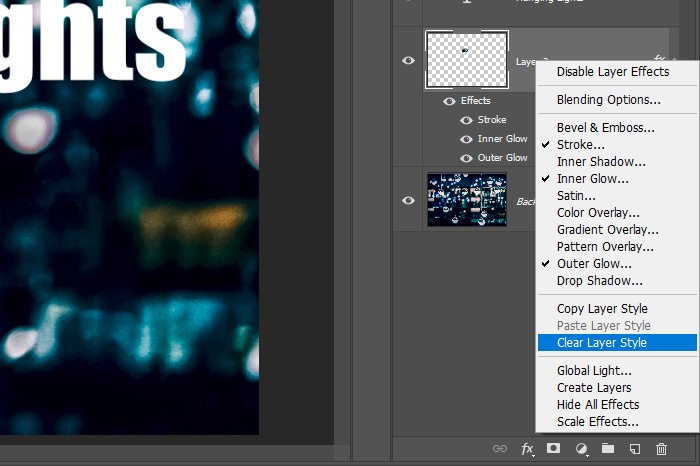
If you’re into using menus in Photoshop as opposed to clicking and dragging, you can right-click on the Fx icon that sits at the right side of any layer with a style applied to it and choose Clear Layer Style from the menu. That will get rid of everything all at once as well.
Let’s say you have a layer group in Photoshop that has lots of layers inside of it.
Using Groups in the Adobe Photoshop Layer Panel
Instead of clicking and dragging a style while holding the Alt key on your keyboard to each and every layer within the group, you can just click and drag to the group layer itself. You know, the one that contains all the layers. If you apply an effect to a group, that effect will automatically be applied to all layers in that group. It doesn’t matter how many layers there are. That is just so cool.
And that, my friends, about sums it up.
——
I hope I clearly explained how to manage layer styles inside of Adobe Photoshop. If you have any questions regarding this post, please leave them in the comment section below. Thanks for reading!
If you work with layer effects (styles) on a regular basis, you’ll probably want to read through this post carefully. There’s nothing more tedious than taking all sorts of time to create the perfect layer effect for one layer and then taking the same amount of time to recreate the same exact effect for another layer. Or perhaps not the same exact effect, but one close to it. Wouldn’t it be nice if there was a way to simply create an effect once and then copy that over to other layers? Oh, it would be nice? Well, we’re in luck because there is such a way. And it’s totally easy. There’s also a method for moving an effect, or effects, from one layer to another or for deleting them altogether. These things are quite versatile, you know.
In today’s post, I’ll take an image, or text, or whatever, and apply a combination of effects to it via the Layer Style palette in Adobe Photoshop. Then, once those effects are in place, I’ll continue on and demonstrate how to do the things I just mentioned above. I’ll copy the effects, move them and even delete them. This is one of those topics that you’ll likely remember forever because effects in Photoshop are really popular and you’ll probably use them more often than not and also, the whole thing is super simple. A perfect situation.
The Demo Image – Hanging Christmas Lights
I think I’ll get creative today and use a photo of some hanging Christmas lights. I’d like to select one of the bulbs and then copy it into its own layer. After that, I’ll add a bit of text to the image. Finally, I’ll create an effect for the text layer and transfer that effect to the bulb. I hope this comes out well because it looks really cool in my brain right now.Here’s the photo I’ll be using.

Selecting the Bulb
To kick things off, I’ll go ahead and select the bulb. To do this, I’ll use the Elliptical Marquee Tool and some guides. First, I’ll set my guides so one is underneath the bulb and one is along the left side.
After that, I’ll find the Elliptical Marquee Tool over in the left toolbar and click to activate it.

And finally, to select the bulb, I’ll place my mouse pointer right on top of the intersection of the guides, press and hold the Shift key on my keyboard and then drag up until the selection encompasses the bulb.

Since there’s only one layer in this file so far, I don’t need to concern myself with making that layer active. With that in mind, I’ll simply use the keyboard shortcuts of Ctrl+C to copy and Ctrl+V to paste the selected bulb into its own layer. I’m going to keep this bulb copy right on top of the original bulb, but I’ll move it over in the screenshot below, so you can see it better.

Now, you may have noticed that the bulb in question isn’t perfectly round. There’s a part on top that’s flat. Since I’m going to be applying an effect or two to this bulb, I’d like to trim the top part off, so it’s flat like it should be. To do this, I’ll activate the Rectangular Marquee Tool and then drag it out so it covers the top part of the area I want to remove.

Making sure the bulb copy layer is active in the Layers panel, I’ll press the Delete key on my keyboard to remove that small area.

Ah, that’s better. Now I’ll use the Select > Deselect menu item to get rid of the marching ants and the selection.

Now I’ll move that copied bulb back so it’s sitting perfectly on top of the original one.
Adding Some Layer Effects
Before I go any further, let’s take a look at the Layers panel, just to see what’s going on.
As you can see, I have the background layer and then the layer with the copied light bulb in it. To add an effect or effects, I’ll double-click on the empty gray part of the top layer. That will open up the Layer Style palette. I could have also just as easily clicked on the Fx icon located at the bottom of the Layers panel or used the Layer > Layer Style menu item. Really though, double-clicking the layer is the fastest, so that’s what I normally do.

I’m going to go ahead and apply some random styles. Don’t worry about which ones I apply. Remember, this is merely for demonstration. If you’d like to learn how to apply different effects, please read through this post:
Layer Effects & Styles in Adobe Photoshop
When I’m finished applying the different effects, I’ll click on the OK button to close out of the Layer Style palette and return to the original image, but this time, with a different look going on. I also removed the guides by dragging them off screen.

Lastly, I’ll write some text into a new layer, so I have something to copy these effect to. Here’s the image so far.

Moving Layer Effects From One Layer to Another
Before I show you how to move layer effects, let’s take another look at the Layers panel.
Basically, I would like to move the effects that I applied to the bulb layer to the text layer. Let me show you just how easy this is.
To move effects from one layer to another, all you need to do is click and drag. If I want to move all of the effects at the same time, I can either click the word Effects in the Layers panel or the Fx letters to the right of the layer that I want to drag from.

All I would need to do is drag either of these things to the layer I’d like to move the effects to. So in this case, I would drag them to the text layer, right there in the Layers panel.
If I wanted to move just one of the effects I applied to the bulb layer up to the text layer, I would click on just that individual effect and drag it up and let go. That would remove that particular effect from the bulb layer and apply it to the text one.

Copying Effects to Another Layer
To copy layer effects to another layer, as opposed to cutting the effects (removing from one and adding to another), all you have to do is follow the same exact instructions as above, but hold down the Alt (Option on Mac) key on your keyboard while doing it. Holding the Alt key will keep the original style intact and will also add it to a target layer.What’s particularly helpful when doing this is how easy it is to edit an effect once it’s been copied to another layer. To do so, simply double-click on the effect you’d like to modify (in the Layers panel) and edit it in the Layer Style palette. When finished, click OK to apply the change. These effects aren’t linked to each other in any way, so you don’t need to concern yourself with any change you make affecting anything other than that effect.
Deleting Layer Effects
Again, this one is really easy. To delete layer effects from a layer, all you need to do is click, drag and drop those effects on the trash can at the bottom of the Layers panel.
You can delete one effect at a time or you can delete all effects at once by dragging the word Effect down to the trash can.
If you’re into using menus in Photoshop as opposed to clicking and dragging, you can right-click on the Fx icon that sits at the right side of any layer with a style applied to it and choose Clear Layer Style from the menu. That will get rid of everything all at once as well.

Applying Effects to a Layer Group
In my opinion, this last trick is the best. I like it because it has tons of power.Let’s say you have a layer group in Photoshop that has lots of layers inside of it.
Using Groups in the Adobe Photoshop Layer Panel
Instead of clicking and dragging a style while holding the Alt key on your keyboard to each and every layer within the group, you can just click and drag to the group layer itself. You know, the one that contains all the layers. If you apply an effect to a group, that effect will automatically be applied to all layers in that group. It doesn’t matter how many layers there are. That is just so cool.
And that, my friends, about sums it up.
——
I hope I clearly explained how to manage layer styles inside of Adobe Photoshop. If you have any questions regarding this post, please leave them in the comment section below. Thanks for reading!
