JodyBuchanan
Member
- Joined
- May 10, 2021
- Messages
- 138
- Reaction Score
- 0
- Points
- 21
- #1
Let’s face facts. Pretty much every photo of anyone you see in a magazine has been Photoshopped. If I had to guess, I’d probably say that softening the skin in general is the first priority for the editor and then, right behind that would be to remove any blemishes. Beyond those two things, edits like removing wrinkles and reshaping areas is best left for those who want their photos to be completely transformed. Luckily for us, the two primary and most important edits are also the easiest to complete.
I’ve already talked a lot about removing blemishes on this website. If you’d like to read those posts, please feel free to click through below.
How to Remove Face Blemishes in Adobe Camera Raw
How to Undo Random Spot Healing Brush Tool Corrections in Adobe Photoshop
Clearing Skin with the Spot Healing Brush Tool in Adobe Photoshop
In today’s post, I’d like to discuss how to generally soften skin while using Adobe Photoshop and Camera Raw combined. This is a simple process in which a photo is opened in Photoshop, is converted to a Smart Object and then has a Smart Filter applied to it. After that, it’s as simple as working with a filter mask and then adjusting the layer opacity. If you’re into editing people’s faces for modeling or wedding photography and aren’t sure how to go about it, this post is for you. And just as a side note, this technique isn’t reserved for softening or smoothing only faces, it can also be used for softening or smoothing just about anything.

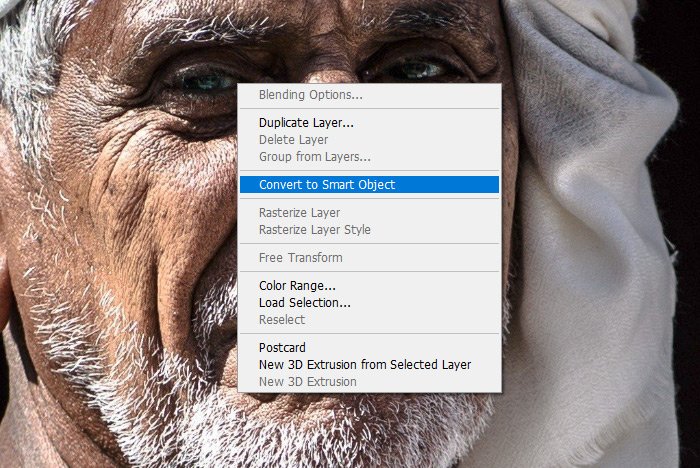
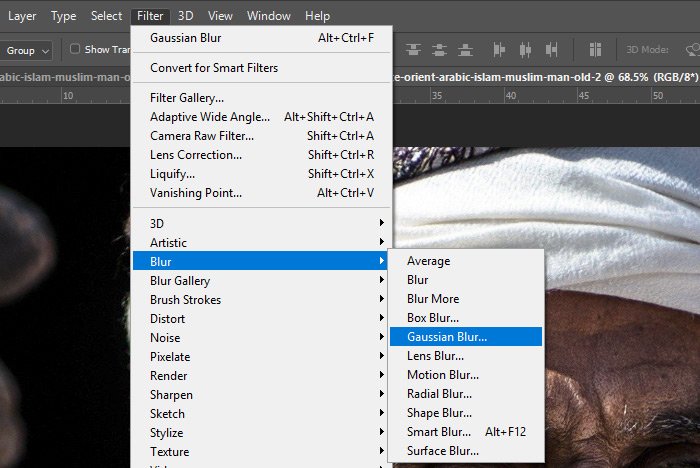
Next, I’ll go ahead and complete a very important task, which is to convert the top layer image for a Smart Filter. To do this, I’ll click the image thumbnail in the Layers panel and then I’ll head up to the Filter > Convert for Smart Filters menu item and click.
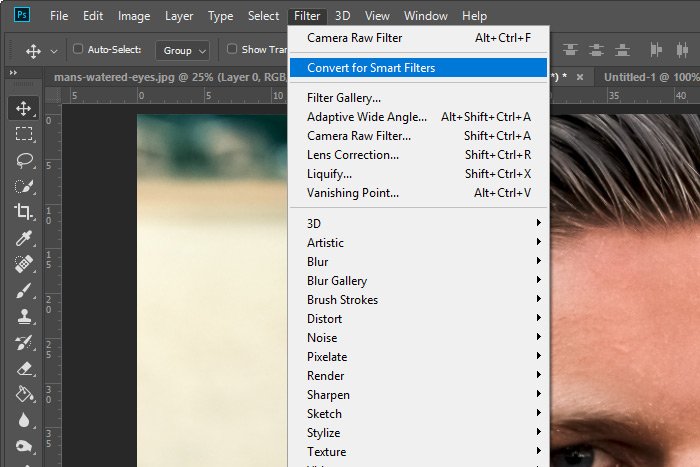
This will convert the layer into a Smart Object, which will allow me to work with it in a non-destructive manner.
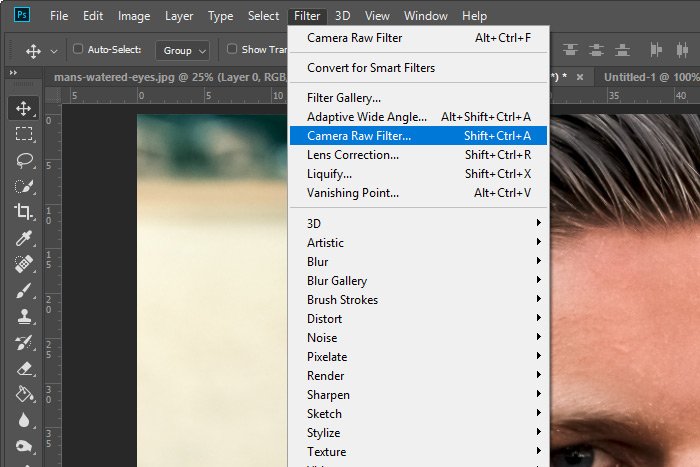
Once Camera Raw opens up, I’ll go straight to the Clarity slider in the Basic panel. This is the slider I’ll be using to soften the skin in this photo.
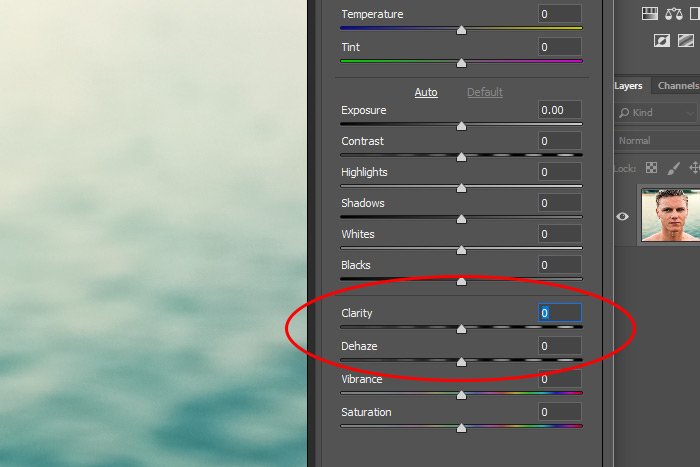
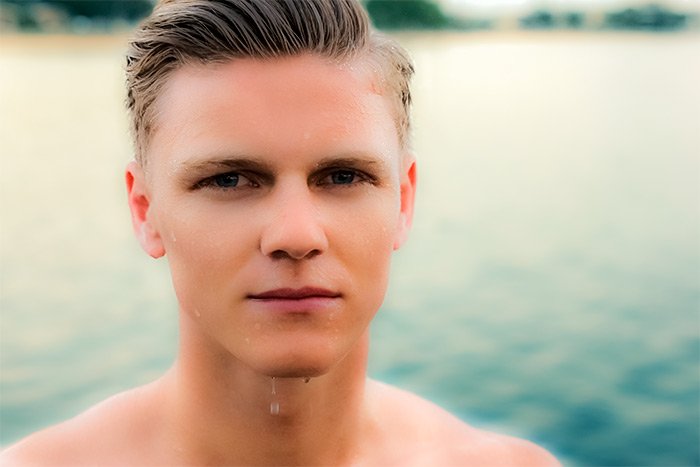
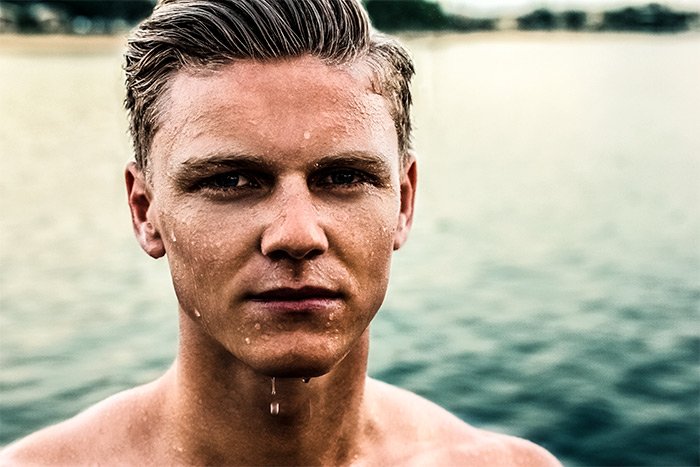
Let me take a moment to show you the two extremes to which the Clarity slider can bring things. As I mentioned earlier, this one slider can make the photo appear extremely soft or extremely hard. The reason for this is because, depending on which way you push the slider, it can either add or remove midtone contrast. As you’ll see in the two comparison shots below, this can be a big deal.
Here’s an example of moving the Clarity slider all the way to the left, which removes much of the midtone contrast.
And here’s an example of moving the Clarity slider all the way to the right, which adds a lot of midtone contrast.
If you were editing this photo and wanted to add smoothness to it, which way would you push the slider? That’s right, to the left. So that’s what I’ll do. I’ll push the Clarity slider about half way to the left and then I’ll click the OK button to return to Photoshop. Don’t worry, I know things will be somewhat extreme looking for the time being. I’ll fix all that later. Let’s take a look at the image now.
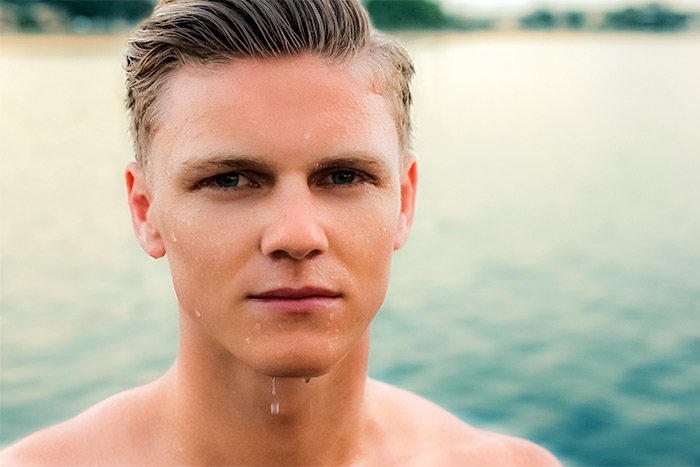
That actually looks pretty good, but I can see that some areas of the face and hair are too smooth. In the next section, I’ll fix those areas. Remember, all I want to soften is the skin, nothing else.
The first thing I’ll do to finish up this photo is to head over to the Layers panel and click on the white filter mask thumbnail to select it.
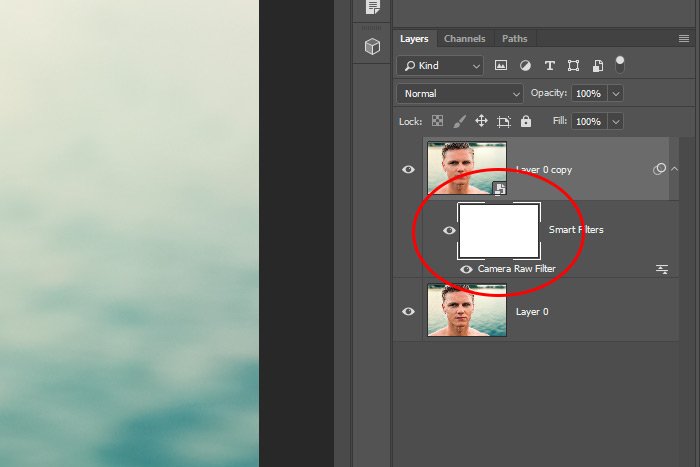
Then, I’ll click to activate the Brush Tool in the left toolbar and finally, I’ll make sure the color black is chosen in the Color Picker. I’ll soften the edge of the brush and I’ll begin painting anywhere on the image that I do not want softened. Basically, I’ll resize the brush and I’ll paint over the hair, lips, etc…
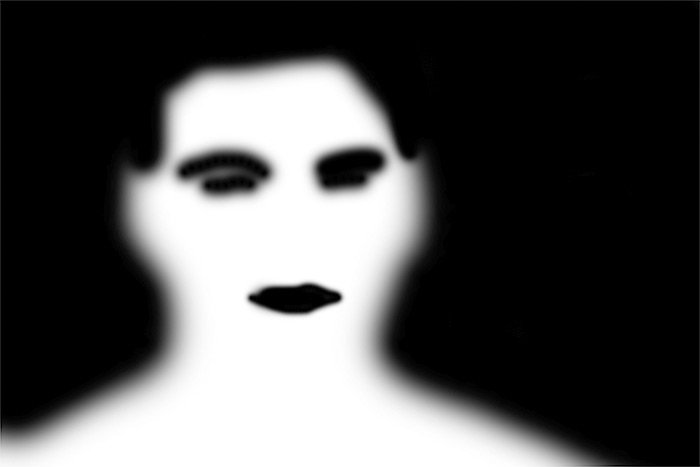
Here’s what the mask looks like after I’m finished with my painting. As you can see, only the skin is being revealed in the mask, which is telling Photoshop to only apply the softening to that white area.
Of course, I’ll be sure to click on the top Smart Object layer first, to make sure it’s selected and active.
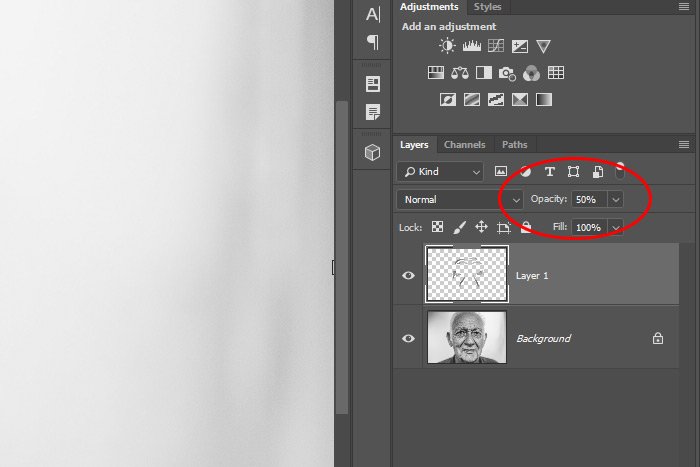
By reducing the opacity of the top layer, I’m allowing some of the layer underneath to show through, which sort of blends together the original image with the newer, smoother one. This offers a very realistic result.
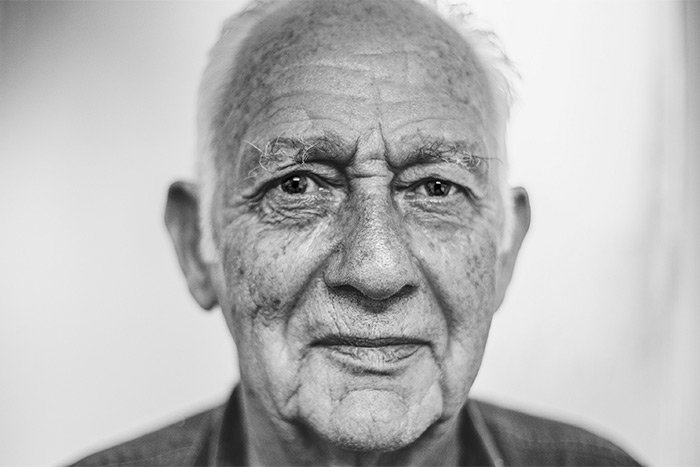
Here’s the output of my efforts.

I’d say that looks pretty good. Obviously, this model didn’t need much fixing up, but I’m sure you can see the possibilities for a workflow like this. Also, combined with blemish removal, this type of technique can really save the day.
——
I hope I clearly explained how to soften skin in Adobe Photoshop by using a Camera Raw filter as well as a filter mask. If you have any questions regarding this post, please leave them in the comment area below. Thanks for reading!
I’ve already talked a lot about removing blemishes on this website. If you’d like to read those posts, please feel free to click through below.
How to Remove Face Blemishes in Adobe Camera Raw
How to Undo Random Spot Healing Brush Tool Corrections in Adobe Photoshop
Clearing Skin with the Spot Healing Brush Tool in Adobe Photoshop
In today’s post, I’d like to discuss how to generally soften skin while using Adobe Photoshop and Camera Raw combined. This is a simple process in which a photo is opened in Photoshop, is converted to a Smart Object and then has a Smart Filter applied to it. After that, it’s as simple as working with a filter mask and then adjusting the layer opacity. If you’re into editing people’s faces for modeling or wedding photography and aren’t sure how to go about it, this post is for you. And just as a side note, this technique isn’t reserved for softening or smoothing only faces, it can also be used for softening or smoothing just about anything.
The Demo Photo
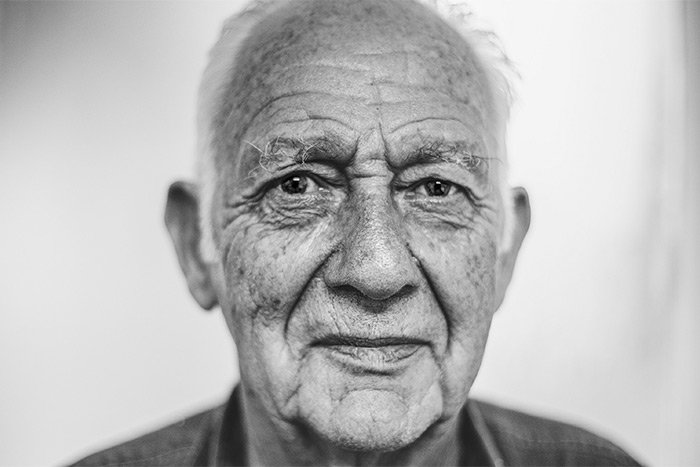
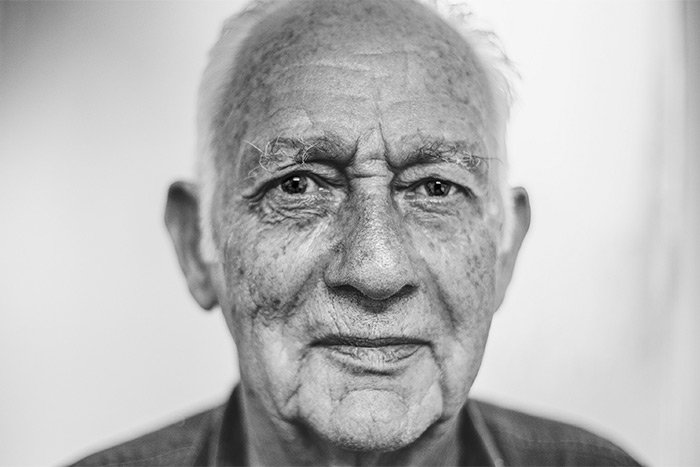
This is the photo I’ll be using for this demonstration. I chose this photo because the subject has water and droplets on his face. Those droplets can go two ways, either much more pronounced or softened up quite a bit. I’ll show you both scenarios below.
Converting for a Smart Filter
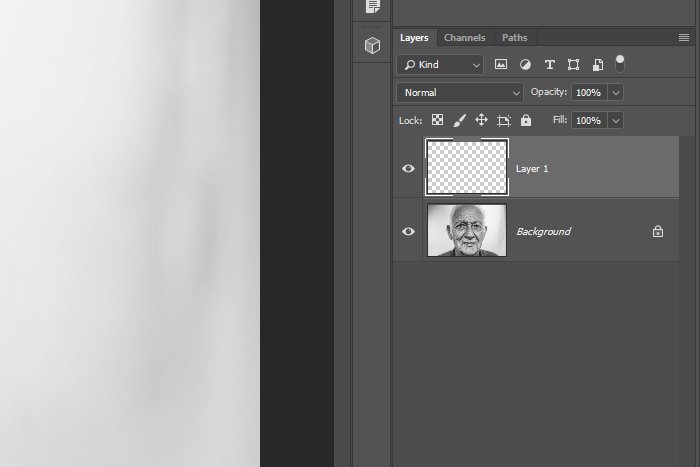
The very first thing I’ll do with this project, since this photograph is already opened up in Adobe Photoshop, is to duplicate the image layer by clicking and dragging the layer in the Layers panel down to the Create New Layer icon at the bottom of the panel. I need this duplicate layer for one of the final steps down below.Next, I’ll go ahead and complete a very important task, which is to convert the top layer image for a Smart Filter. To do this, I’ll click the image thumbnail in the Layers panel and then I’ll head up to the Filter > Convert for Smart Filters menu item and click.

This will convert the layer into a Smart Object, which will allow me to work with it in a non-destructive manner.
Applying a Camera Raw Filter
The next step I’ll take is to move the image into Camera Raw to apply one very straightforward filter to it. To move the image into Camera Raw, I’ll return to the same Filter menu up top, but this time, I’ll click Camera Raw Filter.
Once Camera Raw opens up, I’ll go straight to the Clarity slider in the Basic panel. This is the slider I’ll be using to soften the skin in this photo.

Let me take a moment to show you the two extremes to which the Clarity slider can bring things. As I mentioned earlier, this one slider can make the photo appear extremely soft or extremely hard. The reason for this is because, depending on which way you push the slider, it can either add or remove midtone contrast. As you’ll see in the two comparison shots below, this can be a big deal.
Here’s an example of moving the Clarity slider all the way to the left, which removes much of the midtone contrast.

And here’s an example of moving the Clarity slider all the way to the right, which adds a lot of midtone contrast.

If you were editing this photo and wanted to add smoothness to it, which way would you push the slider? That’s right, to the left. So that’s what I’ll do. I’ll push the Clarity slider about half way to the left and then I’ll click the OK button to return to Photoshop. Don’t worry, I know things will be somewhat extreme looking for the time being. I’ll fix all that later. Let’s take a look at the image now.

That actually looks pretty good, but I can see that some areas of the face and hair are too smooth. In the next section, I’ll fix those areas. Remember, all I want to soften is the skin, nothing else.
Removing Smoothness via the Filter Mask
Okay, I’m at the point of cleaning up this photo. I’ve already added some smoothness, but the issue I’m seeing is that too much is smooth, such as the eyes, eyebrows, hair, lips and background. This isn’t a problem because I can fix the situation with little trouble.The first thing I’ll do to finish up this photo is to head over to the Layers panel and click on the white filter mask thumbnail to select it.

Then, I’ll click to activate the Brush Tool in the left toolbar and finally, I’ll make sure the color black is chosen in the Color Picker. I’ll soften the edge of the brush and I’ll begin painting anywhere on the image that I do not want softened. Basically, I’ll resize the brush and I’ll paint over the hair, lips, etc…
Here’s what the mask looks like after I’m finished with my painting. As you can see, only the skin is being revealed in the mask, which is telling Photoshop to only apply the softening to that white area.

Changing Layer Opacity
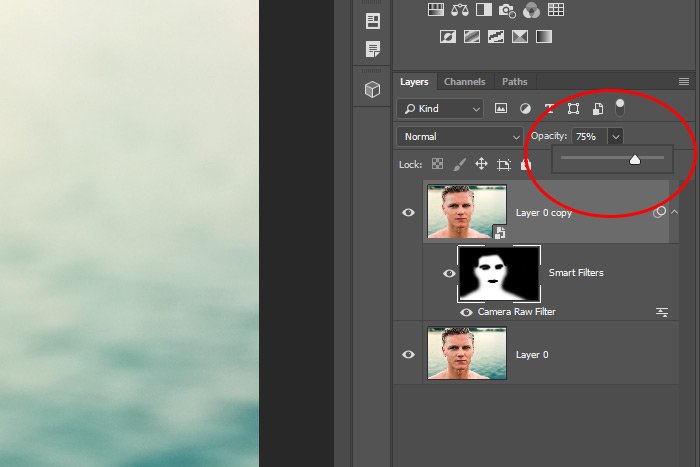
For the final step of this project, I’ll take a look at the image to determine if the softening needs to be reduced any. Sometimes, the Camera Raw filter can be applied at too strong a level. Instead of double-clicking the filter layer to revisit Camera Raw and make adjustments there, I can simply reduce the opacity of the top layer itself, right in the Layers panel. For this image, I’ll reduce the opacity of the top layer to 75% by pushing the Opacity slider somewhat to the left.
Of course, I’ll be sure to click on the top Smart Object layer first, to make sure it’s selected and active.
By reducing the opacity of the top layer, I’m allowing some of the layer underneath to show through, which sort of blends together the original image with the newer, smoother one. This offers a very realistic result.
Here’s the output of my efforts.

I’d say that looks pretty good. Obviously, this model didn’t need much fixing up, but I’m sure you can see the possibilities for a workflow like this. Also, combined with blemish removal, this type of technique can really save the day.
——
I hope I clearly explained how to soften skin in Adobe Photoshop by using a Camera Raw filter as well as a filter mask. If you have any questions regarding this post, please leave them in the comment area below. Thanks for reading!

