WendyMay
Member
- Joined
- May 11, 2021
- Messages
- 142
- Reaction Score
- 0
- Points
- 21
- #1
There may come a time when you need to change the shape of something, such as a body, toy, car, wrinkle or anything with a defined edge. While there are multiple methods for altering shape, not many come close to the quality and efficiency of the Liquify filter in Adobe Photoshop. This filter really is the place to turn when something needs to be nudged or pushed into just the right proportion.
In today’s post, I’d like to talk about one specific area of the Liquify filter inside of Adobe Photoshop. While this tool is rather large and complex and while it can push, pull, rotate, reflect, pucker, and bloat, I’m going to focus today’s efforts on just one thing, the Forward Warp Tool that sits inside of the Liquify workspace. This is the tool I generally turn to when I need to reshape an edge. I also think it’s one of the most popular tools that’s used when anyone has to complete a task such as what I discussed above, so it’s a good place to start. Also, if you have been reading my posts for any amount of time, you also know that I’m bound to revisit the Liquify workspace again in the future to discuss other aspects of the filter. I just don’t want to overwhelm you in one sitting.

To convert the layer, I’ll right-click on it somewhere in the gray part, inside of the Layers panel. When I see the menu pop up, I’ll click on Convert to Smart Object.
After that, I’ll move over to the right column, where I’ll push some of the sliders into appropriate positions. I’ll also explain what each slider does here.
Size: Simply put, this slider controls the size of the brush that you’ll be doing the warping with.
Density: This option controls how wide a brush stroke will affect whatever it is you’re attempting to move. A lower density will focus its strength towards the center of the brush while a higher density will fill most of the brush, all the way to the edges.
Pressure: This option has a huge effect on how severe any stoke you make with the brush will be. A higher pressure means that, as you’re brushing, the specified part of the image will warp very quickly. A lower pressure means that no matter how you move the mouse pointer, the image will warp very slowly. The slower method offers much more accuracy, while the faster one gets the job done at a quicker pace.
Okay, I set the sliders so they’re right in the middle, which will suit me just fine. Now, I’ll go ahead and make some wild changes, just so you can see what this tool is capable of. I’ll push some of the subject’s shoulder out, so the muscles look bigger.
To accomplish what I just did, I simply clicked and dragged the edge of the shoulder outward. I did this slowly and carefully as to avoid any distortion. Now, I’ll do the opposite. I’ll click and drag the shoulder muscles inward, so they appear smaller than they actually are.
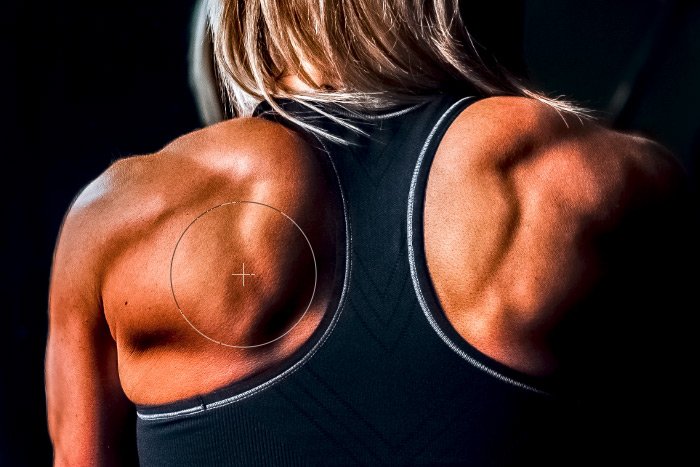
Do you see the difference? Any time I click to move an edge, I only do so gently. I don’t click and drag with big, long strokes. I click and drag with short strokes, again, to avoid distorting the surrounding areas.
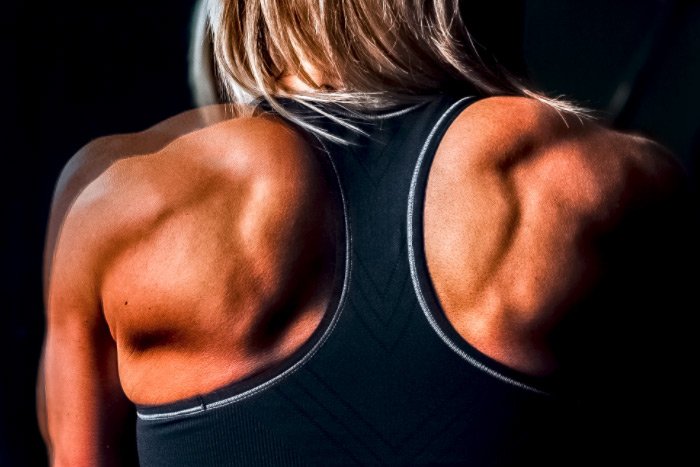
Do you see the overlay? It’s sometimes easier to work with this option activated because your changes can be viewed in a much more clear manner. By the way, the check box is in the right column, under the sliders I spoke of earlier.
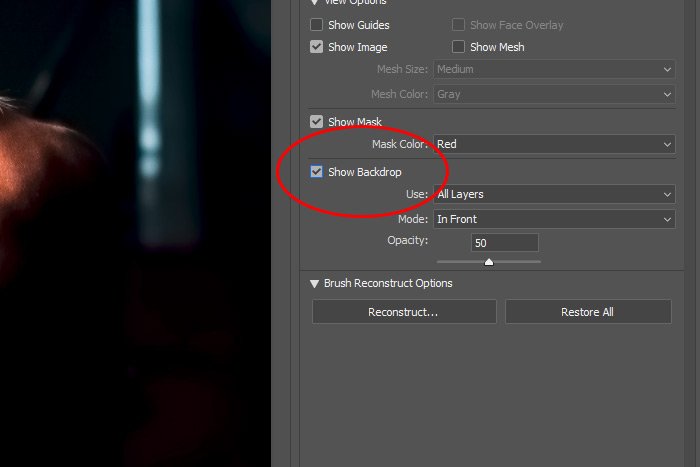
At the bottom of the options panel on the right side is also a Preview check box. It’s a good idea to check and uncheck that box as you’re working to see your changes more clearly as well.
When I’m finished, I’ll click the OK button to exit the filter and to return to the regular workspace.
Working with the Liquify filter will take some practice to get the results you’re after, but it’s a relatively simply filter to get used to. I made the image changes for this post in about 20 seconds, so if I can do it, you can do it too.
——
I hope I clearly explained how to use the Forward Warp Tool inside the Liquify filter workspace in Adobe Photoshop. If you have any questions regarding this post, please leave them in the comment section below. Thanks for reading!
In today’s post, I’d like to talk about one specific area of the Liquify filter inside of Adobe Photoshop. While this tool is rather large and complex and while it can push, pull, rotate, reflect, pucker, and bloat, I’m going to focus today’s efforts on just one thing, the Forward Warp Tool that sits inside of the Liquify workspace. This is the tool I generally turn to when I need to reshape an edge. I also think it’s one of the most popular tools that’s used when anyone has to complete a task such as what I discussed above, so it’s a good place to start. Also, if you have been reading my posts for any amount of time, you also know that I’m bound to revisit the Liquify workspace again in the future to discuss other aspects of the filter. I just don’t want to overwhelm you in one sitting.
The Demo Photo
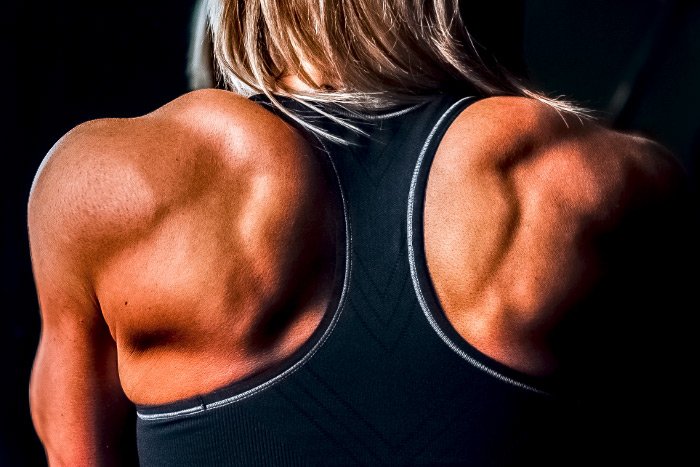
I have a photo of a woman working out in what looks like a gym of some sort. Now, I don’t see anything particularly wrong with the photo below, but I do see some shoulders and arms and even muscle tone in her back that would be perfect to practice this tool on. As an example below, I’ll push and pull some of her muscles in an effort to show you just what this thing can accomplish.
What is the Forward Warp Tool?
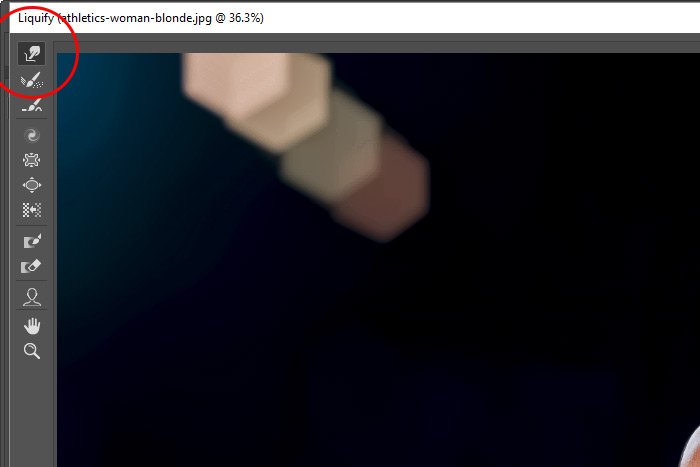
Basically, the Forward Warp Tool is an option inside of the Liquify filter workspace that looks like a brush. It pushes pixels of an image forward as you push the brush. There are a few options that one can set while working with this tool, such as Size, Density and Pressure and I’ll touch on some of them after I get going.Converting the Layer to a Smart Object
The image is already opened inside of Photoshop. Like usual, before I do anything, I’m going to convert the layer into a Smart Object. This Liquify filter can radically change a photo and the last thing I want to do is have those changes permanently alter the only copy of the image I have. Converting the layer to a Smart Object will protect me from that.To convert the layer, I’ll right-click on it somewhere in the gray part, inside of the Layers panel. When I see the menu pop up, I’ll click on Convert to Smart Object.
Entering the Liquify Workspace
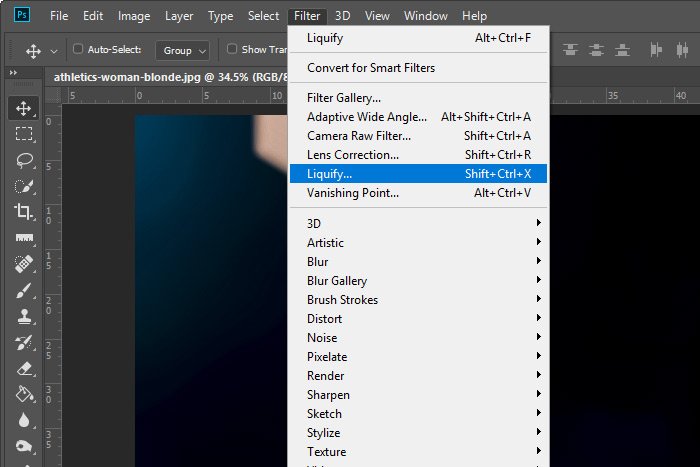
Now that I have the layer in question converted, I’ll head up to the top menu and visit the Filter > Liquify option. I’ll click that and then I’ll be presented with the Liquify workspace.
Moving Some Muscles
Since I’m now in the proper workspace, I’ll go ahead and click on the Forward Warp Tool to activate it.
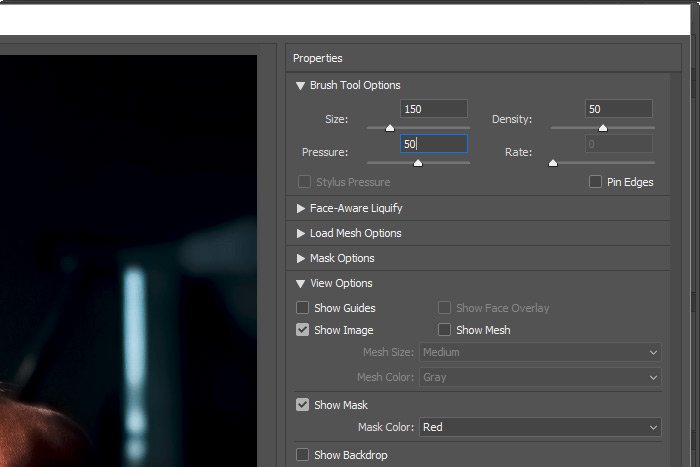
After that, I’ll move over to the right column, where I’ll push some of the sliders into appropriate positions. I’ll also explain what each slider does here.

Size: Simply put, this slider controls the size of the brush that you’ll be doing the warping with.
Density: This option controls how wide a brush stroke will affect whatever it is you’re attempting to move. A lower density will focus its strength towards the center of the brush while a higher density will fill most of the brush, all the way to the edges.
Pressure: This option has a huge effect on how severe any stoke you make with the brush will be. A higher pressure means that, as you’re brushing, the specified part of the image will warp very quickly. A lower pressure means that no matter how you move the mouse pointer, the image will warp very slowly. The slower method offers much more accuracy, while the faster one gets the job done at a quicker pace.
Okay, I set the sliders so they’re right in the middle, which will suit me just fine. Now, I’ll go ahead and make some wild changes, just so you can see what this tool is capable of. I’ll push some of the subject’s shoulder out, so the muscles look bigger.

To accomplish what I just did, I simply clicked and dragged the edge of the shoulder outward. I did this slowly and carefully as to avoid any distortion. Now, I’ll do the opposite. I’ll click and drag the shoulder muscles inward, so they appear smaller than they actually are.

Do you see the difference? Any time I click to move an edge, I only do so gently. I don’t click and drag with big, long strokes. I click and drag with short strokes, again, to avoid distorting the surrounding areas.
Showing a Before & After
The more you work with the Liquify filter, the better you’ll become at it. The issue with getting better is that your changes will ultimately look so seamless that you’ll likely forget what you actually changed. This is where the Show Backdrop option comes in handy. Show Backdrop is a check box that allows both views to appear on top of one another. It sort of overlays the original on the changed version. Take a look at the left shoulder below.
Do you see the overlay? It’s sometimes easier to work with this option activated because your changes can be viewed in a much more clear manner. By the way, the check box is in the right column, under the sliders I spoke of earlier.

At the bottom of the options panel on the right side is also a Preview check box. It’s a good idea to check and uncheck that box as you’re working to see your changes more clearly as well.
When I’m finished, I’ll click the OK button to exit the filter and to return to the regular workspace.
Working with the Liquify filter will take some practice to get the results you’re after, but it’s a relatively simply filter to get used to. I made the image changes for this post in about 20 seconds, so if I can do it, you can do it too.
——
I hope I clearly explained how to use the Forward Warp Tool inside the Liquify filter workspace in Adobe Photoshop. If you have any questions regarding this post, please leave them in the comment section below. Thanks for reading!
