KristinaW
Member
- Joined
- May 7, 2021
- Messages
- 127
- Reaction Score
- 0
- Points
- 18
- #1
Selecting objects and manipulating those objects is one of the most commons tasks you’ll encounter while working in Adobe Photoshop. Since this type of thing is so common, it’s important that you know the ins and outs of what you can do to speed this process up. Now, I know I’ve touched on this area in the past, but I wanted to take this opportunity to continue on to show you a few more neat little tricks that I maybe haven’t showed you yet.
In today’s post, I’m going to select an object in a photograph using Adobe Photoshop. I’ll then alter the object contained within the selection by taking advantage of an adjustment layer. After that, I’ll reselect the same area and invert it so I can apply a different adjustment to the newly selected area. What I’d like to focus on in this post is the method for reselecting an object and inverting that selection. There are a few ways to go about these things and one can be more helpful over the other, depending on where you are in Photoshop.

I’ll size the tool and adjust it so it fits my needs and then I’ll select what needs selecting.
Selecting Objects & Refining Edges in Adobe Photoshop

Okay, that looks pretty good.
Once I do that, my original selection will return. Since I don’t want to adjust the same thing again, but actually the opposite, I’ll go back up to the Select menu item, but this time, I’ll click on the Inverse menu item. This will alter the selection so everything but the house and dock are selected.
It’s at this point I can apply a new adjustment layer that will darken things down. I think I’ll click on the Exposure icon in the Adjustments panel and then I’ll push the resulting Exposure slider to the left a bit.
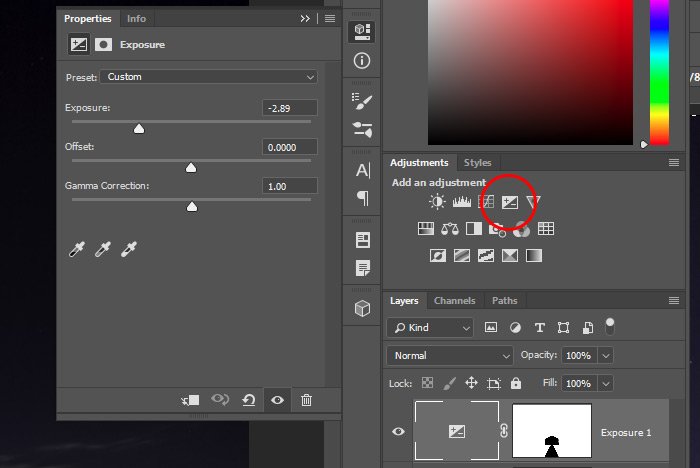
Here’s the resulting image.

I like the look of the photo, but that’s not the point of this post. The point I wanted to share was how someone can quickly reselect something and then invert that selection.
Earlier in this post, I mentioned that there are different methods for doing some of these things, depending on where you are in Photoshop. If I was in the Select & Mask workspace, I could easily invert a selection there as well. I’ll enter that workspace now to show you what I’m referring to.
I have an active selection. To enter the referenced workspace, I’ll click the Select and Mask button up in the options bar (this option is only available when a selection tool is active).
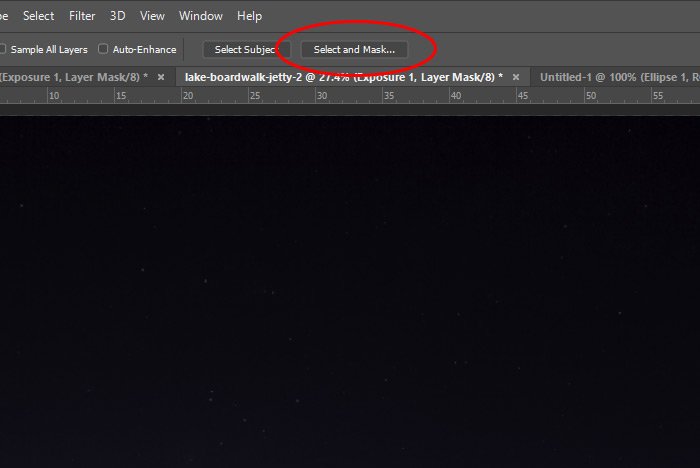
Once the workspace opens up, I’ll see the active selection in white.

If I went over to the right column, I would see an Invert button. I could click that to invert the selection, making the opposite area now selected.
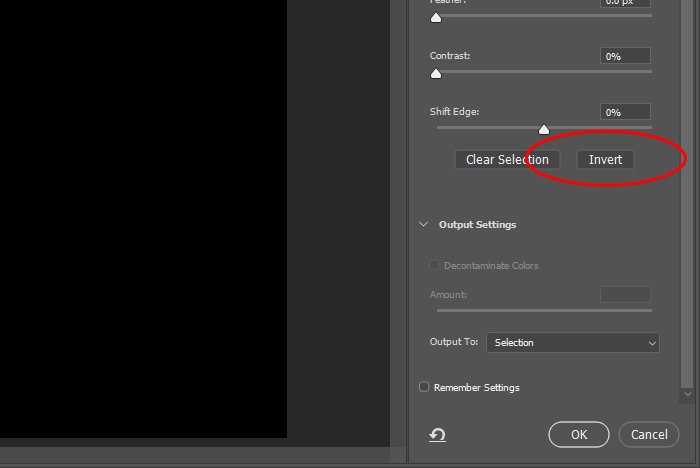
My view would change to this:
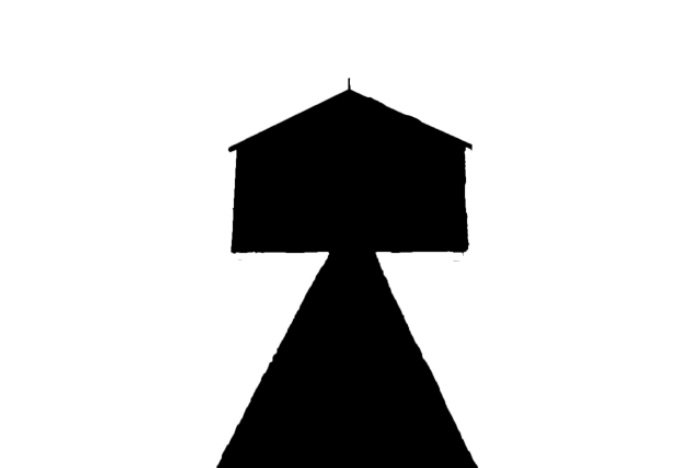
If I clicked on the OK button located at the bottom right of the workspace, I would return to the regular workspace, where I’d see the marching ants traveling around the larger area of the image. It’s that easy. And that, my friends, is how you can invert a selection quickly and easily.
I hope I clearly explained the multiple methods for selecting, reselecting and choosing the inverse of a selection in Adobe Photoshop. If you have any questions regarding this post, please leave them in the comment section below. Thanks for reading!
In today’s post, I’m going to select an object in a photograph using Adobe Photoshop. I’ll then alter the object contained within the selection by taking advantage of an adjustment layer. After that, I’ll reselect the same area and invert it so I can apply a different adjustment to the newly selected area. What I’d like to focus on in this post is the method for reselecting an object and inverting that selection. There are a few ways to go about these things and one can be more helpful over the other, depending on where you are in Photoshop.
Today’s Demo Photo
I chose this photo to use because it’s got an object in it that’s going to be really easy to select. There are clear edges and by using the Quick Selection Tool, I think capturing the house and the dock will take all of five seconds. Take a look.
Selecting the House & Dock
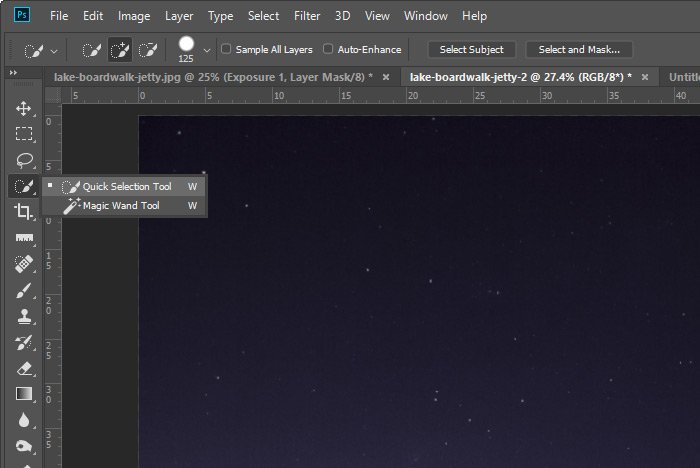
As I said, I’ll use the Quick Selection Tool to select the house and dock, so I’ll head over to the left toolbar to activate this tool right now.
I’ll size the tool and adjust it so it fits my needs and then I’ll select what needs selecting.
Selecting Objects & Refining Edges in Adobe Photoshop

Okay, that looks pretty good.
Making an Adjustment
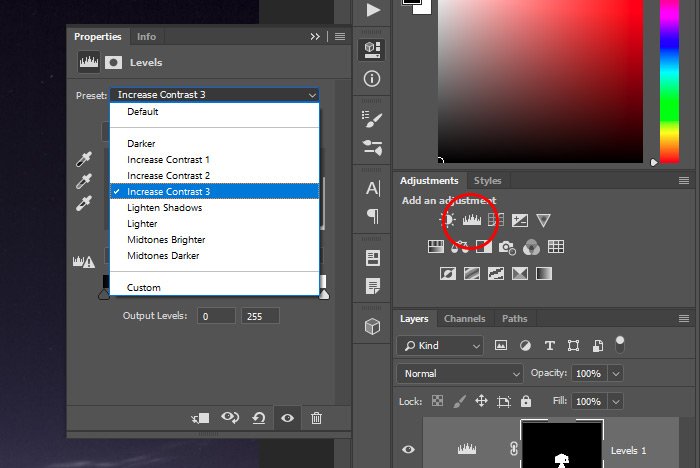
What I’d like to do now is make an adjustment to the house and the dock to, let’s say, brighten them up somewhat or maybe add some contrast. To accomplish this, I’ll head towards the Adjustments panel and click on the Levels icon. Once I do that, the adjustment layer will be created and the Properties panel for that adjustment will open up. Inside that panel, I’ll click the Presets drop-down and then the Increase Contrast 3 option.
Adjusting the Background – Reselecting & Inverting
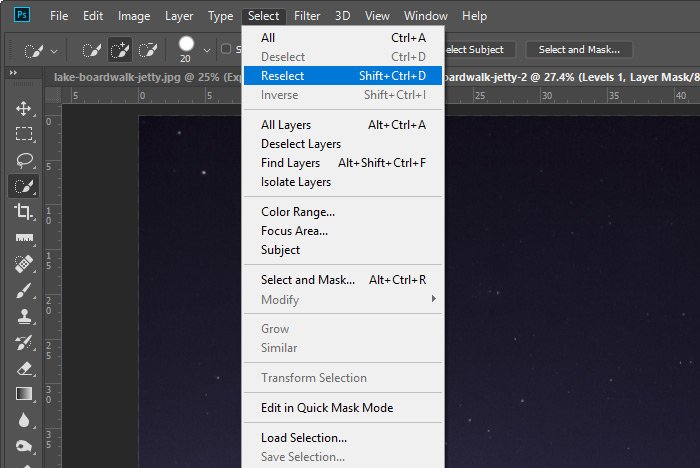
At this point, I’d like to darken the background so the house and dock really stand out. The thing is, by applying the adjustment layer I just applied, I also deselected my selection. To quickly get that selection back without doing any of the work involved, I’ll go up to the Select > Reselect menu item and click.
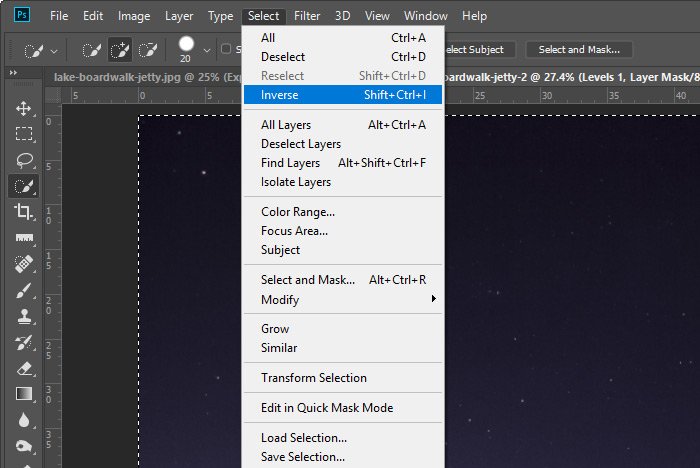
Once I do that, my original selection will return. Since I don’t want to adjust the same thing again, but actually the opposite, I’ll go back up to the Select menu item, but this time, I’ll click on the Inverse menu item. This will alter the selection so everything but the house and dock are selected.

It’s at this point I can apply a new adjustment layer that will darken things down. I think I’ll click on the Exposure icon in the Adjustments panel and then I’ll push the resulting Exposure slider to the left a bit.

Here’s the resulting image.

I like the look of the photo, but that’s not the point of this post. The point I wanted to share was how someone can quickly reselect something and then invert that selection.
Fast Tips
You’ll always need to physically make your first selection, so use the proper tool and do it carefully. Once it’s made though, you can use it for a long time. Oftentimes, for the remainder of the project. The keyboard shortcut for reselecting something is Shift+Ctrl+D. If you’d like to invert a selection, you can use a keyboard shortcut for that as well. It’s Shift+Ctrl+I.Earlier in this post, I mentioned that there are different methods for doing some of these things, depending on where you are in Photoshop. If I was in the Select & Mask workspace, I could easily invert a selection there as well. I’ll enter that workspace now to show you what I’m referring to.
I have an active selection. To enter the referenced workspace, I’ll click the Select and Mask button up in the options bar (this option is only available when a selection tool is active).

Once the workspace opens up, I’ll see the active selection in white.

If I went over to the right column, I would see an Invert button. I could click that to invert the selection, making the opposite area now selected.

My view would change to this:

If I clicked on the OK button located at the bottom right of the workspace, I would return to the regular workspace, where I’d see the marching ants traveling around the larger area of the image. It’s that easy. And that, my friends, is how you can invert a selection quickly and easily.
I hope I clearly explained the multiple methods for selecting, reselecting and choosing the inverse of a selection in Adobe Photoshop. If you have any questions regarding this post, please leave them in the comment section below. Thanks for reading!
