Phoenix1
Member
- Joined
- May 7, 2021
- Messages
- 135
- Reaction Score
- 0
- Points
- 23
- #1
Did you know that you can make really good looking trees right inside of Adobe Photoshop? I’m not talking about lousy one dimensional trees either. I’m talking about trees that actually look real; ones that you can change and customize in about a million different ways. That’s right, this is one of those virtually unknown features of an application many of us use almost every day of our lives. It’s a good feature too, so read on below.
In today’s post, I’d like to introduce you to the Tree filter in Adobe Photoshop. I’ll create a blank document and then enter the filter area where I’ll explore many of the customization options available to us. I’ll also walk through the process of creating a custom tree and then applying it to the document at hand. It’s such an easy process and I’m sure you’ll love it.
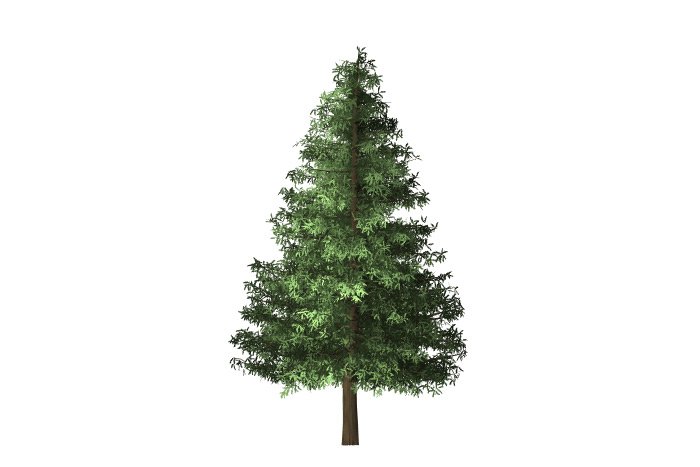
I also created a new, transparent, layer that sits directly on top of the white background layer. The reason I did this is because I’d like to have control over any tree or trees I create. I’ll make a new layer for each tree. That way, I’ll be able to move all the trees around independently of one another. If I were to simply place them on the background layer, they’d all be stuck together and I’d ultimately have very little flexibility.
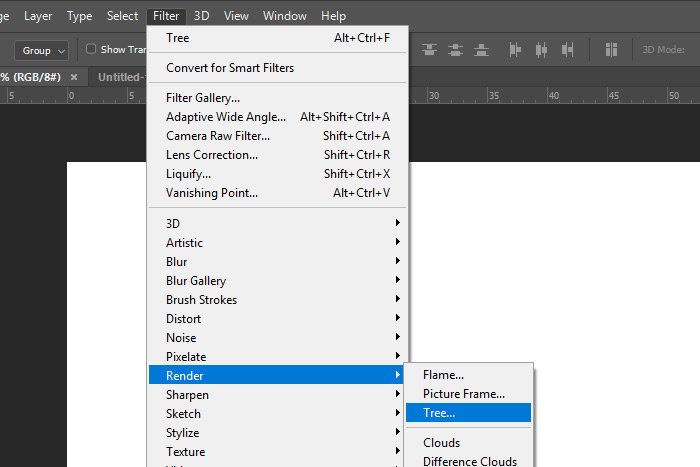
To get to the Tree palette, I’ll head up to the top of the application and select the Filter > Render > Tree menu item.
Once the Tree palette opens, I’ll see something that looks like this:
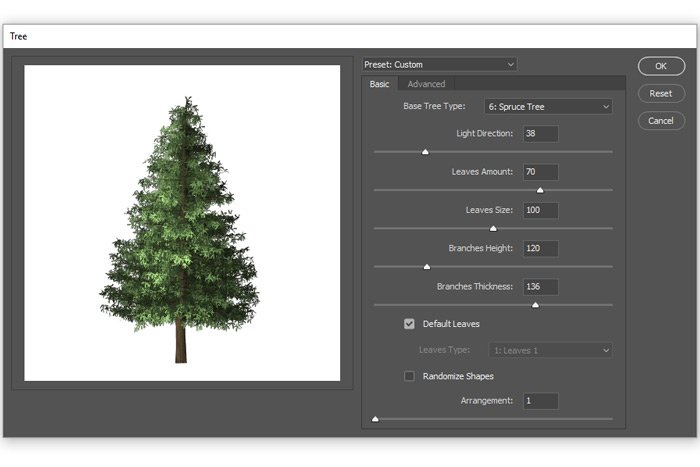
Now, just to let you know, there’s already a tree created inside of this palette. You can see it in the previous screenshot. If I wanted to keep that tree and use it, all I’d need to do is to click on the OK button inside this palette and that tree would end up in my workspace. Since most people have a certain tree in mind before entering this palette, I’ll discuss some of the options available to us next.
The palette currently has two tabs; one is called the Basic tab and the other is the Advanced tab. In previous versions of Photoshop, the options contained in these tabs were merged into just one. Adobe has since split some things apart though.
The most important option in the entire palette has to do with what type of tree you’d like to end up with. If I were to click on the Base Tree Type drop-down, I’d have a fair number of types of trees to choose from.
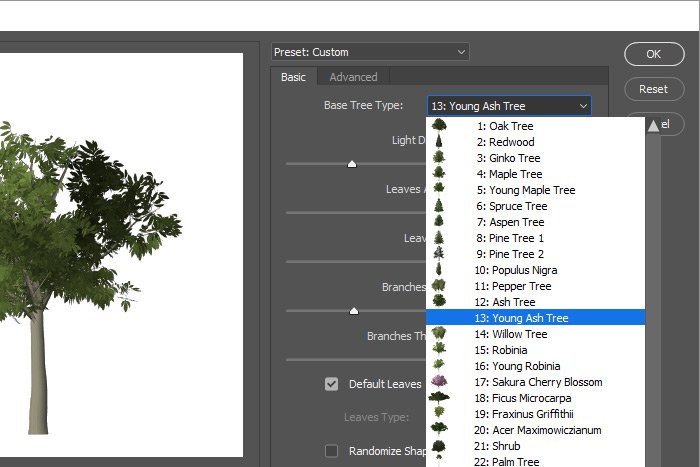
Once I click on one of the tree varieties, that type of tree will appear in the preview area to the left. Currently, there are 34 varieties of trees available to choose from.
As you may have noticed there are quite a few different adjustments someone could make to any tree they’re working on. I’ll list those adjustments and offer some words of explanation below.
Light Direction: Picture having a large light in your hands and shining that light at the tree you’re creating. You can walk from the left side of the tree all the way to the right side. That’s pretty much what this option controls; the lighting that’s illuminating the tree. This option offers 180 degrees to choose from, therefore, the available slider values are anything between 0 and 180. The lower values shine the light on the left side of the tree and the higher values move around to the right.
Leaves Amount: Do you want a sparse looking tree or a very bushy one? You can control the amount of foliage your tree contains by moving this slider to the left or to the right. The available values range from 0 to 100, with 0 being completely bald and 100 being completely full.
Leaves Size: This option goes hand-in-hand with the previous one. Not only do we have control over how many leaves are on a tree, but we can also control how large those leaves are. The available values for this slider range between 0 and 200, with 0 being the smallest leaves available and 200 being the largest.
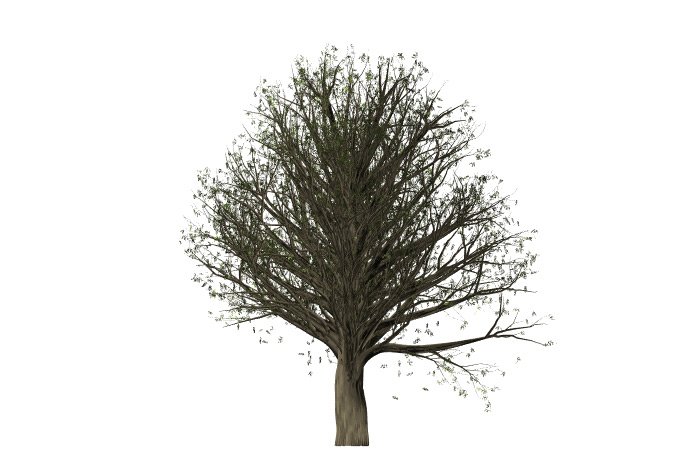
Branches Height: At what distance from the ground would you like the branches on your tree to begin stemming from the trunk? You can select from rather low branches to ones that begin almost all the way at the top of the tree. This slider offers values that range from 70 to 300. Here are some examples for you. This is a Zelkova Serrata tree. The first image has the Branches Height value set to 70 (lowest) and the second image has it set to 300 (highest).
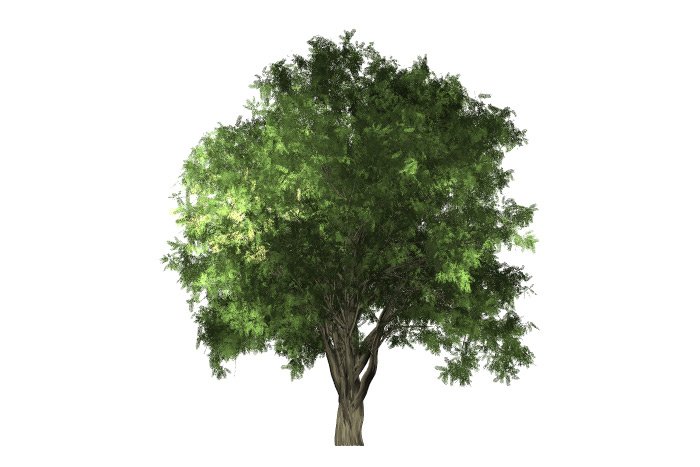
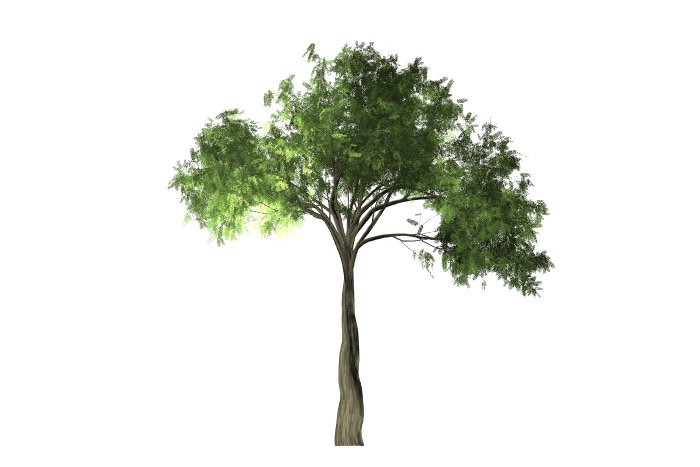
Branches Thickness: This option controls how thick the wood is on your tree. It controls the thickness of not only the branches, but of the trunk as well. The range of values for this slider span from 0 to 200. Here’s an Ash Tree with a Branch Thickness of 20. The lower numbers show less wood.
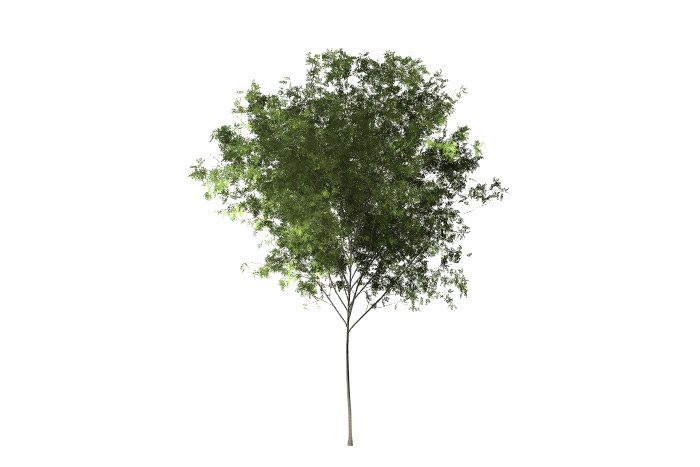
And here’s the same Ash Tree with a Branch Thickness of 200. The higher numbers show more wood.
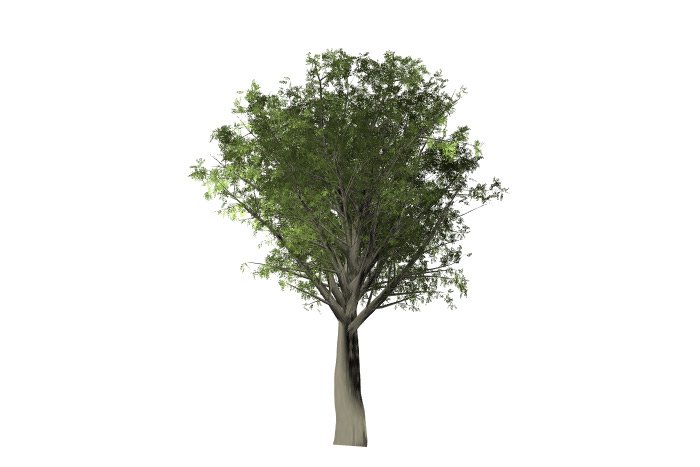
Default Leaves: If I’d like Photoshop to keep the default style leaf for the selected tree, I’d check this box.
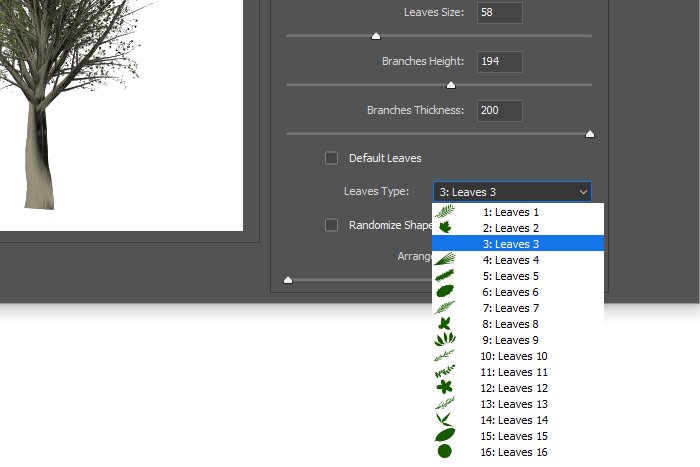
Leaves Type: If I uncheck the above box, I can choose my own style of leaf, no matter what type of tree I’d like. Currently, there are 16 available different leaf types to choose from.
Randomize Shapes: If I’d like Photoshop to choose the shapes and positions of the branches on the tree for me, I can check this box.
Arrangement: If I’d like to choose my own branch arrangement, I can move this slider. The values fall from 1 to 100 and appear to make no sense at all. Continue to move the slider until you find a look that appeals to you.
Camera Tilt: Let’s say you wanted to view your tree from a different angle. You can do that with this setting. The values of this option span the range of 0 through 24, with 0 being as if you were standing on the ground in front of the tree. As you increase this value, it would be as if you were levitating up, off the ground and hovering over the tree.
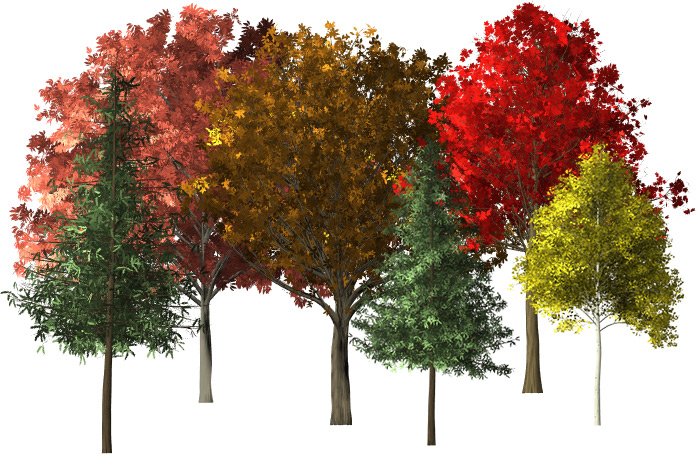
Use Custom Color For Leaves: We’re also able to change the color of the leaves on all of the available trees. If you were going for an early spring look, you could change the color to a lighter green and if you were going for a late fall look, you could change the leaves to either orange, yellow, red or brown.
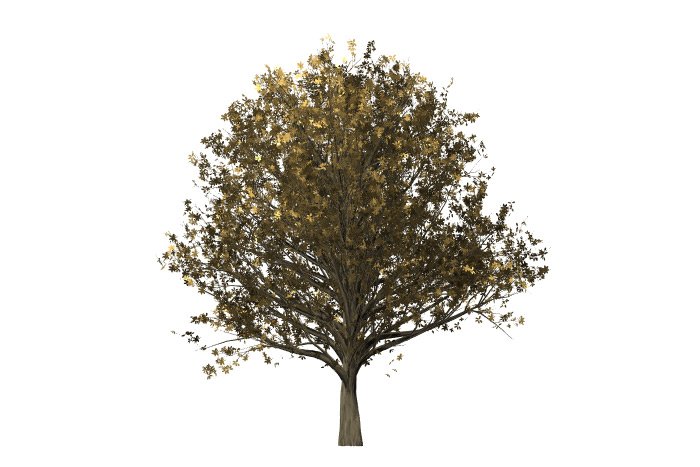
Use Custom Color For Branches: Along the same lines as the option above, we can also change the color of the branches. So, if you wanted a lighter wood, you could change the default color to a light brown. The same is true with a darker wood, but you’d go with a darker brown.
Flat Shading – Leaves: The default leaves include a lot of gradient for the sake of interest. To remove this interest, you could give the leaves a flat color.
Enhance Contrast – Leaves: In contrast to the option just above, you can also add even more contrast than the default offers. To increase the contrast in the leaves, simply check this box.
Flat Shading – Branches: To remove any gradient from the wood and to make the color flat in the trunk and the branches of any tree you create, check this box.
Leaves Rotation Lock: If you check this box, you can stop the leaves from rotating three dimensionally. Doing this will create a result that’s much more like an illustration.
I hope I clearly explained how to create a tree in Adobe Photoshop by using the Tree filter. If you have any questions regarding this post, please let me know in the comment section below. Thanks for reading!
COMMENT: Very useful…but cannot figure out how to re-size the tree. Help.
COMMENT: Is the tree on its own layer? If so, can you press Ctrl+T to free transform it? To accomplish the same thing, try going to Edit > Free Transform up in the menu at the top of Photoshop. Let me know if this works.
COMMENT: Nevermind….figured out how to use free transform to decrease the size (which I should have known!).
COMMENT: Can the tree options be used to colourise a black & white tree selection? Thanks.
COMMENT: I have been using this feature for a while now and all of a sudden something changed and when I go to render a tree it is in a square shape. What I mean by this is like instead of trees, it is creating a vine in a square shape and I have no clue how to go back to an actual tree. Please help!
In today’s post, I’d like to introduce you to the Tree filter in Adobe Photoshop. I’ll create a blank document and then enter the filter area where I’ll explore many of the customization options available to us. I’ll also walk through the process of creating a custom tree and then applying it to the document at hand. It’s such an easy process and I’m sure you’ll love it.

The Tree Palette
Okay, let’s get right into it. I’ve gone ahead and created a new document inside of Photoshop. The document is 700 pixels wide, but that doesn’t matter. The only reason I used that dimension is because it fits well on the pages of this blog. I also made the background white, so each tree I create is clearly visible. If you’re following along, feel free to use any dimensions you wish and any color you wish.I also created a new, transparent, layer that sits directly on top of the white background layer. The reason I did this is because I’d like to have control over any tree or trees I create. I’ll make a new layer for each tree. That way, I’ll be able to move all the trees around independently of one another. If I were to simply place them on the background layer, they’d all be stuck together and I’d ultimately have very little flexibility.
To get to the Tree palette, I’ll head up to the top of the application and select the Filter > Render > Tree menu item.

Once the Tree palette opens, I’ll see something that looks like this:

Now, just to let you know, there’s already a tree created inside of this palette. You can see it in the previous screenshot. If I wanted to keep that tree and use it, all I’d need to do is to click on the OK button inside this palette and that tree would end up in my workspace. Since most people have a certain tree in mind before entering this palette, I’ll discuss some of the options available to us next.
The palette currently has two tabs; one is called the Basic tab and the other is the Advanced tab. In previous versions of Photoshop, the options contained in these tabs were merged into just one. Adobe has since split some things apart though.
The most important option in the entire palette has to do with what type of tree you’d like to end up with. If I were to click on the Base Tree Type drop-down, I’d have a fair number of types of trees to choose from.

Once I click on one of the tree varieties, that type of tree will appear in the preview area to the left. Currently, there are 34 varieties of trees available to choose from.
As you may have noticed there are quite a few different adjustments someone could make to any tree they’re working on. I’ll list those adjustments and offer some words of explanation below.
Basic Panel
The most widely used options are contained in this panel.Light Direction: Picture having a large light in your hands and shining that light at the tree you’re creating. You can walk from the left side of the tree all the way to the right side. That’s pretty much what this option controls; the lighting that’s illuminating the tree. This option offers 180 degrees to choose from, therefore, the available slider values are anything between 0 and 180. The lower values shine the light on the left side of the tree and the higher values move around to the right.
Leaves Amount: Do you want a sparse looking tree or a very bushy one? You can control the amount of foliage your tree contains by moving this slider to the left or to the right. The available values range from 0 to 100, with 0 being completely bald and 100 being completely full.
Leaves Size: This option goes hand-in-hand with the previous one. Not only do we have control over how many leaves are on a tree, but we can also control how large those leaves are. The available values for this slider range between 0 and 200, with 0 being the smallest leaves available and 200 being the largest.

Branches Height: At what distance from the ground would you like the branches on your tree to begin stemming from the trunk? You can select from rather low branches to ones that begin almost all the way at the top of the tree. This slider offers values that range from 70 to 300. Here are some examples for you. This is a Zelkova Serrata tree. The first image has the Branches Height value set to 70 (lowest) and the second image has it set to 300 (highest).


Branches Thickness: This option controls how thick the wood is on your tree. It controls the thickness of not only the branches, but of the trunk as well. The range of values for this slider span from 0 to 200. Here’s an Ash Tree with a Branch Thickness of 20. The lower numbers show less wood.

And here’s the same Ash Tree with a Branch Thickness of 200. The higher numbers show more wood.

Default Leaves: If I’d like Photoshop to keep the default style leaf for the selected tree, I’d check this box.
Leaves Type: If I uncheck the above box, I can choose my own style of leaf, no matter what type of tree I’d like. Currently, there are 16 available different leaf types to choose from.

Randomize Shapes: If I’d like Photoshop to choose the shapes and positions of the branches on the tree for me, I can check this box.
Arrangement: If I’d like to choose my own branch arrangement, I can move this slider. The values fall from 1 to 100 and appear to make no sense at all. Continue to move the slider until you find a look that appeals to you.
Advanced Panel
For more advanced, but less used, options, click into this panel.Camera Tilt: Let’s say you wanted to view your tree from a different angle. You can do that with this setting. The values of this option span the range of 0 through 24, with 0 being as if you were standing on the ground in front of the tree. As you increase this value, it would be as if you were levitating up, off the ground and hovering over the tree.
Use Custom Color For Leaves: We’re also able to change the color of the leaves on all of the available trees. If you were going for an early spring look, you could change the color to a lighter green and if you were going for a late fall look, you could change the leaves to either orange, yellow, red or brown.

Use Custom Color For Branches: Along the same lines as the option above, we can also change the color of the branches. So, if you wanted a lighter wood, you could change the default color to a light brown. The same is true with a darker wood, but you’d go with a darker brown.
Flat Shading – Leaves: The default leaves include a lot of gradient for the sake of interest. To remove this interest, you could give the leaves a flat color.
Enhance Contrast – Leaves: In contrast to the option just above, you can also add even more contrast than the default offers. To increase the contrast in the leaves, simply check this box.
Flat Shading – Branches: To remove any gradient from the wood and to make the color flat in the trunk and the branches of any tree you create, check this box.
Leaves Rotation Lock: If you check this box, you can stop the leaves from rotating three dimensionally. Doing this will create a result that’s much more like an illustration.
Converting to Smart Objects
Remember, after creating your trees, you’ll likely resize them quite a bit in an effort to get the look you’re going for just right. If you convert each individual tree layer to a Smart Object, you’ll save yourself a lot of time by not having to create new trees when you lose resolution from scaling down and then scaling back up again. Smart Objects are key when it comes to this sort of thing.
I hope I clearly explained how to create a tree in Adobe Photoshop by using the Tree filter. If you have any questions regarding this post, please let me know in the comment section below. Thanks for reading!
COMMENT: Very useful…but cannot figure out how to re-size the tree. Help.
COMMENT: Is the tree on its own layer? If so, can you press Ctrl+T to free transform it? To accomplish the same thing, try going to Edit > Free Transform up in the menu at the top of Photoshop. Let me know if this works.
COMMENT: Nevermind….figured out how to use free transform to decrease the size (which I should have known!).
COMMENT: Can the tree options be used to colourise a black & white tree selection? Thanks.
COMMENT: I have been using this feature for a while now and all of a sudden something changed and when I go to render a tree it is in a square shape. What I mean by this is like instead of trees, it is creating a vine in a square shape and I have no clue how to go back to an actual tree. Please help!
