JodyBuchanan
Member
- Joined
- May 10, 2021
- Messages
- 138
- Reaction Score
- 0
- Points
- 21
- #1
When I work on files in Adobe Photoshop that have multiple images contained in them, I usually combine those images in the same file by clicking on the appropriate layers in the individual tabs and then by dragging those layers over to the working file. I’ve discussed this process quite a bit on this website. I can’t tell you why I work this way. It’s probably habit. I generally open all the images I’ll need at the same time and then do a lot of dragging around. Ultimately, I end up with my working file that contains all the images as layers.
Another method for doing the same thing is called Placing files. Let’s say I am already working on a file and that I would like to include any number of supported files into the working one. And by supported, I mean JPEG, Illustrator (AI), PDF and a whole bunch of others. Instead of opening those files into Photoshop the regular way via the File > Open menu item, I could avoid “opening” them altogether. I could simple “place” them into the working file with one command. And when those files are placed as their own individual layers, they’ll be set as Smart Objects by default, which is good because those layers are typically worked with and transformed quite a bit.
Placing, Replacing & Modifying Smart Object Files in Adobe Photoshop
As you may know, Smart Objects create larger file sizes. That’s the only negative aspect of them that I can think of off the top of my head. If you have a lot of storage room on your computer, then you should probably create Smart Objects all over the place. If you have extremely limited space though, Smart Objects might not be in your best interest. I know of folks who would encourage you to make it work though because Smart Objects are really that valuable.
In today’s post, I’d like to show you something inside of Adobe Photoshop. As I mentioned above, when you place a file into another file, that new layer will automatically be converted into a Smart Object. Well, what if you’re one of those people who don’t want to place a Smart Object? What if you have limited storage space or have some other type of limitation? Can you turn off that “automated” conversion? The answer is yes, you can.
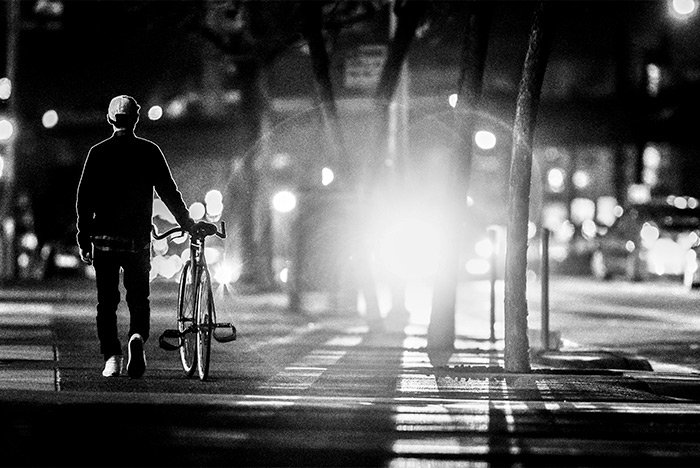
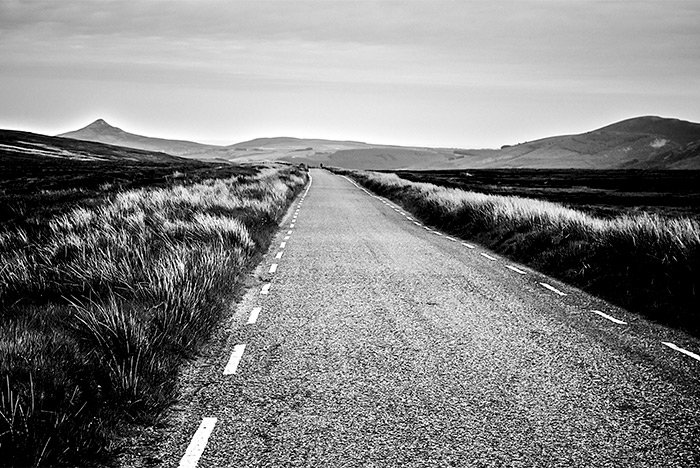
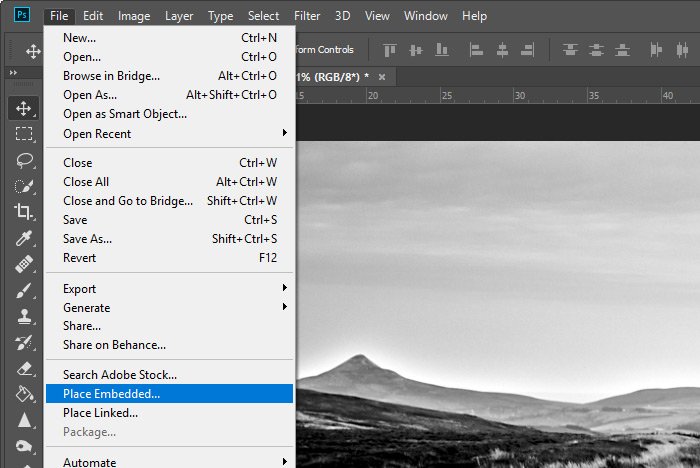
I’ll start off by placing the bicycle image into the road image’s file as a Smart Object. To do this, I’ll head up to the File > Place Embedded menu item and click.
When I do that, a dialog will open where I’m able to search my computer for the bicycle image. When I find it, I’ll double-click it to place the image into Photoshop. When it’s placed, it’ll look something like this.
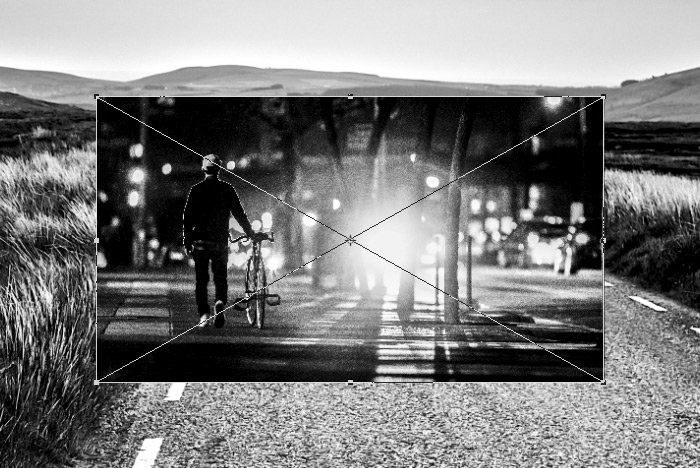
The bounding box you see can vary in size. If I press the Enter key on my keyboard, the bounding box will disappear and the image will appear as a layer in the Layers panel.
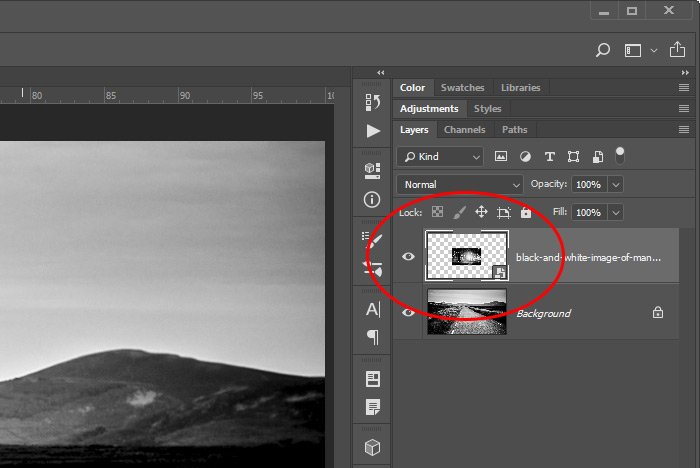
If you look closely at the above screenshot, you can see that the layer is a Smart Object by the small icon in the lower right corner of the layer thumbnail.
Here’s the neat thing about this layer. I can shrink it all the way down to just a mere few pixels by a mere few pixels with the Free Transform tool and then apply that transformation. Here’s an enlarged view of that.
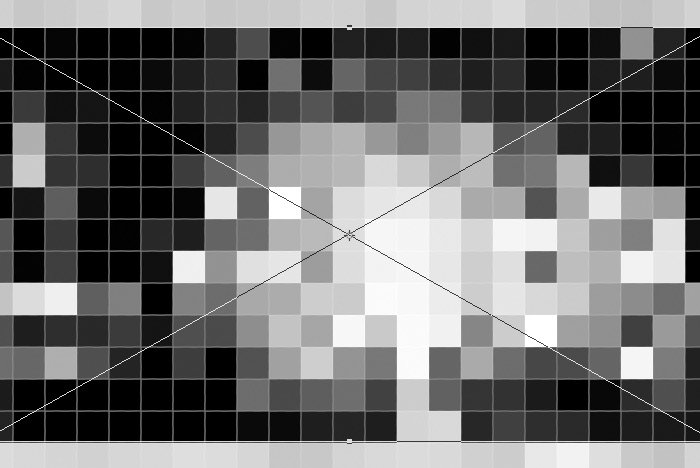
Again, when I press Enter, the bounding box will disappear and the transformation will be applied. Since this is a Smart Object though, Photoshop remembers what the original layer looked like, so if I transform this layer again, but make it larger this time, I’ll get exactly the same quality as I had when I first placed the layer into this file.
Take a look at this next screenshot. I just enlarged the layer from that tiny transformation. See how it’s gaining its quality back?
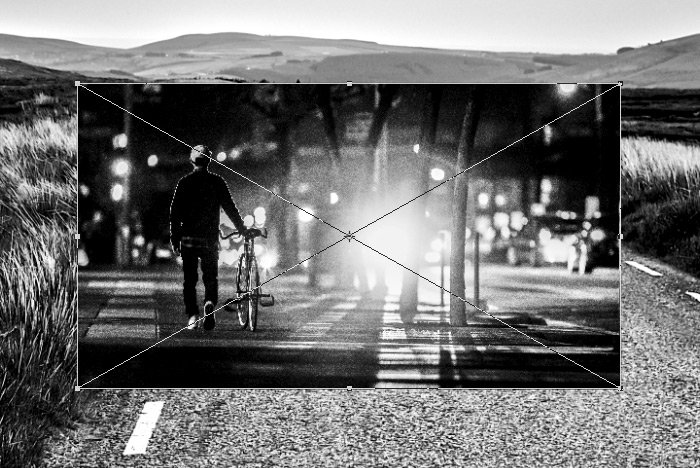
I could continue enlarging until the size meets its original file size. The quality would be just fine.
The very first thing I’ll need to do is to tell Photoshop that I don’t want it to convert the placed layer to a Smart Object anymore. To do this, I’ll head up to the Edit > Preferences > General menu item and click (keyboard shortcut Ctrl+K).
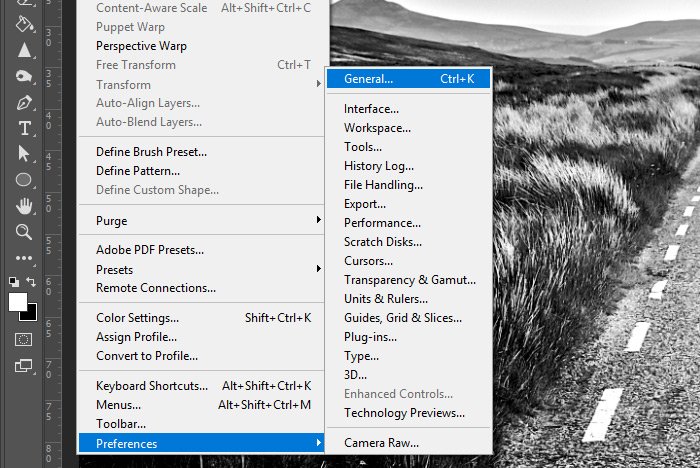
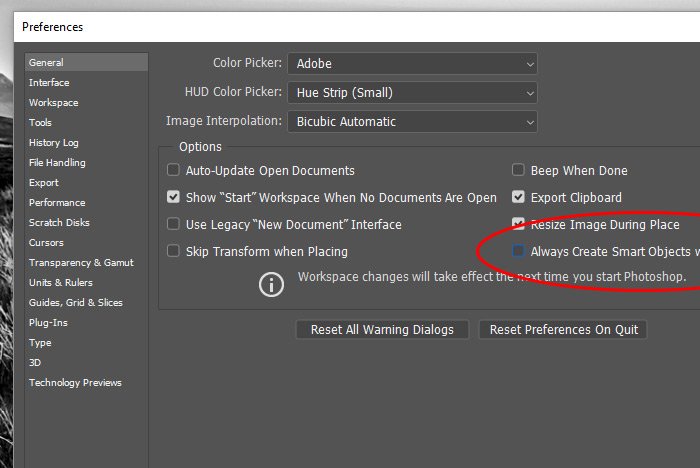
When I do this, the General section of the Preferences dialog box will appear. Inside of this dialog, there’s a check box that says, Always Create Smart Objects when Placing. By default, that box is checked. I’ll need to uncheck it.
When I’m finished with that, I’ll click on the OK button to exit the dialog.
At this point, I’ll follow the exact same instructions for placing a new layer as I gave above. I’ll also free transform this placed layer all the way down until it’s tiny, as I did above as well. And then, I’ll apply that transformation and then enlarge it. I’ll apply the enlarged transformation exactly as I did above. This time though, the quality should be much lower because this placed layer isn’t a Smart Object. Let’s take a look.
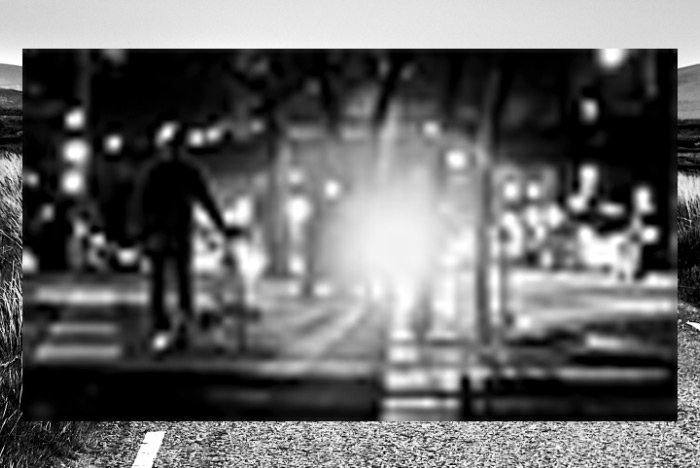
See how lousy that looks? That’s because when a layer isn’t a Smart Object, Photoshop discards any information it has on a layer after it’s been transformed. Any subsequent transformations are built off of what just preceded it. This storage of information is what adds file size those those that contain Smart Objects. As you can see though, that additional file size is sometimes worth it.
——
I hope I clearly explained how to turn off the “create Smart Object by default” feature in Adobe Photoshop, as well as the benefits of placing Smart Objects in general. If you have any questions regarding this post, please let me know in the comment section down below. Thanks for reading!
Another method for doing the same thing is called Placing files. Let’s say I am already working on a file and that I would like to include any number of supported files into the working one. And by supported, I mean JPEG, Illustrator (AI), PDF and a whole bunch of others. Instead of opening those files into Photoshop the regular way via the File > Open menu item, I could avoid “opening” them altogether. I could simple “place” them into the working file with one command. And when those files are placed as their own individual layers, they’ll be set as Smart Objects by default, which is good because those layers are typically worked with and transformed quite a bit.
Placing, Replacing & Modifying Smart Object Files in Adobe Photoshop
As you may know, Smart Objects create larger file sizes. That’s the only negative aspect of them that I can think of off the top of my head. If you have a lot of storage room on your computer, then you should probably create Smart Objects all over the place. If you have extremely limited space though, Smart Objects might not be in your best interest. I know of folks who would encourage you to make it work though because Smart Objects are really that valuable.
In today’s post, I’d like to show you something inside of Adobe Photoshop. As I mentioned above, when you place a file into another file, that new layer will automatically be converted into a Smart Object. Well, what if you’re one of those people who don’t want to place a Smart Object? What if you have limited storage space or have some other type of limitation? Can you turn off that “automated” conversion? The answer is yes, you can.
Today’s Working Photos
As in many other posts, I could have used any images. I chose these two because they’re black and white and very cool looking. I’ll be opening one of them in Photoshop and then placing the other in the first’s file.

Placing an Embedded Smart Object
There are two different Place commands. One deals with placing as an embedded layer and the other deals with placing as a layer that’s linked to a file that’s stored outside of Photoshop. Today, I’ll use the embedded command for this demonstration.I’ll start off by placing the bicycle image into the road image’s file as a Smart Object. To do this, I’ll head up to the File > Place Embedded menu item and click.

When I do that, a dialog will open where I’m able to search my computer for the bicycle image. When I find it, I’ll double-click it to place the image into Photoshop. When it’s placed, it’ll look something like this.

The bounding box you see can vary in size. If I press the Enter key on my keyboard, the bounding box will disappear and the image will appear as a layer in the Layers panel.

If you look closely at the above screenshot, you can see that the layer is a Smart Object by the small icon in the lower right corner of the layer thumbnail.
Here’s the neat thing about this layer. I can shrink it all the way down to just a mere few pixels by a mere few pixels with the Free Transform tool and then apply that transformation. Here’s an enlarged view of that.

Again, when I press Enter, the bounding box will disappear and the transformation will be applied. Since this is a Smart Object though, Photoshop remembers what the original layer looked like, so if I transform this layer again, but make it larger this time, I’ll get exactly the same quality as I had when I first placed the layer into this file.
Take a look at this next screenshot. I just enlarged the layer from that tiny transformation. See how it’s gaining its quality back?

I could continue enlarging until the size meets its original file size. The quality would be just fine.
Placing a Regular Layer (Non-Smart Object)
What I just wrote above is the process most of us should be using. If we do this, we’ll have tons of flexibility when it comes to sizing and resizing layers. Now, I know there are some of us out there who don’t want to place Smart Objects. They want to place regular ol’ layers. I’ll show you how to do that now.The very first thing I’ll need to do is to tell Photoshop that I don’t want it to convert the placed layer to a Smart Object anymore. To do this, I’ll head up to the Edit > Preferences > General menu item and click (keyboard shortcut Ctrl+K).

When I do this, the General section of the Preferences dialog box will appear. Inside of this dialog, there’s a check box that says, Always Create Smart Objects when Placing. By default, that box is checked. I’ll need to uncheck it.

When I’m finished with that, I’ll click on the OK button to exit the dialog.
At this point, I’ll follow the exact same instructions for placing a new layer as I gave above. I’ll also free transform this placed layer all the way down until it’s tiny, as I did above as well. And then, I’ll apply that transformation and then enlarge it. I’ll apply the enlarged transformation exactly as I did above. This time though, the quality should be much lower because this placed layer isn’t a Smart Object. Let’s take a look.

See how lousy that looks? That’s because when a layer isn’t a Smart Object, Photoshop discards any information it has on a layer after it’s been transformed. Any subsequent transformations are built off of what just preceded it. This storage of information is what adds file size those those that contain Smart Objects. As you can see though, that additional file size is sometimes worth it.
——
I hope I clearly explained how to turn off the “create Smart Object by default” feature in Adobe Photoshop, as well as the benefits of placing Smart Objects in general. If you have any questions regarding this post, please let me know in the comment section down below. Thanks for reading!
