CampFireJack
Member
- Joined
- May 9, 2021
- Messages
- 118
- Reaction Score
- 1
- Points
- 16
- #1
When I work in Adobe Photoshop, I use the various shape tools quite a bit. Even when I write these posts and create the screenshots for them, I use the shape tools. In these cases, I primarily draw with the Rectangle Tool and the Ellipse Tool to outline points of interest in those screenshots, but I could just as easily choose from one of the others. As it stands right now, there are six different shape tools available to us. I’ll talk about all of them below.
While there are currently six tools to choose from, there’s an infinite number of ways we can make shapes look with these tools. Many of them are customizable. They weren’t always capable of being customized, but with the more recent versions of Photoshop, we’ve been granted the ability to, say, make a octagon look like a star or make a sharp edged rectangle look like a rounded rectangle. There’s a lot we can do with these things and I’ll be discussing all of it in this post and those that follow.
In today’s post, I’d like to merely take an introductory look at how to use the various shape tools, what they can accomplish and how we can customize them for different purposes. I’ll even tell you the difference between the vector based shapes and the pixel based shapes. And how you can cheat and have the pixel based shapes act like vector ones, sort of. More on all this below.
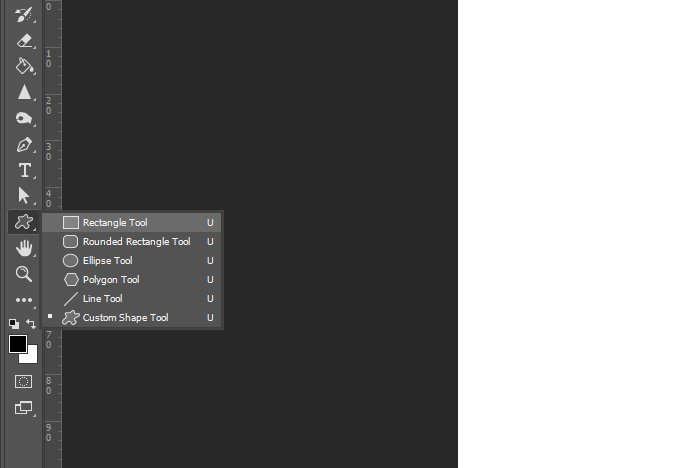
As you can see, we have the Rectangle Tool, Rounded Rectangle Tool, Ellipse Tool, Polygon Tool, Line Tool and Custom Shape Tool. To select one of these tool, simply roll over it with your mouse and click.
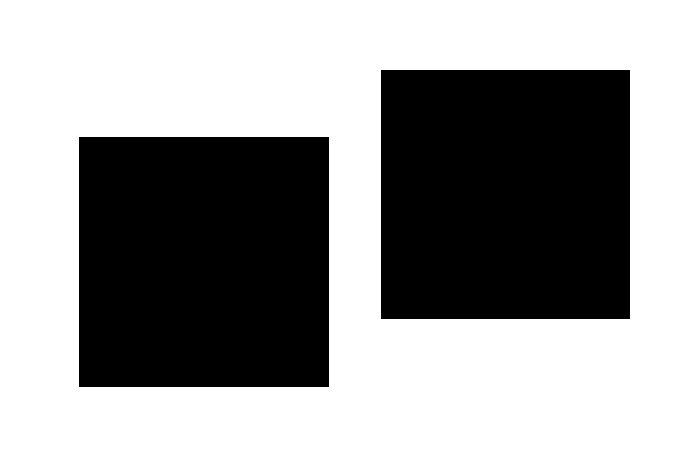
Conversely, pixel based shapes are those that rely on the original shape’s pixel count. So, if you have a square that’s 100 pixels by 100 pixels when first drawn, the edges will look sharp. As you transform that square though, the edges will become more and more blurry as the transformations and applying the transformations continue. In the image below, I’ve drawn a vector based square on the left and a pixel based square on the right. Take a look. They appear to be duplicates of one another.
If I use the keyboard shortcut of Ctrl+T to free transform both of these shapes a number of times, while pressing the Enter key each time, I should see the vector shape maintain its sharpness and the pixel based shape get all blurry and screwed up looking. Let’s take a look.
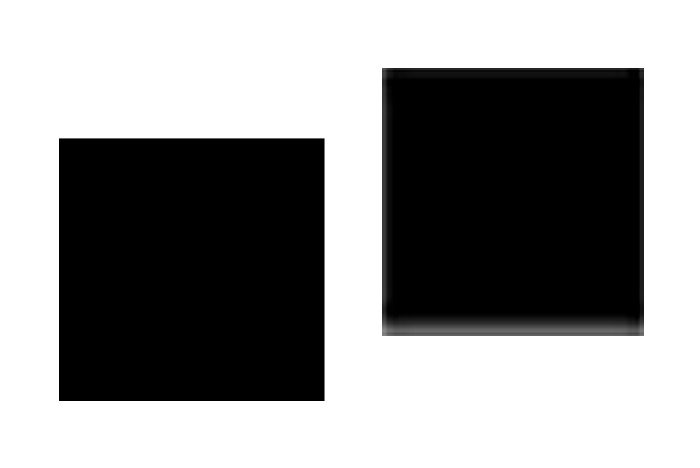
Take a look at the edges of the square on the right, especially the bottom edge. I transformed these squares about seven times and this is the result. Squares tend to keep their composure quite a bit. I’m thinking that if I used circles for this example, the results would have been more dramatic. Perhaps next time.
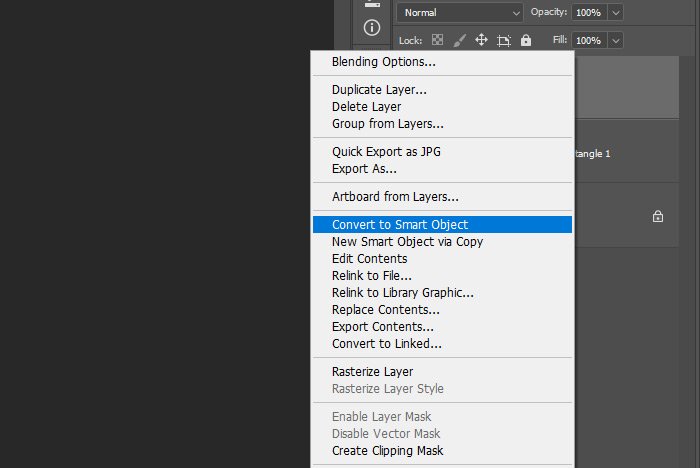
Even though pixel based shapes aren’t that great for certain uses, I have a workaround for you. If you convert the shape to a Smart Object, the edges will remain sharp, as long as you don’t extend past the original size. For example, I just created two rounded rectangles in the image below. The one on the left is vector based and the one on the right is pixel based. Before I did any transforming this time, I converted the shape on the right to a Smart Object by right clicking on the layer in the Layers panel and selecting Convert to Smart Object in the menu that pops up.
Then, I free transformed the shapes a number of times. I didn’t transform them to a size larger than their original size though. Let’s take a look to see if the edges are still sharp.
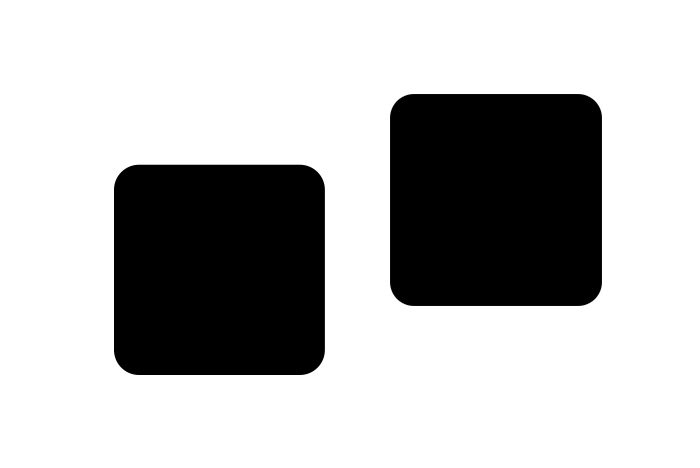
They do appear to be sharp, so if you want to work with pixel based shapes, do yourself a favor and convert the layer to a Smart Object before you start manipulating them in any way.
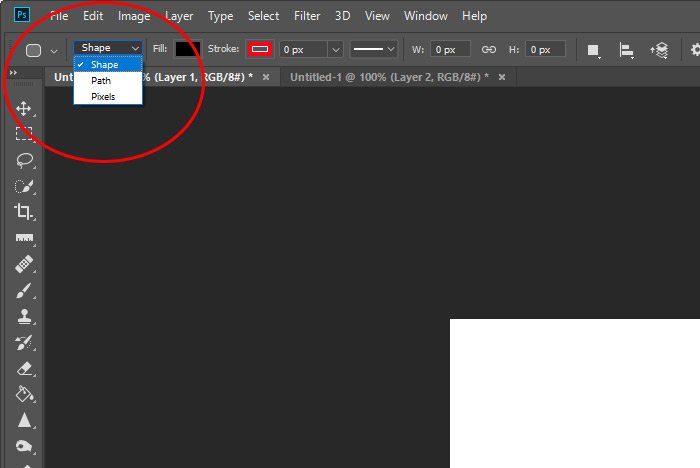
For the remainder of this post, I’ll be working with the Shape option, which is the vector alternative.
And here’s what the Properties panel looks like.
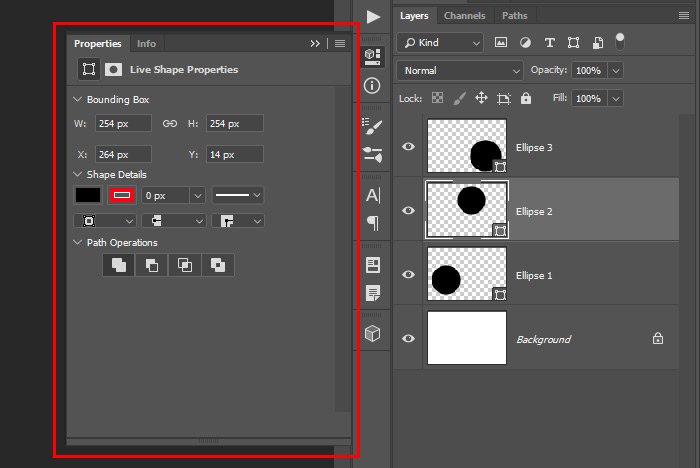
As you can see, both of these areas control a number of things when it comes to drawing and customizing shapes. You can choose the background color you’d like the shape to be, or perhaps even a gradient as opposed to something solid. You can apply a stroke of any color or thickness as well control what the properties of that stroke should be. Dashed, dotted, solid, etc… Here’s an example of me drawing three circles, each with a different background and stroke.
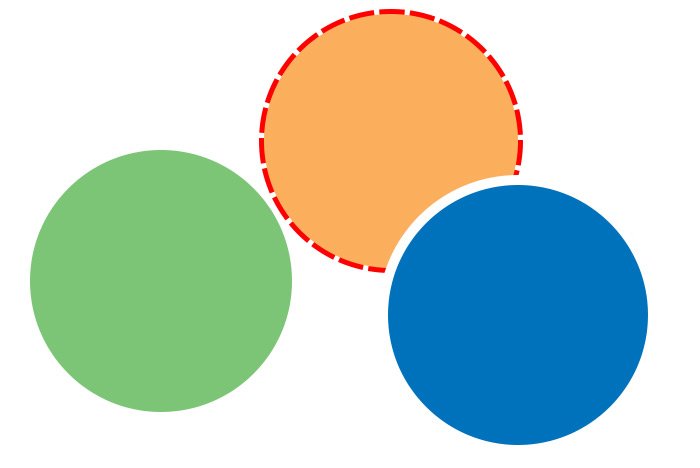
I applied all these colors and strokes right in the Properties panel, but I could have done the same thing in the options bar up top. Many options are redundant between the two locations.
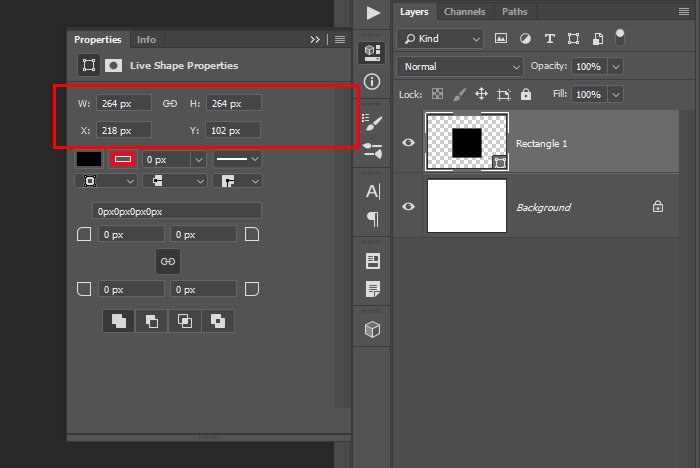
If you’ll notice in the above screenshot, there’s a small chain link between the size fields. If I click that link and then type a new size value into one of the fields, the other will be adjusted in relation to what I just entered. The chain link locks the size values together.
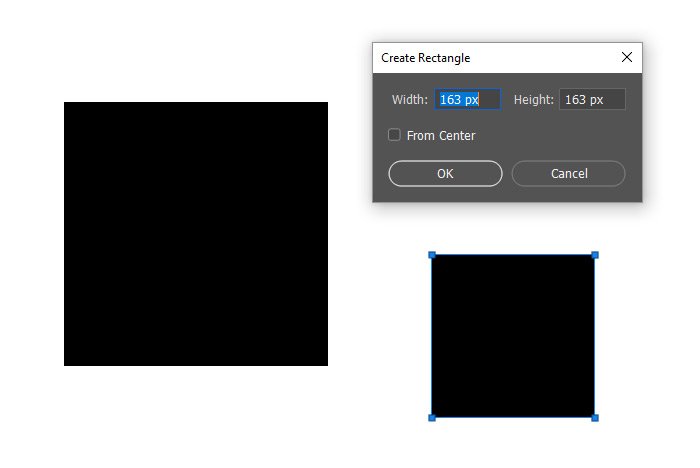
Another cool feature of the shape tools is how we can activate one of the tools by selecting it in the left vertical toolbar and then click anywhere once in the workspace. When I do this (I’m in the Rectangle Tool), the Create Rectangle dialog box appears, where I can enter the size of the shape I’d like to make. When I press the OK button, the shape will be created in the workspace automatically, with no dragging to form the shape.
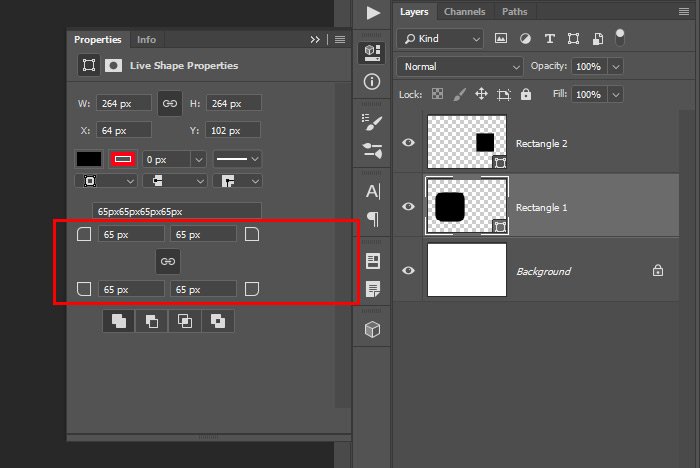
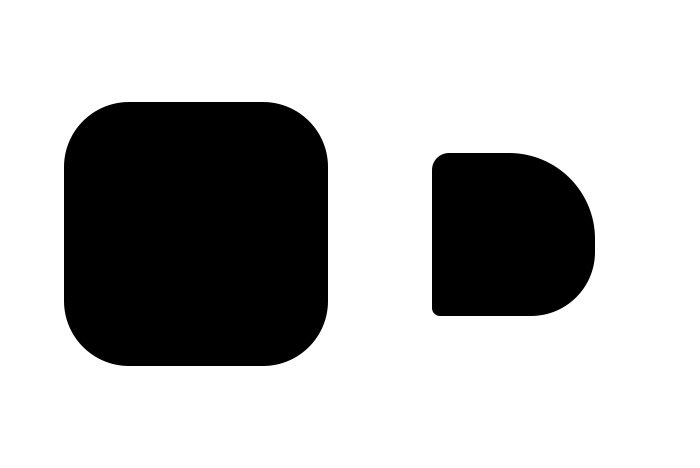
As you can see, each of the corners is locked with the others. I set the value of the upper left corner to 65px and all the remaining corners followed suit. If I were to click on that chain link that’s situated at the center of the four corner values so it wasn’t active anymore, I’d be able to adjust each corner independently from one another. In the following image, I adjusted the corners of the large square with the chain link locked and I then adjusted the corners of the small square independently. Take a look.
By the way, shapes are easily moved while being drawn if the Spacebar is held down on your keyboard.
If I wanted to create something much more interesting though, I could select the Polygon Tool from the toolbar and then click once in my work area. When I do that, the Create Polygon dialog box would appear and then I could fill in some different values for all the different attributes. Check this out.
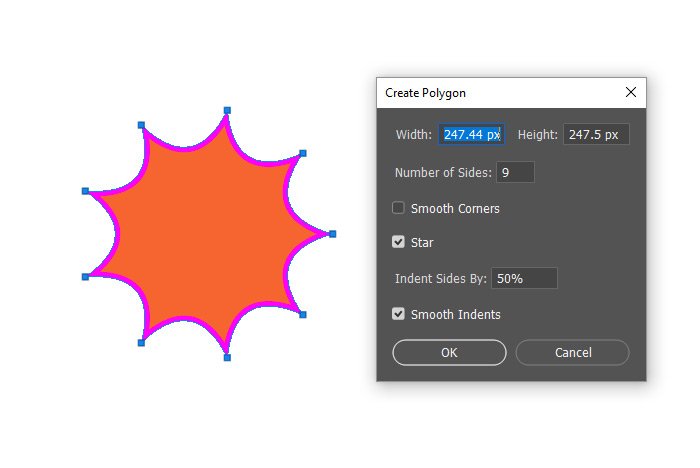
As you can see, I sort of inverted the polygon and added a few sides. I could have used the controls in the options bar, but it’s easier in the dialog box that appears after clicking.
Introducing the Path & Direct Selection Tools in Adobe Photoshop
And here are the tools I’m talking about in the left toolbar.
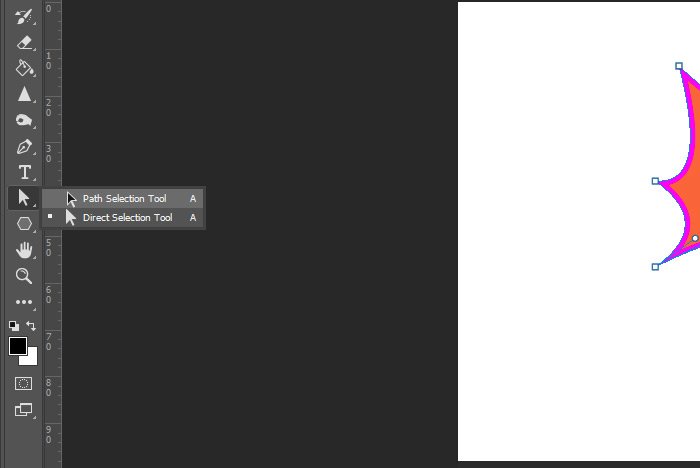
This is an example of what you can do with the Path Selection Tool. Notice how the anchor points are highlighted and once they’re clicked on, the control handle appear.
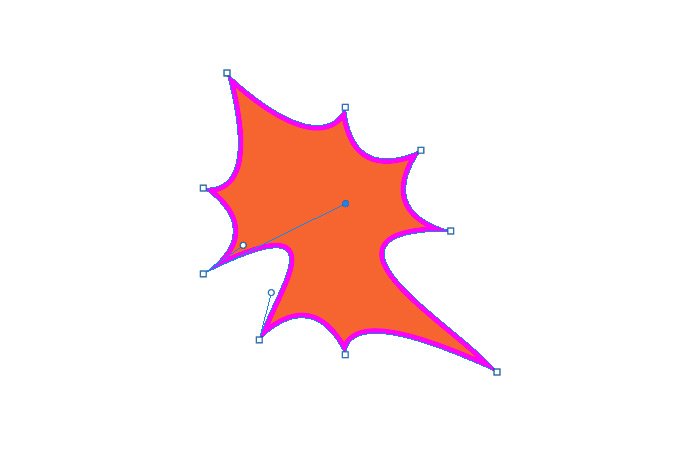
You can also click and drag those control handles to adjust the shape. I’m actually going to leave this topic for another post because it’s pretty big. I did want to mention it here though because you might want to experiment with it yourself now.
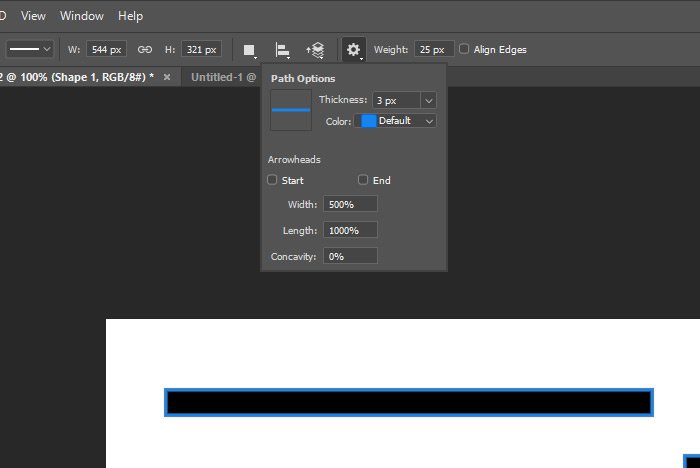
In this next screenshot, I’m showing you where the line attributes can be adjusted. There’s an options drop-down that sits next to the Weight setting. In this drop-down, you can set the stroke thickness and color, whether or not you want arrow heads on either end of the line and a few more things. To adjust the weight, just type the pixel value in the Weight field.
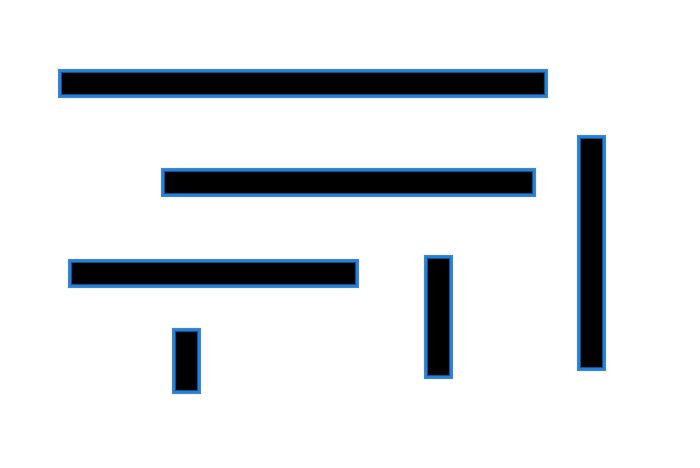
Here are a few lines I just drew for you.
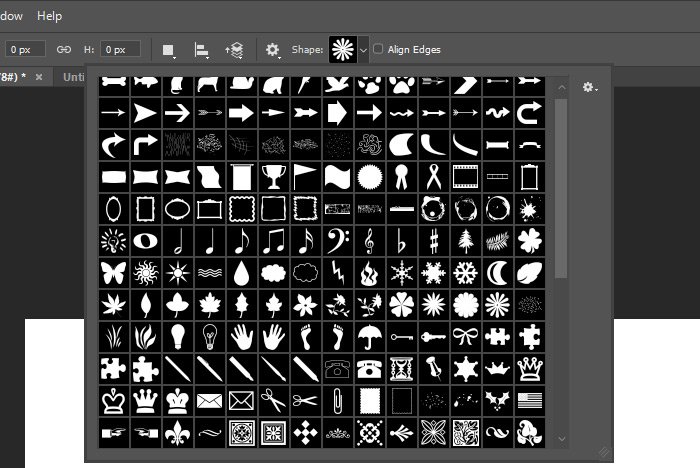
To draw a particular shape, simply choose it from the Shape drop-down and draw it as you would any other shape. All of the typical conventions apply to this tool. You can reshape it by free transforming it, you can click once to create a new shape with certain shape and size attributes and once created, you can even change the color by double-clicking on the shape’s thumbnail in the Layers panel.

And with that, I think I’ll end this post. I covered a lot here and I don’t want to make it too long. If I think anything needs to be fleshed out more, I’ll write a separate post for those topics.
I hope I gave you a clear introduction into the shape tools in Adobe Photoshop. If you have any questions regarding this post, please let me know in the comment section below. Thanks for reading!
While there are currently six tools to choose from, there’s an infinite number of ways we can make shapes look with these tools. Many of them are customizable. They weren’t always capable of being customized, but with the more recent versions of Photoshop, we’ve been granted the ability to, say, make a octagon look like a star or make a sharp edged rectangle look like a rounded rectangle. There’s a lot we can do with these things and I’ll be discussing all of it in this post and those that follow.
In today’s post, I’d like to merely take an introductory look at how to use the various shape tools, what they can accomplish and how we can customize them for different purposes. I’ll even tell you the difference between the vector based shapes and the pixel based shapes. And how you can cheat and have the pixel based shapes act like vector ones, sort of. More on all this below.
Available Shapes
As I mentioned above, we’ve got a few shapes to choose from when using this cluster of tools. If I head over to the left vertical toolbar and click on one of the shapes and drag it out, I can see all of them waiting for me.
As you can see, we have the Rectangle Tool, Rounded Rectangle Tool, Ellipse Tool, Polygon Tool, Line Tool and Custom Shape Tool. To select one of these tool, simply roll over it with your mouse and click.
Vector Shapes vs. Pixel Shapes
I’ve discussed what vector shapes and pixels shapes are in previous posts on this website, but if you aren’t familiar, a vector based shape is one that uses an algorithm to keep sharp edges. You can manipulate the shape in any which way and that shape will stay sharp, no matter what. It’s not based on how many pixels were in the original; it’s based on what the shape’s relationship is to what’s outside its edges, mathematically. When drawing, these are typically the types shapes you want to work with.Conversely, pixel based shapes are those that rely on the original shape’s pixel count. So, if you have a square that’s 100 pixels by 100 pixels when first drawn, the edges will look sharp. As you transform that square though, the edges will become more and more blurry as the transformations and applying the transformations continue. In the image below, I’ve drawn a vector based square on the left and a pixel based square on the right. Take a look. They appear to be duplicates of one another.

If I use the keyboard shortcut of Ctrl+T to free transform both of these shapes a number of times, while pressing the Enter key each time, I should see the vector shape maintain its sharpness and the pixel based shape get all blurry and screwed up looking. Let’s take a look.

Take a look at the edges of the square on the right, especially the bottom edge. I transformed these squares about seven times and this is the result. Squares tend to keep their composure quite a bit. I’m thinking that if I used circles for this example, the results would have been more dramatic. Perhaps next time.
Even though pixel based shapes aren’t that great for certain uses, I have a workaround for you. If you convert the shape to a Smart Object, the edges will remain sharp, as long as you don’t extend past the original size. For example, I just created two rounded rectangles in the image below. The one on the left is vector based and the one on the right is pixel based. Before I did any transforming this time, I converted the shape on the right to a Smart Object by right clicking on the layer in the Layers panel and selecting Convert to Smart Object in the menu that pops up.

Then, I free transformed the shapes a number of times. I didn’t transform them to a size larger than their original size though. Let’s take a look to see if the edges are still sharp.

They do appear to be sharp, so if you want to work with pixel based shapes, do yourself a favor and convert the layer to a Smart Object before you start manipulating them in any way.
How to Define Which Type of Shape to Use
I guess it would help to tell you how to actually choose between the different types of shapes you can draw with. When you click on one of the shape tools in the toolbar, the options bar up top will change for whichever shape you choose. There’s a small drop-down on the left side and currently, there are three options to choose from, Shape, Path and Pixels.
For the remainder of this post, I’ll be working with the Shape option, which is the vector alternative.
The Options Bar & the Properties Panel
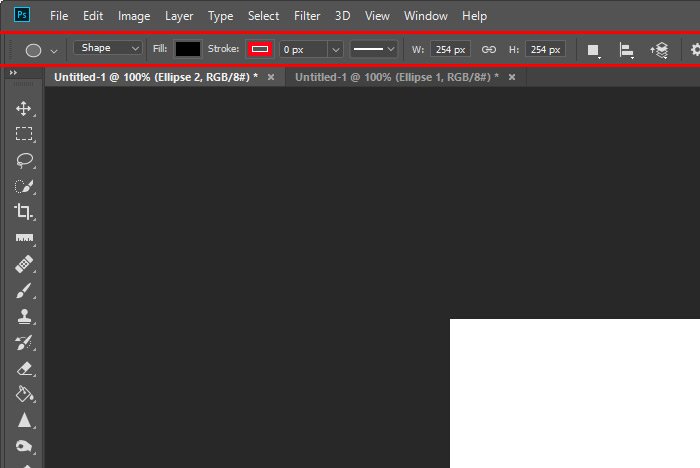
All the controls you’ll need, beyond clicking and dragging, when drawing and working with shapes in Photoshop can be accessed from either the options bar that’s above the workspace or in the Properties panel that oftentimes pops open right after a shape is drawn. Here’s what a typical shape options bar looks like.
And here’s what the Properties panel looks like.

As you can see, both of these areas control a number of things when it comes to drawing and customizing shapes. You can choose the background color you’d like the shape to be, or perhaps even a gradient as opposed to something solid. You can apply a stroke of any color or thickness as well control what the properties of that stroke should be. Dashed, dotted, solid, etc… Here’s an example of me drawing three circles, each with a different background and stroke.

I applied all these colors and strokes right in the Properties panel, but I could have done the same thing in the options bar up top. Many options are redundant between the two locations.
Changing Size & Position
A common property to alter when creating and working with shapes is the pixel size and shape’s location in the workspace. To gain precise control both of these areas, I can type values right into the respective fields in the Properties panel. In the next screenshot, you can see the width and height fields as well as the x and y coordinate fields.
If you’ll notice in the above screenshot, there’s a small chain link between the size fields. If I click that link and then type a new size value into one of the fields, the other will be adjusted in relation to what I just entered. The chain link locks the size values together.
Another cool feature of the shape tools is how we can activate one of the tools by selecting it in the left vertical toolbar and then click anywhere once in the workspace. When I do this (I’m in the Rectangle Tool), the Create Rectangle dialog box appears, where I can enter the size of the shape I’d like to make. When I press the OK button, the shape will be created in the workspace automatically, with no dragging to form the shape.

Rounding Sharp Corners
I’m still in the Rectangle Tool. Let’s say I have a square that’s already created in my workspace. I now have the ability to soften the hard edges of that square any way I wish. Here are the controls for this feature.
As you can see, each of the corners is locked with the others. I set the value of the upper left corner to 65px and all the remaining corners followed suit. If I were to click on that chain link that’s situated at the center of the four corner values so it wasn’t active anymore, I’d be able to adjust each corner independently from one another. In the following image, I adjusted the corners of the large square with the chain link locked and I then adjusted the corners of the small square independently. Take a look.

The Difference Between Live Shapes & Not So Live Shapes
The Rectangle Tool, Rounded Rectangle Tool and Ellipse Tools are considered what’s called Live Shape Tools. Live Shapes allow us to change various properties of a shape after it’s been drawn, right in the Properties panel. This is a somewhat new(ish) feature that’s extraordinarily helpful, given all the flexibility it offers. Some of these properties include those I covered above, such as the color, stroke, corners and some others. So, once a shape is drawn, that’s not the end of the story. It can still be edited at any time in the Properties panel. The other shapes still rely on the controls in the options bar.Creating Custom Polygons
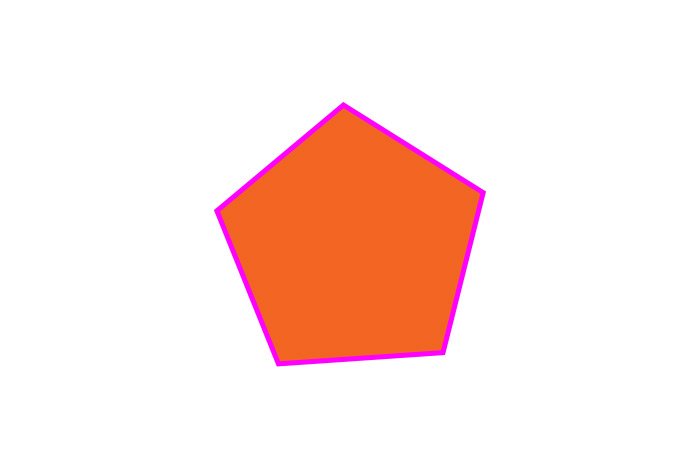
The Polygon Tool in Adobe Photoshop has the ability to create some interesting looking creatures. At first glance, it can draw something that looks like this.
By the way, shapes are easily moved while being drawn if the Spacebar is held down on your keyboard.
If I wanted to create something much more interesting though, I could select the Polygon Tool from the toolbar and then click once in my work area. When I do that, the Create Polygon dialog box would appear and then I could fill in some different values for all the different attributes. Check this out.

As you can see, I sort of inverted the polygon and added a few sides. I could have used the controls in the options bar, but it’s easier in the dialog box that appears after clicking.
Reshaping & Moving Shapes
This is a pretty large topic and I began writing about it in another post a while ago. Basically, if you draw a shape and then select the Direct Selection Tool from the left toolbar, you can click and move the shape around the workspace. If you select the Path Selection Tool though, you can click and drag any of the path or anchor points in the shape and do whatever you wish with them. Here’s the post I began writing about these tools in.Introducing the Path & Direct Selection Tools in Adobe Photoshop
And here are the tools I’m talking about in the left toolbar.

This is an example of what you can do with the Path Selection Tool. Notice how the anchor points are highlighted and once they’re clicked on, the control handle appear.

You can also click and drag those control handles to adjust the shape. I’m actually going to leave this topic for another post because it’s pretty big. I did want to mention it here though because you might want to experiment with it yourself now.
Line Weight & Arrow Heads
Line Tool attributes need to be set before drawing the line itself. You can’t change them once the line is drawn. The most widely used setting for the line tool is the Weight attribute, which can be set up in the options bar. Also, to draw either a perfectly horizontal or vertical line, simply hold down the Shift key on your keyboard. That will lock the direction in place.In this next screenshot, I’m showing you where the line attributes can be adjusted. There’s an options drop-down that sits next to the Weight setting. In this drop-down, you can set the stroke thickness and color, whether or not you want arrow heads on either end of the line and a few more things. To adjust the weight, just type the pixel value in the Weight field.

Here are a few lines I just drew for you.

The Custom Shape Tool
This is a big one and it really deserves a post of its own, which I’m sure I’ll write one day soon. Anyway, simply put, the Custom Shape Tool offers tons of different shapes to choose from. I actually just used one of these shapes in my previous How to Add a Copyright Watermark to your Photos post. If I click to activate this tool in the left vertical toolbar, I can click the Shape drop-down in the options bar to see all the available shapes I have to choose from. Again, I’ll write about this tool in its entirely later on.
To draw a particular shape, simply choose it from the Shape drop-down and draw it as you would any other shape. All of the typical conventions apply to this tool. You can reshape it by free transforming it, you can click once to create a new shape with certain shape and size attributes and once created, you can even change the color by double-clicking on the shape’s thumbnail in the Layers panel.

And with that, I think I’ll end this post. I covered a lot here and I don’t want to make it too long. If I think anything needs to be fleshed out more, I’ll write a separate post for those topics.
I hope I gave you a clear introduction into the shape tools in Adobe Photoshop. If you have any questions regarding this post, please let me know in the comment section below. Thanks for reading!
