WendyMay
Member
- Joined
- May 11, 2021
- Messages
- 142
- Reaction Score
- 0
- Points
- 21
- #1
The really cool thing about using Adobe Photoshop for video editing is that much of what you know about editing photographs in this application can be used for editing video. Really, if you think about it, all a video is is multiple photographs that are being displayed across a timeline. Just as you can crop, lighten, darken, rotate or apply an adjustment layer to a photo, you can do the same to a video. And the process is exactly the same. Many people I know are completely aware of how to enhance their photos, but have no idea how to edit videos. Luckily, Photoshop makes the process extremely simple.
In today’s post, I’d like to bring two things to your attention. These two things may prove useful when editing video in Adobe Photoshop. The first one is the use of blending modes for video and the second one is the use of layer masks for the same type of editing. As I mentioned above, your knowledge of these two features for photography can be transferred over to videography. I really like the fact that Adobe has made the transition as seamless as they have.
The reason I chose this particular video clip is because there’s lots of white in its background. I’m going to use that white to show you how blending mode can affect the clip in relation to a background layer.
The reason I’m doing this is because I’m going to add a background layer next and having a group for the video layer and the background layer isn’t necessary.
Next, I’ll add that background layer. The reason I’d like to add this is because I’m going to be applying a blending mode and I’d like the video clip to have something to contrast.
To add the background layer, I’ll head down to the bottom of the Layers panel and click on the Create New Layer button.
From there, I’ll drag that new layer down in the Layers panel so it’s underneath the video layer. I’ll also be sure to stretch its timeline so it matches the video’s length down in the Timeline panel. Finally, I’ll use the Paint Bucket Tool to pour a nice light yellow into the background layer. Here’s what I have so far.
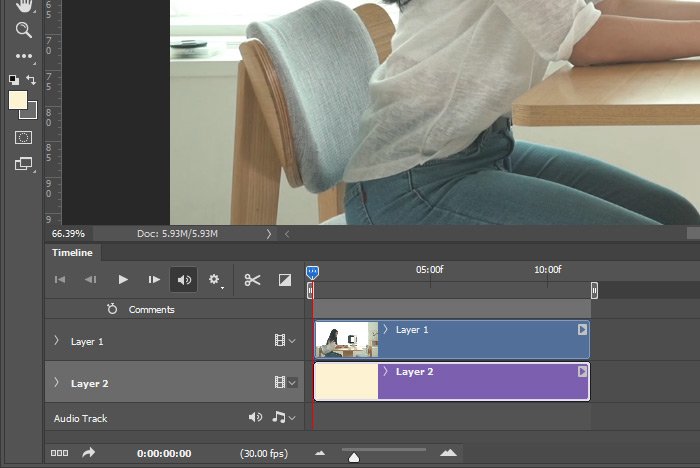
Mind you, this is all just setup to show you a very simple concept.
To apply a blending mode, all I need to do is click on the appropriate drop-down box in the Layers panel. First, I’ll make sure the video clip layer is selected in the Layer panel. After I click one blending mode, I can use my down and up arrow keys on my keyboard to quickly filter through the list.
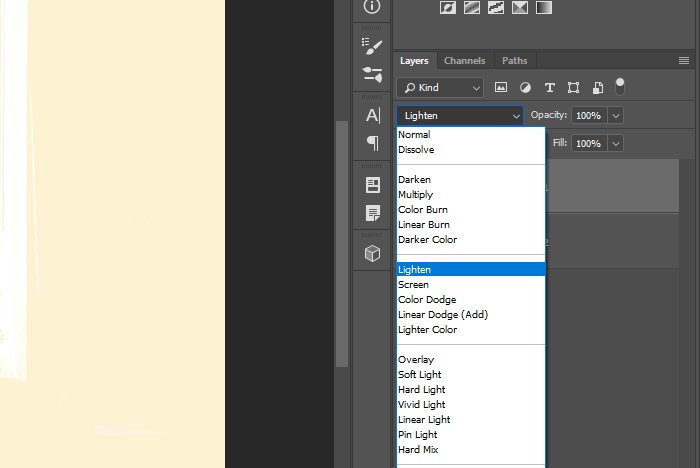
If I choose the Lighten blending mode, I’ll see something like this.
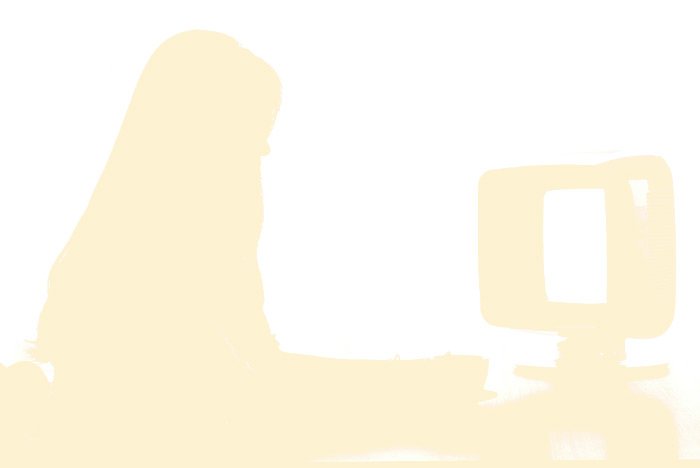
And if I choose the Luminosity blending mode, I’ll see something like this.
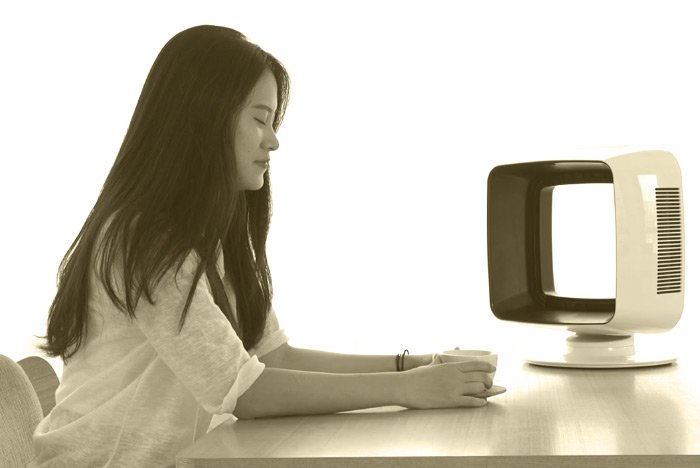
If I choose the Difference blending mode, I’ll see something like this.
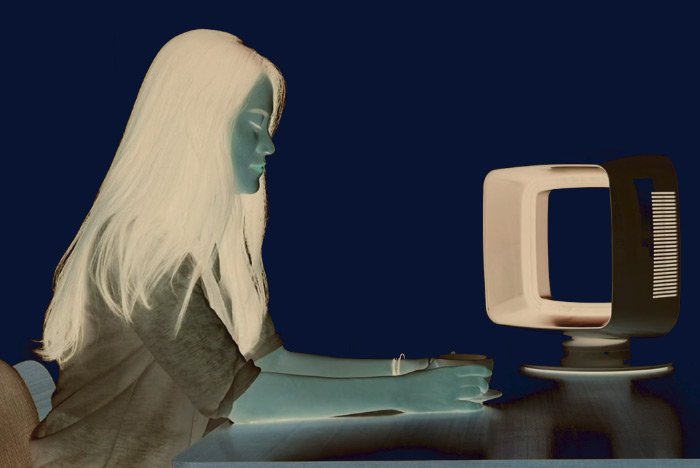
My point here is that these blending modes can add some cool effects to video that shouldn’t be dismissed. They also apply to every single frame of the clip they’re applied to, which is sort of hard to wrap your head around at first. These blending modes are quite powerful.
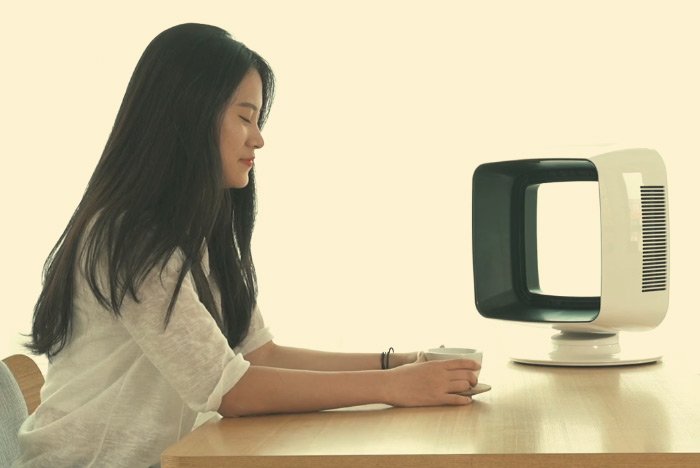
For the next step though, I’d like to apply the Multiply blending mode. The reason for this is because I’m going to apply a layer mask to brush away some of the video clip layer. Notice how all the white has disappeared with this mode. The background layer shows through.
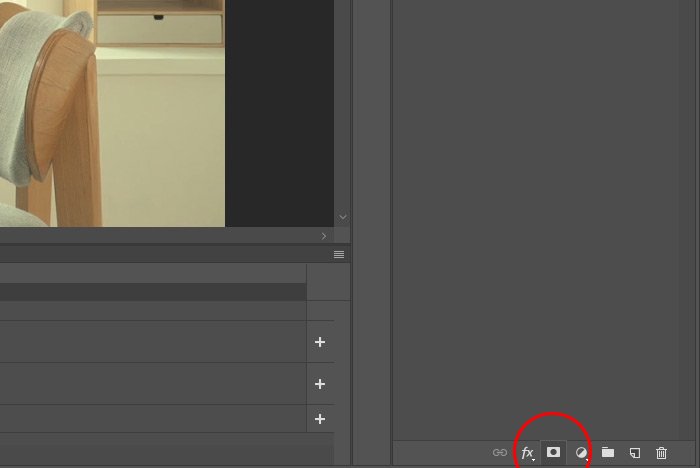
Once I click on that, the new layer mask will appear inside of the video clip layer.
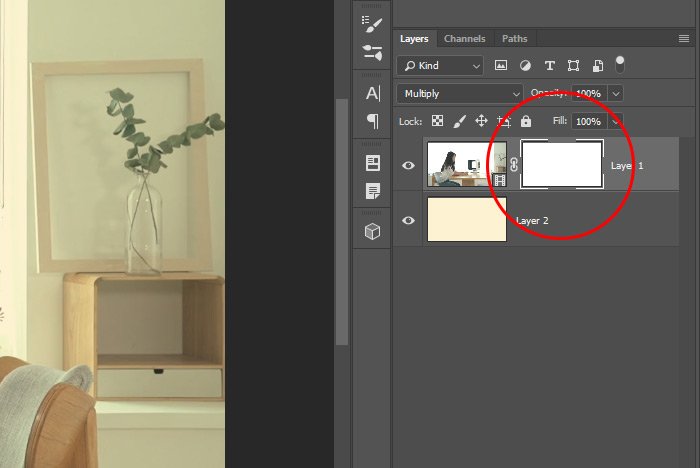
Here’s the point with this section - if I go ahead and use my Brush Tool to paint the color black anywhere in the video, I’ll essentially hide that part of the video from view – for the entire duration of the video clip. This is like masking a photo on steroids. As an example, I’ll soften up my brush and size it a bit and then paint away the right top part of the video. Let’s see a still shot of that.
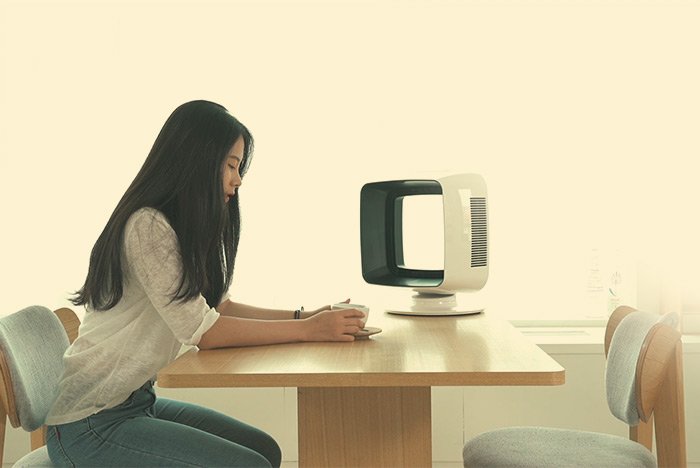
Do you see how the right side is now hidden? It’s sort of tough to explain all this here, but I want you to understand the possibilities. If you mask out part of a video, you’ll have tremendous flexibility when it comes to your editing. In this post, I’m merely demonstrating that something is possible and leaving the creativity up to you.
——
I hope I clearly explained how to go about applying a blending mode and a layer mask to a video clip in Adobe Photoshop. If you have any questions regarding this post, please let me know in the comment section down below. Thanks for reading!
In today’s post, I’d like to bring two things to your attention. These two things may prove useful when editing video in Adobe Photoshop. The first one is the use of blending modes for video and the second one is the use of layer masks for the same type of editing. As I mentioned above, your knowledge of these two features for photography can be transferred over to videography. I really like the fact that Adobe has made the transition as seamless as they have.
Today’s Demo Video
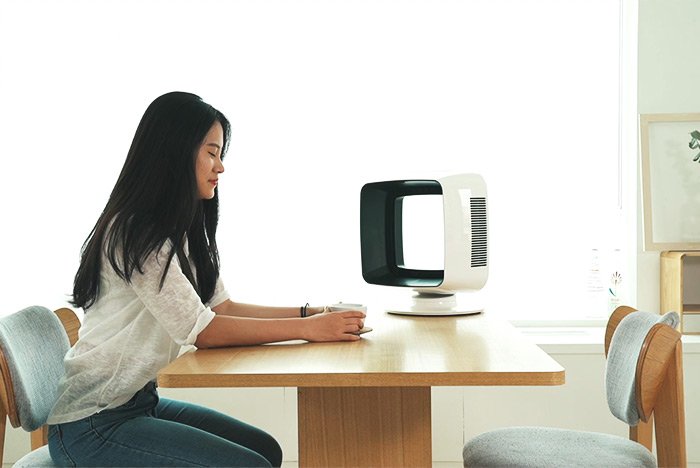
While I’ll be using a video clip for this post, I’m not even going to show you any moving scenes. What I’d like to demonstrate below is how to go about using both of the tools I just mentioned while doing your editing. It’s not necessary that you see any movement in this post. That said, here’s a still shot of the video I’ll be using.
The reason I chose this particular video clip is because there’s lots of white in its background. I’m going to use that white to show you how blending mode can affect the clip in relation to a background layer.
Applying a Blending Mode to a Video
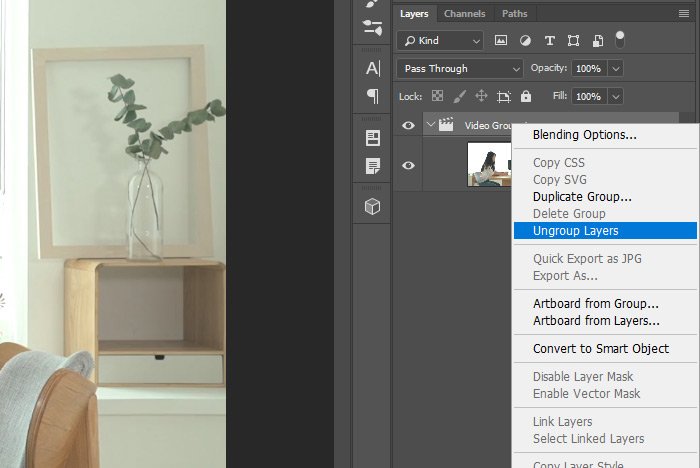
For this example, the first thing I’m going to do is remove the video clip from the group is was automatically put in. To do this, I’ll right click on the Video Group layer and then select Ungroup Layers from the menu that appears.
The reason I’m doing this is because I’m going to add a background layer next and having a group for the video layer and the background layer isn’t necessary.
Next, I’ll add that background layer. The reason I’d like to add this is because I’m going to be applying a blending mode and I’d like the video clip to have something to contrast.
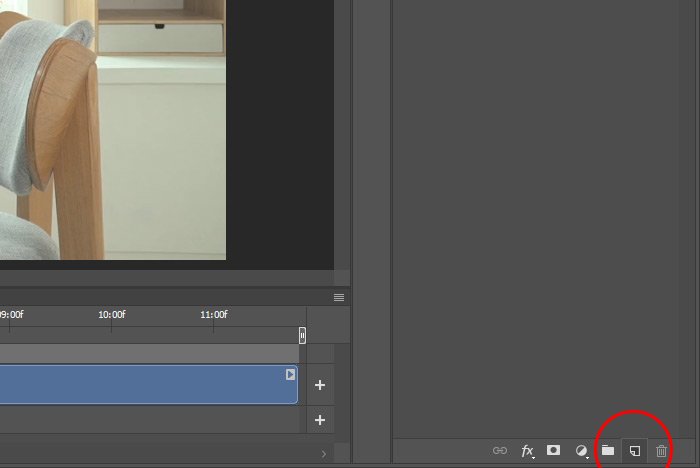
To add the background layer, I’ll head down to the bottom of the Layers panel and click on the Create New Layer button.

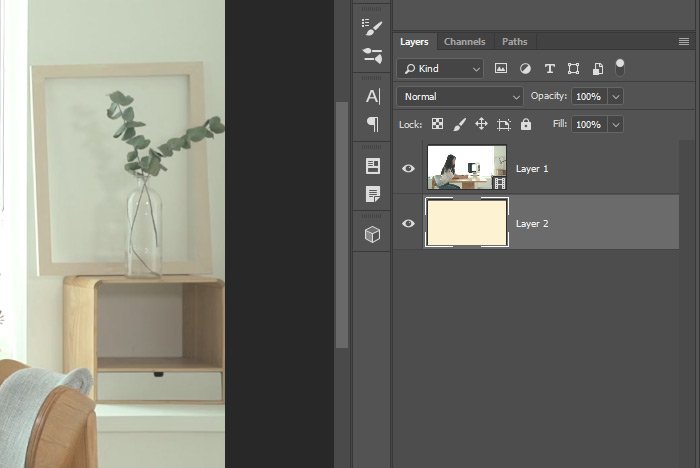
From there, I’ll drag that new layer down in the Layers panel so it’s underneath the video layer. I’ll also be sure to stretch its timeline so it matches the video’s length down in the Timeline panel. Finally, I’ll use the Paint Bucket Tool to pour a nice light yellow into the background layer. Here’s what I have so far.


Mind you, this is all just setup to show you a very simple concept.
To apply a blending mode, all I need to do is click on the appropriate drop-down box in the Layers panel. First, I’ll make sure the video clip layer is selected in the Layer panel. After I click one blending mode, I can use my down and up arrow keys on my keyboard to quickly filter through the list.

If I choose the Lighten blending mode, I’ll see something like this.

And if I choose the Luminosity blending mode, I’ll see something like this.

If I choose the Difference blending mode, I’ll see something like this.

My point here is that these blending modes can add some cool effects to video that shouldn’t be dismissed. They also apply to every single frame of the clip they’re applied to, which is sort of hard to wrap your head around at first. These blending modes are quite powerful.
For the next step though, I’d like to apply the Multiply blending mode. The reason for this is because I’m going to apply a layer mask to brush away some of the video clip layer. Notice how all the white has disappeared with this mode. The background layer shows through.

Applying a Layer Mask to a Video Clip
Layer masks with video work the same exact way they work with regular photos. To apply one, all I have to do is make sure the video layer is selected in the Layers panel and then head down to the bottom of that panel. From there, I can click on the Add Layer Mask button.
Once I click on that, the new layer mask will appear inside of the video clip layer.

Here’s the point with this section - if I go ahead and use my Brush Tool to paint the color black anywhere in the video, I’ll essentially hide that part of the video from view – for the entire duration of the video clip. This is like masking a photo on steroids. As an example, I’ll soften up my brush and size it a bit and then paint away the right top part of the video. Let’s see a still shot of that.

Do you see how the right side is now hidden? It’s sort of tough to explain all this here, but I want you to understand the possibilities. If you mask out part of a video, you’ll have tremendous flexibility when it comes to your editing. In this post, I’m merely demonstrating that something is possible and leaving the creativity up to you.
——
I hope I clearly explained how to go about applying a blending mode and a layer mask to a video clip in Adobe Photoshop. If you have any questions regarding this post, please let me know in the comment section down below. Thanks for reading!
