EmeraldHike
Member
- Joined
- May 10, 2021
- Messages
- 133
- Reaction Score
- 0
- Points
- 21
- #1
Halloween is just around the corner, so I thought I’d write a post that discusses how to turn a creepy photograph into an even more creepy photograph. I mean, when it comes to Halloween, you can’t get creepy enough.
For today’s post, I’ll focus primarily on the Gradient Map adjustment layer in Adobe Photoshop. Gradients from this adjustment layer are overlays that include just a few colors. They pretty much hide the existing colors in the image and turn the image into a blend of whatever colors you choose. Below, I’ll show you how to apply the layer, load gradients that aren’t yet installed and also how to adjust the gradient’s outward appearance. After I do all this, I’ll go a step further and apply a Curves adjustment layer and simply choose one of the presets available to me. My goal with this step will be to add a bit of contrast. Finally, I’ll use the Camera Raw Filter to move the image into Camera Raw, where I can make any tweaks I deem necessary. Hopefully, at the end of all this, the photo will have a duo-tone sort of a look that screams Halloween. Or at least scary. Or something like that.
Down toward the bottom of the menu that appears are the different sets of gradients you’re able to install. Click one of the sets and then from the pop-up window that appears, click on Append. That will add the chosen gradients to the current list of them. The set that I installed and that I’ll be working with today is called Photographic Toning. You can see these gradients in the previous screenshot. Is the more subtle variety at the bottom of the drop-down box.
Let’s take a look at this gradient’s effect on the image.
That’s looking pretty good, but it’s not quite where I want it yet.
The way I’m going to make the adjustments I’d like is to click on the small sliders that reside on the bottom gradient that spans the palette. When I click one, the Color Picker will open up, where I can choose to modify the color for that part of the gradients. I can also click and drag these sliders back and forth until I see an effect that I like. For now, I think I’ll merely saturate the brown/orange a bit and then push that slider (second one in from the right on the bottom) to the right a hair. That will give me more color and make things slightly darker.
Once in Camera Raw, I’ll push a few sliders around. The primary ones I know I’ll need to move are Highlights to the left to reduce the brightness of the lamp hanging from the ceiling, Whites to the right for some brightness where it counts (the centers of those lights), Blacks to the left to make the shadows in the image stand out and then, most importantly, Clarity all the way to the right. That one will give me the creepy factor I want.
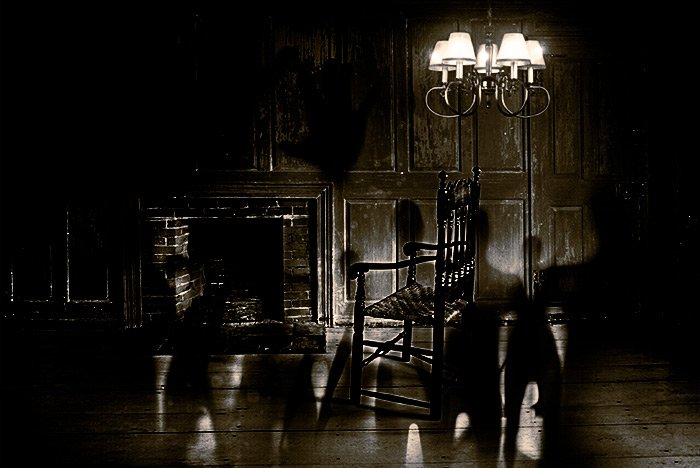
Now check out the final image. This is a huge change from the original.
Now, I know I could have gone in any direction with this and I could have chosen any range of colors and creative avenues. I thought this one was good because it was easy to do and it was fun. At the very least, I demonstrated how to strip color and add a gradient overlay to an image in Adobe Photoshop, which may come in handy one day. If you have any questions regarding this post, please let me know in the comment section below. Thanks for reading!
PS – Here’s another view. I desaturated the orange for this one in the gradient controls. This may be the best one!

For today’s post, I’ll focus primarily on the Gradient Map adjustment layer in Adobe Photoshop. Gradients from this adjustment layer are overlays that include just a few colors. They pretty much hide the existing colors in the image and turn the image into a blend of whatever colors you choose. Below, I’ll show you how to apply the layer, load gradients that aren’t yet installed and also how to adjust the gradient’s outward appearance. After I do all this, I’ll go a step further and apply a Curves adjustment layer and simply choose one of the presets available to me. My goal with this step will be to add a bit of contrast. Finally, I’ll use the Camera Raw Filter to move the image into Camera Raw, where I can make any tweaks I deem necessary. Hopefully, at the end of all this, the photo will have a duo-tone sort of a look that screams Halloween. Or at least scary. Or something like that.
Today’s Demo Photo
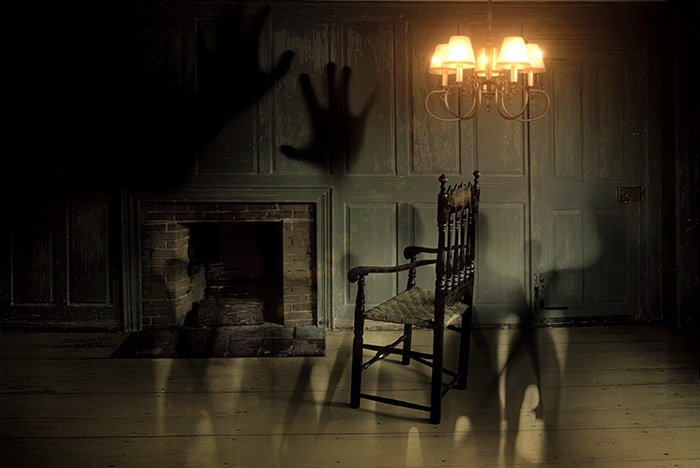
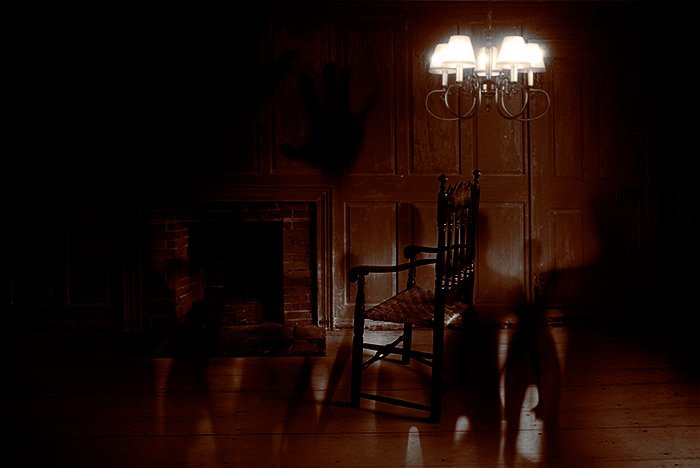
I decided to go with this image because it was already looking pretty scary. I thought it would be easy to alter. After playing around with it for a while earlier, my suspicions were confirmed. It was easy to work with and I was happy with my result.
Adding a Gradient Map Adjustment Layer
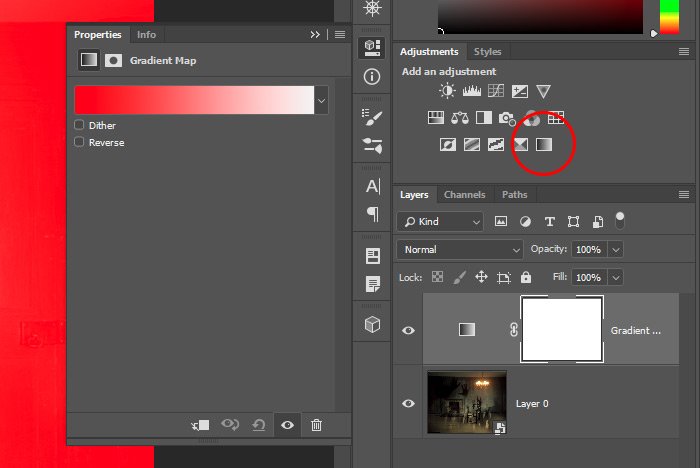
Okay, since I don’t know what I’ll be doing with this image further down the road in this project, I’m going to go ahead and convert the image layer into a Smart Object now. To do this, I’ll right-click on the layer and then select Convert to Smart Object from the menu that appears. Once that’s done, I’ll head up to the Adjustments panel and click the Gradient Map icon. After I do that, the appropriate Properties panel will pop up and the adjustment layer will be added to the Layers panel. Now, I want you to know that some odd colors might appear over the image. Ignore them. I’m going to show you how to adjust all that in a moment.
Loading Additional Gradients
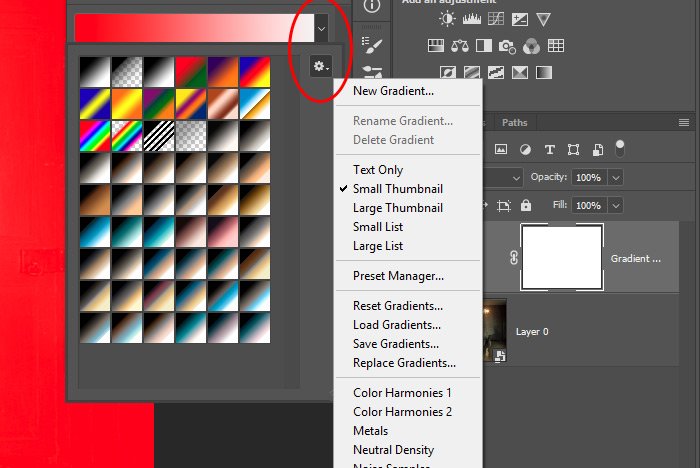
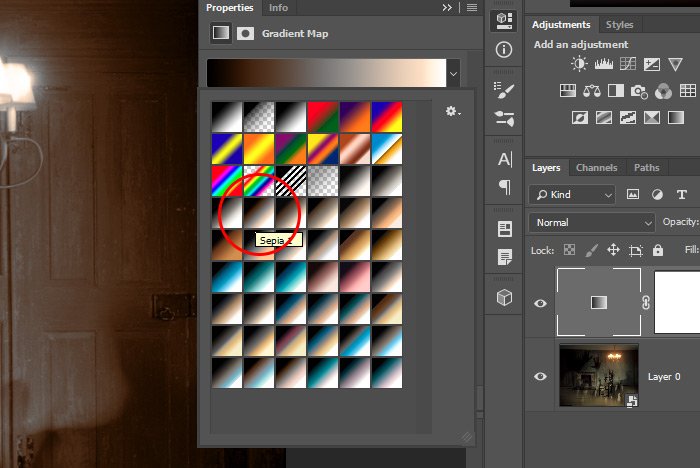
By default, Photoshop shows only a few different gradients. If you’d like more, you’ll have to load them. Luckily, loading gradients is painless and very easy to do. To load more gradients, I moved over to the Properties panel. I then clicked the small arrow in the drop-down and from there, I clicked the gear icon. Take a look at the next screenshot. I circled both of these icons in red.
Down toward the bottom of the menu that appears are the different sets of gradients you’re able to install. Click one of the sets and then from the pop-up window that appears, click on Append. That will add the chosen gradients to the current list of them. The set that I installed and that I’ll be working with today is called Photographic Toning. You can see these gradients in the previous screenshot. Is the more subtle variety at the bottom of the drop-down box.
Choosing a Gradient
It’s now time to actually choose a gradient to apply to this image. Again, since it’s going to be Halloween soon, I’d like to inject some orange into things. After experimenting for a while, I settled on one called Sepia 1.
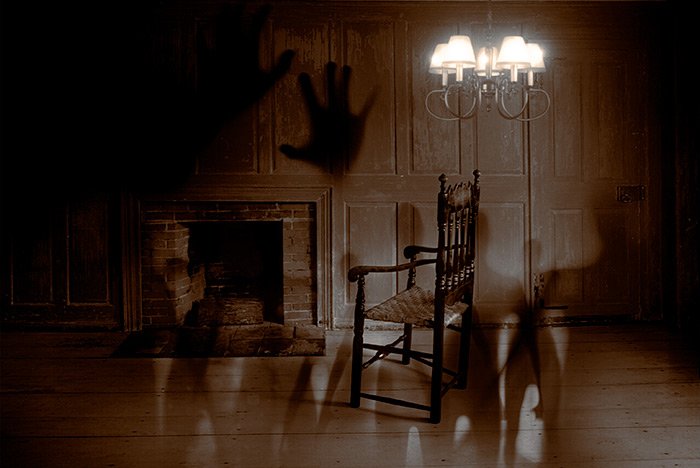
Let’s take a look at this gradient’s effect on the image.

That’s looking pretty good, but it’s not quite where I want it yet.
Adding Some Contrast via Curves
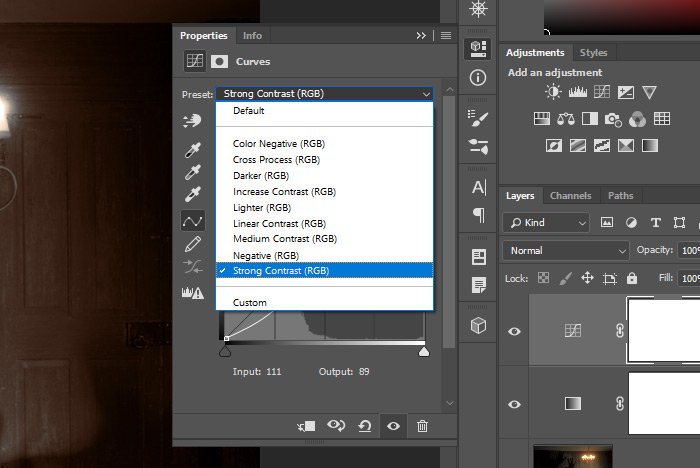
As I stated earlier, I’d like a bit more contrast in this image. To get that, I’ll apply a Curves adjustment layer. Once I do that, I’ll click on the Preset drop-down that’s in the Properties panel and then select the Strong Contrast option. That should darken things down and make things somewhat spookier than they were.
Making Further Gradient Adjustments
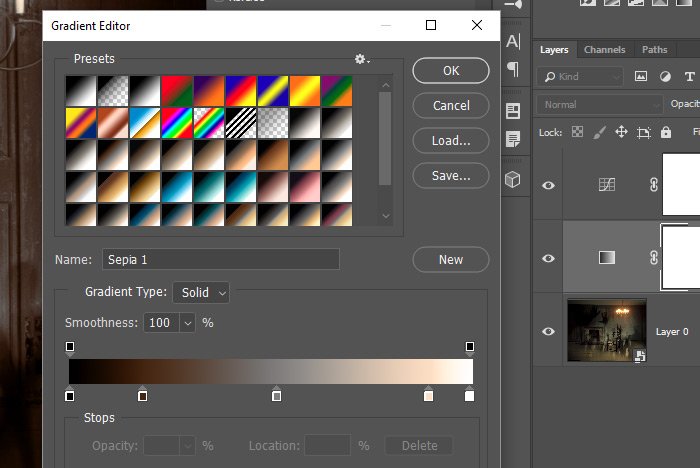
Now that I know what things will generally look like, I can go back to the Gradient Map adjustment layer and click on it. After this adjustment is active in the Properties panel, I’ll click once right on top of the gradient bar. This will open up the Gradient Editor palette where I can make more adjustments.
The way I’m going to make the adjustments I’d like is to click on the small sliders that reside on the bottom gradient that spans the palette. When I click one, the Color Picker will open up, where I can choose to modify the color for that part of the gradients. I can also click and drag these sliders back and forth until I see an effect that I like. For now, I think I’ll merely saturate the brown/orange a bit and then push that slider (second one in from the right on the bottom) to the right a hair. That will give me more color and make things slightly darker.

Adding a Camera Raw Filter
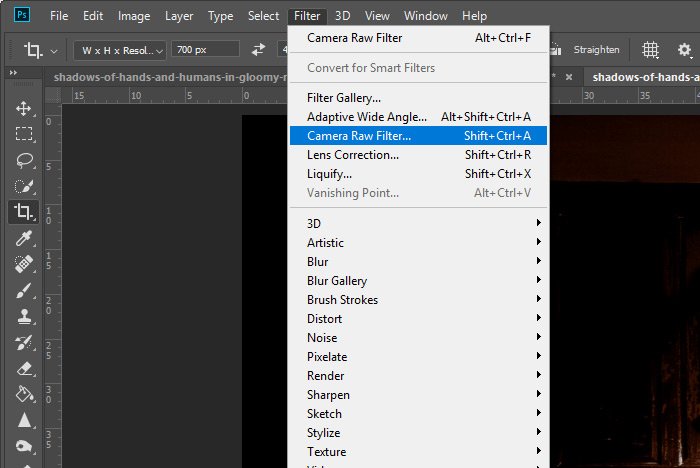
Everything is looking pretty good so far, but I’m not seeing scary yet. For that, I know I’ll need to use Camera Raw. The way to move this image into Camera Raw is to head up to the Filter > Camera Raw Filter menu item and click. This will open up Camera Raw for me to do some editing.
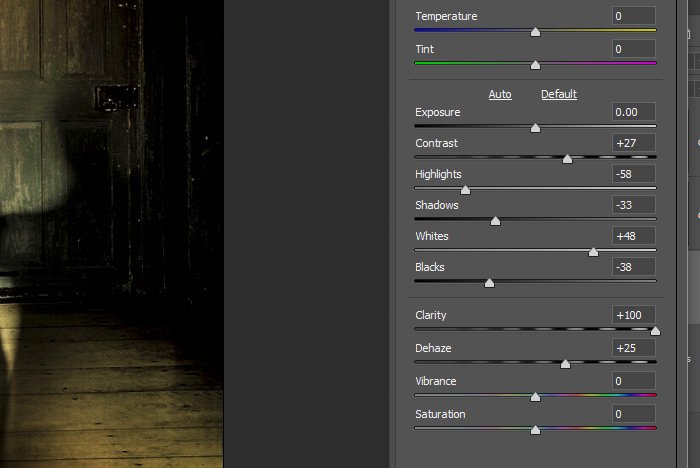
Once in Camera Raw, I’ll push a few sliders around. The primary ones I know I’ll need to move are Highlights to the left to reduce the brightness of the lamp hanging from the ceiling, Whites to the right for some brightness where it counts (the centers of those lights), Blacks to the left to make the shadows in the image stand out and then, most importantly, Clarity all the way to the right. That one will give me the creepy factor I want.

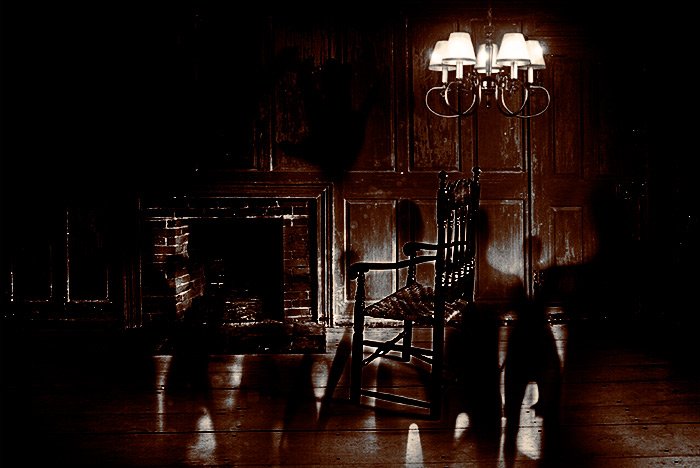
Now check out the final image. This is a huge change from the original.

Now, I know I could have gone in any direction with this and I could have chosen any range of colors and creative avenues. I thought this one was good because it was easy to do and it was fun. At the very least, I demonstrated how to strip color and add a gradient overlay to an image in Adobe Photoshop, which may come in handy one day. If you have any questions regarding this post, please let me know in the comment section below. Thanks for reading!
PS – Here’s another view. I desaturated the orange for this one in the gradient controls. This may be the best one!
