Newman
Member
- Joined
- May 11, 2021
- Messages
- 106
- Reaction Score
- 0
- Points
- 23
- #1
Apparently, videos on the internet are hot commodities for theft. People steal them and post them all over random websites daily. While it takes big money to police this sort of thing and to stay on top of it, there is one smaller area that you can focus on for free. That’s adding a watermark to your video before you post it anywhere. You would do this during editing and while it won’t stop the theft, it will at least lead viewers back to your website where they can learn more about you and what you offer.
In today’s post, I’d like to walk through the process of adding a watermark to a video in Adobe Photoshop. I’ve written about the very same thing before, but that was more targeted toward adding a watermark to an image. Adding one to a video is slightly different, so I thought I’d write a separate post for it.
The process is straightforward and easy to complete. All you need to do is either write some text, add a custom shape or both and then reduce the opacity of it or them. Then you’ll need to adjust the length of duration for these elements on the timeline, which is simple. If you wanted to, you could create a watermark that you’ll use for various videos in a separate file and then simply drag them over to the video file when needed, but I’ll talk about that another time. Today, all I want to do is to show you how to make the watermark so it works and can be seen in a video file.

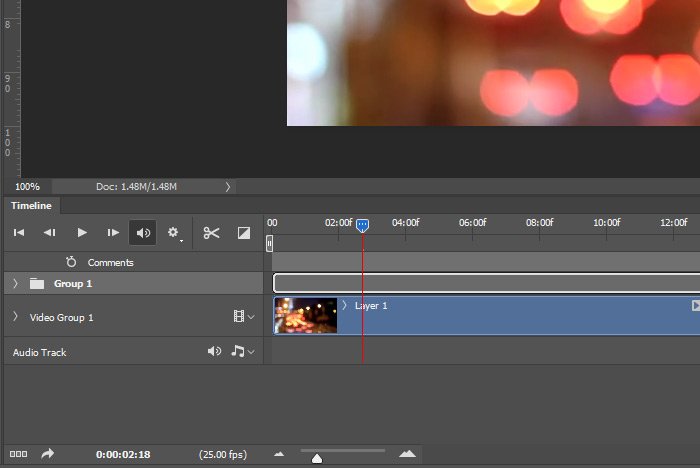
Let’s also take a look at the Timeline panel to see what this group looks like.
All pretty simple stuff. I’ll even double-click on the name of the group and rename it “Watermark,” just to make things ultra clear.
Attach files
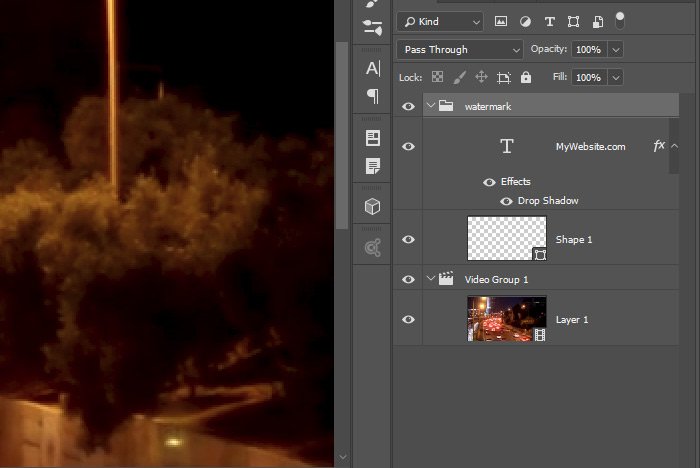
As you can see, inside of the Watermark group is the text and the shape. Both are set to an Overlay blending mode and the text layer has a Drop Shadow effect applied to it as well. Now that everything is set up, I’ll position the elements in the lower right corner of the video.
To make sure of this, I’ll open the watermark group in the Timeline panel and click to drag the elements inside of it so they’re the same length of the video clip. If I have to extend each element, I’ll do that as well. Ultimately, things will look like this below.
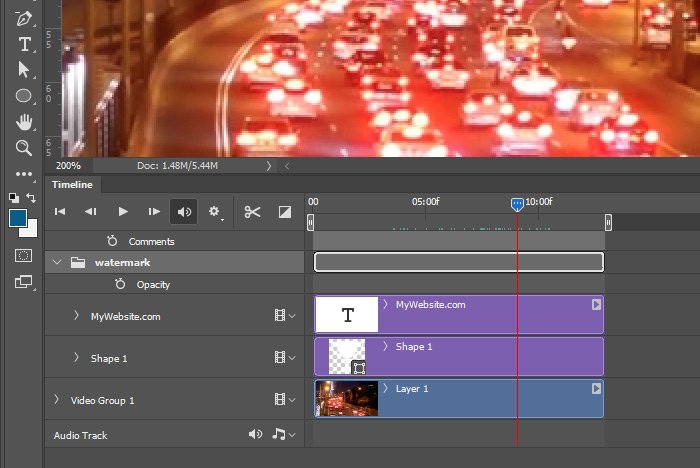
As you can see, the watermark elements and the video clip are the same length, as they should be.
Let’s take a look at the final video.
I’d say that’s pretty good!
I hope I clearly explained how to create a watermark in a video using Adobe Photoshop. If you have any questions regarding this post, please let me know in the comment section below. You may also ask any question you wish in the Adobe Photoshop user forum. Thanks for reading!
In today’s post, I’d like to walk through the process of adding a watermark to a video in Adobe Photoshop. I’ve written about the very same thing before, but that was more targeted toward adding a watermark to an image. Adding one to a video is slightly different, so I thought I’d write a separate post for it.
The process is straightforward and easy to complete. All you need to do is either write some text, add a custom shape or both and then reduce the opacity of it or them. Then you’ll need to adjust the length of duration for these elements on the timeline, which is simple. If you wanted to, you could create a watermark that you’ll use for various videos in a separate file and then simply drag them over to the video file when needed, but I’ll talk about that another time. Today, all I want to do is to show you how to make the watermark so it works and can be seen in a video file.
The Final Watermark
Just to give you a sneak preview, I’ll show you the watermark I had in mind for this project. Since the video is related to driving, I figured that the website URL watermark should contain a trophy. I put a custom shape trophy as well as the website URL in the lower right corner. Here’s a large view of that corner.
Creating a Layer Group
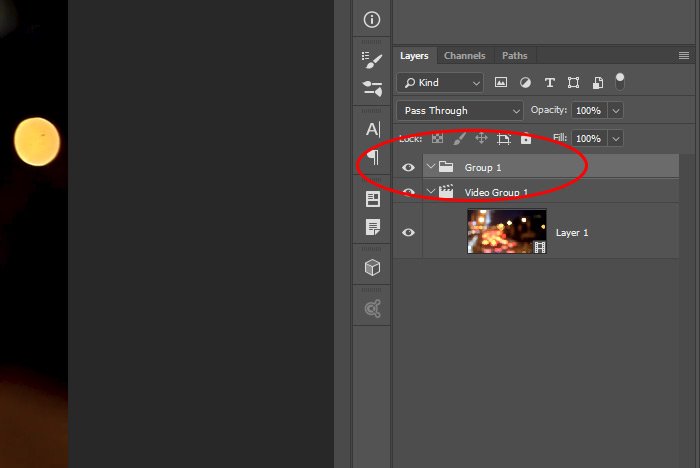
Okay, let’s get going. I’ve already got the video clip opened up in Adobe Photoshop. What I’d like to do next is to create a group in the Layers panel to contain the text I’ll write as well as the custom shape. To do this, I’ll head down to the Create New Group button at the bottom of the Layers panel and click. Then, once I see the group layer, I’ll click and drag it up to the very top position of said panel. It’s important for it to be up top so the watermark is always visible and never hidden behind another layer.
Let’s also take a look at the Timeline panel to see what this group looks like.

All pretty simple stuff. I’ll even double-click on the name of the group and rename it “Watermark,” just to make things ultra clear.
Creating the Text & Shape
This section will be quick because I’ve already covered all this in my previous post about how to create watermarks in Photoshop. For instructions on how to write out the text and how to create a custom shape, please refer back to that post. In this section, I merely want to let you know that, for some added interest, I set the blending mode for both new layers to Overlay. This blending mode allows the viewer to see right though the watermark without having to reduce the opacity. It’s a neat effect, especially for video. Depending on the lighting in yours, you may have good luck with this blend mode or you may have to choose another.Attach files

As you can see, inside of the Watermark group is the text and the shape. Both are set to an Overlay blending mode and the text layer has a Drop Shadow effect applied to it as well. Now that everything is set up, I’ll position the elements in the lower right corner of the video.
Adjusting the Timeline
This is a very important step that’s unique to video. When it comes to a regular image, we don’t need to concern ourselves with a timeline at all, but since video is “alive” we need to make sure that the text and shape layers are situated along the timeline just as the video elements are. Basically, the watermark needs to be visible for the entire duration of the video. If it isn’t, it simply won’t be seen.To make sure of this, I’ll open the watermark group in the Timeline panel and click to drag the elements inside of it so they’re the same length of the video clip. If I have to extend each element, I’ll do that as well. Ultimately, things will look like this below.

As you can see, the watermark elements and the video clip are the same length, as they should be.
Let’s take a look at the final video.
I’d say that’s pretty good!
I hope I clearly explained how to create a watermark in a video using Adobe Photoshop. If you have any questions regarding this post, please let me know in the comment section below. You may also ask any question you wish in the Adobe Photoshop user forum. Thanks for reading!
