KodyWallice
Member
- Joined
- May 7, 2021
- Messages
- 123
- Reaction Score
- 1
- Points
- 23
- #1
There may come a time when you need to separate out colors in a photograph for some reason or another. This may be because you want something to stand out in an image or because you simply want certain areas to fade into the background. Whatever the reason, it’s oftentimes far too tedious to sit there with your selection tool of choice or your painting tool in Adobe Photoshop and work things pixel by pixel. For complicated images, that’s just too much work. If you’re facing a photo that’s got big, broad colors that are easy to select, that’s one thing, but if you’re facing a complex photo, that’s quite another. Nobody wants to work on something all day long. Especially if that something is only one part of a larger project in Photoshop.
In today’s post, I’m going to work through a quick project in Photoshop that will hopefully give you some ideas for your own projects in the future. I’ll show you how to apply the Hue/Saturation adjustment and then how to use the Color Range tool inside the Masks panel to choose just the color you either want to keep saturated or make desaturated. I’ll then show you how to desaturate the colors you want to fade away, which will make the other saturated colors really pop. This will be a fun post and again, I hope you learn something from it.
When I click the Color Range button, the Color Range dialog box will appear.
In the above screenshot, you can see that I already clicked on the color pink. Basically, when this dialog box appears, the mouse turns into a dropper that selects the color you want. Since I already clicked on pink, I’ll need to switch from a “one use” dropper to a “cumulative” dropper.
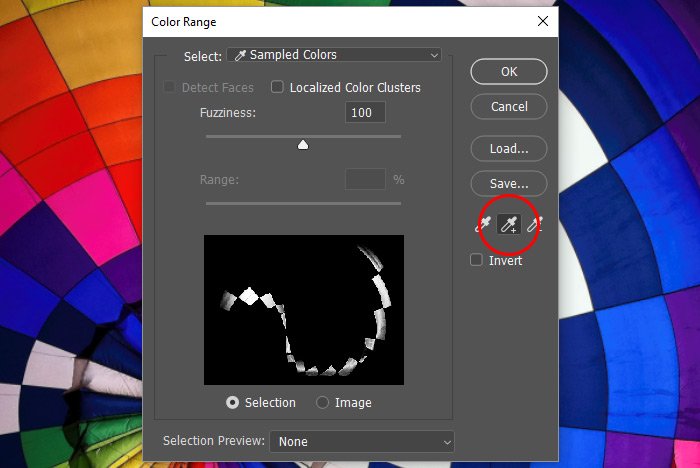
By using this cumulative eyedropper version with the small + (plus) mark next to it, I’ll be able to select one color and then another and another. It adds to what I’ve already selected. I’ll go ahead and click on the pink, red, and orange squares in the photo now. If I need to, I’ll move the fuzziness slider to make my selections more sharp. I’ll then click on the OK button when I’m happy with my selection.
NOTE: If I see that random areas of the image are being selected as I click, I can check the Localized Color Clusters box to limit the reach of each click (selection).
If I return to the regular Hue/Saturation Properties panel and push the Saturation slider all the way to the left, I’ll see everything in the image become grayscale while the areas I selected will stay saturated. Pretty cool.
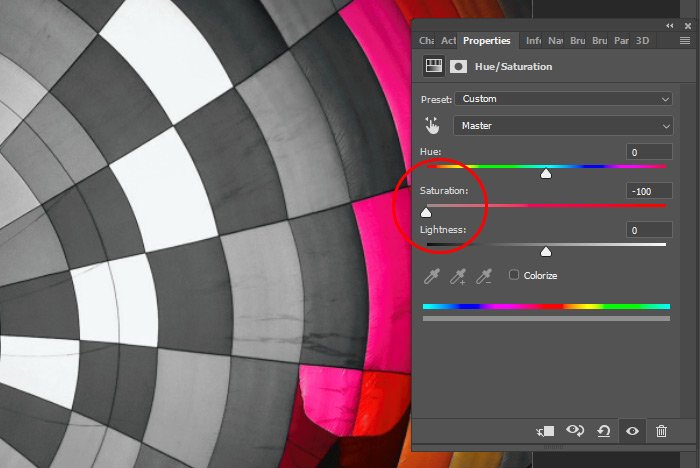
This is what I have as a result so far.
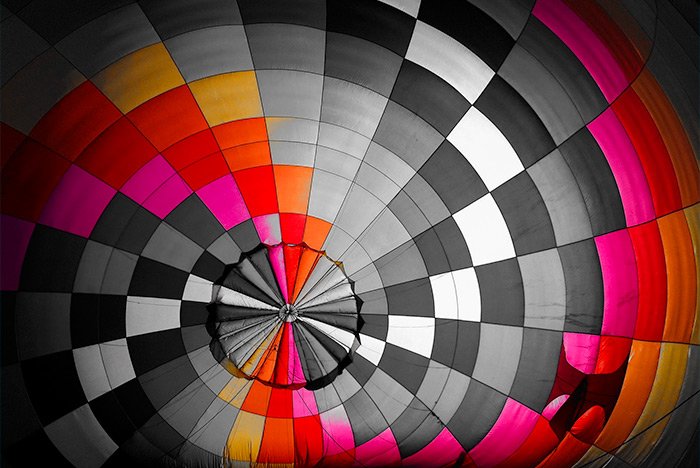
To see a larger view of the mask, I’ll hold down the Alt (Option on Mac) key on my keyboard and then click once on the mask thumbnail in the Layers panel. Check this out.
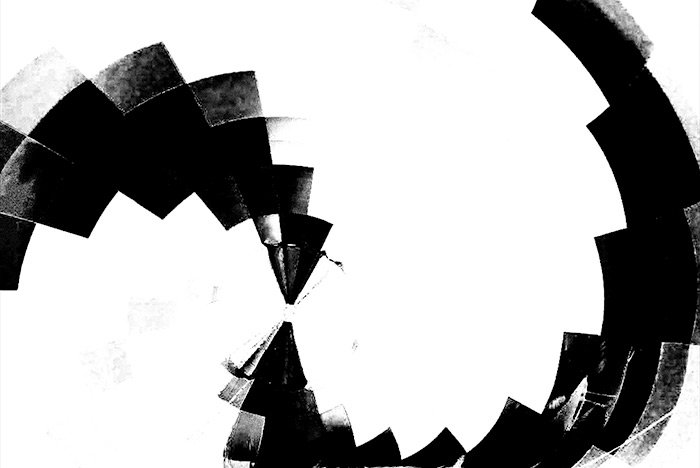
Next, I’ll use my Brush Tool that’s been sized appropriately with the colors of white and black to either remove black from areas it’s not supposed to be and to add it to areas it is supposed to be. Basically, anything that’s gray and supposed to be black, I’ll color over with black so I get the full saturation I’m after.
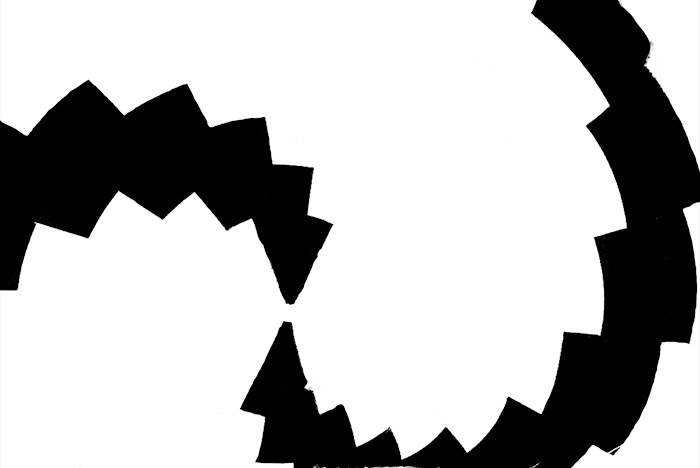
This is the cleaned up version of the mask.
And here’s the final version of the photograph.
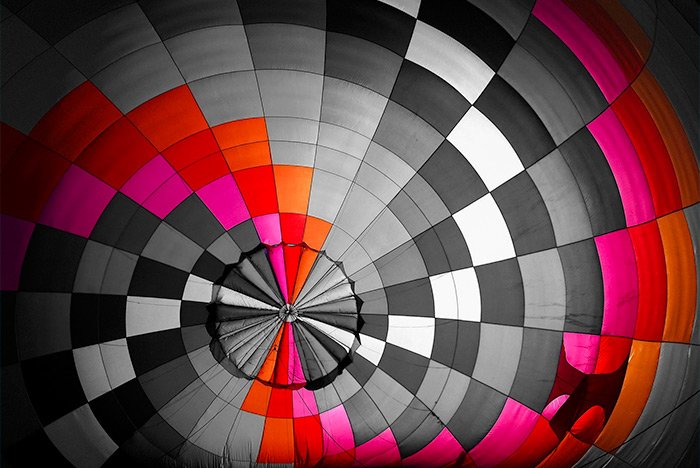
As you can see, the Color Range selection tool can help out a lot when it comes to making selections based on color. Also, if you want to get creative with your selections like I did today, you can combine the Color Range tool with a mask and completely change the appearance of a photograph.
I hope I taught you something new in this post. If you have any questions, please ask in the comment section down below or in the Photoshop section of the user’s forum. Thanks for reading!
In today’s post, I’m going to work through a quick project in Photoshop that will hopefully give you some ideas for your own projects in the future. I’ll show you how to apply the Hue/Saturation adjustment and then how to use the Color Range tool inside the Masks panel to choose just the color you either want to keep saturated or make desaturated. I’ll then show you how to desaturate the colors you want to fade away, which will make the other saturated colors really pop. This will be a fun post and again, I hope you learn something from it.
Demo Photo
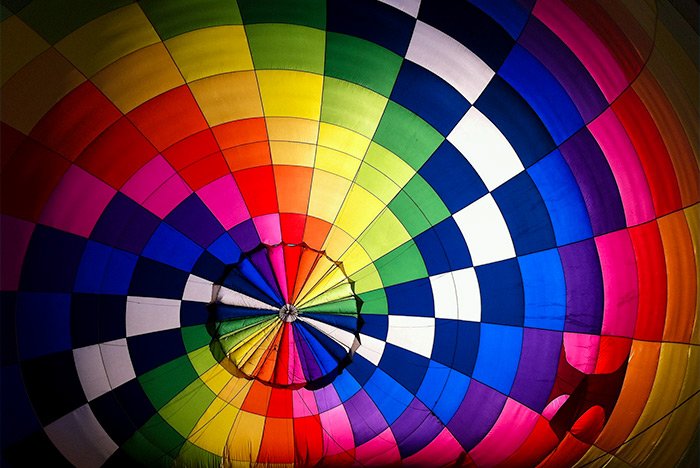
Take a look at this image. I’d like to make it so only the pinks, reds and oranges are saturated, while everything else is desaturated. Can you imagine trying to select or paint these colors for use with a mask to change their saturation values? That’s not something I’d want to get myself involved in. Luckily, there’s a better way.
Adding the Hue/Saturation Adjustment Layer
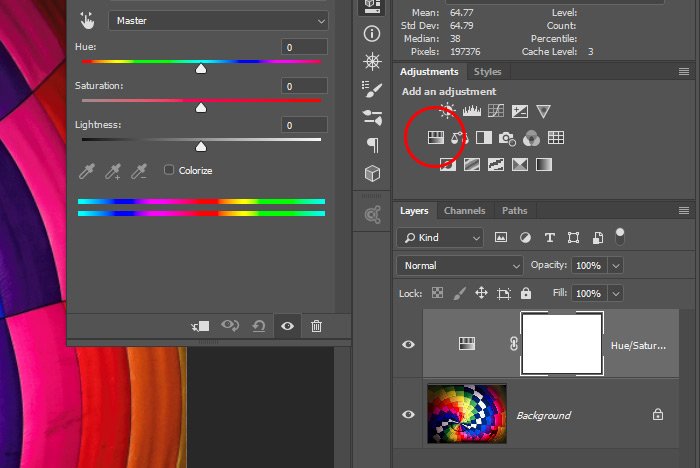
I’ve already got the image I’ll be working on open in Adobe Photoshop. The next step I’ll take will be to apply the Hue/Saturation adjustment layer. To do this, I’ll click on the Hue/Saturation icon in the Adjustments panel, which will, in turn, add that adjustment layer to the Layers panel. Take a look.
Choosing the Color Range
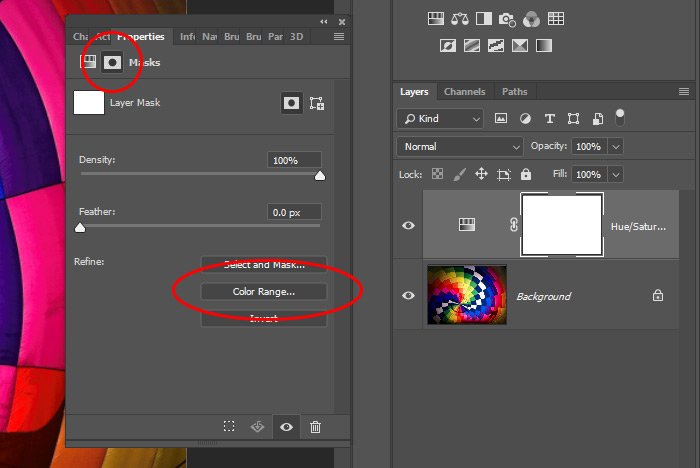
Now, I’ll click on the Masks tab in the Properties panel that appeared after I applied the adjustment layer. And then from there, I’ll click the Color Range button.
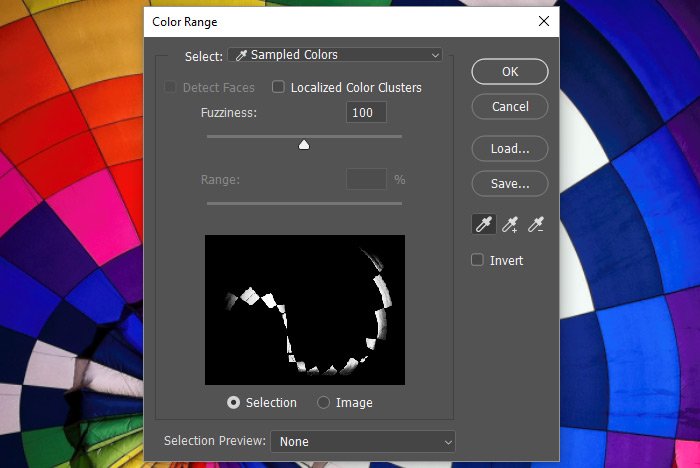
When I click the Color Range button, the Color Range dialog box will appear.

In the above screenshot, you can see that I already clicked on the color pink. Basically, when this dialog box appears, the mouse turns into a dropper that selects the color you want. Since I already clicked on pink, I’ll need to switch from a “one use” dropper to a “cumulative” dropper.

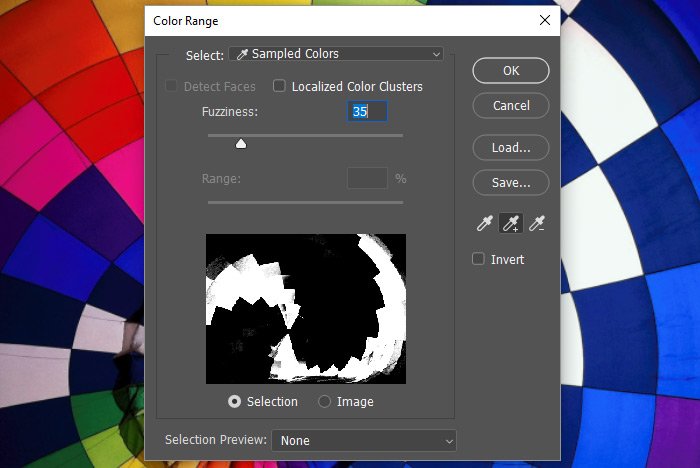
By using this cumulative eyedropper version with the small + (plus) mark next to it, I’ll be able to select one color and then another and another. It adds to what I’ve already selected. I’ll go ahead and click on the pink, red, and orange squares in the photo now. If I need to, I’ll move the fuzziness slider to make my selections more sharp. I’ll then click on the OK button when I’m happy with my selection.
NOTE: If I see that random areas of the image are being selected as I click, I can check the Localized Color Clusters box to limit the reach of each click (selection).

Inverting the Selection
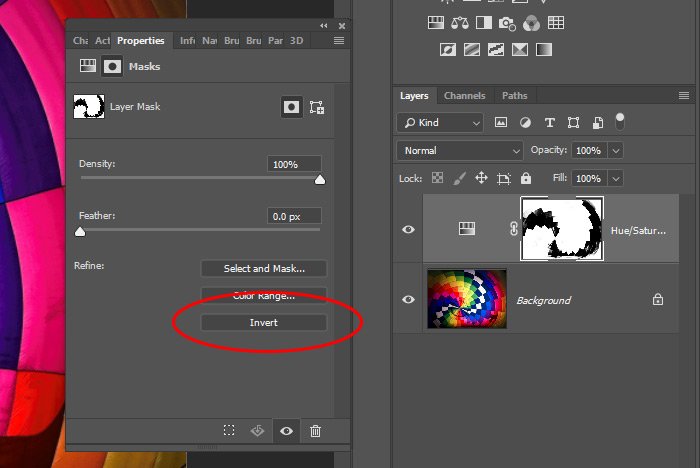
Okay, this is the tricky part. If I look at the mask thumbnail that’s in the Layers panel, I’ll see that my selected areas are white while the areas that weren’t selected are black. Since this is a mask, that means that the white areas will be affected by the adjustment layer and the black areas won’t be. Since I’m using this adjustment to desaturate, I’d like to reverse the effects of the mask. I want the selected areas to stay saturated and the areas that weren’t selected to become desaturated. To make this happen, I’ll click the Invert box in the Properties panel.
If I return to the regular Hue/Saturation Properties panel and push the Saturation slider all the way to the left, I’ll see everything in the image become grayscale while the areas I selected will stay saturated. Pretty cool.

This is what I have as a result so far.

Cleaning Up the Mask
While the Color Range selection method can save tons of time, it’s not perfect. Sometimes when using this method, it’s necessary to go back into the mask afterwards and clean things up. This is what I’ll do now. As you can see in the image directly above, there are some squares that need filling in or color removal.To see a larger view of the mask, I’ll hold down the Alt (Option on Mac) key on my keyboard and then click once on the mask thumbnail in the Layers panel. Check this out.

Next, I’ll use my Brush Tool that’s been sized appropriately with the colors of white and black to either remove black from areas it’s not supposed to be and to add it to areas it is supposed to be. Basically, anything that’s gray and supposed to be black, I’ll color over with black so I get the full saturation I’m after.
This is the cleaned up version of the mask.

And here’s the final version of the photograph.

As you can see, the Color Range selection tool can help out a lot when it comes to making selections based on color. Also, if you want to get creative with your selections like I did today, you can combine the Color Range tool with a mask and completely change the appearance of a photograph.
I hope I taught you something new in this post. If you have any questions, please ask in the comment section down below or in the Photoshop section of the user’s forum. Thanks for reading!
