Newman
Member
- Joined
- May 11, 2021
- Messages
- 106
- Reaction Score
- 0
- Points
- 23
- #1
When I think about the depth of Adobe Photoshop, I sometimes can’t believe what it’s capable of doing. For so many people, Photoshop is merely an application that enhances photographs so they look a little better than they did when they came out of the camera. For others though, Photoshop is a full-fledged photo and graphics application that has the ability to tackle almost any project. While I’ll admit that I mostly use this application for photo editing and manipulation, I do also use it for graphics at times. It’s actually quite functional as a graphics tool. The thing is, to take advantage of it for this type of use, editors need to learn an entirely new basket of skills.
In today’s post, I’d like to touch on a few of those skills. I’ll begin with a very simple guide setup and then I’ll move into the creation of a shape. After that, I’ll show you some very cool tricks that will help when it comes to duplicating the shape and finally, I’ll demonstrate how you can use the shapes to “cut out” part of the background photo that I’ll be using for this tutorial. This may be brand new material for some of you, so I’m excited to share it. My favorites are the quick tips. I always love sharing those.
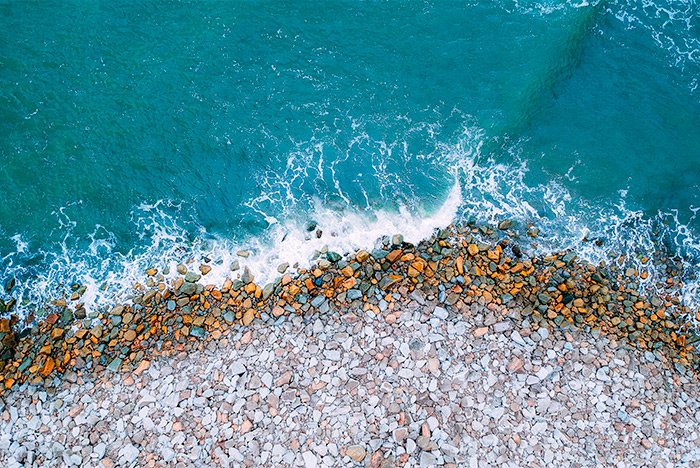
Here’s the photo.
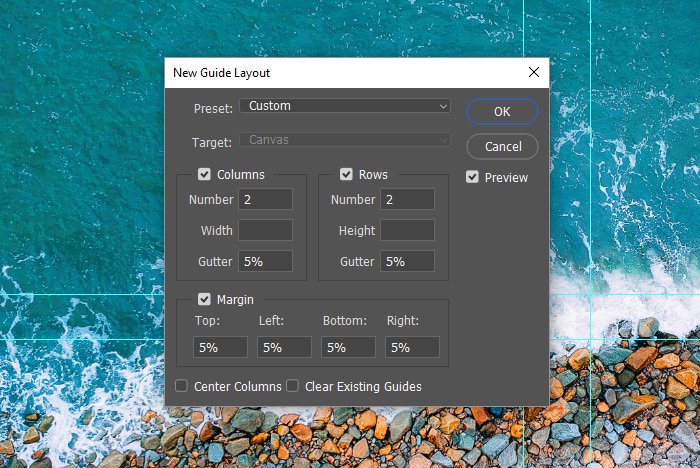
When the New Guide Layout dialog box appears, I’ll make a few settings. I’ll choose Custom from the Preset drop-down and then I’ll set it so I’ll have two Rows and two Columns with a Gutter and Margin of 5%. When I’m finished inserting those values, I’ll click the OK button to accept them.
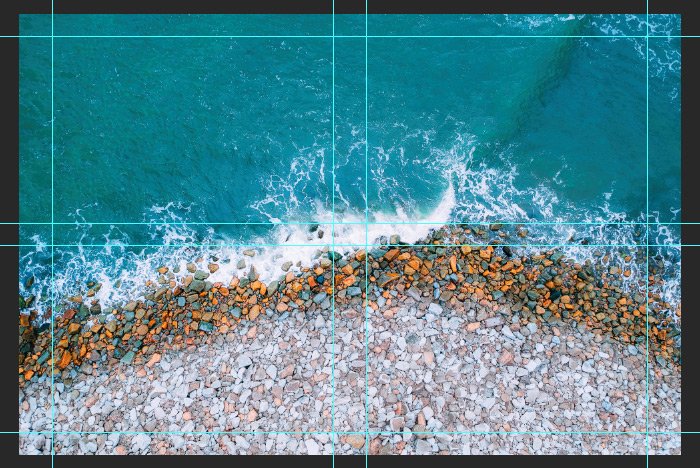
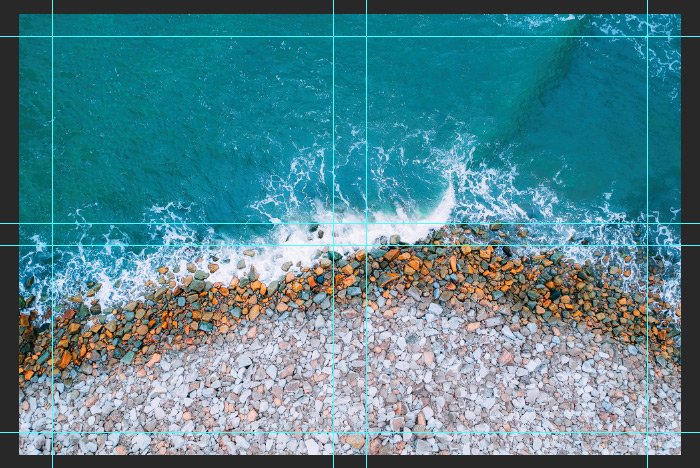
This is what the guide layout looks like.
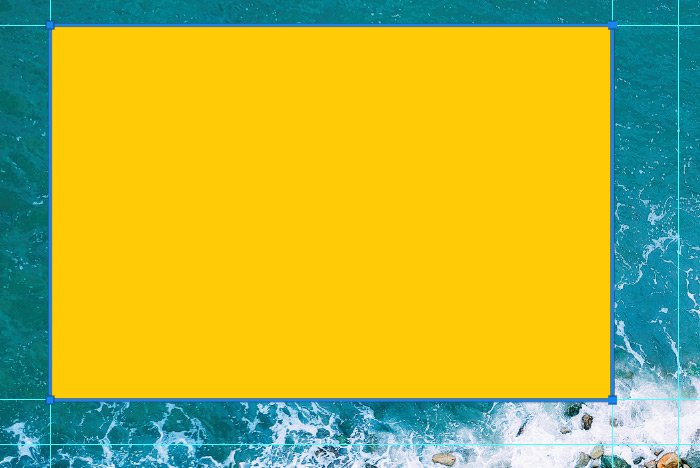
This is what the shape looks like in the upper left guide area.
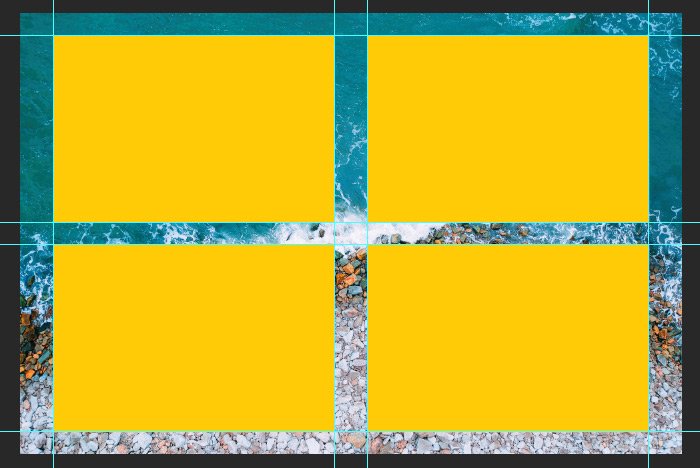
The best way to duplicate a layer during a project such as the one I’m undertaking today is to go out in to the work space and hold down the Alt key on your keyboard. After that, simply click and drag the layer you’d like to duplicate and you’ll see that new duplicate be created out of thin air. It’s a neat little trick. I’ll do that right now and I’ll drag the new shape over to the right, so both upper boxes are filled in with shapes.
Next, I’d like to fill in the two bottom areas with shapes as well. Since I already have two up above, I’ll go into the Layers panel and select to highlight both of the shape layers. Then, I’ll go back out into the workspace and hold the Alt key again and drag one of the shapes downward. I’ll see that two duplicates are created and I’ll move them to the bottom areas that need to be filled in. This is what things will look like.
This is the result when I do this.
So basically, if I place an image or a layer on top of a shape and then create a clipping mask, that image will take the form of the shape. Pretty cool.
To change the background from transparent to white, I’ll create a new layer and drag it all the way to the bottom of the stack. Then, I’ll use the Paint Bucket Tool to pour white into the layer.
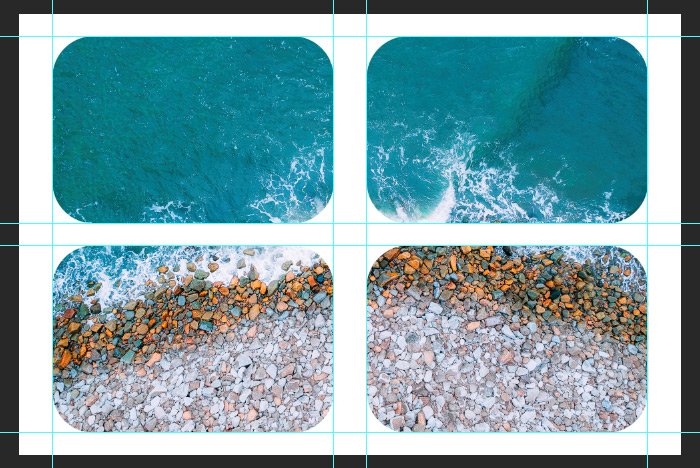
After I do that, I’ll press Enter on my keyboard and I’ll watch as the corners of the rectangle are rounded. Then, I’ll close the tab I’m in. I’ll save the file, which will close it out and when I look at the original document, I’ll see that not only the one rectangle has been rounded, but all four of them have been rounded. Take a look.
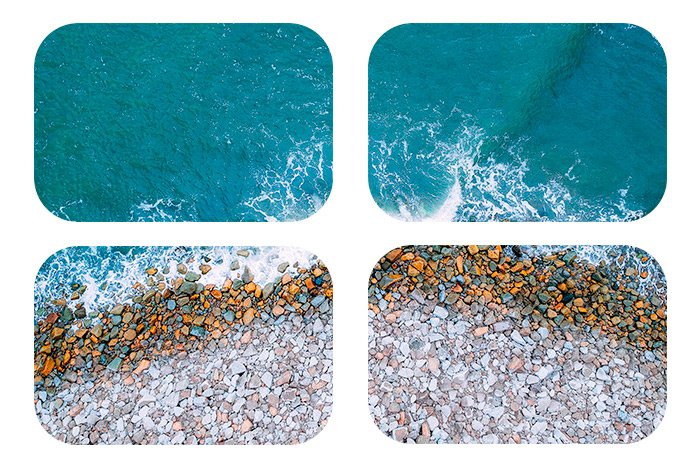
Have you ever seen artwork hanging on the wall that looks like this? It’s a pretty good idea. I’ve seen this style a bunch. I could have just as easily clipped four different images, so each one had a corner. That would have been nice too.
I hope that I clearly explained how to use shapes, Smart Objects, clipping masks and the Properties panel to create a unique appearance for a photograph. If you have any questions about this process or about this post, please let me know in the comment section below or in the Photoshop discussion forum. Thanks for reading!
In today’s post, I’d like to touch on a few of those skills. I’ll begin with a very simple guide setup and then I’ll move into the creation of a shape. After that, I’ll show you some very cool tricks that will help when it comes to duplicating the shape and finally, I’ll demonstrate how you can use the shapes to “cut out” part of the background photo that I’ll be using for this tutorial. This may be brand new material for some of you, so I’m excited to share it. My favorites are the quick tips. I always love sharing those.
Demo Photo
You’ll see below that it really doesn’t matter what photo I use for this post. Any will do. I thought that using a pretty one would be better though, since I’ll be looking at it for an hour or so as I write this post. The entire purpose of what I hope to accomplish is to show you that Photoshop can help you transform an image into a shape of your choosing. I’m simply going to jazz things up a bit by multiplying those shapes a few times.Here’s the photo.

Setting Up Guides
I’ve got the image opened up in Photoshop already, so the very first thing I’ll do is to create a new guide layout. These guides will help me create my shapes in the next steps and then duplicate them layer on. To create the guides, I’ll visit the View > New Guide Layout menu item and click.
When the New Guide Layout dialog box appears, I’ll make a few settings. I’ll choose Custom from the Preset drop-down and then I’ll set it so I’ll have two Rows and two Columns with a Gutter and Margin of 5%. When I’m finished inserting those values, I’ll click the OK button to accept them.

This is what the guide layout looks like.

Creating a Shape
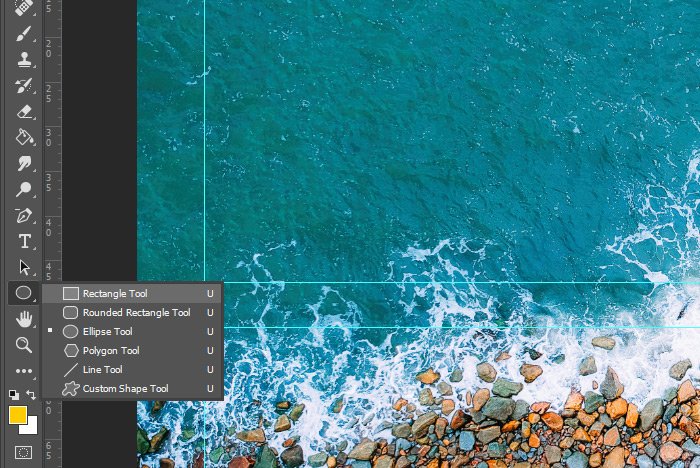
For the next step, I’ll use a shape to fill in one of the areas I just made with the guides. I’ll activate the Rectangle Tool over in the left toolbar and with any color I’d like, I’ll trace the upper left box with it. There should be no stroke value and again, it really doesn’t matter what color the shape is.
This is what the shape looks like in the upper left guide area.

Converting to Smart Object
Because of a step I need to do down below, the shape I just made needs to be converted into a Smart Object. Do accomplish this, I’ll right click on the shape layer in the Layers panel and select Convert to Smart Object from the menu that appears.Duplicating the Shape
In this section, I’ll show you two very cool tricks that will make duplicating layers so much easier for you in the future. As you may already know, you can click and drag a layer in the Layers panel down to the Create a New Layer icon and it will be duplicated that way. Another way to duplicate a layer is to click to select the layer and then use Ctrl or Command on your keyboard and the letter J. So, the keyboard shortcut would be Ctrl+J and you’ll get a duplicate that way as well.The best way to duplicate a layer during a project such as the one I’m undertaking today is to go out in to the work space and hold down the Alt key on your keyboard. After that, simply click and drag the layer you’d like to duplicate and you’ll see that new duplicate be created out of thin air. It’s a neat little trick. I’ll do that right now and I’ll drag the new shape over to the right, so both upper boxes are filled in with shapes.
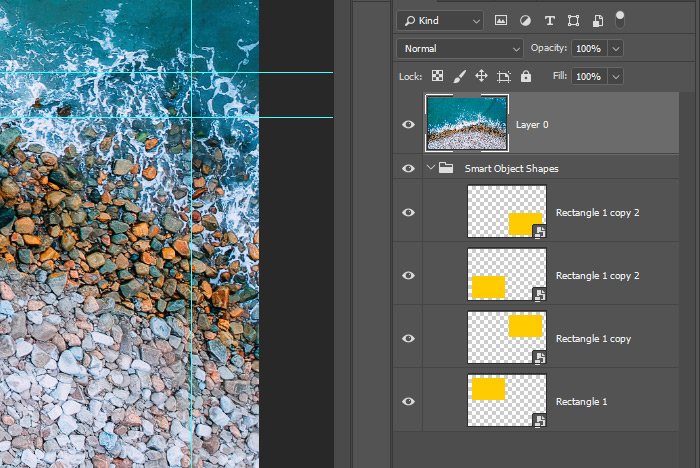
Next, I’d like to fill in the two bottom areas with shapes as well. Since I already have two up above, I’ll go into the Layers panel and select to highlight both of the shape layers. Then, I’ll go back out into the workspace and hold the Alt key again and drag one of the shapes downward. I’ll see that two duplicates are created and I’ll move them to the bottom areas that need to be filled in. This is what things will look like.

Grouping the Smart Objects
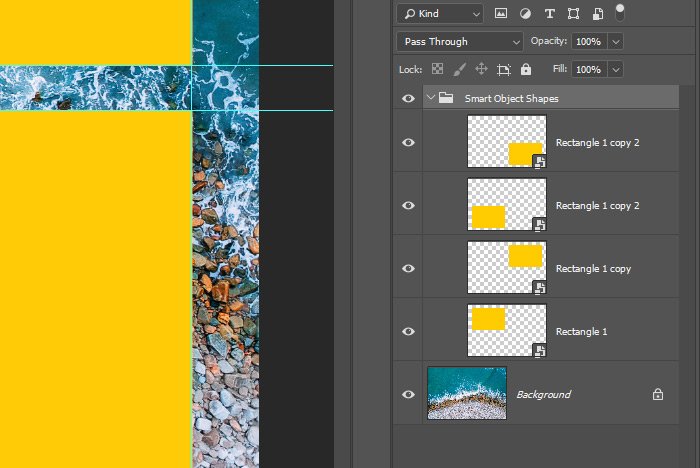
Now that I have all the shape layers I’ll need, I’d like to group them in the Layers panel. This is easy to accomplish. All I need to do is select to highlight each Smart Object layer and then use the keyboard shortcut of Ctrl+G. That will automatically create a group with the layers in it.
Moving the Photo Layer
I’ll need to create a mask in the next step with the image layer, so before I do that, I’ll need to reorder the layers in the Layers panel. The first thing I’ll need to do is unlock the background photo layer by clicking either the lock icon in the layer itself or the one that’s up above the layers. They both do the same thing. As long as the lock icon isn’t visible in the layer, I’m good. After that, I’ll hold down the Ctrl key on my keyboard and then I’ll push the right bracket key a few times until the photo layer is all the way at the top of the stack. I don’t want this layer inside of the group though. I want it above it. So again, the keyboard shortcut is Ctrl+].
Creating a Clipping Mask
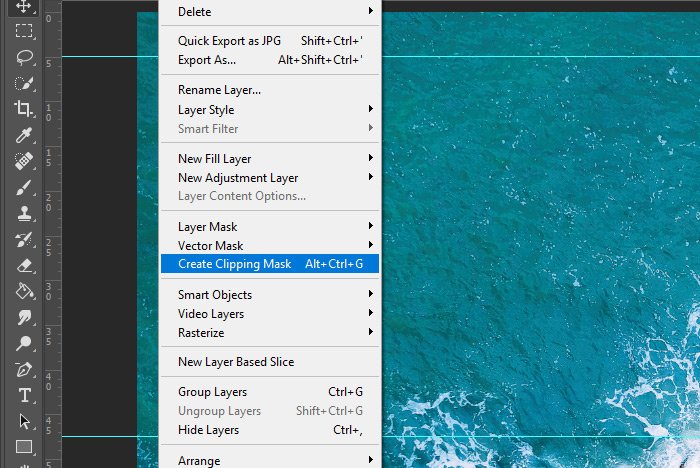
The next step is to create a clipping mask, so the photo shows in the form of the shapes only. To create this mask, I’ll head up to the Layer > Create Clipping Mask menu item and click.
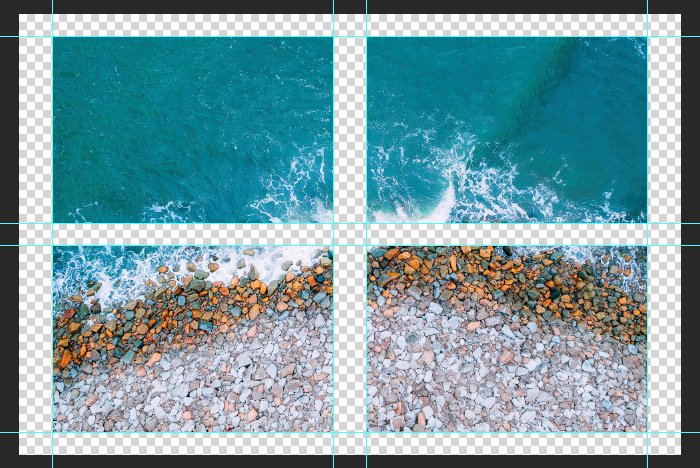
This is the result when I do this.

So basically, if I place an image or a layer on top of a shape and then create a clipping mask, that image will take the form of the shape. Pretty cool.
To change the background from transparent to white, I’ll create a new layer and drag it all the way to the bottom of the stack. Then, I’ll use the Paint Bucket Tool to pour white into the layer.
Changing the Shape of the Rectangles
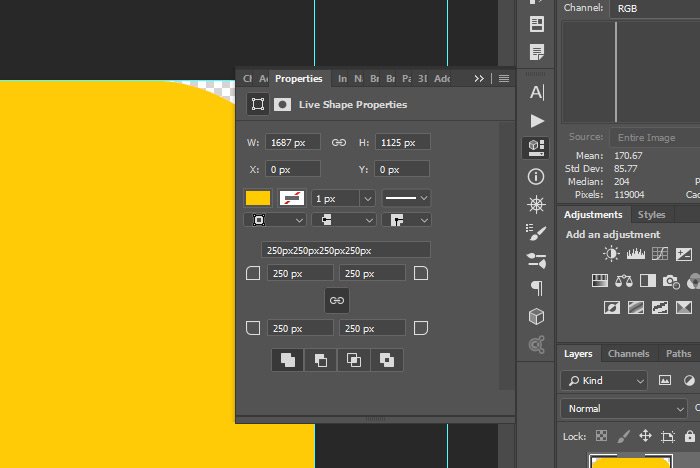
Since hard corners are harsh to look at, I’d like to round them a bit. To do this, I’ll double-click on the thumbnail of one of the shape layers to enter into the Smart Object itself. From there, I’ll open the shape’s Properties panel. Once inside, I’ll insert the value to 250px into one of the corner fields.
After I do that, I’ll press Enter on my keyboard and I’ll watch as the corners of the rectangle are rounded. Then, I’ll close the tab I’m in. I’ll save the file, which will close it out and when I look at the original document, I’ll see that not only the one rectangle has been rounded, but all four of them have been rounded. Take a look.

The Final Image
By the way, the keyboard shortcut for hiding the guides is Ctrl+;. That’s the Ctrl key plus the semicolon key. You can turn the guides on and off with that shortcut. Let’s take a look at the final image.
Have you ever seen artwork hanging on the wall that looks like this? It’s a pretty good idea. I’ve seen this style a bunch. I could have just as easily clipped four different images, so each one had a corner. That would have been nice too.
I hope that I clearly explained how to use shapes, Smart Objects, clipping masks and the Properties panel to create a unique appearance for a photograph. If you have any questions about this process or about this post, please let me know in the comment section below or in the Photoshop discussion forum. Thanks for reading!
