EmeraldHike
Member
- Joined
- May 10, 2021
- Messages
- 133
- Reaction Score
- 0
- Points
- 21
- #1
Lots of users take advantage of Adobe Photoshop for its photo editing capabilities. I’d say that I edit photos about 90% of the time in this application. There are many folks, however, who use Photoshop’s many graphics tools to draw and makes shapes and do all sorts of things. Since it’s a creative application, there is an endless amount of design that can stem from it.
Much of Photoshop’s drawing and shape creation abilities revolve around paths. I actually discussed paths a few other times on this blog as well as in my previous post, to be more precise. Paths can do all sorts of things and are amazing little creatures, so if you’d like to create your own art, I encourage you to read up on this topic.
In today’s post, I’d like to show you how to align paths in Adobe Photoshop. This won’t take long at all since it’s an easy maneuver, but it’s a critical step in making your creations look presentable. I can’t even tell you how many times I’ve had to align things in this program. Trust me when I say this; it’s not fun eyeballing it. Pressing a arrow keys over and over again in an attempt to get things just right. That’s a silly way of doing things, so I’ll demonstrate a much better one.
Once I have the tool active, I’ll make sure the Path option is selected in the drop-down in the options bar and then I’ll hold down the Shift key on the keyboard to constrain the shape’s proportions. Finally, I’ll click and drag so the triangle is a few inches across.
Then, to duplicate the triangle twice more, I’ll hold down the Alt key on my keyboard and click and drag while using the Path Selection Tool.

Since I’d like to flip these two triangles over, I’ll take advantage of the Free Transform tool. I’ll use the keyboard shortcut of Ctrl+T to create the bounding box around the shapes and then I’ll right-click inside the bounding box and I’ll click Flip Vertical. This is what I’ll end up with.

When I’m finished with that, I’ll select only the top three triangles and then I’ll click on the Align Top Edges and then I’ll select the bottom two triangles and then click Align Bottom Edges. After that, all of the triangles will have been aligned properly.
To finish things up, I’ll apply a vector mask to the shapes. You can learn how to do that in this post.
Since that doesn’t look very good, I’ll add a background layer and some color to it. This is the final image.

And that’s it! Like I said, if you do any type of graphics, you’ll eventually need to align paths, so this is a good thing to learn. If you have any questions regarding this technique, please ask down below in the comment section or in the Photoshop discussion board. Thanks for reading!
Much of Photoshop’s drawing and shape creation abilities revolve around paths. I actually discussed paths a few other times on this blog as well as in my previous post, to be more precise. Paths can do all sorts of things and are amazing little creatures, so if you’d like to create your own art, I encourage you to read up on this topic.
In today’s post, I’d like to show you how to align paths in Adobe Photoshop. This won’t take long at all since it’s an easy maneuver, but it’s a critical step in making your creations look presentable. I can’t even tell you how many times I’ve had to align things in this program. Trust me when I say this; it’s not fun eyeballing it. Pressing a arrow keys over and over again in an attempt to get things just right. That’s a silly way of doing things, so I’ll demonstrate a much better one.
Drawing the Shapes
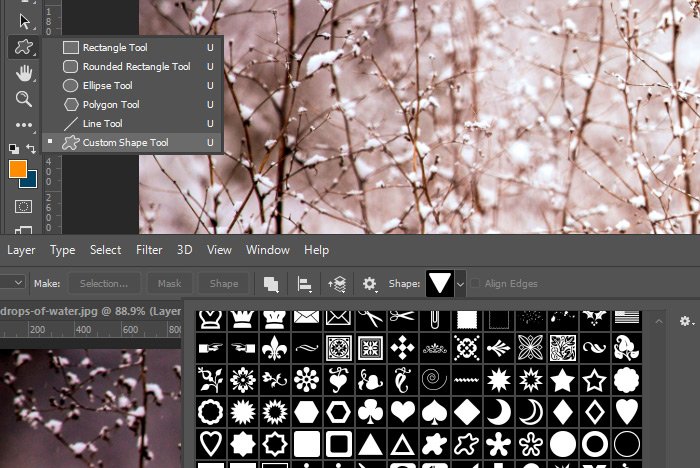
Today I’ll be using the Custom Shape Tool to draw five rounded triangles. I’ll click to activate the tool in the left toolbar and then I’ll head up to the options bar and choose the triangle I’m after.
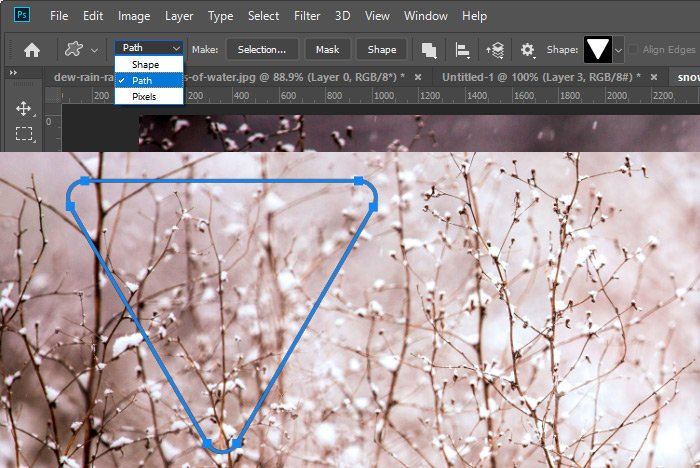
Once I have the tool active, I’ll make sure the Path option is selected in the drop-down in the options bar and then I’ll hold down the Shift key on the keyboard to constrain the shape’s proportions. Finally, I’ll click and drag so the triangle is a few inches across.

Then, to duplicate the triangle twice more, I’ll hold down the Alt key on my keyboard and click and drag while using the Path Selection Tool.

Flipping the Duplicates Vertically
I already have three triangles. I think I’ll make two more to fill in those empty spaces between the three. I’ll use the same method I used above to create those additional two. Then, I’ll select just those additional two by holding down the Ctrl (Command) button on my keyboard and clicking on them while using the Path Selection Tool. The anchor handles will appear when the triangles are selected.Since I’d like to flip these two triangles over, I’ll take advantage of the Free Transform tool. I’ll use the keyboard shortcut of Ctrl+T to create the bounding box around the shapes and then I’ll right-click inside the bounding box and I’ll click Flip Vertical. This is what I’ll end up with.

Distributing & Aligning the Shapes
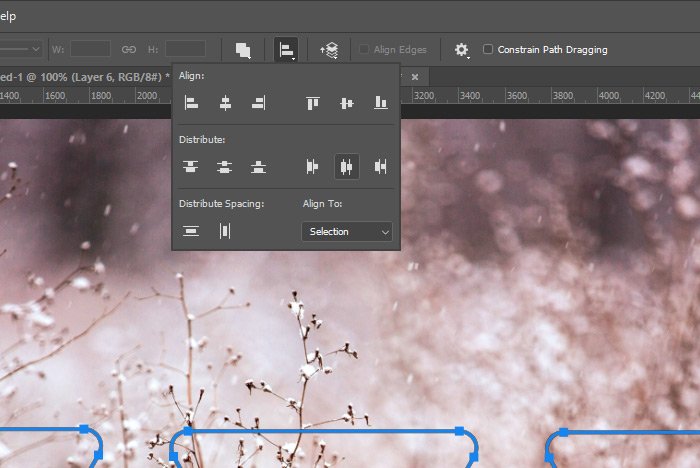
Now, to actually get to the point of this post, I’ll click on each triangle to select them all. Either that, or I’ll click and drag a box around the shapes with the Path Selection Tool. Either way, all of the shapes will be selected and active. To distribute the shapes equally across, I’ll go back up to the options bar and I’ll click on the Path Alignment drop-down. From there, I’ll click on the Distribute Horizontal Centers. This will space all of the shapes evenly.
When I’m finished with that, I’ll select only the top three triangles and then I’ll click on the Align Top Edges and then I’ll select the bottom two triangles and then click Align Bottom Edges. After that, all of the triangles will have been aligned properly.
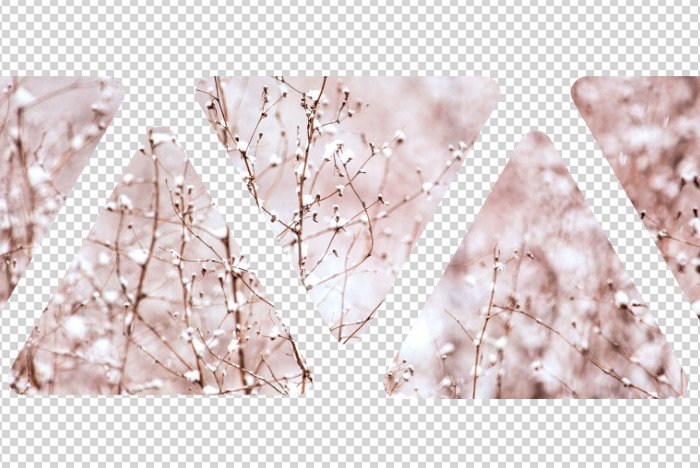
To finish things up, I’ll apply a vector mask to the shapes. You can learn how to do that in this post.

Since that doesn’t look very good, I’ll add a background layer and some color to it. This is the final image.

And that’s it! Like I said, if you do any type of graphics, you’ll eventually need to align paths, so this is a good thing to learn. If you have any questions regarding this technique, please ask down below in the comment section or in the Photoshop discussion board. Thanks for reading!
