KristinaW
Member
- Joined
- May 7, 2021
- Messages
- 127
- Reaction Score
- 0
- Points
- 18
- #1
I’ve been sitting at my desk messing around in Photoshop this morning and I think I found a pretty neat little type effect that can be used in many different situations. My original goal was much more complicated than what I ended up with and I’m happy about that (that it ended up less complicated). I much prefer simple things and if they can look as cool as what I managed to pull off, that’s all the better.
In today’s post, I’ll be using a long exposure photograph of sparks to create a selection. Then, I’ll apply that selection to the (random) word “Sparks” as a layer mask. From there, I’ll adjust the color of the text and invert the mask a few times to see the results. I may even create a new layer for the selection itself to see how it sits on top of the text. This is basically a continuation of my morning of experimentation, so I’m just going to keep it casual and have fun. Yes, this is what I do with my free time.
As I work through this project below, think about how you can apply the same technique to your own images. You may not like pictures of sparks and flame, but you may like smoke or plants or something much different like that. This technique is versatile, so you’re only limited by your imagination.
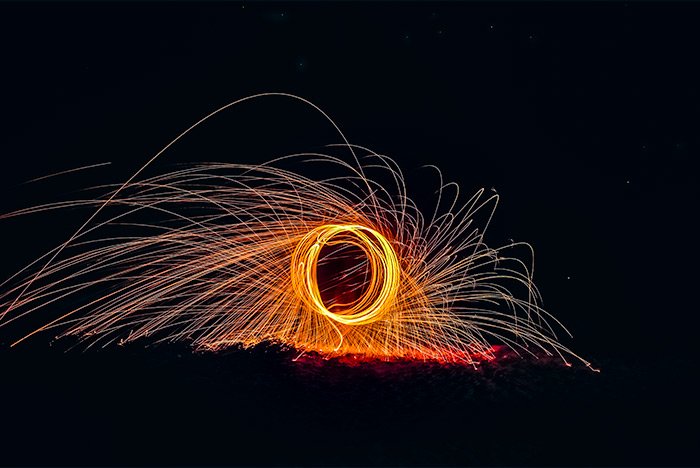
This is the original image I’ll be working with.
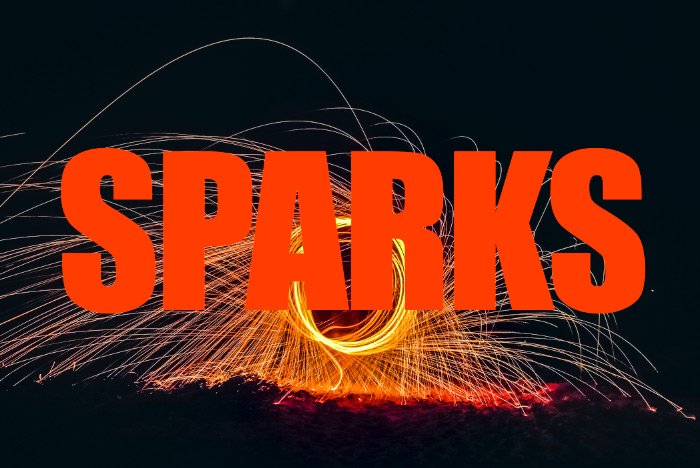
I’ll start off by typing out the word SPARKS in its own layer on top of the text.
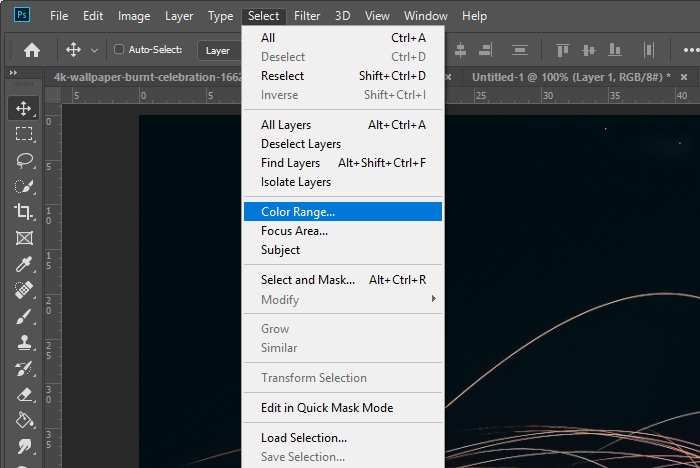
Then, I’ll turn off the visibility of the text by clicking on the layer eye icon in the Layers panel. After that, I’ll select the sparks photo layer again by clicking on it and then I’ll go to the Select > Color Range menu item and click.
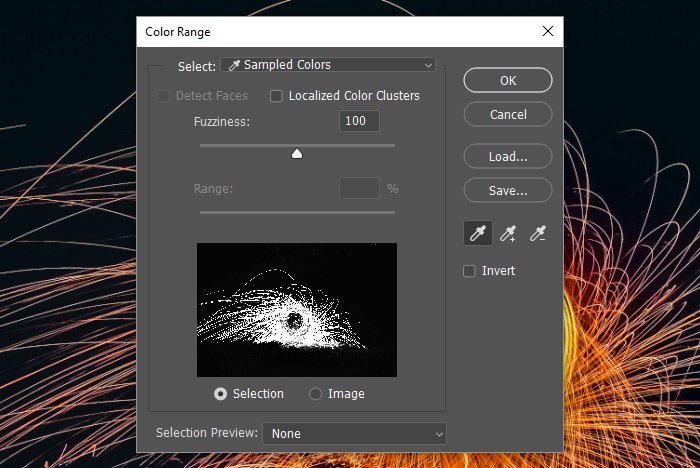
When the Color Range dialog appears, I’ll make sure the orange sparks are highlighted in white in the preview panel and then I’ll click the OK button to select them.
If you need help working with the color range selection tool in Photoshop, you can search for “Color Range” in the website search bar above. I’ve got lots of posts that cover this topic. Here’s one of them:
Changing Colors with Color Range Selection in Adobe Photoshop
Next, I’ll click the text layer eye icon again to make the text visible and then I’ll click on that text layer in the Layers panel to make it active. This is what the workspace looks like.
Then, I’ll click on the Add Layer Mask (which turns into Add Vector Mask because of the text application) icon at the bottom of the Layers panel. This is what the workspace will look like after I do this.
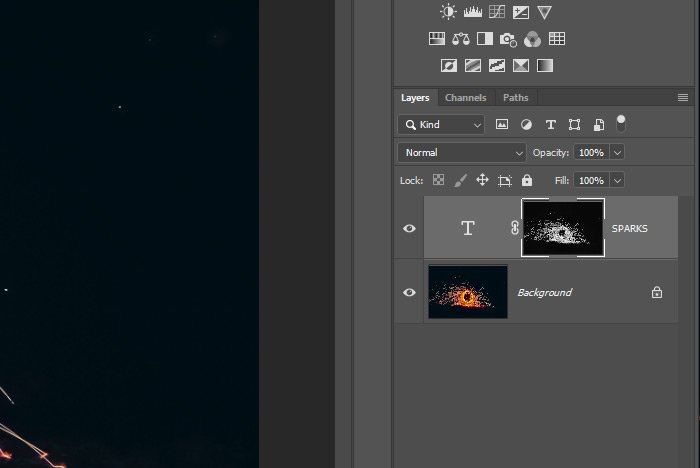
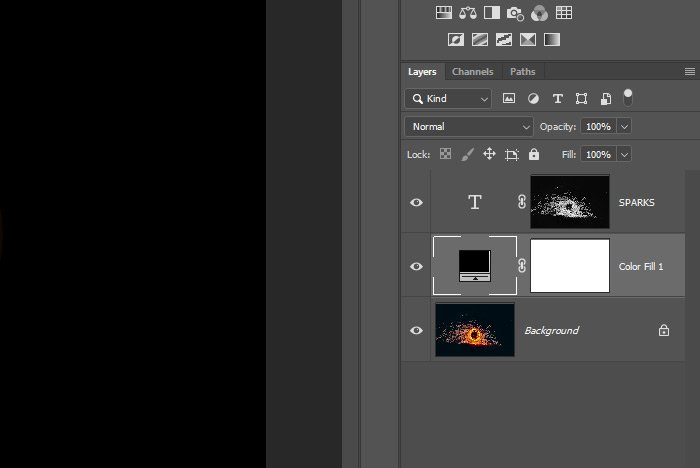
And this is what the Layers panel will look like.
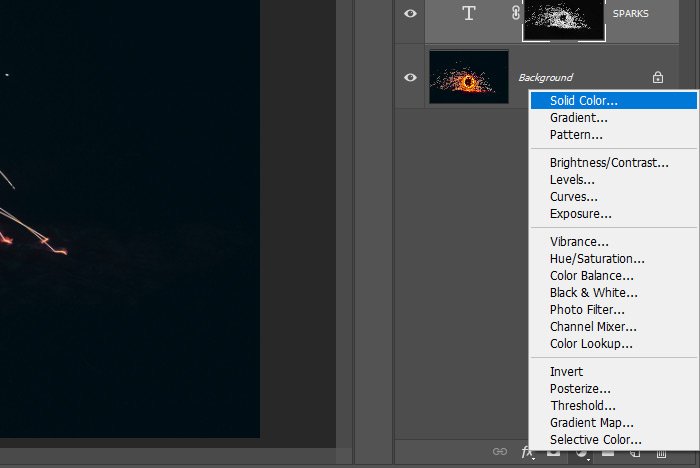
Since the background photo layer is still visible, I’ll add a new solid color layer in between the two existing layers to hide it. To do this, I’ll click the Add New Fill or Adjustment Layer button at the bottom of the Layers panel and in the menu that appears, I’ll choose the Add Solid Color option.
I’ll make sure the color is black and again, I’ll make sure this layer is above the background photo layer and beneath the masked text layer.
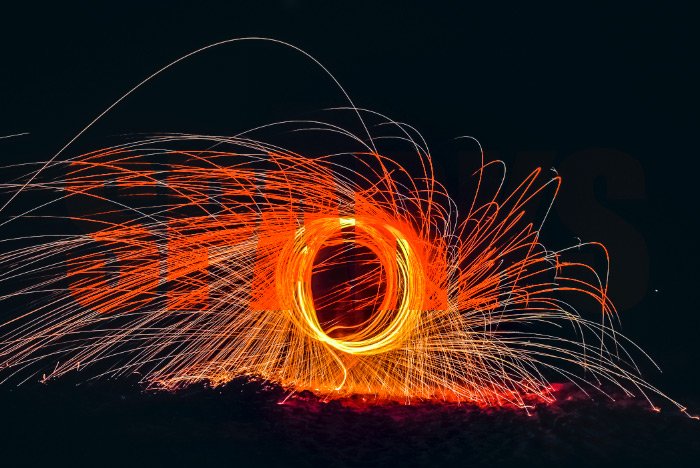
This is the result of my efforts so far.
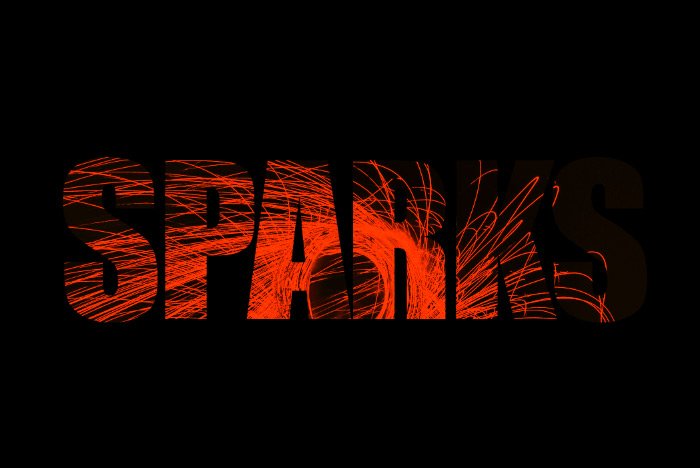
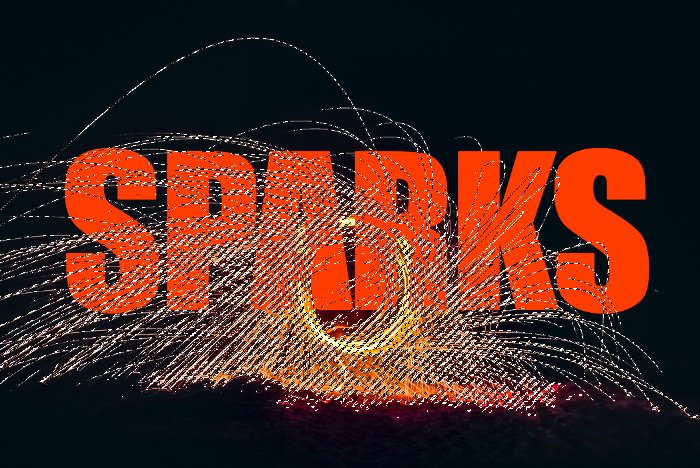
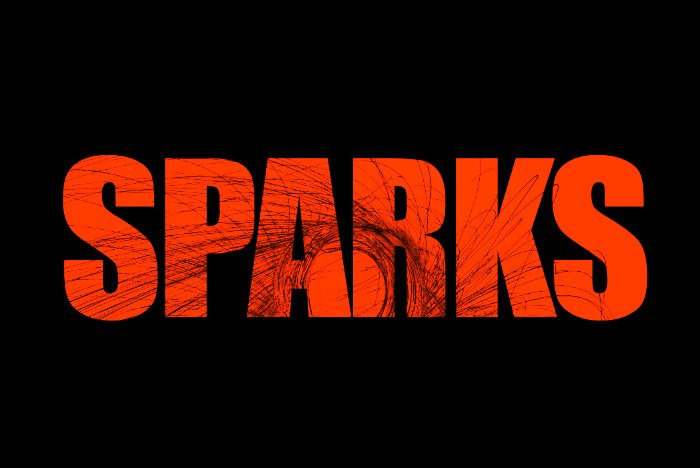
From here, I can begin to get even more creative. I can easily invert the layer mask to see the initial color of the text show through with the sparks as black. To invert the mask, I’ll click on it in the Layers panel to make it active and then I’ll use the keyboard shortcut of Ctrl+I. This is the result of doing that.
Finally, because it’s so easy to select these sparks using the Color Range command, I can hide all the layers except for the bottom photo layer and make the selection again. Once I have that, I’ll copy and paste it into a new layer with the Ctrl+C and Ctrl+V keyboard shortcuts. I’ll make sure this new layer is on the very top of the stack and then I’ll reveal all of the layers once more. This final effect makes things appear as if the sparks on in the foreground and the text is hovering in the background behind them. Take a look.
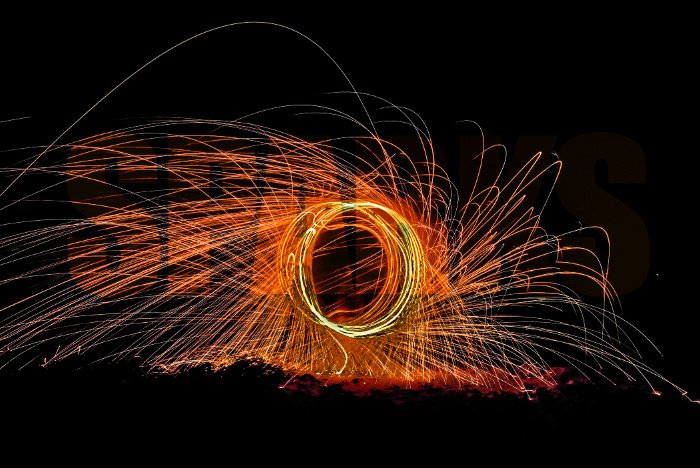
From here, I can change the color of the text, invert the mask and do any number of creative things to the elements I’ve created in the document. I’ll stop here though and let you continue on to come up with something fabulous. My work is done.
If you have any questions about this masking text effect in Adobe Photoshop, please let me know in the comment section below or in the Photoshop discussion board. Thanks for reading!
In today’s post, I’ll be using a long exposure photograph of sparks to create a selection. Then, I’ll apply that selection to the (random) word “Sparks” as a layer mask. From there, I’ll adjust the color of the text and invert the mask a few times to see the results. I may even create a new layer for the selection itself to see how it sits on top of the text. This is basically a continuation of my morning of experimentation, so I’m just going to keep it casual and have fun. Yes, this is what I do with my free time.
As I work through this project below, think about how you can apply the same technique to your own images. You may not like pictures of sparks and flame, but you may like smoke or plants or something much different like that. This technique is versatile, so you’re only limited by your imagination.
This is the original image I’ll be working with.

I’ll start off by typing out the word SPARKS in its own layer on top of the text.

Then, I’ll turn off the visibility of the text by clicking on the layer eye icon in the Layers panel. After that, I’ll select the sparks photo layer again by clicking on it and then I’ll go to the Select > Color Range menu item and click.

When the Color Range dialog appears, I’ll make sure the orange sparks are highlighted in white in the preview panel and then I’ll click the OK button to select them.

If you need help working with the color range selection tool in Photoshop, you can search for “Color Range” in the website search bar above. I’ve got lots of posts that cover this topic. Here’s one of them:
Changing Colors with Color Range Selection in Adobe Photoshop
Next, I’ll click the text layer eye icon again to make the text visible and then I’ll click on that text layer in the Layers panel to make it active. This is what the workspace looks like.

Then, I’ll click on the Add Layer Mask (which turns into Add Vector Mask because of the text application) icon at the bottom of the Layers panel. This is what the workspace will look like after I do this.

And this is what the Layers panel will look like.

Since the background photo layer is still visible, I’ll add a new solid color layer in between the two existing layers to hide it. To do this, I’ll click the Add New Fill or Adjustment Layer button at the bottom of the Layers panel and in the menu that appears, I’ll choose the Add Solid Color option.

I’ll make sure the color is black and again, I’ll make sure this layer is above the background photo layer and beneath the masked text layer.

This is the result of my efforts so far.

From here, I can begin to get even more creative. I can easily invert the layer mask to see the initial color of the text show through with the sparks as black. To invert the mask, I’ll click on it in the Layers panel to make it active and then I’ll use the keyboard shortcut of Ctrl+I. This is the result of doing that.

Finally, because it’s so easy to select these sparks using the Color Range command, I can hide all the layers except for the bottom photo layer and make the selection again. Once I have that, I’ll copy and paste it into a new layer with the Ctrl+C and Ctrl+V keyboard shortcuts. I’ll make sure this new layer is on the very top of the stack and then I’ll reveal all of the layers once more. This final effect makes things appear as if the sparks on in the foreground and the text is hovering in the background behind them. Take a look.

From here, I can change the color of the text, invert the mask and do any number of creative things to the elements I’ve created in the document. I’ll stop here though and let you continue on to come up with something fabulous. My work is done.
If you have any questions about this masking text effect in Adobe Photoshop, please let me know in the comment section below or in the Photoshop discussion board. Thanks for reading!
