WendyMay
Member
- Joined
- May 11, 2021
- Messages
- 142
- Reaction Score
- 0
- Points
- 21
- #1
Every graphics and photo editing application worth its salt includes some sort of feature that allows the user to save states, or progressions along their workflow. Camera Raw includes a feature called Snapshots and Lightroom offers Snapshots as well. In Photoshop, this feature is referred to as Layer Comps and to access its panel, all you need to do is visit the Window > Layer Comps menu item and click.
Basically, it works like this: Begin work on a project and every time you’d like to save a specific set of conditions, simply create a new layer comp, name it and save it. This is helpful for when you’re not sure if your continuation is the right thing to do. You can save your current state and then move on with your editing with confidence that your previous position was saved and easily accessible.
Designers also value this feature because they’re able to save one file with many different looks. If you’re using Photoshop as a presentation tool, it’s helpful to have multiple versions of the same file saved as layer comps. So, let’s say you have one file and inside of it, you have a shape. You can save the shape as yellow, red and green and then show those multiple versions to whoever is interested, without having to ever make any changes or having to open multiple files. It’s a great thing to be aware of.
I’ve gone ahead and created a graphics file with a few squares in it to use as a demonstration in this post. Here’s the graphic.

I’ll consider this one look of the file. To save this as a snapshot, state or, as they call them in Photoshop, a Layer Comp, I’ll open that panel as I described above. Once open, I’ll click the Create New Layer Comp button that’s located at the bottom of the panel. When the New Layer Comp dialog box appears, I’ll name this version of the file “Nine Red Squares.” Then, I’ll make sure the Visibility, Position and Appearance boxes are checked.
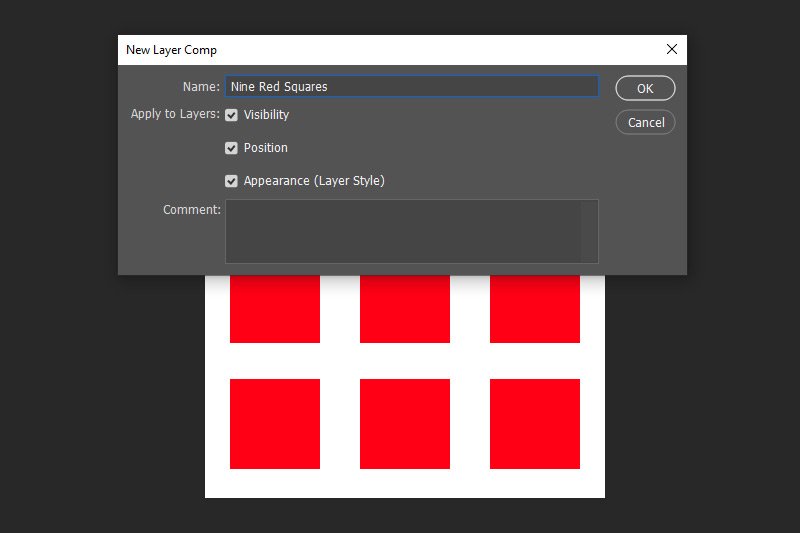
When finished, I’ll click the OK button and then move onto further changes.
Next, I’ll hide a few of the squares in the file as my second version.

Since this is my second version of the file, I’ll create a new Layer Comp, but this time, I’ll name it “Red Cross” and click the OK button to save it.
Finally, I’ll give the remaining red boxes some black strokes.
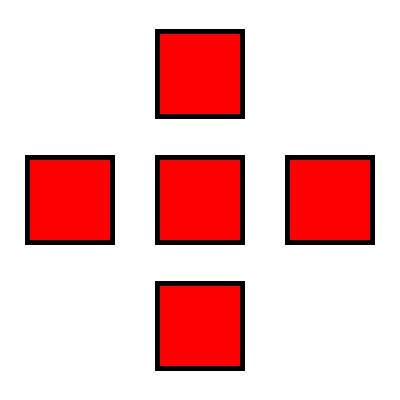
I’ll create my final Layer Comp and call this one “Red Squares – Black Strokes” and then I’ll click the OK button to save it out.
This is what the Layer Comps panel looks like at this point.
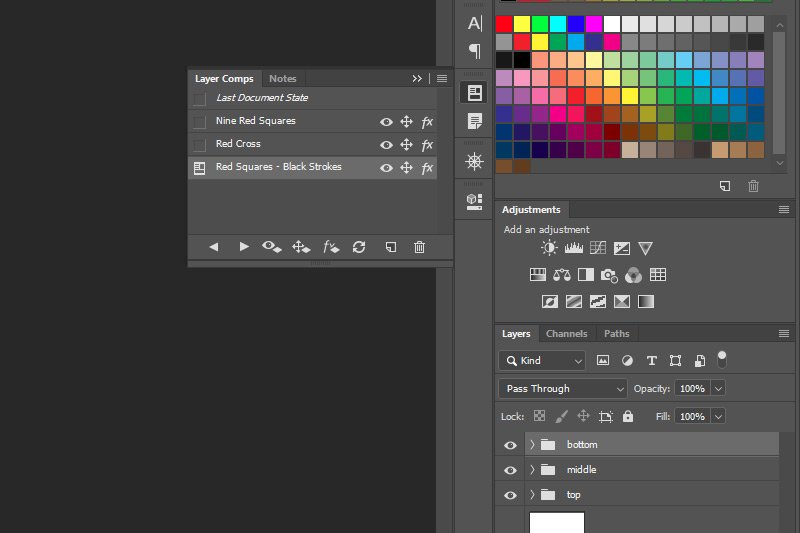
As you can see, there are three different states and each one has the name I gave it. So, if I was showing someone the multiple versions of this one file, all I would need to do is click on each state to snap back to that one. It’s that easy.
What do you think about these layer comps, or otherwise known as snapshots or states? Do you like them? Do you find them useful? I love them and I hope you do too.
Basically, it works like this: Begin work on a project and every time you’d like to save a specific set of conditions, simply create a new layer comp, name it and save it. This is helpful for when you’re not sure if your continuation is the right thing to do. You can save your current state and then move on with your editing with confidence that your previous position was saved and easily accessible.
Designers also value this feature because they’re able to save one file with many different looks. If you’re using Photoshop as a presentation tool, it’s helpful to have multiple versions of the same file saved as layer comps. So, let’s say you have one file and inside of it, you have a shape. You can save the shape as yellow, red and green and then show those multiple versions to whoever is interested, without having to ever make any changes or having to open multiple files. It’s a great thing to be aware of.
I’ve gone ahead and created a graphics file with a few squares in it to use as a demonstration in this post. Here’s the graphic.

I’ll consider this one look of the file. To save this as a snapshot, state or, as they call them in Photoshop, a Layer Comp, I’ll open that panel as I described above. Once open, I’ll click the Create New Layer Comp button that’s located at the bottom of the panel. When the New Layer Comp dialog box appears, I’ll name this version of the file “Nine Red Squares.” Then, I’ll make sure the Visibility, Position and Appearance boxes are checked.

When finished, I’ll click the OK button and then move onto further changes.
Next, I’ll hide a few of the squares in the file as my second version.

Since this is my second version of the file, I’ll create a new Layer Comp, but this time, I’ll name it “Red Cross” and click the OK button to save it.
Finally, I’ll give the remaining red boxes some black strokes.

I’ll create my final Layer Comp and call this one “Red Squares – Black Strokes” and then I’ll click the OK button to save it out.
This is what the Layer Comps panel looks like at this point.

As you can see, there are three different states and each one has the name I gave it. So, if I was showing someone the multiple versions of this one file, all I would need to do is click on each state to snap back to that one. It’s that easy.
What do you think about these layer comps, or otherwise known as snapshots or states? Do you like them? Do you find them useful? I love them and I hope you do too.
