Phoenix1
Member
- Joined
- May 7, 2021
- Messages
- 135
- Reaction Score
- 0
- Points
- 23
- #1
I’ve never been an expert when it’s come to how many bits I’m supposed to use when editing photographs. I know that JPEG images use 8 bits and my Canon T7i RAW images use 12 bits. For the uninitiated, 8-bit images offer 256 levels (shades of color) per channel and 16-bit images offer a staggering 65,536 levels per channel. For only an 8 bit increase, that’s a pretty big jump in quality.
Here, read this:
A bit is a computer term for data storage. It can only contain two values, typically 0 or 1. 8-bit simply means the data chunk is 8 bits in total (or 2 to the power of 8, as each bit can be either 1 or 0). This allows for numeric values ranging from 0 to 255.
Similarly 16-bit means the data size is 16 bits in total (or 2 to the power of 16). This allows for numeric values ranging from 0 to 65,535.
Changing Color Settings & Saving File Types in Adobe Photoshop
While I was led to believe that 16 bits of data would be ample for any type of photography I was ever to engage in, it’s come to my attention that folks out there who are “in the know” are using 32 bits for their HDR images. This comes just at the right time too because I’ve been taking lots of HDR images this autumn. I’ve been hiking all over the place up here in Maine and let me tell you, there has been no shortage of photo ops.
I usually perform all my HDR photo merges in Adobe Camera Raw. I’ve got that application set to use 16 bits, so my results have been very good. Since I’m always trying to expand my dynamic range though, when I heard about a method for combining images while using Photoshop and then setting the file to 32-bit, I jumped at the chance. I mean, why not? That’s got to offer the best of the best, right?
If you don’t yet know how to create an HDR photo in Camera Raw, you can read through this post. It’s a simple process that only takes a few steps.
How to Create an HDR Image in Adobe Camera Raw
In today’s post, I’d like to walk you through the process of using Adobe Photoshop to merge three photographs I took over this past weekend. I’ll show you a few different commands that will merge, align and output the images and then I’ll show you how you can jump right into Camera Raw for some final editing. This process is almost as simple as the Camera Raw exclusive one, but it’s sort of hidden. And the best part is that during one of the steps I’ll show you, it’s possible to change the images from 8 bit or 16 bit, to 32 bit. Think about the color range you can get from that!
Since landscape photography on sunny days is notoriously challenging, I decided to take three shots in quick burst mode with my camera while hiking on French’s Mountain in Rome, Maine. I set the camera to take the first shot at one stop underexposed, the second shot to normal exposure and the final shot to one stop overexposed. Here are the three photos, straight out of the camera with no editing at all.
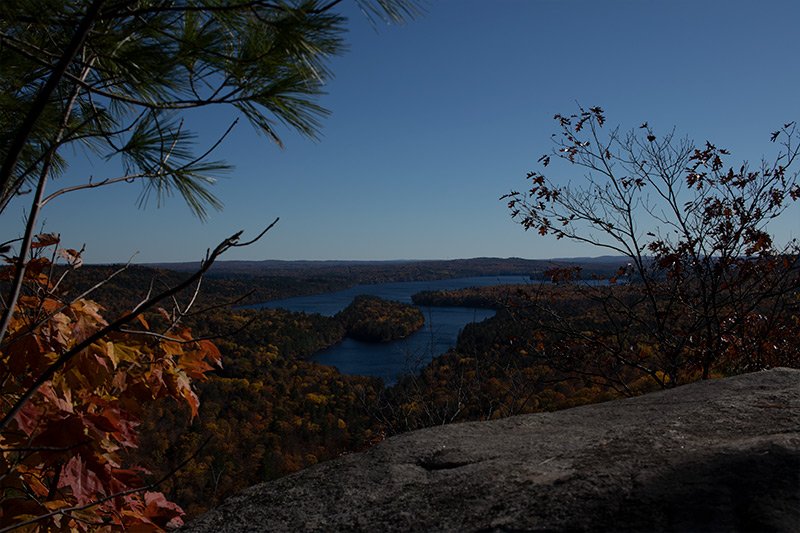
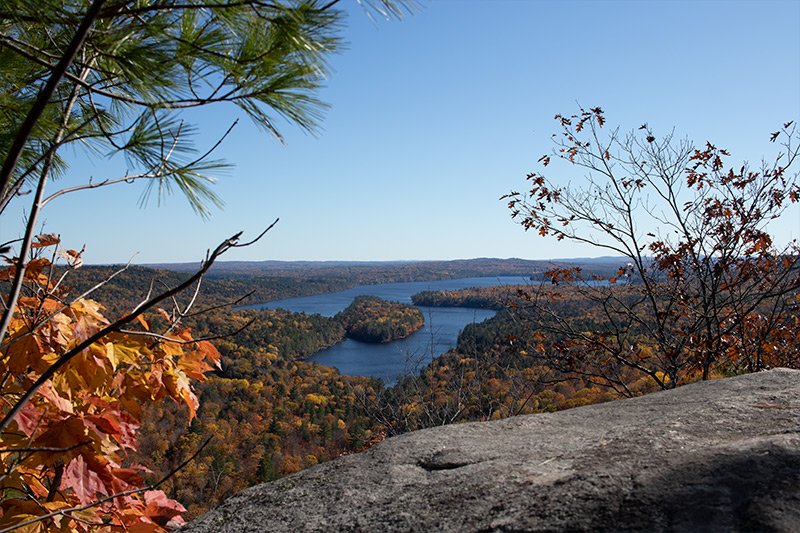
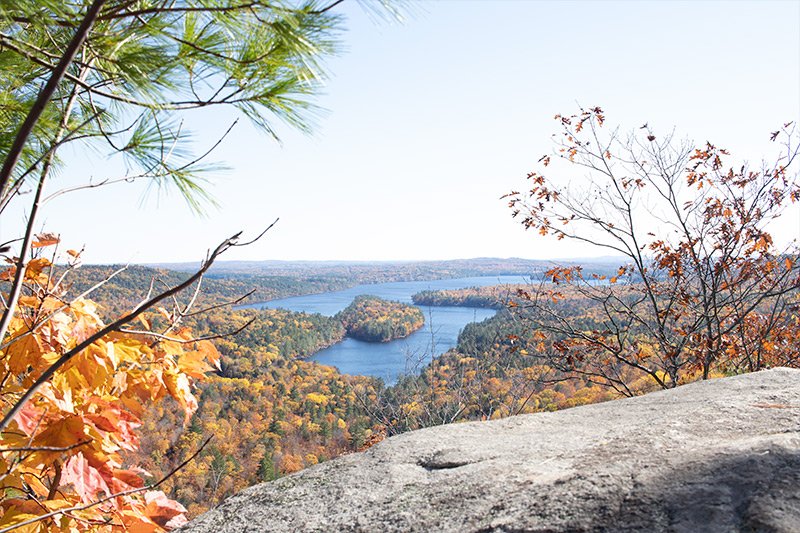
What generally occurs when attempting to capture one of these types of landscape photos is that either the sky comes out blown out too bright or the trees and leaves come out way underexposed and black. The camera has difficulty determining the best exposure values and even when you set those values using manual mode, the dynamic range is still too small. Merging multiple images in HDR format is almost a necessity. By the way, these photos are just a small sampling of the far too many that I took during our hike. Good thing I’ve got a big data card.
Let’s now walk through the process of using Photoshop to merge these images.
I’ll start off by opening Photoshop and then visiting the File > Automate > Merge to HDR Pro menu item and clicking.
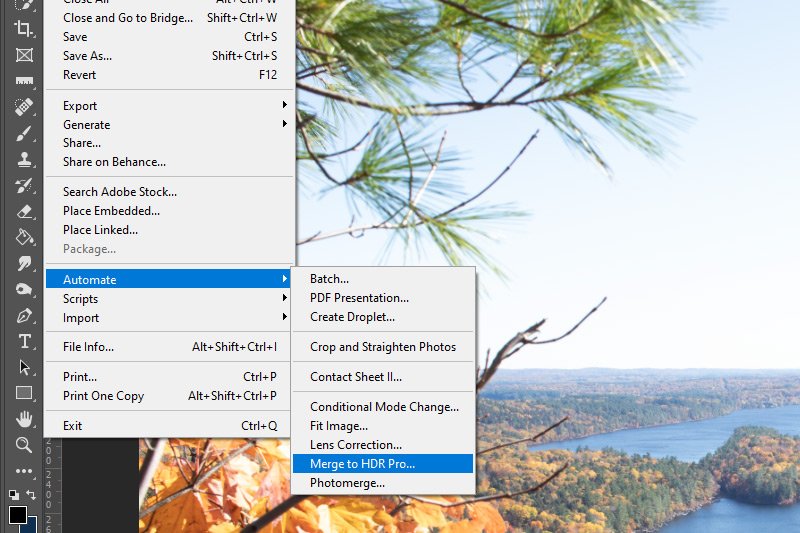
Also, just so you are aware, I already had Photoshop launched and had a photo opened in a tab. It’s not necessary to have any tabs opened before beginning this process. And actually, it’s better if you don’t have any of the source images opened in Photoshop before beginning this process. I’ve had strange results with one of my source images opened in Photoshop.
After I click the menu item, I’ll be presented with the Merge to HDR Pro dialog box. I”ll click the Browse button and then locate the three images I’d like to merge. After that, I’ll select the images and then click the OK button in the dialog box to begin the merging process.
NOTE: Before clicking the OK button, be sure to check the Attempt to Automatically Align Source Images box.
When the larger Merge to HDR Pro dialog window appears, I’ll choose the 32 Bit option from the drop-down box in the upper right corner.
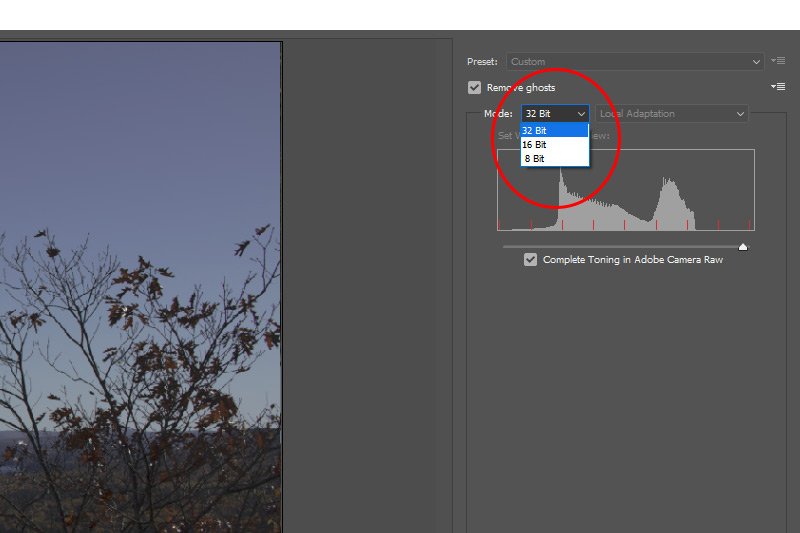
When I’m finished with that, I’ll click the Tone in ACR button down at the bottom. Each of these steps will take a few moments for Photoshop to complete, so be patient and don’t go clicking around in an attempt to make things faster. You’ll only slow them down. Eventually though, Camera Raw will launch, where you can edit the photo to your heart’s delight.
Once the image is in Camera Raw, you can do as you wish with it. I like to click the Auto button in the Basic panel as a starting point and then push some sliders from there, but you can do what makes your image look best. After I was finished with mine, I returned to Photoshop and this is my result.
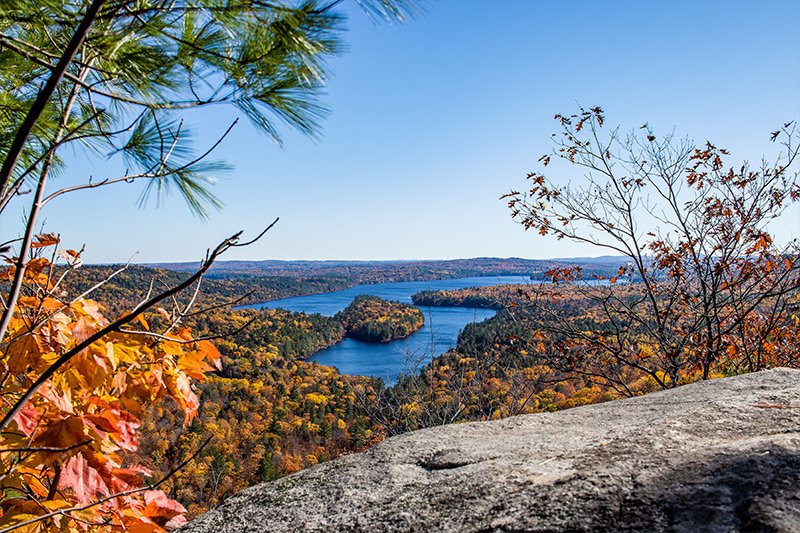
Really, the primary benefit of using this method is to save as much information from the photo as possible to use while editing later on. If you needed to edit in Photoshop to lift shadows or to reduce highlights in the HDR output photo, the data would still be captured in the image and you wouldn’t experience a reduction in quality. As far as this image stands, I can’t see too much of a difference between it and its 16-bit counterparts, so I’ll stay with my previous method unless I need to engage in some extensive editing. But definitely give this a try to learn it and get used to it. You never know, you may need it in the future. Thanks for reading!
Here, read this:
A bit is a computer term for data storage. It can only contain two values, typically 0 or 1. 8-bit simply means the data chunk is 8 bits in total (or 2 to the power of 8, as each bit can be either 1 or 0). This allows for numeric values ranging from 0 to 255.
Similarly 16-bit means the data size is 16 bits in total (or 2 to the power of 16). This allows for numeric values ranging from 0 to 65,535.
Changing Color Settings & Saving File Types in Adobe Photoshop
While I was led to believe that 16 bits of data would be ample for any type of photography I was ever to engage in, it’s come to my attention that folks out there who are “in the know” are using 32 bits for their HDR images. This comes just at the right time too because I’ve been taking lots of HDR images this autumn. I’ve been hiking all over the place up here in Maine and let me tell you, there has been no shortage of photo ops.
I usually perform all my HDR photo merges in Adobe Camera Raw. I’ve got that application set to use 16 bits, so my results have been very good. Since I’m always trying to expand my dynamic range though, when I heard about a method for combining images while using Photoshop and then setting the file to 32-bit, I jumped at the chance. I mean, why not? That’s got to offer the best of the best, right?
If you don’t yet know how to create an HDR photo in Camera Raw, you can read through this post. It’s a simple process that only takes a few steps.
How to Create an HDR Image in Adobe Camera Raw
In today’s post, I’d like to walk you through the process of using Adobe Photoshop to merge three photographs I took over this past weekend. I’ll show you a few different commands that will merge, align and output the images and then I’ll show you how you can jump right into Camera Raw for some final editing. This process is almost as simple as the Camera Raw exclusive one, but it’s sort of hidden. And the best part is that during one of the steps I’ll show you, it’s possible to change the images from 8 bit or 16 bit, to 32 bit. Think about the color range you can get from that!
Since landscape photography on sunny days is notoriously challenging, I decided to take three shots in quick burst mode with my camera while hiking on French’s Mountain in Rome, Maine. I set the camera to take the first shot at one stop underexposed, the second shot to normal exposure and the final shot to one stop overexposed. Here are the three photos, straight out of the camera with no editing at all.


What generally occurs when attempting to capture one of these types of landscape photos is that either the sky comes out blown out too bright or the trees and leaves come out way underexposed and black. The camera has difficulty determining the best exposure values and even when you set those values using manual mode, the dynamic range is still too small. Merging multiple images in HDR format is almost a necessity. By the way, these photos are just a small sampling of the far too many that I took during our hike. Good thing I’ve got a big data card.
Let’s now walk through the process of using Photoshop to merge these images.
I’ll start off by opening Photoshop and then visiting the File > Automate > Merge to HDR Pro menu item and clicking.

Also, just so you are aware, I already had Photoshop launched and had a photo opened in a tab. It’s not necessary to have any tabs opened before beginning this process. And actually, it’s better if you don’t have any of the source images opened in Photoshop before beginning this process. I’ve had strange results with one of my source images opened in Photoshop.
After I click the menu item, I’ll be presented with the Merge to HDR Pro dialog box. I”ll click the Browse button and then locate the three images I’d like to merge. After that, I’ll select the images and then click the OK button in the dialog box to begin the merging process.
NOTE: Before clicking the OK button, be sure to check the Attempt to Automatically Align Source Images box.
When the larger Merge to HDR Pro dialog window appears, I’ll choose the 32 Bit option from the drop-down box in the upper right corner.

When I’m finished with that, I’ll click the Tone in ACR button down at the bottom. Each of these steps will take a few moments for Photoshop to complete, so be patient and don’t go clicking around in an attempt to make things faster. You’ll only slow them down. Eventually though, Camera Raw will launch, where you can edit the photo to your heart’s delight.
Once the image is in Camera Raw, you can do as you wish with it. I like to click the Auto button in the Basic panel as a starting point and then push some sliders from there, but you can do what makes your image look best. After I was finished with mine, I returned to Photoshop and this is my result.

Really, the primary benefit of using this method is to save as much information from the photo as possible to use while editing later on. If you needed to edit in Photoshop to lift shadows or to reduce highlights in the HDR output photo, the data would still be captured in the image and you wouldn’t experience a reduction in quality. As far as this image stands, I can’t see too much of a difference between it and its 16-bit counterparts, so I’ll stay with my previous method unless I need to engage in some extensive editing. But definitely give this a try to learn it and get used to it. You never know, you may need it in the future. Thanks for reading!
