Search

Long Exposure/Time Lapse Photography Tutorials

  • Thread starter CaptainDan
  • Start date
CaptainDan

CaptainDan

Member
Joined
May 9, 2021
Messages
113
Reaction Score
0
Points
16
  • #1
In my opinion, one of the best and easiest ways to make regular photos come alive is to extend the exposure time of your camera. You could have 100 photographers take a normal photo of the same thing and you'd be left with 100 identical photos. If you had each photographer increase their camera's shutter speed to their own liking though and then have them take the same photo, you'd have 100 unique images. It's magical what a bit of fiddling with a camera's settings can do.

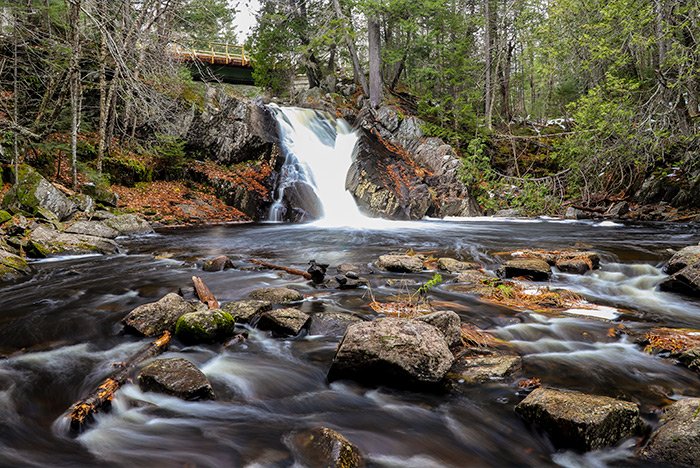
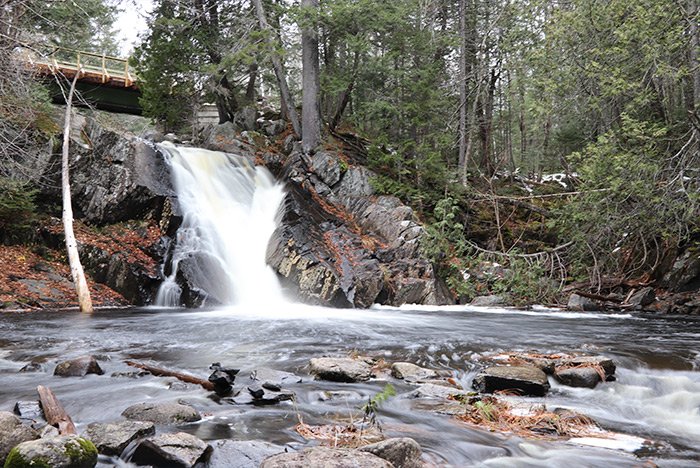
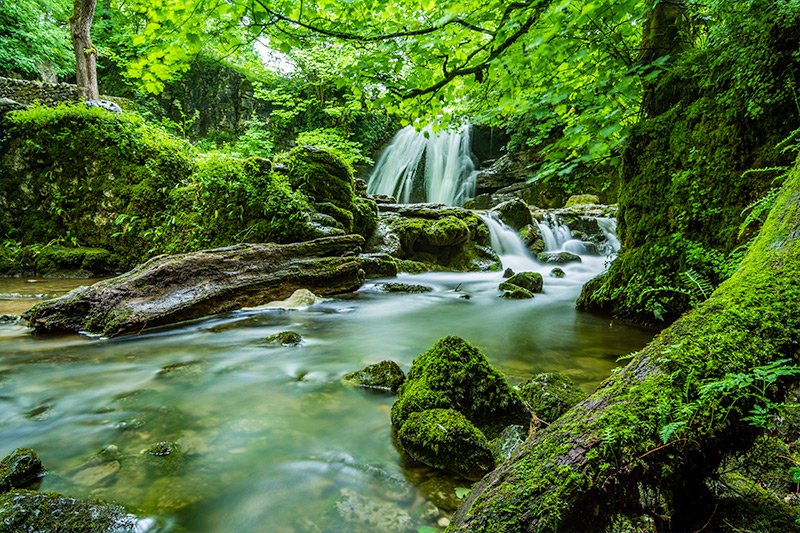
I've written about this topic before. The instructions I've given over the years. can actually be applied to any time lapse photo that's taken during the day. The only gear you'll need is a neutral density lens filter, a tripod and a DSLR camera or the equivalent that can have its shutter speed adjusted. This is a quick demo shot of one of the scenes I visited recently.
time-lapse-water.jpg

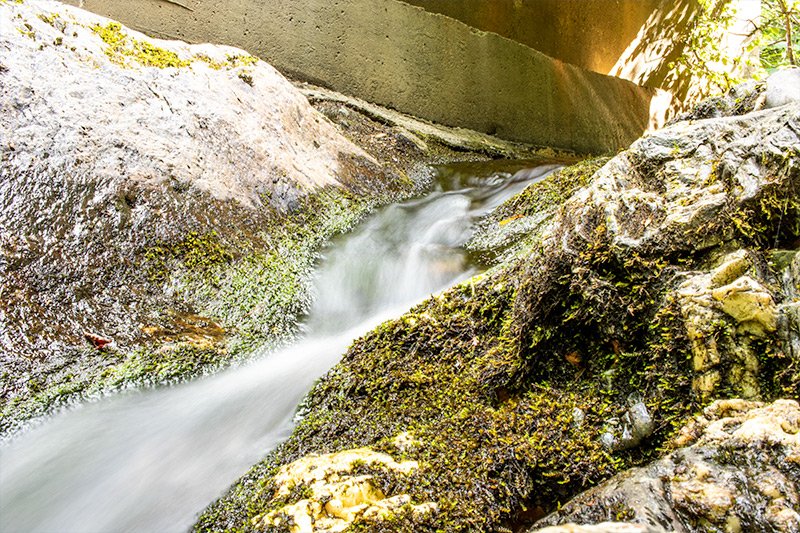
Notice how the water is silky smooth? My camera was in Shutter Priority Mode during this photo and I set the shutter speed to two seconds. Every other setting was made by the camera. Again, I used a +8 neutral density (ND) filter to keep the photo from being overexposed and a tripod to keep the camera in place. I suppose I could have used a remote shutter button as well, but I didn't. I think everything else in the shot is clear enough.

I wanted to give a brief summary of my previous posts. Some instructions to take a time lapse photo, if you will. Here goes...

- Attach a strong enough ND filter to the end of your lens. You might also want to experiment with different strength filters. You can purchase these rather inexpensively online. I have a set that came with three different strengths and they all come in handy. I used the strongest one for this photo shoot.

- Mount your camera on a tripod in the correct position to capture the best photo.

- Set your camera to Shutter Priority (Tv) mode.

- Set your camera's shutter speed to anything between one and four seconds. I found these worked best for the lighting conditions at our location. You'll need to experiment with these times as well. One second gave me nice smooth movement, but four seconds gave me much more silky water.

- Press the shutter button to take the photo.

That's pretty much it. So next time you head out with your camera to take photos, be sure to bring along your lens filters and your tripod because you never know if there will be moving elements in your scene. By capturing a time lapse photo, you can completely transform whatever it is you're taking a picture of.
 
CaptainDan

CaptainDan

Member
Joined
May 9, 2021
Messages
113
Reaction Score
0
Points
16
  • #2

How to Take & Edit Time Lapse Waterfall Photographs​

My lady and I decided that Halloween would be a perfect excuse to hike up into the woods to take photographs of a waterfall. Don't ask me how the two are connected because I won't have a good answer for you. Anyway, we've been meaning to get up to this waterfall because it's very pretty and secluded. The only problem has been the lack of water. It's relatively dry up in the mountains of Maine during most of the summer, so any water related photography needs to happen in either spring or fall. During the winter, the falls are frozen. Since we recently had a healthy rainfall, we decided that Halloween would be the day. New tradition? I'm not sure yet.

Let me ask you a question. Have you ever wondered how to take one of those silky smooth running water photos? I guess they're called time lapse photos. It's when the water is moving, but nothing else in the scene is. In my opinion, these types of photos are very attractive and I've enjoyed taking them in the past. They wake up an otherwise common scene. I've seen time lapses applied to the ocean, rivers, streams, waterfalls and anything else you can imagine that has to do with water. I really do like them.

Yesterday was the day to experiment with a few different lens filters. My goal was to capture a few decent time lapse shots of Poplar Falls in Carrabassett Valley, Maine. Since we were the only ones at the falls, we had as much room and liberty as we wanted.

waterfall.jpg

In today's post, I'd like to show you the very simple process I took to take a few different photographs. They'll be of two scenes and the one I edit will be of one close by scene. Really, I just moved the angle of the camera over a bit. I'd like to write this post for the beginning photographer who wants to walk out into the woods with camera in hand to capture something like this. I'll discuss the equipment that's needed as well as the editing that goes into the photo afterwards. For that editing, I'll be using Adobe Camera Raw and Photoshop.

Equipment & Gear Needed For Time Lapse Photography​

Believe it or not, you don't need much to take great time lapse photos. Yesterday, I went out with a Canon Rebel T7i DSLR camera, a tripod and a few lens filters. The DSLR camera was necessary because I needed to have control over the shutter speed, the tripod was necessary because it's impossible to take handheld time lapse photos and the lens filters were necessary because with many daylight prolonged shutter speed photos, overexposure is a problem. And that's really it. If you can adjust the shutter speed of your camera, attach an ND filter to the end of the lens and keep the camera still somehow, you can take silky smooth waterfall photos.

Some Demo Shots​

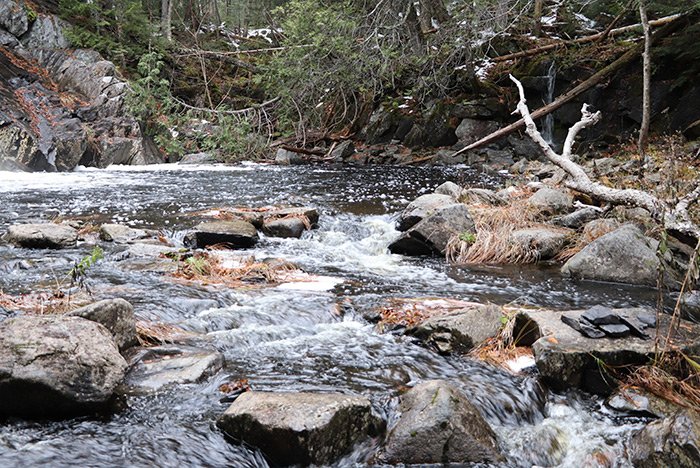
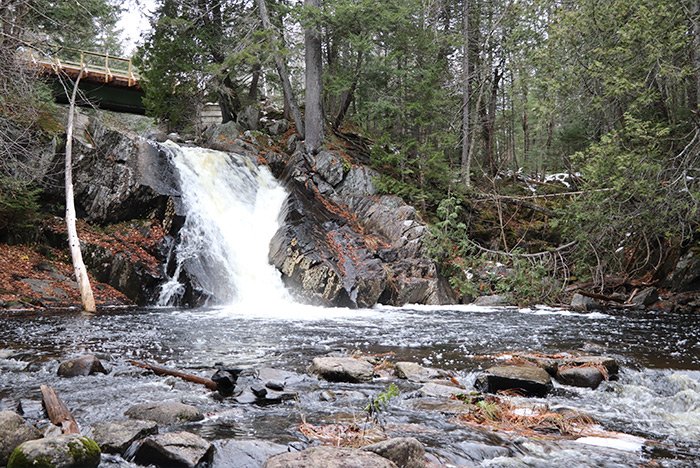
In this section, I'm going to show you two different scenes with two different shutter speeds. These photos are straight out of the camera and haven't been touched at all. The reason I'd like to show you these photos is because it's helpful to see how a simple shutter speed adjustment can affect a photograph.

For this first scene, I set the camera to auto (Program Mode) and took the shot. I let the camera do all the work. I did have my +8 Neutral Density lens filter attached to the lens. Actually, I had that lens filter attached for all of these photos. I also had the camera mounted on my tripod for all these shots.

one-thirtieth-second.jpg

F/4, 1/30 second, ISO 800, 18-135mm lens @ 24mm

As you can see, that's a regular old photo of the water running down the stream and it wouldn't be too remarkable if I posted it on my blog or social media. People would be like, "Yeah, what's so special about that?"

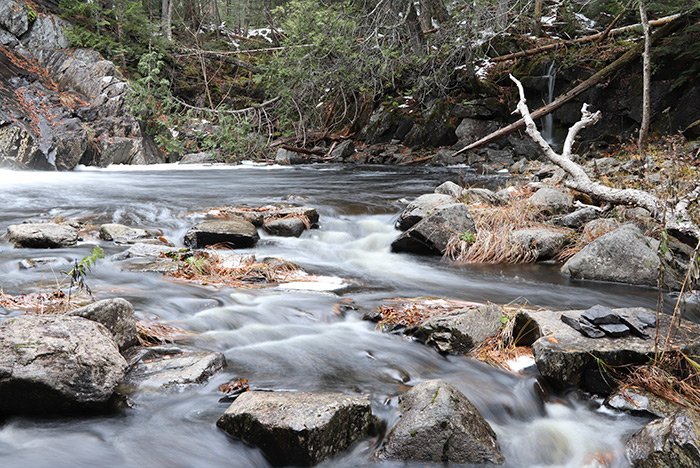
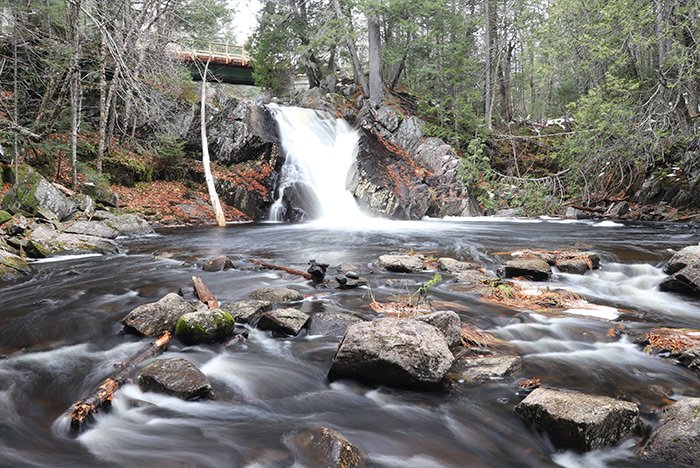
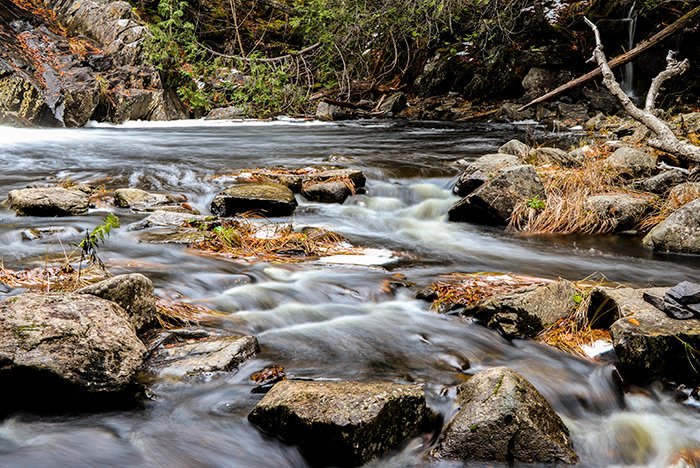
For this next shot, I switched the camera into Shutter Priority Mode. I found that two seconds is the sweet spot for photos like this. Anything between one and four seconds is actually really good, depending on what you're going for.

two-seconds.jpg

F/11, 2 seconds, ISO 100, 18-135mm lens @ 24mm

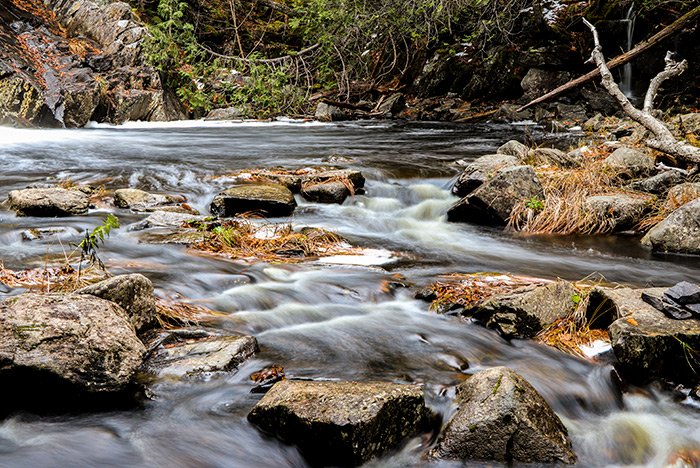
And if I ran this picture through Camera Raw and did a few edits to it (and then cropped it some), I'd end up with a much better photo of a bland scene.

time-lapse-stream.jpg

You have to remember, it was totally cloudy and a fairly ugly day. Can you imagine the nice colors I could have had in these photos if it was sunny out?

Here's another scene that I took. The first photo is again taken with Program Mode and the second is taken with Shutter Priority Mode. Take a look.

one-fourteth.jpg

F/4, 1/40 second, ISO 640, 18-135mm lens @ 24mm

And here's the same shot taken with Shutter Priority Mode at one second.

one-second.jpg

F/10, 1 second, ISO 100, 18-135mm lens @ 24mm

Again, it seemed like the sweet spot for the shutter speed was around two seconds.

Now, let me quickly edit the second shot to see if I can make it look any better than it currently does. I'm sure I can.

smooth-waterfall.jpg

Notice that ugly dead tree to the left of the waterfall. That's got to be removed in this next scene.

The Final Waterfall Scene​

I hope you're seeing how easy it is to capture these kinds of photographs. There's no special skill needed. All you need is a neutral density filter to keep overexposure at bay, a tripod to keep your camera steady and a camera with the ability to adjust shutter speed. That's it.

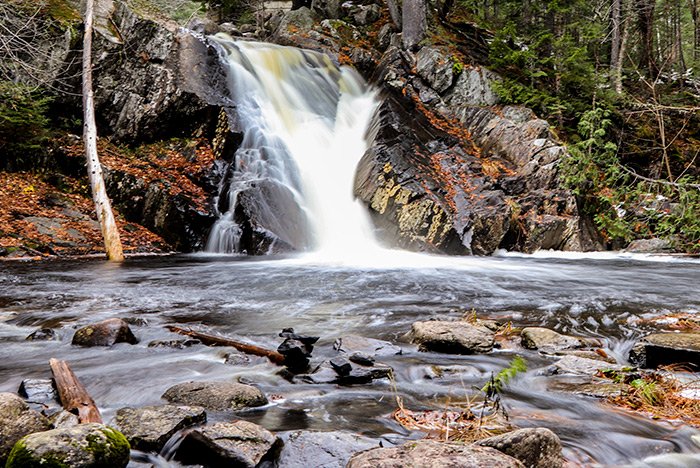
Now, let's take a look at this last photo. This one is my favorite because it's so smooth and the bottom of the falls spread out nice and wide. This is the untouched version.

smooth-waterfall-original-shot.jpg

F/18, 2 seconds, ISO 100, 18-135mm lens @ 18mm

If you haven't guessed by now, much of what makes time-lapse photos look so good comes from post-processing. Photographers and editors add all sorts of filters to these things. Honestly, nature simply isn't as beautiful as what's displayed in most photography out there. Some people think this is cheating and others think it's art. Who's to say what it is?

The way I go about editing photos for posts like this is to just clean the image up and make it presentable. In this photo in particular, I need to add some contrast, depth and to remove that ugly dead tree that's next to the waterfall. I'd also like to add a tad bit of warmth and color to the image as well.

Editing the Image in Adobe Camera Raw​

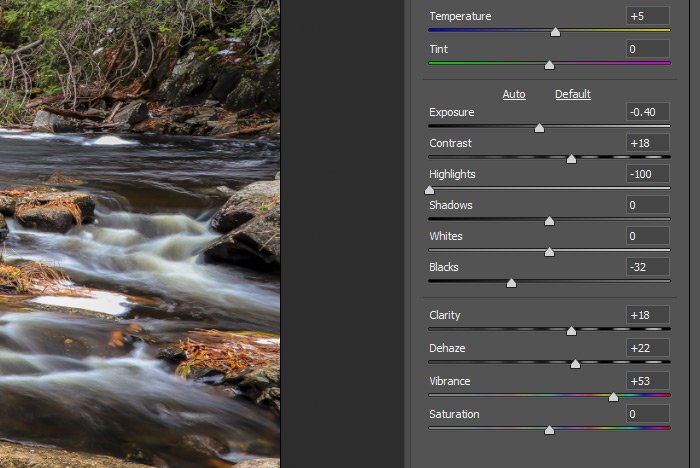
For this photo, I'm going to push a few sliders around. After opening it in Camera Raw, all I used was the Basic panel. Nothing else. I could have added some saturation via the HSL Adjustments panel, but I chose to saturate a few of the colors with the Vibrance slider instead. That worked pretty well. Here are the adjustments I made in Camera Raw.

camera-raw-settings.jpg

Removing the Tree with Adobe Photoshop​

Now, the last thing I need to do with this image is to remove the tree I was talking about earlier. To do this, I used a path and the Spot Healing Brush Tool. I chose to go this route because the tree was fairly straight. Curved a bit, but nothing terrible. Another good option would have been to use the Lasso Tool to remove the tree. Finally, let's take a look at the final image again.

waterfall.jpg

I do like this shot. Especially towards the bottom where the water appears the smoothest.

I hope I clearly explained the basics for how to take a time-lapse photo of a waterfall. I also hope I helped out with the editing of this type of photo as well. As you can see, there are no secrets here, just a few necessary items. If you have any questions regarding this type of photography, please let me know below. Thanks for reading!
 
CaptainDan

CaptainDan

Member
Joined
May 9, 2021
Messages
113
Reaction Score
0
Points
16
  • #3

How to Get Cool Effects with Long Exposure Photography​

What the heck is long exposure photography? I’ve heard this phrase forever now and I think it’s about time we discussed it. For starters, long exposure photography can be defined like this: it’s when you set your camera so the shutter stays open for a longer time than it normally would, resulting in more light being able to hit the camera’s sensor, giving you motion blur, if that’s what you want.

As you may already know, purposeful motion blur gives some very cool effects. What kind of effects, you ask. Well, have you ever see those awesome looking car taillight and headlight trails? Those trails definitely say, “motion.” How about long exposure ferris wheels or other rides at an amusement park? Those rides are full of lights and “movement” photos of them can really dazzle. Or maybe people walking by. That’s right, set your camera down and take a picture of passers by on the sidewalk, boardwalk or whatever. Leave the shutter open for about three seconds and you get a funky looking shot that people will surely talk about. Cityscapes? When there’s water in front of a city, you can totally smooth that water out by leaving the shutter open for a while. It’ll look like glass. The water, that is. The same is true for waterfalls. I’ve done this a ton of times and every time I review my photos after using a tripod and photographing a waterfall with a three second exposure and a lens filter, I’m stunned by the results. I think my favorites are definitely the light trails and the waterfalls. I so love that kind of photography.

Typically, when taking long exposure photos, you’d place the camera on a tripod to keep it completely still and then photograph things that are moving. That’s what gets you that motion blur. Did you know that you can also just as easily set the camera on something that’s steadily moving so it appears that that object is stationary and everything else is moving? Picture keeping your camera steady on an escalator or a roller coaster car. It’s actually those two things that are moving with everything in their environments staying still, but the effect will be in reverse. It’ll seem like both the escalator and roller coaster are stationary with their environments moving.

How does all this work? Well, in general terms, if you keep the camera’s shutter open for longer (say, three or four seconds), more light will be let in and you’ll get more blur. The shorter the shutter speed (say, one half to one second), less light will be let in and you’ll get less blur. You’ll get blur with both shots, but that blur will be substantially different.

If you’re going to do some motion blur photography at night, you’ll probably want to keep your shutter open for a longer time (slow shutter speed) to let more light in. There’s not much light in the atmosphere to begin with, so you’ll need all the help you can get. You’ll just need to be sure to keep the camera steady with some sort of tripod or the equivalent so you don’t get any camera shake. Trust me on this; don’t try to hold the camera in your hands while taking long exposure shots. You’ll never in a million years be able to keep the camera steady. Your pictures won’t look good at all.

I would say the most important thing about taking these types of shots, after all the technical stuff has been taken care of, is your location. Setting your camera up on top of a bridge so you’re looking down as cars are passing by is an incredible vantage point. Sitting behind a waterfall would be perfect. Setting your gear up on the corner of a busy street could possibly give you a good effect and maybe even set your tripod up on a subway platform. I’ve seen many long exposure shots of subways passing by. I’ve always loved those. Your biggest concern after getting situated is your timing. You’re going to need to take a lot of shots because so many of them will be throw-aways. This isn’t the easiest type of photography in the world and it’s definitely not point and shoot. After the camera is set up, you’ll need to wait for your moving subject. Just as it passes by, push the shutter button. If you don’t like the result, try it again. Try it at different times and try it with different shutter time durations. There’s going to be a lot of trial and error, so don’t become discouraged. Half of this type of photography is living and learning and the other half is capturing some decent shots.

There’s also a golden rule you need to follow here. If you’re doing long exposure photography at night and there’s a lot of light out there from street lights and the like, you’ll need to make sure you set your aperture in accordance with your shutter speed. So, if you want a huge aperture, you can’t have really long shutter speeds. I’d say that an f/7 aperture is appropriate for a three second shutter speed in the middle of Times Square at night. If you want to have a longer 30 second shutter speed, then you’ll need to close your aperture to something like f/22. If you keep a large aperture and a long shutter speed, you’ll over-expose your images. Yes, even at night. Of course, you can always moderate the two by adjusting your ISO, so don’t forget about that.

Well, there you go. My two cents for the day. If you have anything to add or if you’d like to share your experiences, please let me know below. Thanks!
 
CaptainDan

CaptainDan

Member
Joined
May 9, 2021
Messages
113
Reaction Score
0
Points
16
  • #4

How to Get the Sharpest Shots with Long Exposure Photography​

I’ve done tons of long exposure photography during my career and I oftentimes get asked how my photos come out so sharp. With long exposures, obviously some elements of the scene will be changing and show movement, but for anything that’s stationary, it’s important for those objects to be as sharp as possible. Those are what viewers will be looking at when they’re judging your photos. Personally, I even go as far as zooming in on other photographer’s images to see what kind of clarity is in the photos. Those edges can say a lot about someone’s skill and equipment.

I’m here today to let you know my secret. This is basic stuff, so don’t think you need to know anything magical or anything like that. If you follow this short set of instructions, you should be able to take very sharp, crisp and clear long exposure photographs.

1. Get yourself a good sturdy tripod. If you’re going to spend the time and money traveling someplace interesting to take photos, go with good equipment. A tripod that’s too small or not sturdy enough can impact the sharpness of your images.

2. Turn off your lens’s image stabilization. IS is meant to reduce shake when the camera is being handheld. If you’re taking photos while using a tripod, turn the feature off because it can actually add a slight bit of shake and vibration to your images when still.

3. Lock your camera’s mirror in the upright position. We all know about camera mirror slap. If you lock the mirror up so it doesn’t move inside the camera, you can reduce the vibration it introduces into your shots.

4. Use a remote shutter button or a 2-second delay. Your finger on the shutter button can cause camera shake. Take your finger out of the equation by taking advantage of one of the suggestions I just made.

Now, I know that if your exposure is long enough, it’ll negate any shake or vibration that’s introduced way back at the beginning of the shot, but it’s a good idea to get into the habit of integrating the suggestions I just made above into your photography. After all, you can never quite predict the length of exposure a specific scene is going to demand, so following these instructions for all photos is the best.

Also, regarding what to focus on, if you’re doing landscape shots and the primary subject is somewhat far away, simply focus on that. If everything is far away and there are multiple objects that you want in focus, you can focus on an area that’s 1/3 the distance of the primary subject and your depth of field should be deep enough to focus in on it all.

If you have any questions, please let me know below. Also, if you’ve got some good advice to share about long exposure photography, please share that down below as well.

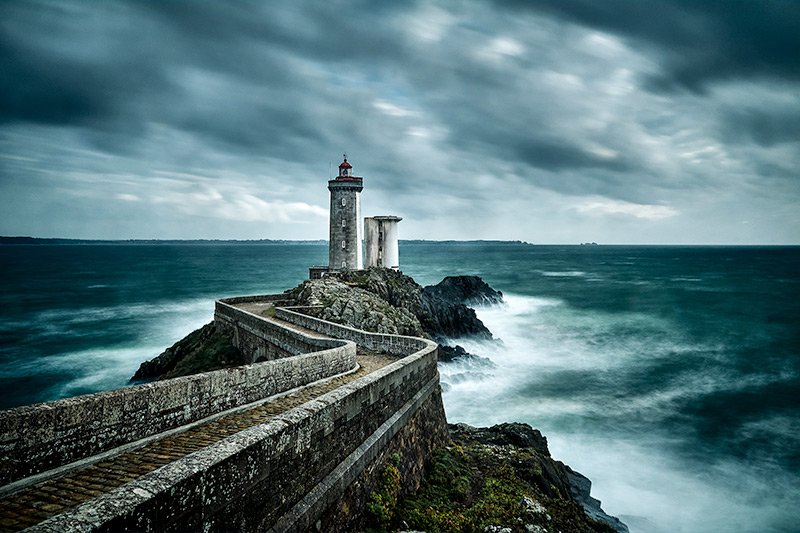
long-exposure-lighthouse.jpg
 
CaptainDan

CaptainDan

Member
Joined
May 9, 2021
Messages
113
Reaction Score
0
Points
16
  • #5

Practicing Waterfall Long Exposure Photography in Maine​

A few days ago, my lady and I went on a rather long ATV ride through the hills of Industry, Maine. There are dozens of miles of trails in this region and there’s no shortage of fun to be had. Of course, being the amateur photographers we are, we brought along our cameras. Luckily, my ATV offers some large trunk space in which to store such things.

We stopped off to enjoy a few different areas. One such stop was at a fairly secret waterfall-type space at the end of Rand Road. At the end of the road is a parking spot for the Sat Manav Yoga Ashram retreat. I’m not quite sure what goes on this this retreat, but I’ll most likely find out one day. They seem like nice people in there. We see them walking on the road every so often.

Anyway, the overall waterfall area consists of multiple smaller falls within Lemon Stream. It’s the kind of place where you think all you need to do is point your camera at something and that you’ll capture a magnificent looking photo. Unfortunately, it’s not that easy. You actually do have to take your time there, but the falls are beautiful and very welcoming.

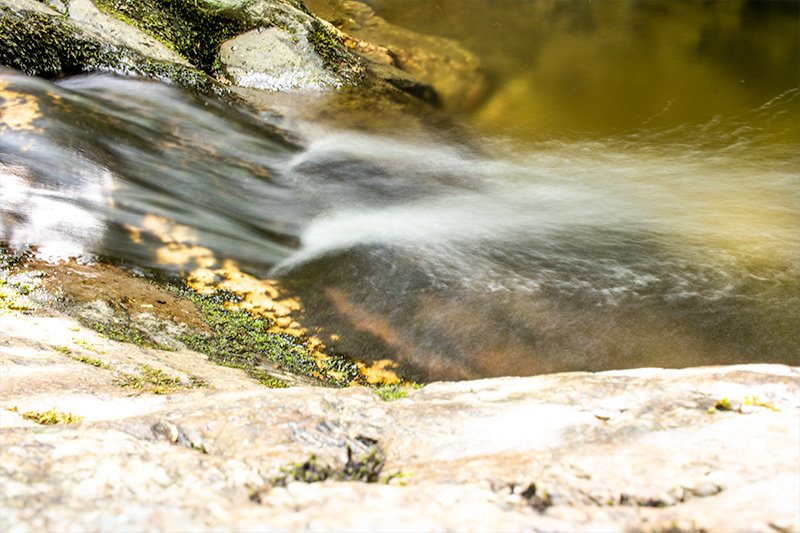
While I didn’t have any gear besides my Canon T7i with me, I tried my hand at some long-exposure photography. Instead of utilizing a tripod, I sat the camera on the rocks and did my best. I think some of the shots came out okay, so I thought I’d share them here. I also took some regular speed photos, but those weren’t nearly as interesting.

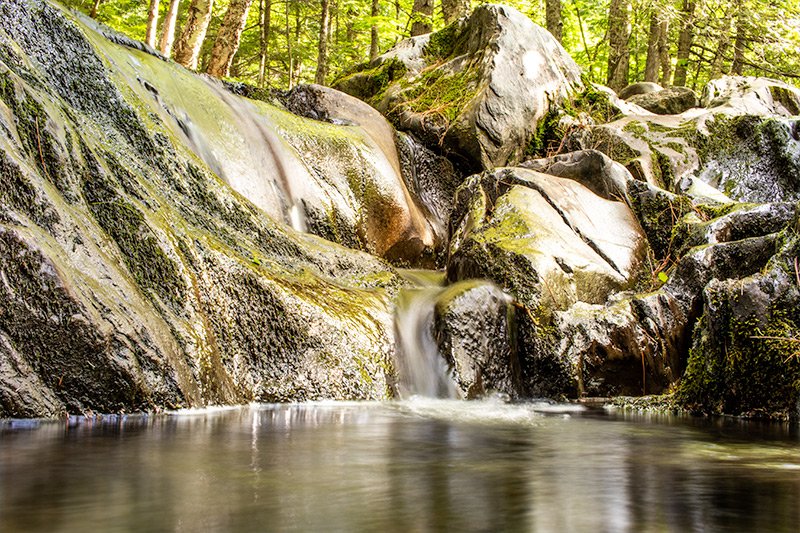
rand-rd-waterfall.jpg

Camera: Canon Rebel T7i
Shutter Speed: 1 sec
Aperture: f/14
ISO: 100
Focal Length: 24mm
Lens: Canon 24mm, f/2.8
Aperture Priority Mode
Edited in Adobe Camera Raw & Photoshop

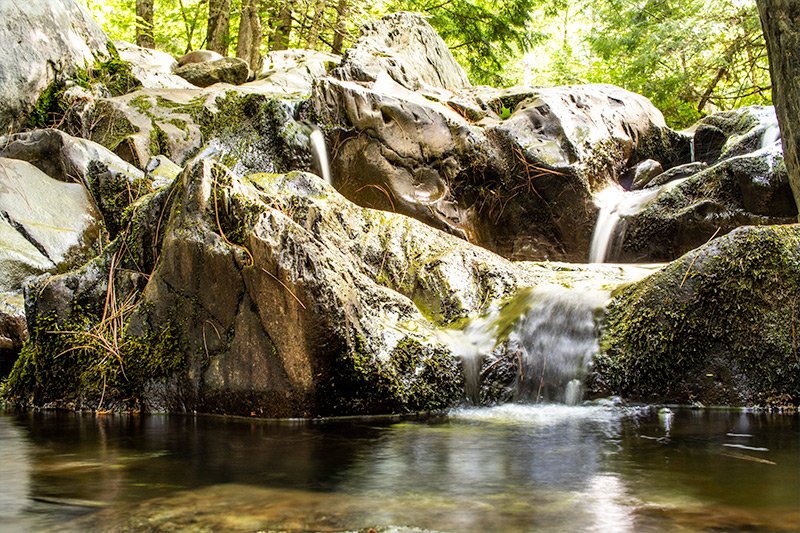
lemon-stream-waterfalls.jpg

Camera: Canon Rebel T7i
Shutter Speed: 2 sec
Aperture: f/20
ISO: 100
Focal Length: 24mm
Lens: Canon 24mm, f/2.8
Aperture Priority Mode
Edited in Adobe Camera Raw & Photoshop

smooth-moving-water.jpg

Camera: Canon Rebel T7i
Shutter Speed: 3.2 sec
Aperture: f/22
ISO: 100
Focal Length: 24mm
Lens: Canon 24mm, f/2.8
Aperture Priority Mode
Edited in Adobe Camera Raw & Photoshop

long-exposure-running-water.jpg

Camera: Canon Rebel T7i
Shutter Speed: 3.2 sec
Aperture: f/20
ISO: 100
Focal Length: 24mm
Lens: Canon 24mm, f/2.8
Aperture Priority Mode
Edited in Adobe Camera Raw & Photoshop

What I’m finding is that many of my outdoor photos are coming out more green than I’d like when I shoot in RAW mode. To correct this, I push the Tint slider to the right towards the magenta. This reduces the green in the image and brings it back to a more natural earthy look. Let me know what you think. Thanks!
 
CaptainDan

CaptainDan

Member
Joined
May 9, 2021
Messages
113
Reaction Score
0
Points
16
  • #6

Changing Scene Brightness in Long Exposure Night Photography​

I think long exposure night photography is one of the most interesting types of photography out there. If you think about it, when you look at a photo that’s been captured over five seconds, fifteen seconds, thirty seconds or longer, you’re essentially looking at a span of time that’s been compressed into a split second. When was the last time you looked at an entire span of time in one blink of an eye? It’s kind of weird to think about it like this, but whatever the duration of the shot was, those seconds are what we’re able to see all at once. I know. This is just the stuff I think about on a daily basis.

Anyway, I’d like to talk about one tiny little area of long exposure night photography today and that tiny little area has to do with brightening up or darkening down your scene. I guess this “awareness” that I’d like to share with you is useful for long exposure photography that was taken in any type of lighting, not just night time lighting. We’ll focus on night time though because those types of photos are super cool and it’s easier to understand what I’d like to share when you think of photographing at night.

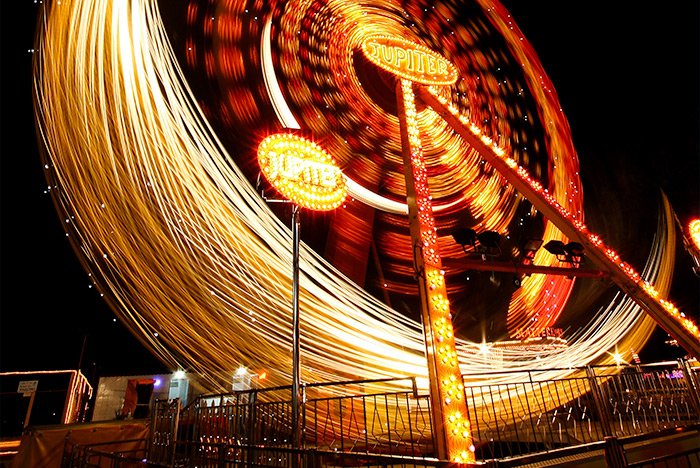
night-long-exposure-ferris-wheel.jpg

In this post, I’m going to talk about what’s referred to as the Exposure Triangle. If you’ve been around photography for a while, you’ve problem heard of this. If you haven’t, then let me tell you what it is. In photography, there are a few variables that determine how a photograph will be exposed. Each of these variables plays off one another to give you the shot you’re looking for. The variables are aperture, shutter speed and ISO. At the beginning, understanding how these three things work together can be a bit confusing, but after a while, they become extremely simple to understand and manage. And once you really get things down, photography becomes very exciting. I remember back when I first began learning about the Exposure Triangle, nothing seemed to click. Once I learned more though, and when things finally did click, I can tell you that they really clicked. What a great feeling that was.

Let me get into this by giving you a quick example. Let’s say that you are all set up to take some night shots of pretty much anything. The subject matter doesn’t make a difference here. You’ve got your camera set up on a tripod and you know the shutter speed that you’d like to use. It’s going to be fifteen seconds. The reason you chose this duration is because you’ve either experimented with the same type of shot before or you simply know what you want from experience. Either way, fifteen seconds it is. Another thing you know is that you’d like your ISO to be set to 100. Again, this is from experience and you know that you can keep the noise in your photos way down by setting the ISO value low. So a 100 ISO value it is. As for the aperture, you start off with a value of f/4. Now, this value isn’t etched in stone like the other two are, so depending on how the shot comes out, you may want to change this one. The shutter speed needs to stay where it is because there’s movement in the shot and that duration will give you just the look your after and the ISO needs to stay where it is because you’ve learned over the years that that’s where it needs to be.

You take your first photo and review it on the back of your camera. Guess what. It’s too bright. Either the object you’re photographing is emitting too much light or there’s too much light in the atmosphere. Whatever it is, your shot is overexposed. What do you do? This is actually a real question that photographers ask themselves every day. To answer it, you need to decide which effect in your photograph is most important. We’ve already covered that the movement in the image is of the utmost importance, so the shutter speed can’t be touched. We also covered how the noise issue is important, so the ISO value can’t be touched. What’s left? Aperture. Since depth of field may not be an issue with the scene you’re shooting, you can increase the aperture value to something like f/5.6 This will let in less light, therefore darkening the scene.

Really, the trick is to decide on what’s most important to you in your shot. In the above example, movement and noise were the most important. Depth of field wasn’t important at all because you were very far away from your subject. After you changed the aperture setting, you didn’t even notice a difference with your shot beyond the fact that it became slightly darker.

Let’s say that you took another photo of the same subject, but on another night. This night was less illuminated than the last, so your image came out much darker than you expected. Let’s also say that you decided that noise wasn’t too big of an issue. You know you can raise the ISO value to 400 to give you the exposure you’re looking for without much grain at all, so that’s what you do and everything is fine.

Finally, you go back to your favorite photo area a third night and take the same photo with the same settings you used the previous night. After taking your first photograph, you realize that there must be a full moon or something, because things are very overexposed. Your image is washed out and you need to do something drastic. You lower the ISO value back to 100, but that doesn’t make enough of a difference. Then, you shrink your aperture to f/8, but you realize after some experimentation that F/8 is making things look a little funny. The scene is too clear and there’s not enough blur where you want there to be, so you put that back. You come to the conclusion that quickening the shutter speed is the only way to cut the light to capture the correct exposure, so that’s what you do. You set your shutter speed to ten seconds as opposed to 15 and your photograph comes out perfectly.

Photography is about experimentation and compromise. Cameras are only capable of so much and you’ll need to make decisions on the fly in regards to the quality of the photo as well as what you seek in the way of creativity. With experience and some creativity of your own, you’ll see that getting the perfect shot every time isn’t very difficult at all.

I hope I made some sense in this post today. I tried to give you a few real world examples of how you can use your knowledge of the Exposure Triangle to your advantage. If you have any questions regarding this post, please let me know in the comment section below. Also, you can ask questions and offer opinions in the Photography Technique forum at any time. Thanks for reading!
 
CaptainDan

CaptainDan

Member
Joined
May 9, 2021
Messages
113
Reaction Score
0
Points
16
  • #7

Should I Use Long Exposure Noise Reduction (LENR) When Photographing?​

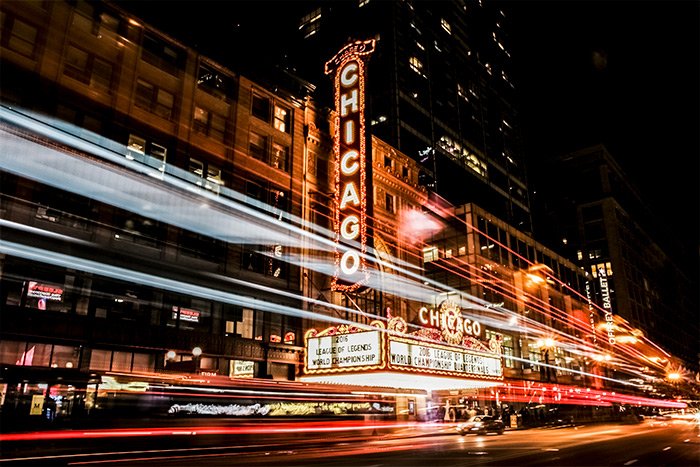
Most of us think of the noise we see in photographs as being related to the photographer using a high ISO when shooting. While that’s the case a good majority of the time, there is another type of noise that can be introduced to images that’s triggered when a photographer uses longer exposure times. Longer exposure times tend to heat up the camera’s sensor and can cause what’s referred to as “amp noise” or “fixed-pattern noise.” This noise can be seen as “bright, abnormally colored flecks of light in an image” and “fog-like brightening around the edges of the frame.” It’s location is generally consistent across photos in a shoot because the same areas of the sensor stay warm while shooting. The noise clings to the warmer areas of the sensor.

If I had to guess, 99% of us really don’t care what type of noise this is or how it’s caused. We just want it to go away. I’ll tell you though, it’s not a bad thing to learn as much about your camera and photography as you can because there may come a time that you need to troubleshoot something. If you once learned about what causes strange color flecks while shooting longer exposures, you might know where to look to solve the problem.

chicago-long-exposure.jpg

The underlying issue with this very specific type of camera noise is that it’s terribly difficult to remove once the photo has been captured. It doesn’t look like other types of noise and post processing isn’t very good at solving the problem.

What Can Be Done To Remove Long Exposure Noise?​

While all of this is definitely a concern for those of us who enjoying shooting with long exposure times, there are surely some steps we can take to mitigate the issue. I’ll list those steps below.

1. Decide which brand of camera to buy. Different camera brands handle long exposure noise differently. Some handle it very well while others are terrible at it. From what I hear right now, Canon isn’t the greatest while Nikon fares very well. I’m hesitant to even write this because various makes, models and technologies are introduced constantly. If you’re looking for a new camera and you know you’ll be taking long exposure shots, be sure to look into this very specific detail. It can save you a lot of pain later on.

2. Let your camera cool between exposures. To be clear, I’m talking about exposure in minutes here, not seconds. If you take one long exposure shot and then take another one directly after it, you’ll likely end up with a lot more noise in the second photo than the first. The reason for this is that the first photo was taken with a cooler camera sensor. To reduce long exposure noise, it’s best to wait a few minutes between photos to give the sensor some time to cool off.

3. Take longer exposure shots in cooler air. Believe it or not, ambient air temperature can have an effect on sensor temperature. If you’re looking to keep the camera temperature down, it only makes sense to take certain types of photos during certain times of the day or during cooler seasons of the year. I know this advice doesn’t help a lot of people out there, but it is something to keep in mind. Or, at the very least, it will help your brain when you’re trying to figure out why some photos taken during the winter aren’t as noisy as others that were taken during the summer.

4. Remove the noise in post-processing. Sometimes, the individual flecks of long exposure noise are so large that you may be able to remove many of them by taking advantage of the healing and spot removal tools in Adobe Camera Raw, Lightroom and Photoshop. Now, I’m not advising that you sit at your computer all day to remove the noise from a photo that you’re only going to post to Facebook, but if you really like a photo and you plan on selling it, perhaps the effort will be worth it.

5. Take advantage of built in Long Exposure Noise Reduction (LENR). Camera makers today are obviously aware of this issue and have done something about it. For many higher-end cameras, there’s an available feature called Long Exposure Noise Reduction that can help remove this type of noise substantially. If you’d like to know if your camera has this option available, you’ll need to take a look at your options under your settings menu.

The whole trick here is to remove the added noise before the user sees it. The way the camera manufacturers have accomplished this is to have the camera take a second photo, right after the first. The second photo doesn’t capture the scene though. Even though the same exact settings are used for both photos, the second photo is captured as if someone has their hand over the end of the lens. No light is allowed in. Because this noise is created by having a warm sensor and because it’s consistent between photos, it’s easy for a camera to compare both the first shot and the second blank shot. The second shot will still contain the noise and after the camera compares the two, it can remove any noise it finds in the second shot from the first. I know this sounds sort of confusing, but it works. I’ve seen tons of photos that have been helped substantially by using this approach. The only time I’ve heard of it not working is during photo shoots that require very high ISO levels. During those instances, other types of noise is introduced and you’ll be dealing with more than what I’m referring to in this post.

The pitfall of using this solution is that it doubles the time it takes to capture a scene. Because the camera needs to essentially take two long exposure photos that take the same exact amount of time each, you may end up doing a lot of waiting around. If time is of the essence, this may not be the option for you. Hopefully some of the above choices will work out.

A Special Trick​

As I was studying up on this topic, I did some reading and found a great trick that truly helps with this type of “noisy” situation. Here is is. All you need is Adobe Photoshop. I tried it out and it really does do a fantastic job of removing this very specific type of noise in a photo.

First, open your noisy photograph in Adobe Photoshop. Drag the background layer down to the Create New Layer icon at the bottom of the Layers panel. Doing this will create a duplicate of the that background layer. This duplicate should sit above the background layer in the panel.

Second, click on the duplicate layer in the Layers panel to select it. Then, head up to the Filter > Noise > Median menu item and when the Median dialog box appears, set the radius to 4. Depending on the size of your photo, you may need to go slightly larger or slightly smaller. Experimentation may be necessary. When finished, click on the OK button to apply the noise reduction.

Third, with the same layer still selected, change the blending mode to Pin Light in the Layers panel. What you’ll see after doing this is nothing short of magic. The noise will be (hopefully) gone.

Another Special Trick​

I read this extra trick online. Basically, the claim is that if you are on a shoot, go ahead and take one shot at the same exposure time as all the others. For this extra shot though, place the cap on the lens or put your hand over it to make sure absolutely no light gets to the sensor. What you’ll get with this photo is just the noise. As you’re editing in Photoshop later on, you can use this image and place it as a layer on top of whichever real image you’d like to edit. After this, you can change the blending mode of the dark shot to Difference and use the Opacity slider to reduce the level of noise in the photo below. I’ve never tried this, but it seems to be a manual version of what the camera does during its long exposure noise reduction operation, without the added wait time experienced with that process.

——

I hope I clearly explained how to deal with amp noise in photos as well as the benefits and pitfalls of using the built in long exposure noise reduction feature many cameras offer today. If you have any questions regarding this post, please leave them for me below. Thanks for reading!
 
CaptainDan

CaptainDan

Member
Joined
May 9, 2021
Messages
113
Reaction Score
0
Points
16
  • #8

Shutter Priority: How to Take Smooth Water Photos​

I’m sure you’ve seen many of these types of photos; very smooth waterfalls, rivers, waves on lakes or oceans. Almost like silk. Any ripple or upset in the water has been completely smoothed out and soothed by the time that lapses from when the shutter inside of a camera opens until the time it closes.

Just as interesting as slow shutter speed photography can be, super fast shutter speed images can be comparable in their interest. With our natural eyesight, it’s impossible to see what each and every droplet of water looks like while it’s moving, but by capturing those droplets with our cameras, we can essentially freeze time to analyze and inspect that slice of existence. It’s fascinating.

So, by this point, I’m sure you’re asking, how can I take smooth water photos with my own camera? Or even, how can I freeze time to see every last detail of water’s tumultuous display? Don’t worry, I’ll answer both of these questions below. Accomplishing these tasks is easier than you’d think.

It all has to do with your camera’s shutter speed. Think about it; if you allow the shutter to stay open for a few seconds, the camera’s sensor is going to capture everything that happens in the scene across that entire span of time. That’s going to create smoothness and silkiness. If you limit the shutter speed to a split-second, much less light is going to reach the sensor, resulting in a sharper, more frozen action oriented photograph. So, depending on your goals, you can create blur or frozen time.

To take these kinds of shots, you’ll need to switch your camera into shutter priority mode. If you’re using a Canon camera like I do, you’ll turn the top dial to the Tv setting. For many of the other makes of cameras out there, you’ll most likely switch it to the S setting. If you’re taking slow shutter speed (silky) photos, you’ll also need a tripod. If you’re taking fast shutter speed photos, a tripod isn’t necessary.

I’ll first explain how to capture slow shutter speed silky water photos. There are a few things that need to be considered for something like this. First, you’ll need a tripod. I already mentioned that. If you don’t use something to keep the camera steady, additional and unwanted blur will appear in your photos. Also, much of the challenge with this kind of photography stems from how much light enters through the lens and touches the sensor. Since you’ll be keeping the shutter open for a longer period of time than is typical, you’ll need to find ways to reduce the exposure. You can either choose to take these types of shots during the early morning or later on towards dusk, or you can use a neutral density filter on the end of your lens to act as sunglasses. You can even reduce your ISO value as low as it will go to make the sensor as least sensitive as possible. Basically, you want to cut the light to avoid overexposing your images.

When it comes time to take the shot, set up your gear and then change your shutter speed to one second to start. Review the photo and then change the shutter speed to two seconds. I think you’ll find that three seconds is as far as you can go until things begin looking strange. Either your photos will be overexposed or you’ll reach the point of diminishing returns, meaning that one image with a shutter speed of two seconds won’t appear any differently than an image with a shutter speed of four seconds. Everything in your shots should be sharp, except for the things that were moving, such as the water, in this case.

To freeze action, things are going to be a bit different. You’ll change your shutter speed to 1/250 of a second and either set your ISO to Auto or set it to something like 1600. Basically, because there won’t be nearly as much light coming into your camera (remove the neutral density filter if it’s still attached), you’ll need to make your camera’s sensor more sensitive to the light. You can also open up your aperture, but that will require going into full manual mode, which is beyond the scope of this post. Anyway, when everything is set up, take your shots. You can adjust the shutter speed so it’s even faster than 1/250 of a second if you want and you can adjust your ISO value, depending on how light it is outside. These will be small adjustments, but at least you now know the general settings that are required to take smooth water and frozen action shots.

Do you have any other advice for this type of photography that I may have missed? If so, please share below. Thanks!

smooth-waterfall.jpg
 
Top