How to Customize the Vertical Toolbar in Adobe Photoshop
If you’re a casual user of Adobe Photoshop, you probably don’t do a lot of workspace customizing. If you use Photoshop more extensively, however, you would most likely benefit from making your workspace as efficient as you possibly could. Luckily, this application is extraordinarily customizable and you can make it look and act pretty much any way you want. All it takes is some know how to make the changes you desire.
In today’s post, I’m going to show you how you can add to and remove tools from the left vertical toolbar in Adobe Photoshop. This type of thing is much easier than you would ever expect, so if you would like to minimize the toolbar options, please read on. If you’d like to reorder your tools in the toolbar or even regroup various tools into different sets, this post is definitely for you as well. I’ll be covering all of this down below.
Accessing the Customize Toolbar Dialog Box
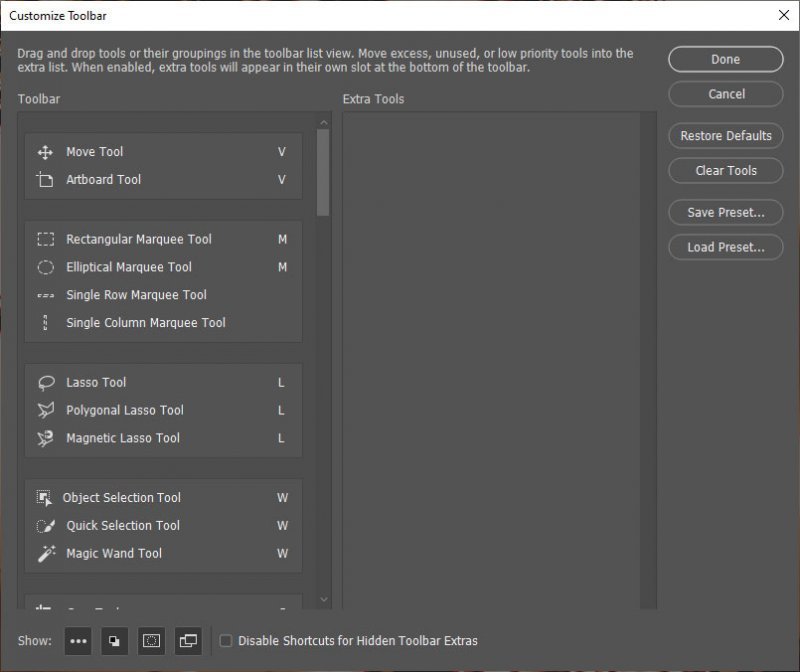
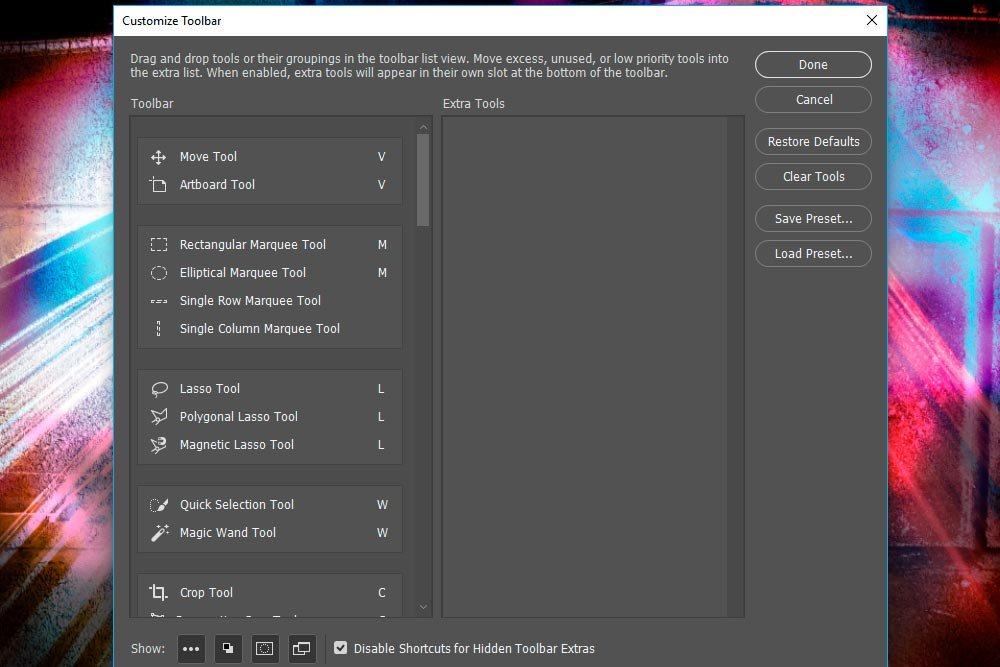
A good percentage of toolbar controls reside in one dialog box. This box has the title of
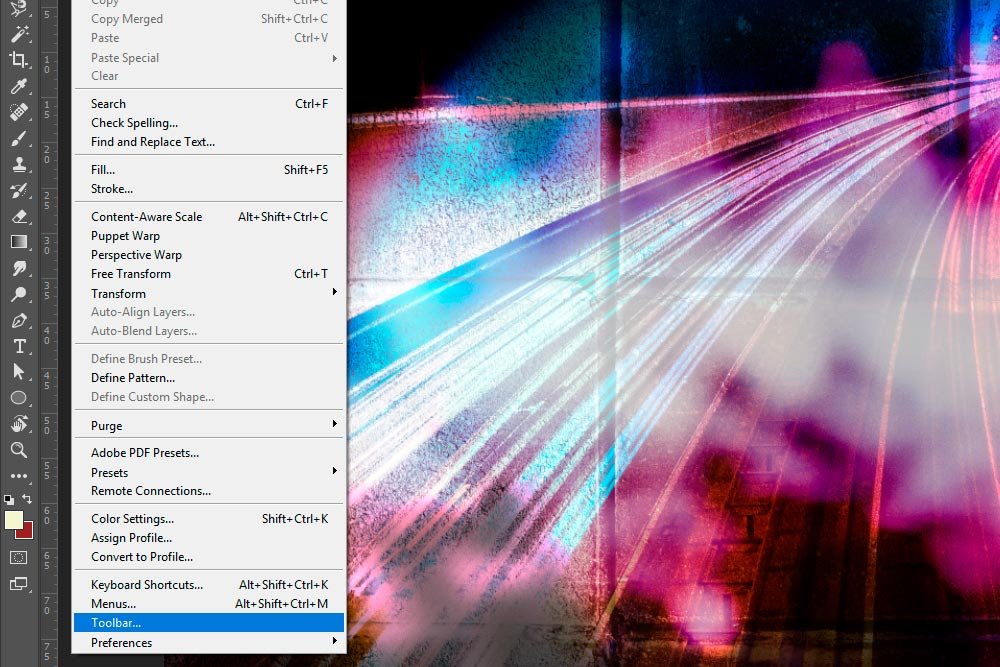
Customize Toolbar and can be accessed a few different ways. If I head up to the
Edit > Toolbar menu item and click, I’ll find that I can get to it that way.

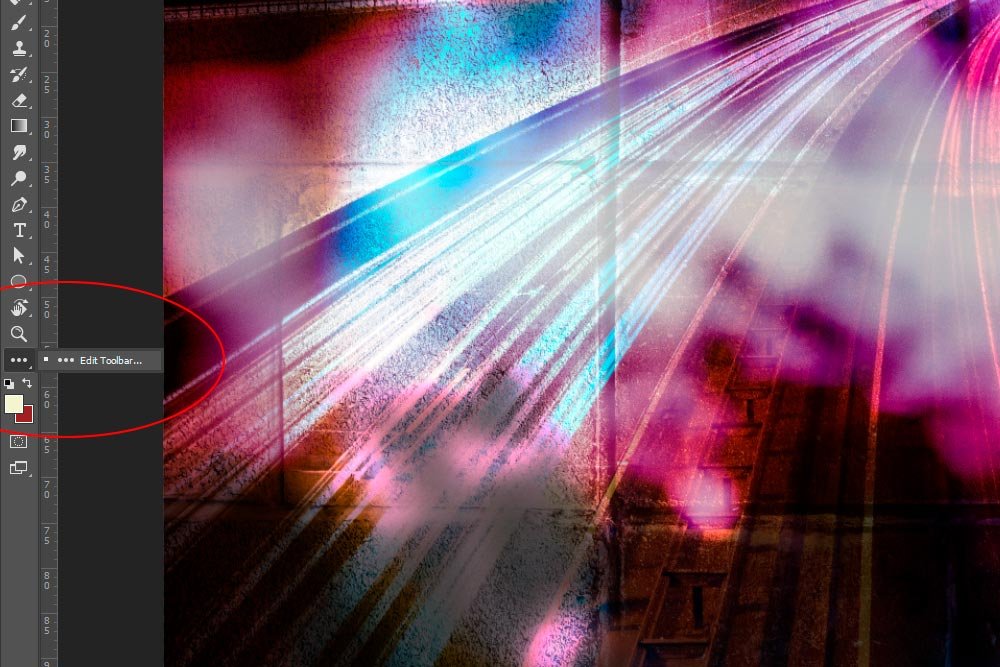
Alternately, if I head to the bottom of the toolbar itself and click on the selection with three dots lying horizontally and hold the mouse button down for a second or two, I’ll see a fly out that can get me to the same exact dialog box. Check it out.

Either method I choose does the same thing. It’ll open the dialog box I referred to above.

How to Delete a Tool From the Toolbar
This dialog box has a lot going on inside of it. It can do a lot of things. The first task I’d like to show you how to complete is the task of removing a tool from the left toolbar. In all honesty, when I go about doing this, I’m not actually removing a tool at all. What I’m doing is hiding it down at the bottom of the toolbar in a place called
Extra Tools. It’s almost as good as removing a tool because it’s essentially gone from the lineup. If your goal is to clean up the toolbar and reduce the number of visible tools showing in it, this is a good option for accomplishing that.
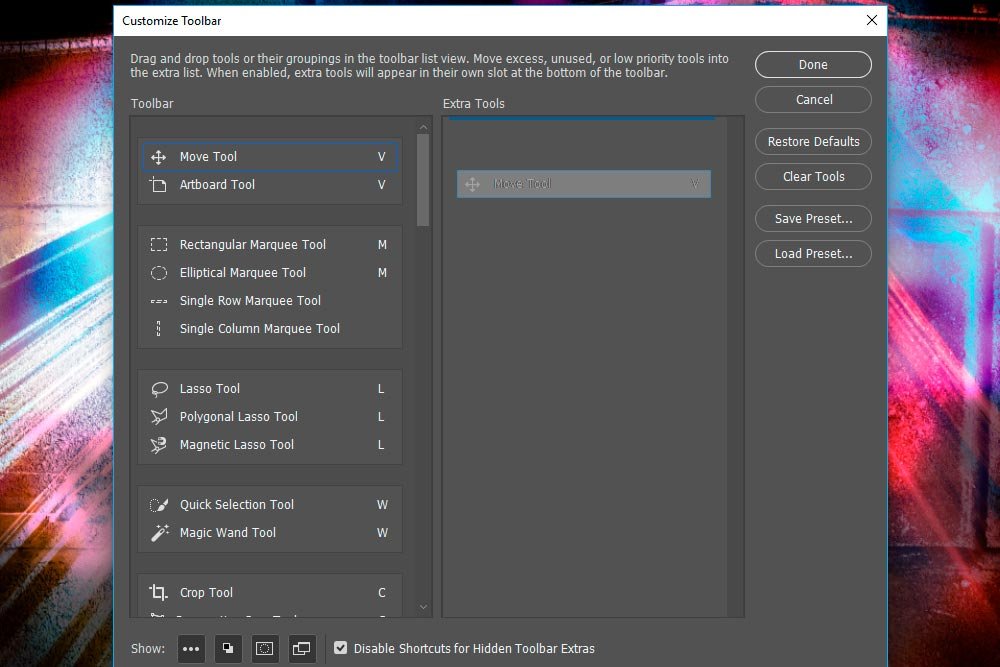
While in the Customize Toolbar dialog box, all I need to do to add a tool to the Extra Tools area is to click and drag that tool over from the left panel to the right one. It’s a drag and drop motion. For instance, if I wanted to remove the
Move Tool from the top position in the toolbar, I can drag and drop that one specifically.

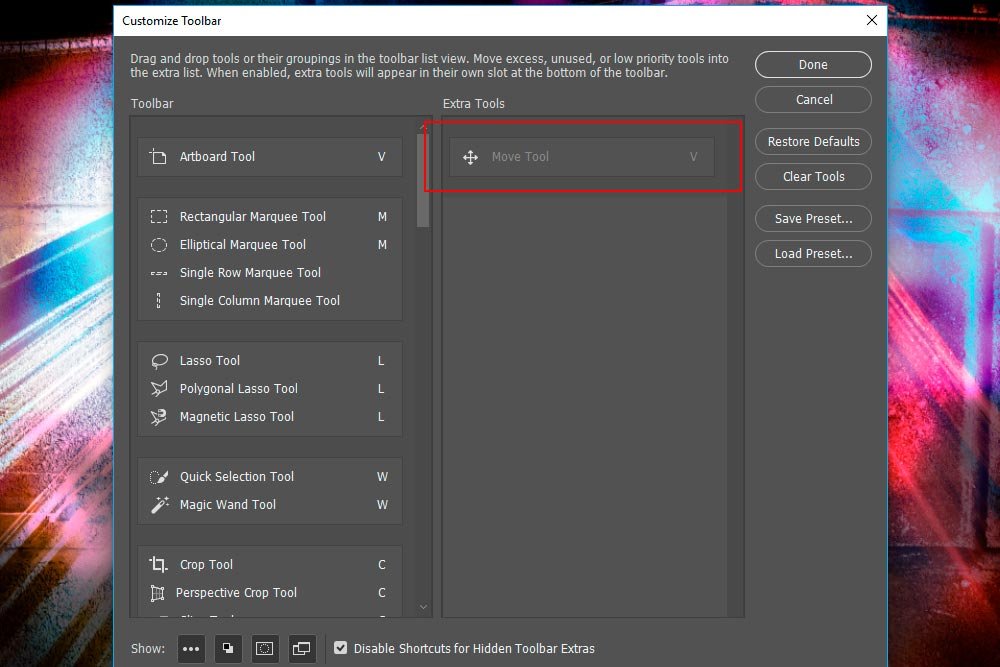
After I do that, I’ll see the tool in question over on the right side instead of the left.

If I head up to the upper right corner and click on the
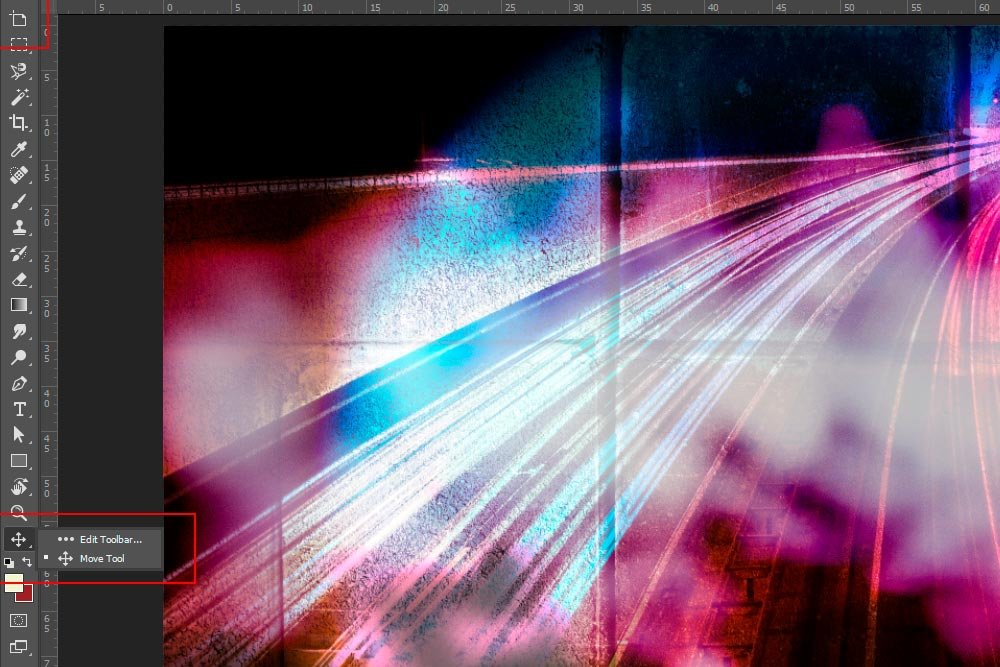
Done button, the window will close. I can then see what I’ve done to the toolbar. If you take a look at the next screenshot, you’ll see that the Move Tool is no longer in the top position of the toolbar, but instead is positioned down at the bottom, nested inside the area those three dots control.

If I continued to do this, I’d shrink the size of the left toolbar and increase the size of the nested Extra Tools area.
To replace a tool to its original position, it’s just as simple as removing it. All I would need to do is to drag it from the right side of the panel back to the left, where it originally sat.
How to Reorder Tools in the Toolbar
This is fun. Many folks aren’t into getting rid of too many things in the toolbar. That’s understandable. Reordering though, that’s a different story all together. If you use a specific tool all day long, you may want that one to be located at the top of the toolbar. Or, if you always use the
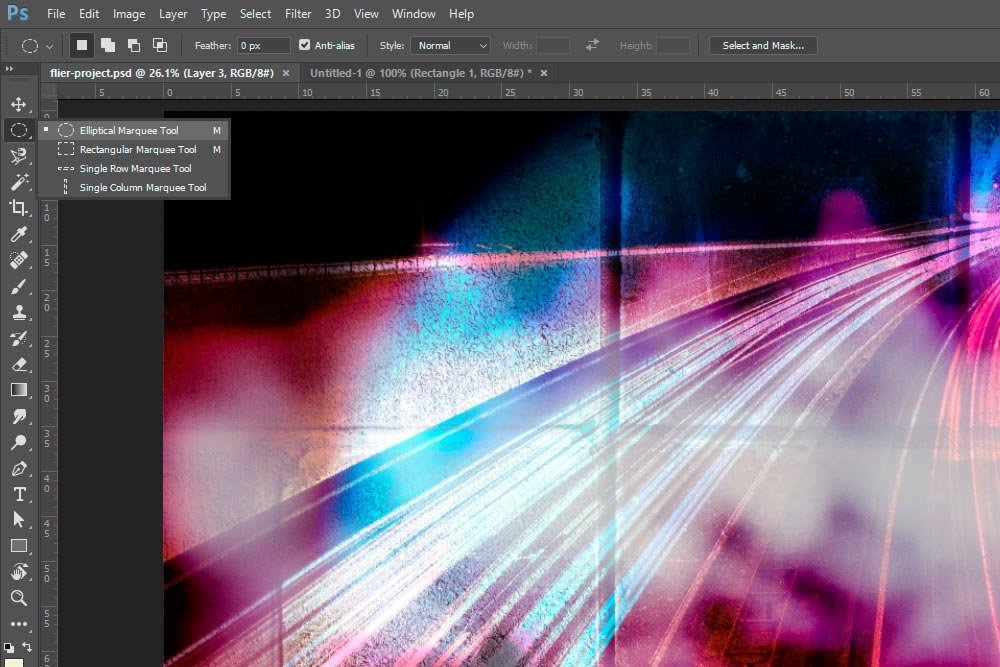
Elliptical Marquee Tool, for instance, instead of the
Rectangular Marquee Tool, you may want that one to show on your active bar as opposed to being nested under the primary Rectangular option. Reordering tools in the toolbar is just as simple of an operation as was the first one I showed you above.
To reorder tools in the toolbar, you’ll need to open up the Customize Toolbar dialog box again. Once that’s opened up, all you need to do is to click and drag a particular tool from its original position to a new one. So, if I wanted to move the
Lasso Tool to the very top position of the toolbar, all I would do is to click and drag that one up above the Move Tool and drop it. I would need to be sure that it creates its own tool position by dragging it all the way up to the top, but that’s easy. Once that’s done, I can check out my work. It happens in real time.

As you can see from the screenshot above, the Lasso Tool is now in it’s own position, which is away from the other selection tools of its kind.
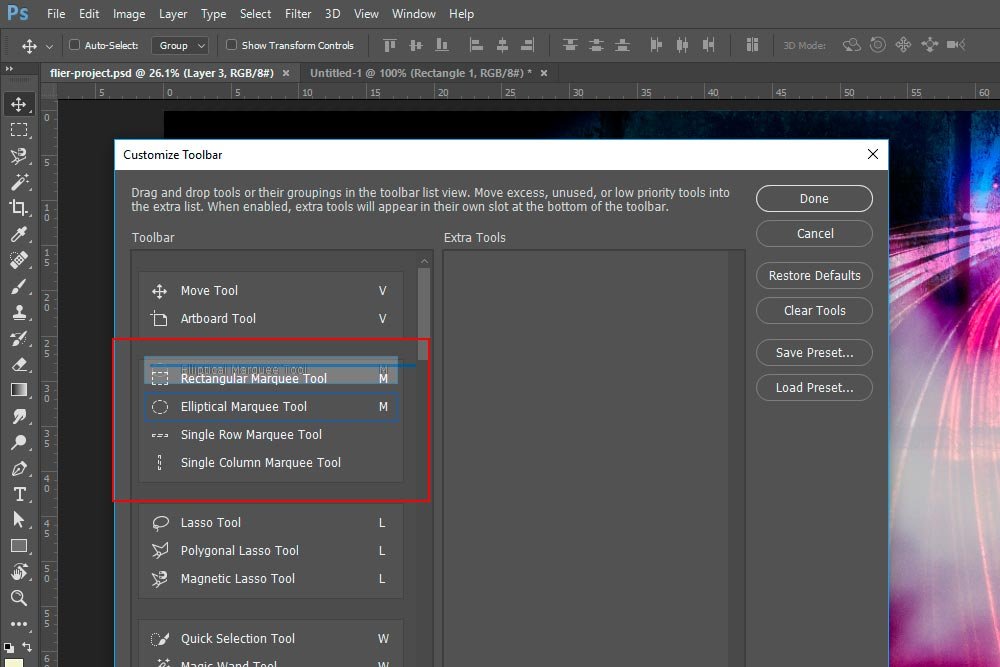
Next, if I wanted to keep a tool in its own group, but alter the order of that group, I’d simply click and drag up or down only slightly. I would be sure that the tool didn’t stray too far as indicated by the blue lines that show during the clicking and dragging operation. In this next screenshot, you can see that I’m dragging the Elliptical Marquee Tool upward, but that I haven’t dropped it yet.

Once I’m happy with the tool’s position, I can let go of my mouse button and drop it. It will then show where I wanted it to show inside the fly out. Notice how the Elliptical option is first in the screenshot below.

To remove a tool from one set and add it to another, I would follow the same instructions as the others in this section. I would click and drag that tool from the group it’s in and let it go in the group I’d like it to live from then on. It’s very straightforward.
How to Restore the Default Toolbar
Sometimes, we make a lot of changes and for whatever reason, we want to bring things back to their original states. You know, how things were when we first installed Photoshop. Getting this done in Photoshop is no problem at all. To accomplish this, while the Customize Toolbar dialog box is open, all I would need to do is to click on the
Restore Defaults button. That would erase everything I changed and bring order back to the universe. Once I click on Done, that’s it. This task will be finished.
How to Save a Custom Toolbar
In my opinion, this is the best part of this entire post because it’s the most practical. After doing all the work of actually creating the perfect toolbar, we also have the opportunity to save that toolbar, just in case we want to create multiple versions of the toolbar to jump back and forth between. Or, perhaps there can be multiple users on a computer and each user has their own preferred toolbar. This would work perfectly for that type of a situation as well.
After making any customization I see fit, I could save that toolbar scenario as what’s called a
Preset. Basically, a preset is just any saved instance of a customization that was done inside of Photoshop. To save my toolbar out, I’d click on the
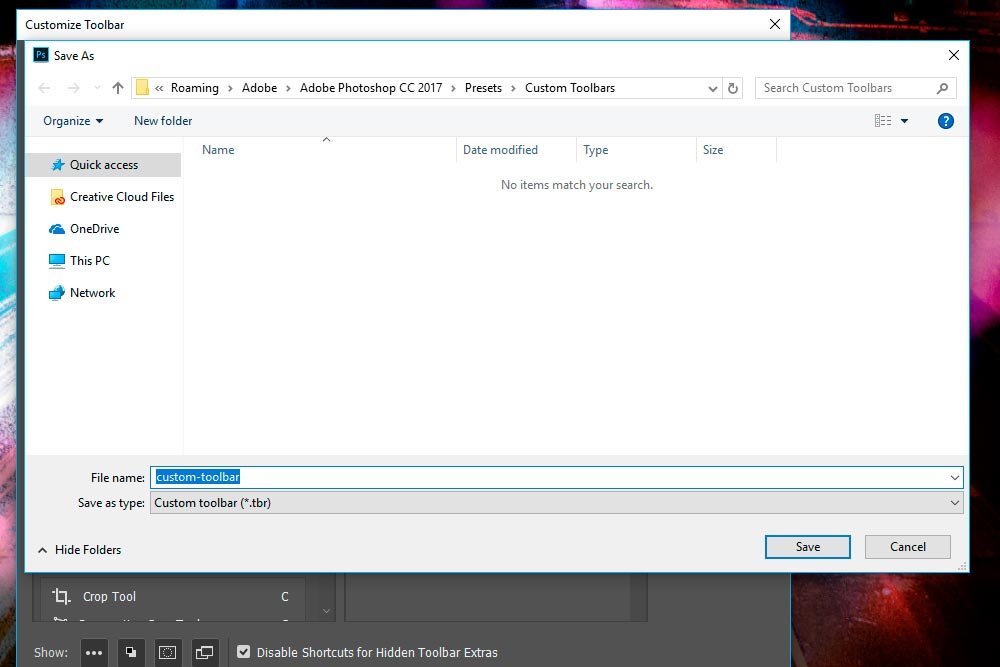
Save Preset button on the right side of the Customize Toolbar dialog box. Once I do that, I’ll see a folder window appear that’s already navigated to the
Photoshop > Presets > Custom Toolbars folder, where these things on my computer are stored.

I would name the preset something descriptive and then click on the
Save button down in the lower right corner of the folder window. That’s it. If I were to create many of these presets and I wanted to jump between them, I could click the
Load Preset button in the same dialog box, wait for the window to open, select whichever custom toolbar I’m interested and then click on the
Load button down at the bottom right of the folder window. To exit out of all the custom toolbars to use the default one again, I would simply click on the Restore Defaults button in the Customize Toolbar dialog box, as I instructed above in a previous section.
——
I hope I gave you some nice background on how to create and save your very own custom toolbar inside of Adobe Photoshop. If you have any questions or concerns regarding this post, please let me know in the comment section below. Thanks for reading!


