CampFireJack
Member
- Joined
- May 9, 2021
- Messages
- 118
- Reaction Score
- 1
- Points
- 16
- #1
I think there are a few different types of users who enjoy working with Adobe Bridge. Those who dabble and who don’t want to become too attached to any application and those who truly revel in immersing themselves in all of the bells and whistles an application has to offer. Personally, I’m the type to dabble. I’ve seen programs come and go through the years and I’ll tell you, I certainly am satisfied with the decision I made long ago to keep a respectable distance from allowing one piece of my workflow to become relied upon too much.
In today’s post, I’m going to discuss how to go about adding keywords to the metadata of an image file. From what I can gather, there are two methods. The first will satisfy those among you who are similar to the first type of personality I discussed above and the second method will let the other personality type set up shop and connect with Bridge more intimately. Both are great ways to add keyword metadata, so it really depends on who you are and which method you prefer.
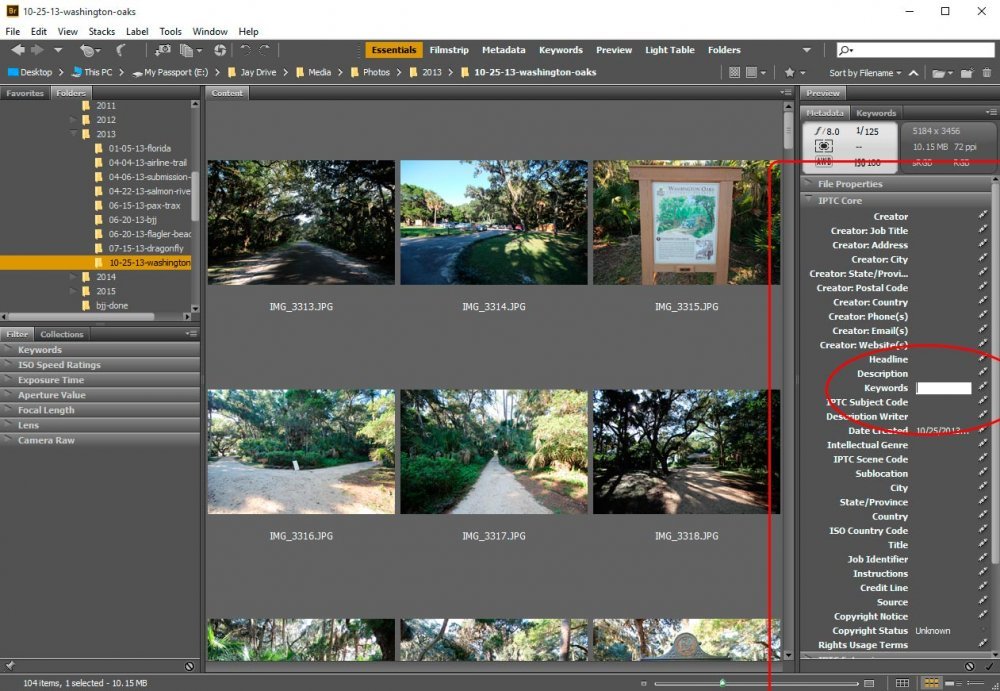
In the above screenshot, I’ve surrounded the IPTC (International Press Telecommunications Council) Core panel with a red square box and enclosed the editable keyword field with a red circle. To add a keyword to an image, simply select the image in the center content panel by clicking on it and then head over to the keyword field and click to the right of the word “Keyword.” That will make the area editable and turn white. Type the keyword inside that area and then click the small check mark at the bottom of the screen to apply the keyword to the image.
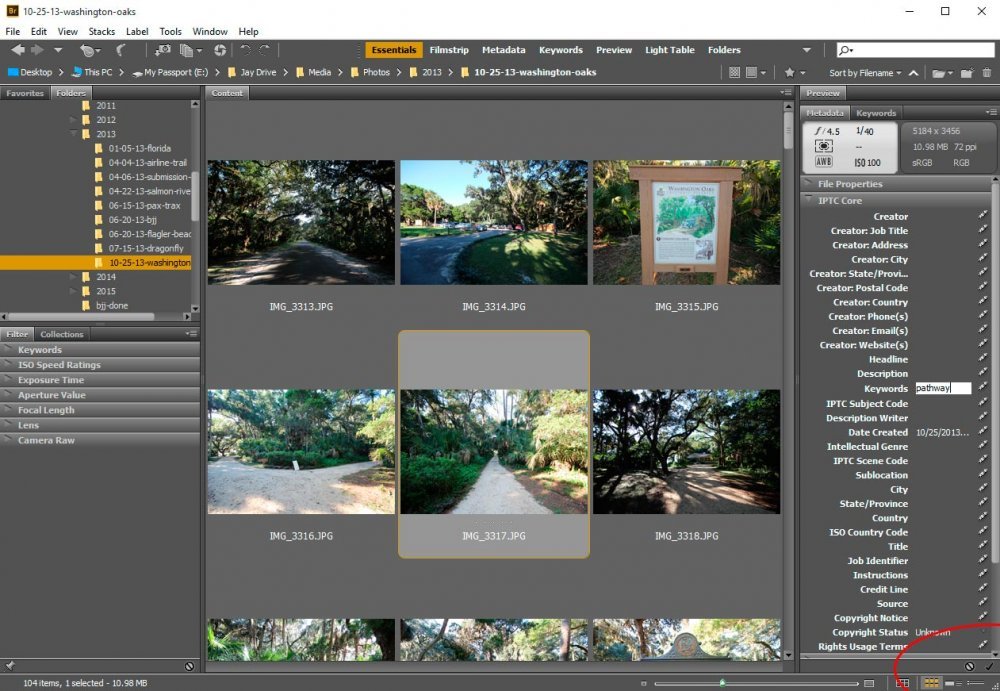
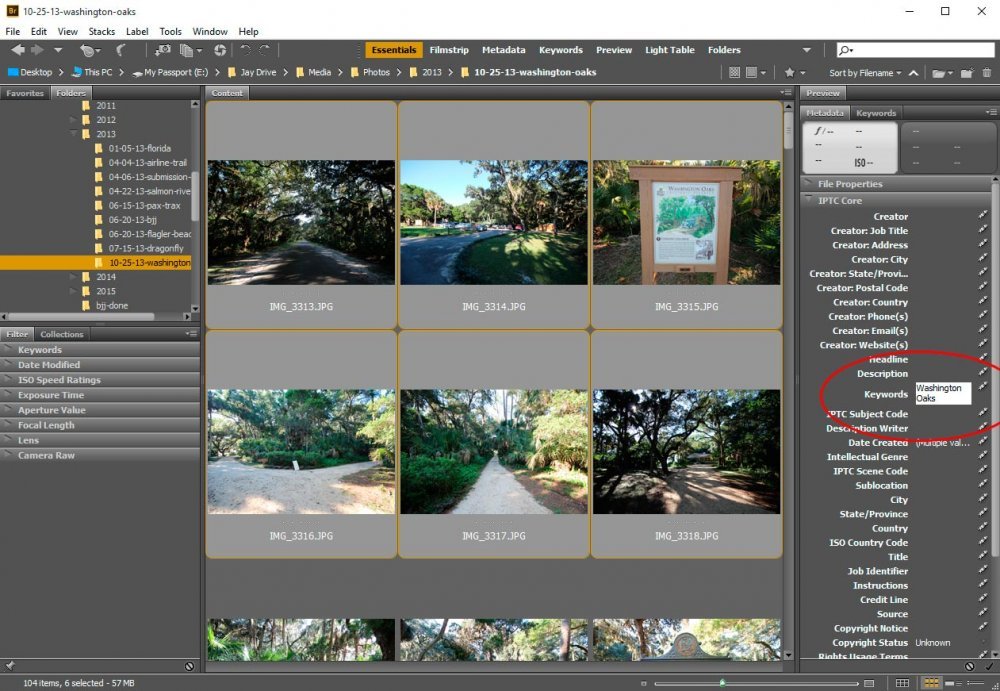
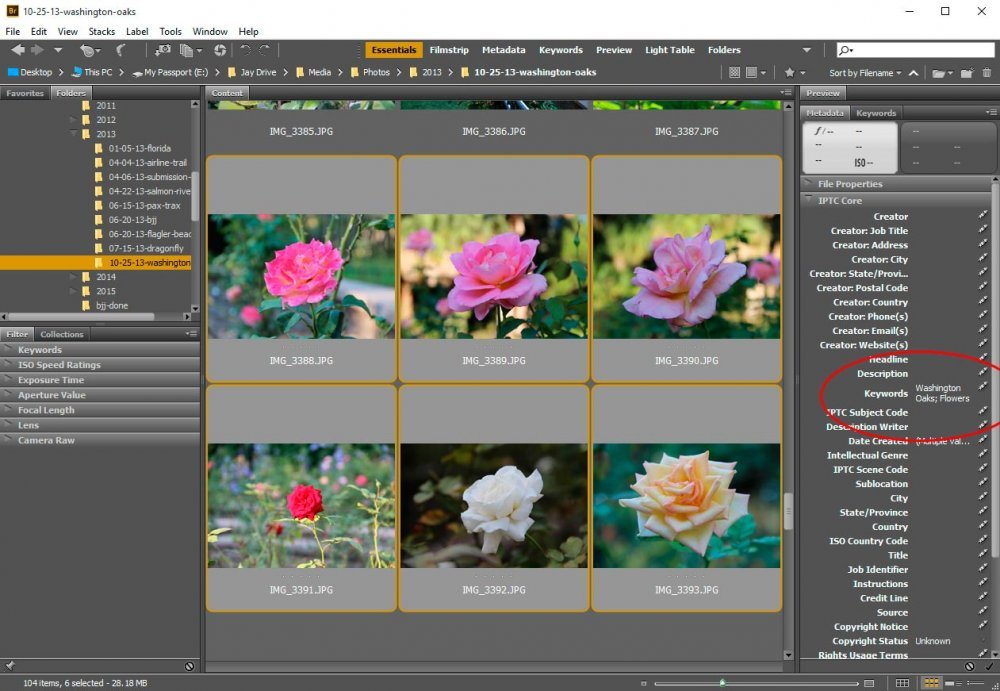
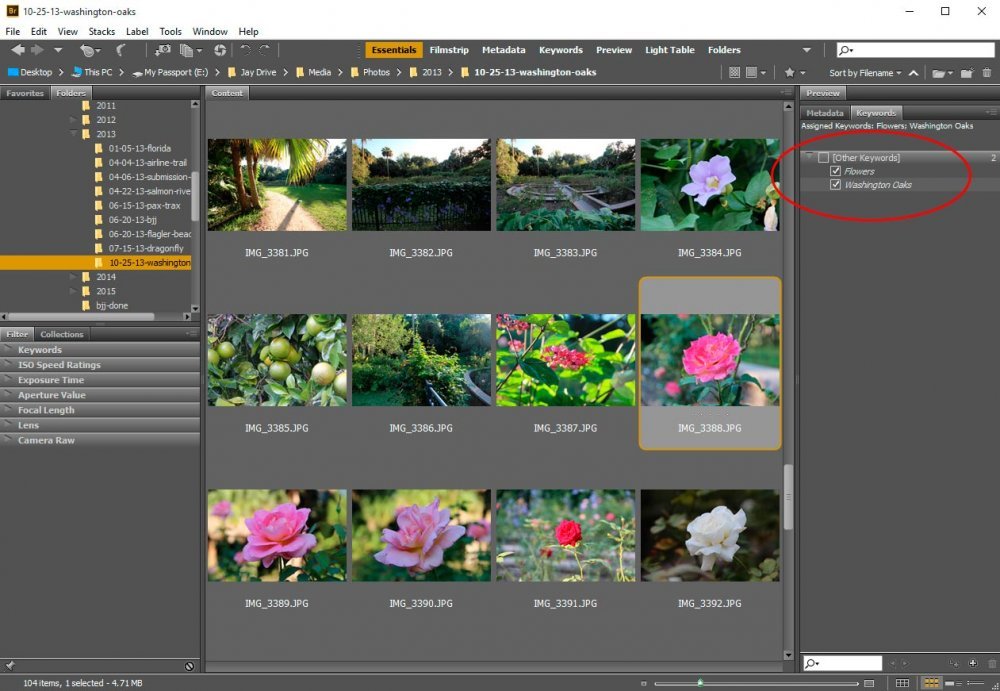
Since I already covered how you would go about adding a keyword to all photos, what I need to do now is go over how to add additional keyword to just a few images. To do this, I’ll go ahead and select the images I’d like to add the keyword “Flowers” to and then click to the right of the Keywords field, just like I did before. When the area becomes editable, I can type a comma (as a keyword separator) and then type my additional keyword. Follow that up with clicking on the “Apply” check mark and I’m all set. As you can see in the screenshot below, the six selected photographs have the keywords “Washington Oaks” and “Flowers” attached to them.
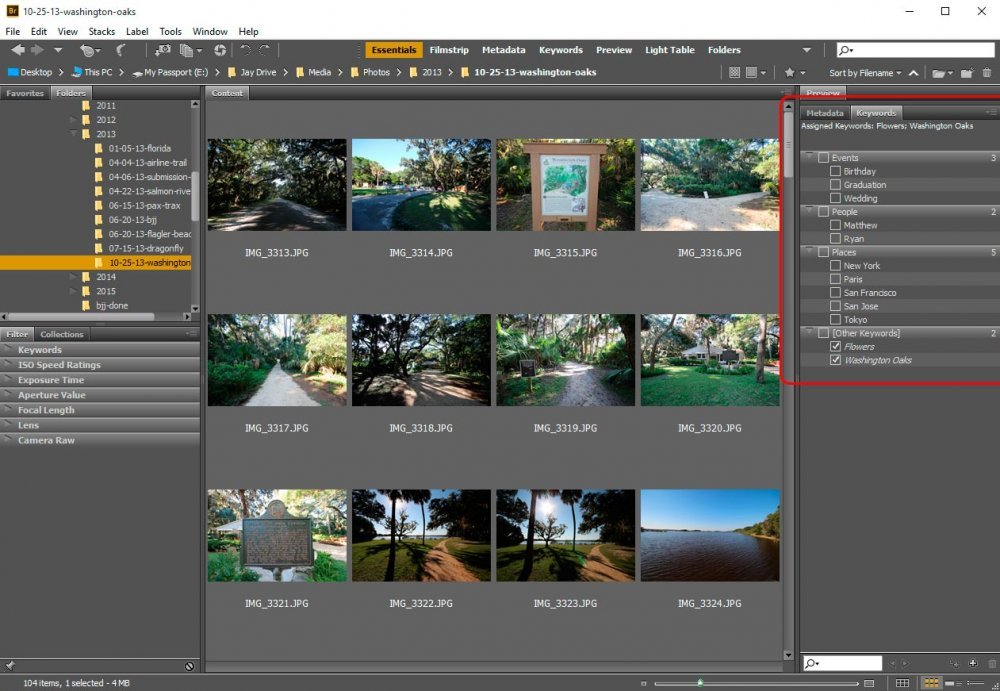
As you can see, it’s located on the right side with a red rectangle surrounding it. And if you’ll notice, it’s got some random keywords in there that I didn’t create. These keywords are headed by “Events,” “People” and “Places.” Since these keywords came with the install of Bridge and I have no use for them, I’ll delete the entire section of each one, which will remove all nested keywords under them as well.
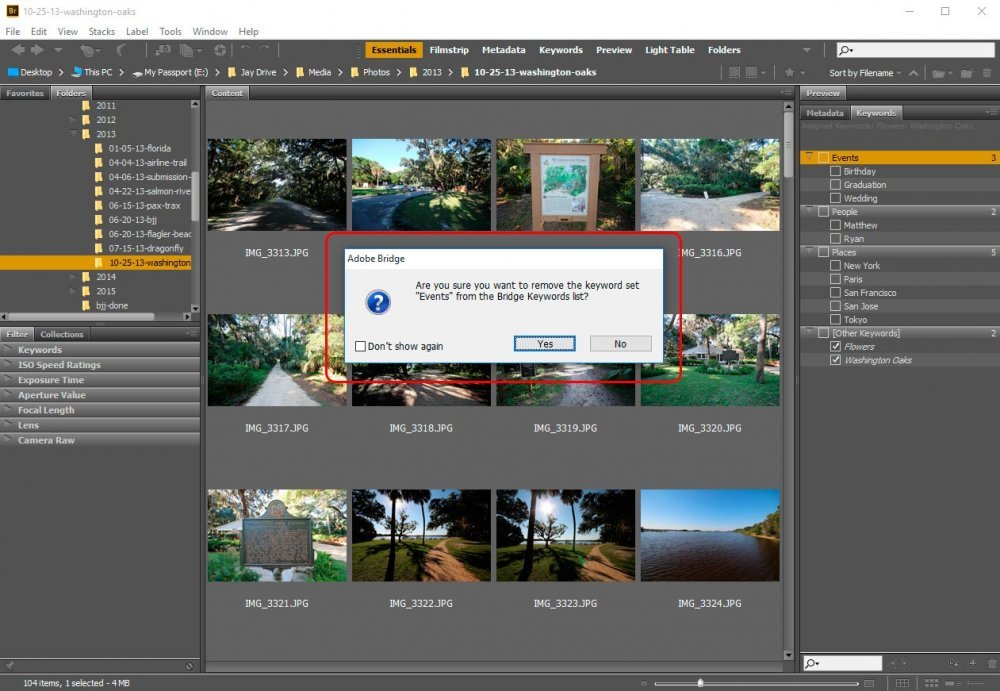
After that, a confirmation box will appear and I’ll click “OK.” This box simply offers a warning that we’re about to delete these keywords.
I’ll continue deleting until I’m left with only the keywords I previously added. And as you’ll see in the following screenshots, all we’ve got left are a few keywords. If I go through my images and click around on some thumbnails, the keywords on the right will either have their boxes checked off or not, based on whether they’ve got the particular keyword applied to it.
For instance, if I click on a random, non-flower image, I’ll see that only the “Washington Oaks” keyword is applied.
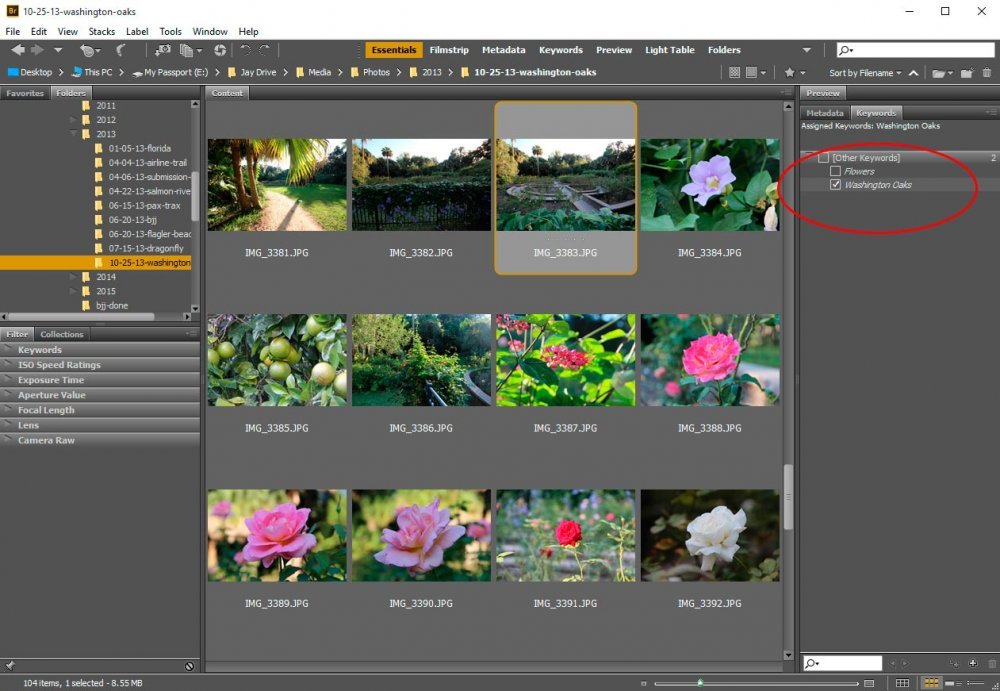
But if I click on a flower image that I already added the multiple keywords to, both “Washington Oaks” and “Flowers” are applied.
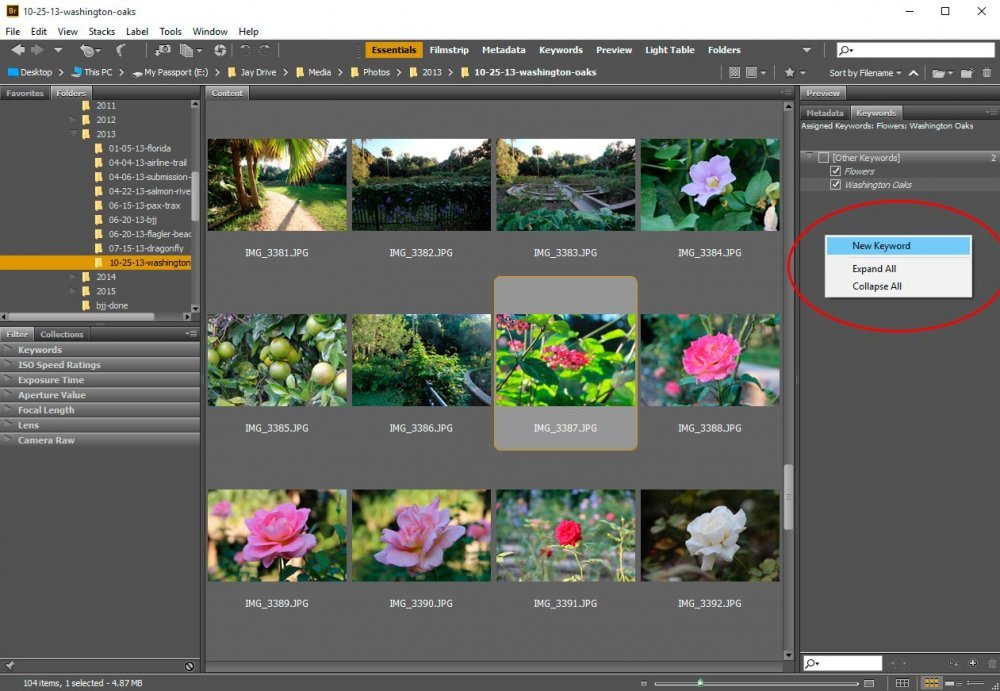
In my case, I added a new keyword called “Florida.” My goal is to have a primary keyword called “Florida” and then have a bunch of Florida galleries tagged with that keyword. Then, under that keyword, I’d like to have galleries, such as the “Washington Oaks” one I’m currently working in to be tagged with that keyword. Finally, on a more granular level, I’d like to have keywords under “Washington Oaks,” such as “Flowers,” “Ponds” and “Trees.” Finally, I’d like to set these keywords up so that make sense, meaning, I want them hierarchical. First though, I’ll go ahead and create the keywords I’ll need.
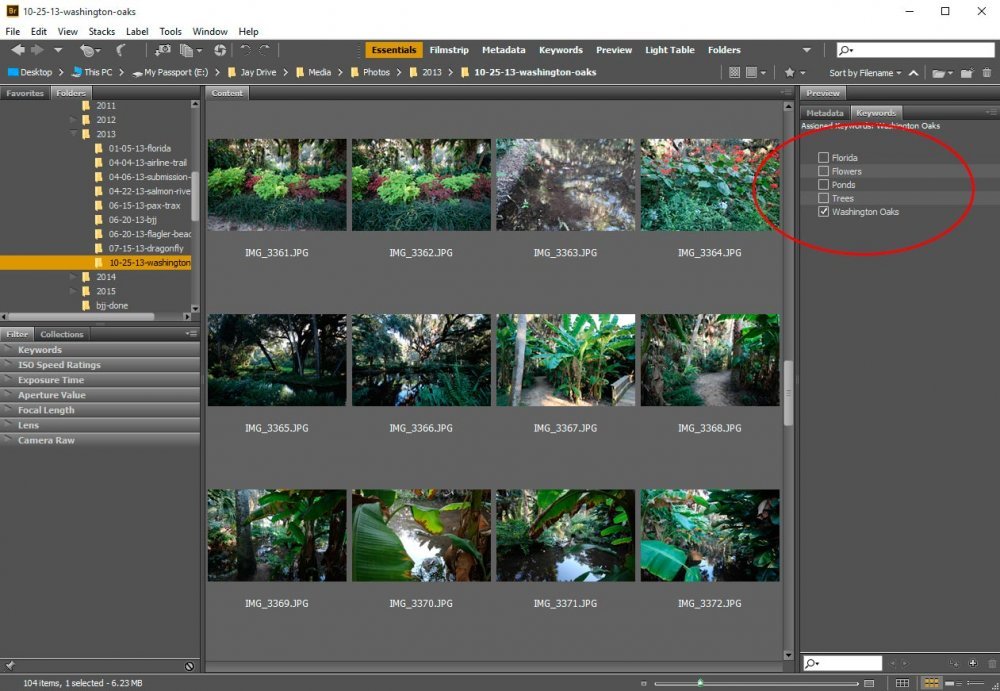
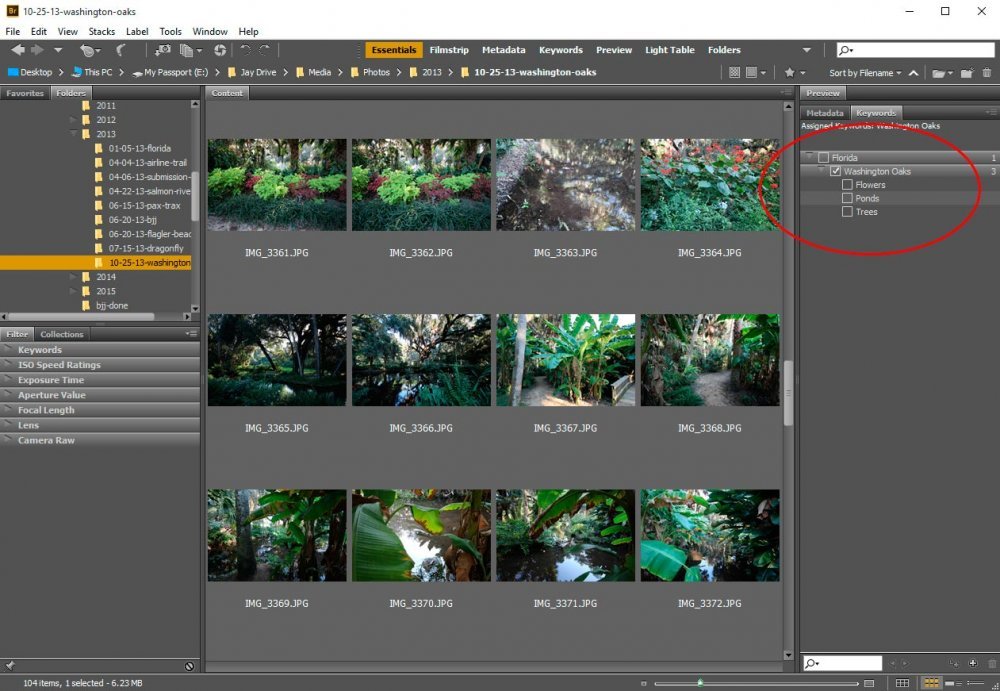
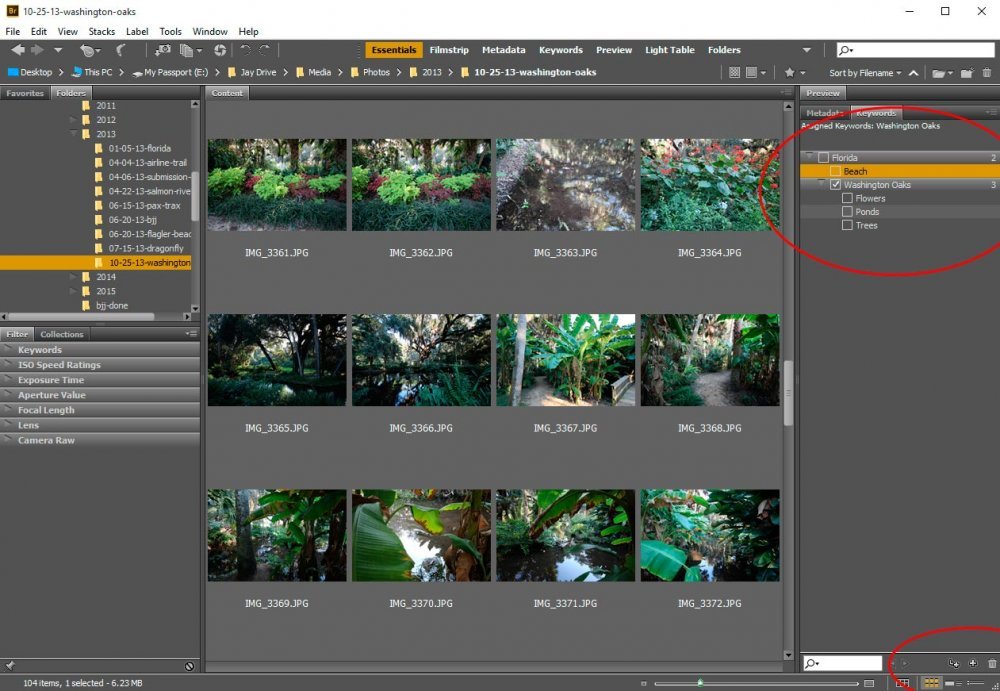
The way I’m going to create a hierarchy is to click and drag each keyword right on top of the keyword I’d like it to be under. So, right now, I’m going to drag and drop the “Washington Oaks” keyword on top of the “Florida” keyword. I’ll also drag and drop the “Flowers,” “Ponds” and “Trees” keywords on top of the “Washington Oaks” keyword. If you take a look at the screenshot below, I think you’ll agree things look more tidy.
If you think about it, it’s sort of like dragging folders around on your computer. You can drag one folder into another and then out again.
Now, I can easily navigate through my images and apply keywords at will.
In today’s post, I’m going to discuss how to go about adding keywords to the metadata of an image file. From what I can gather, there are two methods. The first will satisfy those among you who are similar to the first type of personality I discussed above and the second method will let the other personality type set up shop and connect with Bridge more intimately. Both are great ways to add keyword metadata, so it really depends on who you are and which method you prefer.
Adding Keywords in the IPTC Core Panel
The quickest and most simple method of adding a keyword or keywords to an image is to do it through the “IPCT Core” panel. If you’re not familiar with this panel, I encourage you to read through my previous post which discusses metadata in general. But since this is a new post, I’ll give a screenshot to show you where this panel is and what the keywords field looks like.
In the above screenshot, I’ve surrounded the IPTC (International Press Telecommunications Council) Core panel with a red square box and enclosed the editable keyword field with a red circle. To add a keyword to an image, simply select the image in the center content panel by clicking on it and then head over to the keyword field and click to the right of the word “Keyword.” That will make the area editable and turn white. Type the keyword inside that area and then click the small check mark at the bottom of the screen to apply the keyword to the image.

Adding a Keyword to Multiple Images
Many times, you want to add a keyword to more than one image. In this case, all you need to do is to select which images you’re interested in adding the same keyword to and then follow the instructions I just gave above. By doing this, you’ll be adding that keyword to all your selected photos.
Adding Multiple Keywords to an Image
Most of the time, adding just one keyword isn’t sufficient. You’ll likely find yourself in situations where you need to describe your images with more than one keyword. In my example gallery, I’d like to identify all of the images with the keyword “Washington Oaks” and then identify only a few of the image with the keyword “Flowers.”Since I already covered how you would go about adding a keyword to all photos, what I need to do now is go over how to add additional keyword to just a few images. To do this, I’ll go ahead and select the images I’d like to add the keyword “Flowers” to and then click to the right of the Keywords field, just like I did before. When the area becomes editable, I can type a comma (as a keyword separator) and then type my additional keyword. Follow that up with clicking on the “Apply” check mark and I’m all set. As you can see in the screenshot below, the six selected photographs have the keywords “Washington Oaks” and “Flowers” attached to them.

Using the Keywords Panel
The “Keywords” panel in Adobe Bridge is the organizational freak’s best friend. This is the place where we can see which keywords we’ve already created and where we can create and apply new ones. We can also organize them in a variety of ways to help make our lives easier. I’ll give you a screenshot of this panel below to offer a closer look.
As you can see, it’s located on the right side with a red rectangle surrounding it. And if you’ll notice, it’s got some random keywords in there that I didn’t create. These keywords are headed by “Events,” “People” and “Places.” Since these keywords came with the install of Bridge and I have no use for them, I’ll delete the entire section of each one, which will remove all nested keywords under them as well.
Deleting Keywords From the Keyword Panel
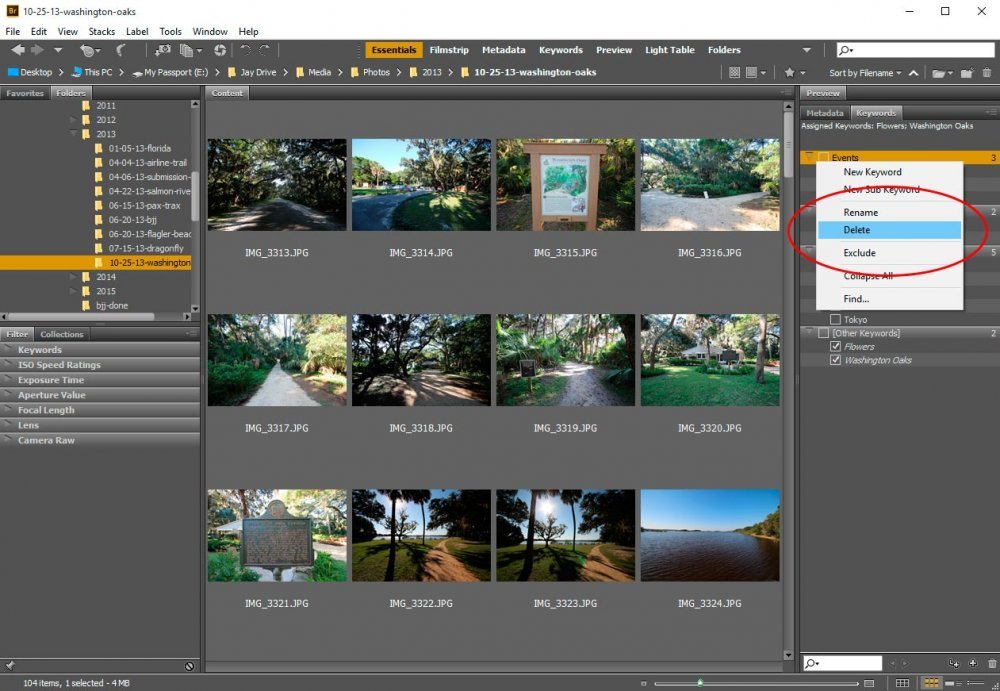
In order to delete a top level keyword with all keywords nested under it, I’ll simply right-click on the header. Once I do this, a small menu will appear with some available selections. I’ll click “Delete,” which will delete that particular section of keywords.
After that, a confirmation box will appear and I’ll click “OK.” This box simply offers a warning that we’re about to delete these keywords.

I’ll continue deleting until I’m left with only the keywords I previously added. And as you’ll see in the following screenshots, all we’ve got left are a few keywords. If I go through my images and click around on some thumbnails, the keywords on the right will either have their boxes checked off or not, based on whether they’ve got the particular keyword applied to it.
For instance, if I click on a random, non-flower image, I’ll see that only the “Washington Oaks” keyword is applied.

But if I click on a flower image that I already added the multiple keywords to, both “Washington Oaks” and “Flowers” are applied.

Applying Keywords Using the Keywords Panel
As you may have already guessed, it’s rather simple to apply an existing keyword to an image that isn’t already tagged with that word. All I need to do is to select the image or images and then check off the box to the left of the keyword in the Keywords panel. To remove a keyword from an image, I’d do the same thing, but uncheck instead of check. That will “unapply” the keyword from that image.Adding Keywords to the Keywords Panel
This is probably the easiest task to complete in this entire post. If we would like to add a new keyword to the Keywords panel that we can use to apply to images, we can right-click inside the panel or click the small “+” icon at the bottom of the application. Both of these functions will allow us to add and name a new keyword.
In my case, I added a new keyword called “Florida.” My goal is to have a primary keyword called “Florida” and then have a bunch of Florida galleries tagged with that keyword. Then, under that keyword, I’d like to have galleries, such as the “Washington Oaks” one I’m currently working in to be tagged with that keyword. Finally, on a more granular level, I’d like to have keywords under “Washington Oaks,” such as “Flowers,” “Ponds” and “Trees.” Finally, I’d like to set these keywords up so that make sense, meaning, I want them hierarchical. First though, I’ll go ahead and create the keywords I’ll need.

Organizing Keywords Through Hierarchy
As you can see, I’ve got a few keywords in the Keywords panel now. As I already mentioned, I’d like to organize these keywords in a hierarchy, so I can apply them faster in the future and so they make sense when I look at them. If all the photos were taken in Florida, it would make sense to have all images tagged with that keyword. If all images in this gallery were taken at the Washington Oaks State Park, it would also make sense to have all these images tagged with that keyword. And since random images throughout the gallery will have individual keywords applied to them, they should be situated under everything.The way I’m going to create a hierarchy is to click and drag each keyword right on top of the keyword I’d like it to be under. So, right now, I’m going to drag and drop the “Washington Oaks” keyword on top of the “Florida” keyword. I’ll also drag and drop the “Flowers,” “Ponds” and “Trees” keywords on top of the “Washington Oaks” keyword. If you take a look at the screenshot below, I think you’ll agree things look more tidy.

If you think about it, it’s sort of like dragging folders around on your computer. You can drag one folder into another and then out again.
Creating Sub-Keywords
I’ve been thinking about it. Even though I won’t need a “Beach” keyword now, I do have some galleries with pictures of the beach in them. Maybe I should create a new keyword called “Beach” and position it under the “Florida” keyword. When I do this, instead of creating a new keyword and dragging it where I want it, I can simply click the “Florida” keyword and then click on the “New Sub Keyword” icon down at the bottom of the panel. I’ll name the keyword and Bridge will position it as a sub-keyword under “Florida” with no dragging necessary.
Now, I can easily navigate through my images and apply keywords at will.
