KodyWallice
Member
- Joined
- May 7, 2021
- Messages
- 123
- Reaction Score
- 1
- Points
- 23
- #1
I frequently use Adobe Bridge to assist with my photo selection and editing workflow. I’m a fairly active blogger who enjoys capturing multitudes of photographs that pertain to the subjects I write about. One of the tools I use most with Bridge is the “Preview” tool. It’s robust and allows me to choose between shots – which ones are higher quality than others. It also lets me organize my photos, but that’s a topic for another time.
In this post, I’m going to discuss a few really simply methods of previewing photos with Bridge. As I mentioned above, the process is robust and will give you the ability to quickly filter out photos that don’t quite make the grade.


When I use this method, I get a wonderfully large image preview.

To return to the regular thumbnail view, all I need to do is hit the space bar once again or hit “Esc” on my keyboard.


Now, if I had tons of photos and really didn’t want to flip through every single one of them, I could specifically select which ones I’d like to move between in my full-screen preview mode (using the left and right arrows on my keyboard). To select which photos I’d like to limit Bridge to previewing, I can either select the first thumbnail in a contiguous range by clicking on it, then hold down the “Shift” key on my keyboard. After that, I can click the last thumbnail in the range. Once that’s completed, I can hit the space bar and the left and right arrows to get a glimpse of what I’d like to see.
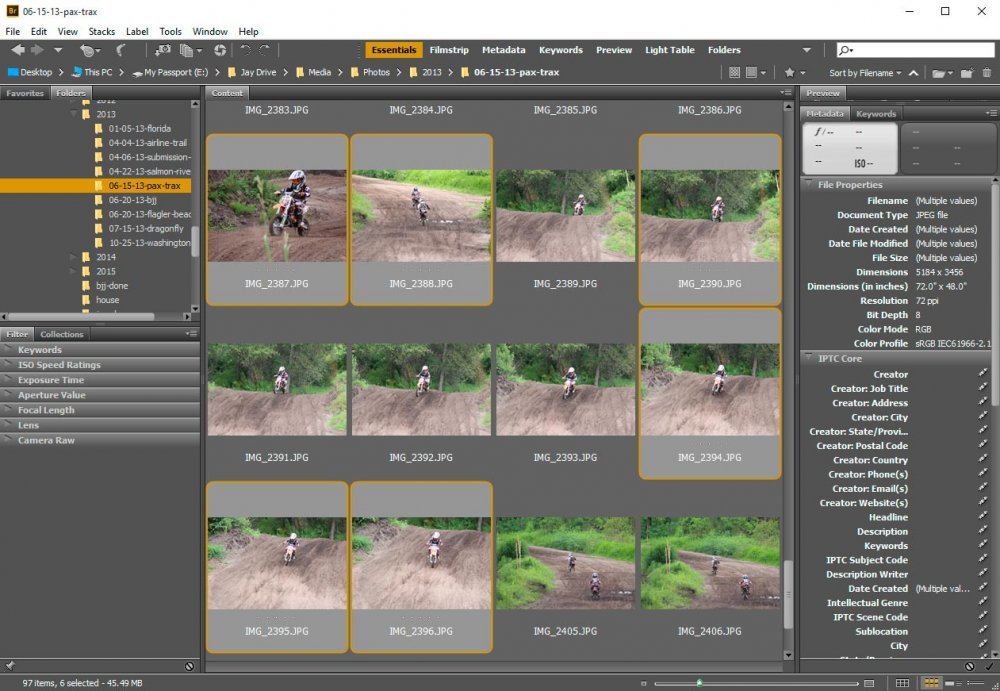
If I have random photos I’d like to preview, I can follow the same instructions, but this time, instead of holding down the “Shift” key, I can hold down the “Ctrl” key and click on the random thumbnails of my choosing. I’ll show you what some randomly selected thumbnails look like in the screenshot below.

Now, if I head into preview mode and flip through these images, Bridge will limit the cycle to only what I’ve selected, leaving all other photos out of the loop. I’d say that’s pretty handy!
In this post, I’m going to discuss a few really simply methods of previewing photos with Bridge. As I mentioned above, the process is robust and will give you the ability to quickly filter out photos that don’t quite make the grade.
My Gallery
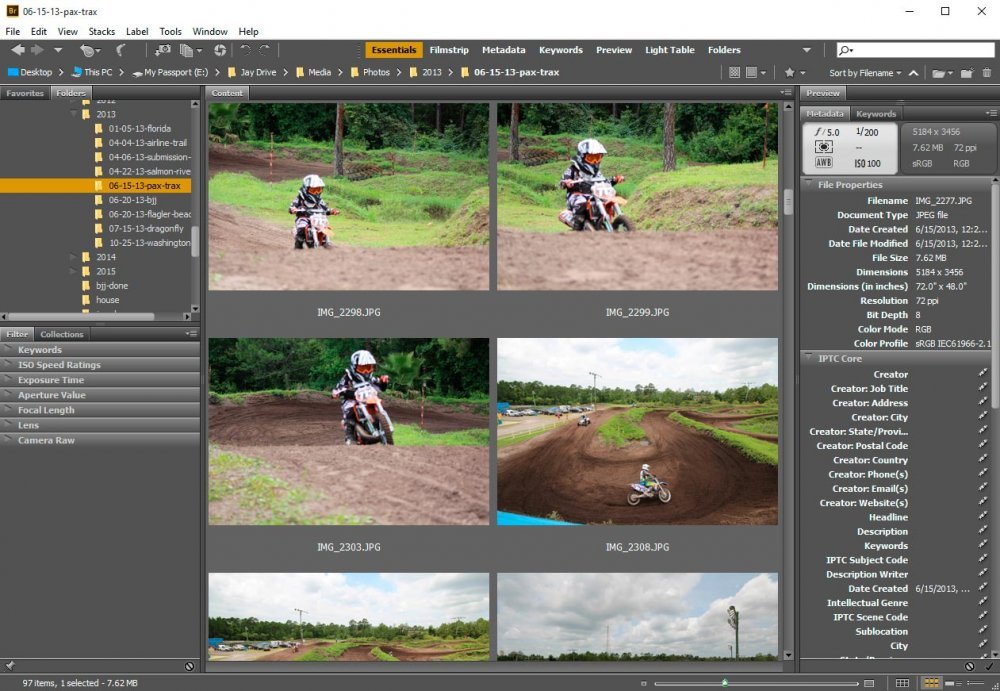
In this post, I’ll be using photos from a shoot I took while I was living in Palm Coast, Florida a few years ago. The son of a friend of mine was racing around a motocross track on his dirt bike and I decided to grab some photos. The venue is called “Pax Trax” and is located in Bunnell. If you take a look at this screenshot, you can see some of the images. I increased the size of the thumbnails for better viewing.
Previewing With Full-Screen
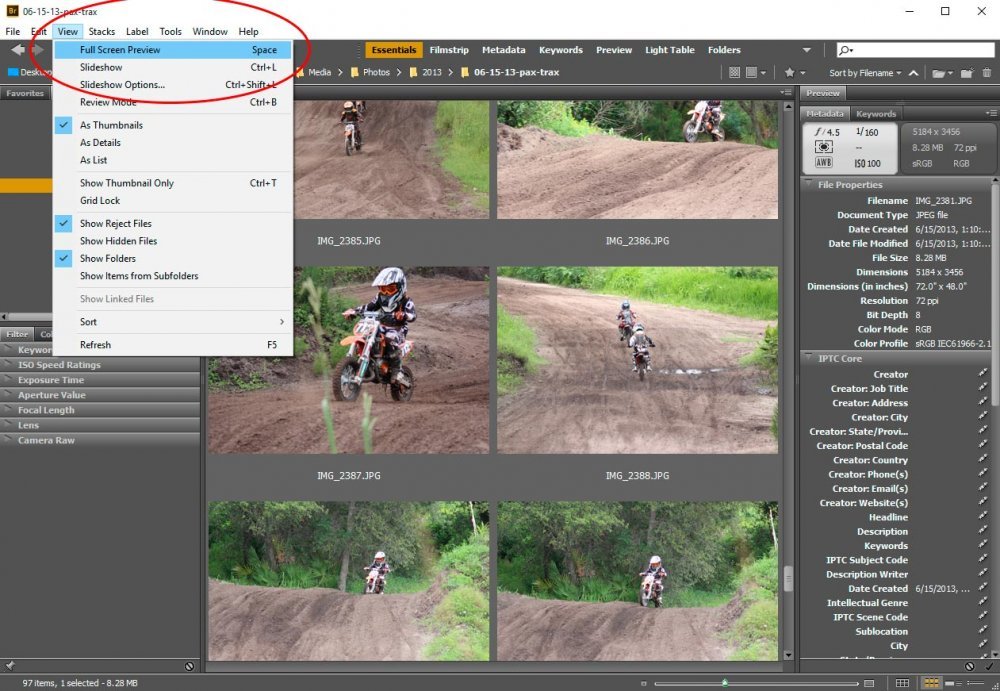
The preview method I use most often is full-screen mode. To preview an image using this method, all I need to do is to click on the thumbnail I’d like to view to selected it and then hit the space bar on my keyboard. That will expand the image so it fills my entire computer monitor. Just as easily, but not as fast, I can use the “View > Full Screen Preview” located up in the main menu area.
When I use this method, I get a wonderfully large image preview.

To return to the regular thumbnail view, all I need to do is hit the space bar once again or hit “Esc” on my keyboard.
Zooming In & Out of the Preview
Previewing an image with full view is great, but what if I wanted to really get an up-close look at a particular area of a photo? Well, to do this, all I need to do is to click my mouse once on the area I’d like to view more closely. If I wanted to use my keyboard to accomplish the same thing, I’d simply hit the “+” key. And to return to regular full-screen size, I’d hit the “–” key. I could also click on the image again to reduce the size as well.
Panning a Zoomed-In Preview
Now we’re getting somewhere. Let’s say that while my full-screen previewed image is zoomed in, I’d like to pan around a bit. You know, just to check things out. It’s always a good idea to see what the entire photo entails. To pan a zoomed-in photo, I’d simply click and drag. Remember, if I click and let go, my image with be reduced back to normal preview size. If I click and hold on, then I can drag it around.
Moving Between Images
The really neat thing about Adobe Bridge’s preview abilities is that in order to preview one image right after another, I don’t have to keep returning to the thumbnail view, only to click on another thumbnail to move to the next photo. If I’d like to preview one photo and then the next in line, right after that, all I need to do is to hit the right arrow on my keyboard. That will give me sort of a manual slide-show of every photo in my gallery.Now, if I had tons of photos and really didn’t want to flip through every single one of them, I could specifically select which ones I’d like to move between in my full-screen preview mode (using the left and right arrows on my keyboard). To select which photos I’d like to limit Bridge to previewing, I can either select the first thumbnail in a contiguous range by clicking on it, then hold down the “Shift” key on my keyboard. After that, I can click the last thumbnail in the range. Once that’s completed, I can hit the space bar and the left and right arrows to get a glimpse of what I’d like to see.
If I have random photos I’d like to preview, I can follow the same instructions, but this time, instead of holding down the “Shift” key, I can hold down the “Ctrl” key and click on the random thumbnails of my choosing. I’ll show you what some randomly selected thumbnails look like in the screenshot below.

Now, if I head into preview mode and flip through these images, Bridge will limit the cycle to only what I’ve selected, leaving all other photos out of the loop. I’d say that’s pretty handy!
