Search

How To Open Multiple Photos From Adobe Bridge Into Camera Raw

  • Thread starter Newman
  • Start date
Newman

Newman

Member
Joined
May 11, 2021
Messages
106
Reaction Score
0
Points
23
  • #1
opening-multiple-photos-from-bridge.jpg

I’ve got a fast, but extremely helpful post today that talks about how to open a photo or multiple photos from Adobe Bridge into Adobe Camera Raw. Now, I know I already covered one technique (which I’ll cover again) in my post on how to batch edit files, but there are a few more I’d like to discuss. After all, not everyone shares my affinity for the methods I choose to use.

In this post, I’ll be demonstrating how to open multiple pictures. And to do anything multiple in Bridge, we need to select what we’d like to open.

Selecting the Images​

The easiest method of selecting multiple images is to click on each one of them while holding down the CTRL key on your keyboard. Alternatively, you can click the first of a series of images, hold down the SHIFT key and then click the last of the series. Either way is good and will get what you need selected. I’ll go ahead and select some pictures for my demonstration now. In the case below, I clicked image number one and then held down the shift key. After that, I clicked the last of the eight images.
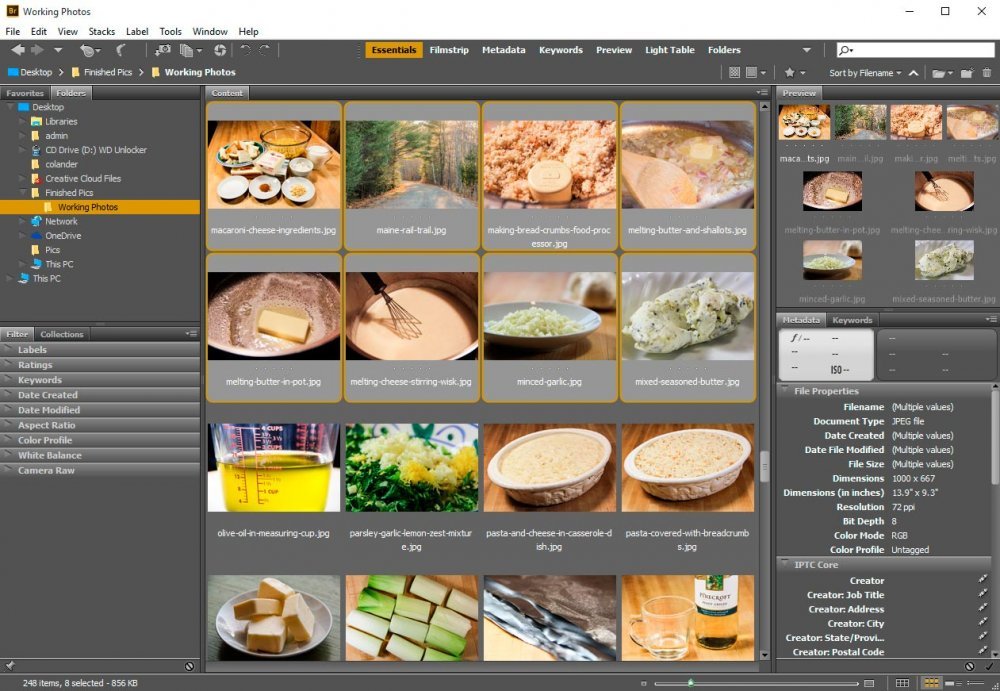
selecting-multiple-images-in-adobe-bridge.jpg

Now that the images are selected, we can move on with launching them into Camera Raw. Again, I love this because it’s so easy.

Method #1 – Using the File Menu​

If you appreciate a good menu, then you’ll love what I say next. To open up my selected photos using the menu up above, all I need to do is head to and click on File > Open in Camera Raw. It’s that simple. Every pictures I want to open, will.
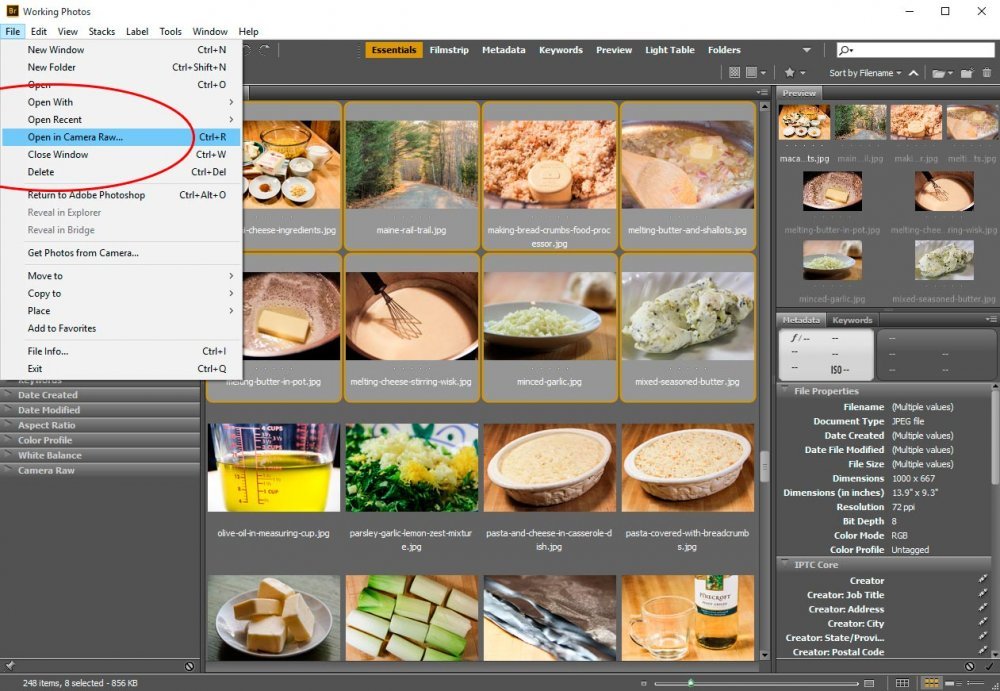
file-open-in-camera-raw-menu.jpg

Method #2 – Right-Clicking On the Images​

The second method is not so well known, but is probably faster and easier than the last. To open the selected images using this method, all I need to do is right-click on any of the selected photos and choose Open With Camera Raw. This will perform the same exact operation as above, but will change which mouse key you use first. I think the simplicity and popularity with using this methods stems with the fact that photographers and designers don’t need to use the menus at the top of the application, reducing their “rolling around” with the mouse.
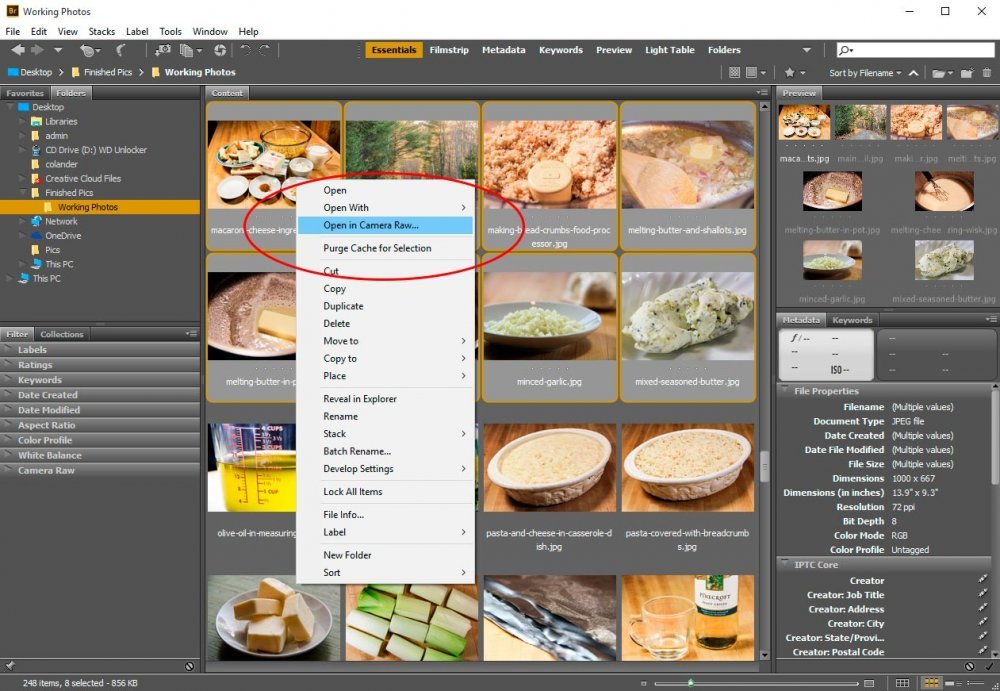
right-click-open-with-camera-raw.jpg

Method #3 – Click the Small Circle Icon​

I use this method all the time. It’s so simple and in-your-face I can’t stand it. To open multiple photos from Bridge into Camera Raw, all I need to do is to select my images and then click the small Open in Camera Raw icon that sits directly below the main menu up top. Here, take a look at the screenshot below.
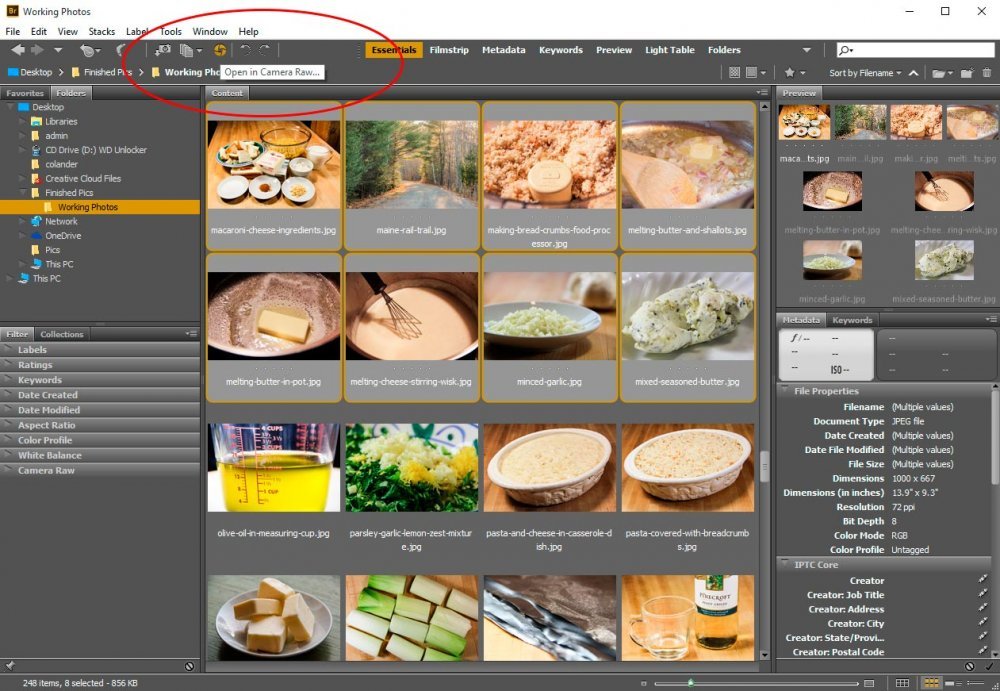
open-in-camera-raw-icon.jpg

What you’re looking for is the small orange (because I’m rolling over it) icon that’s positioned directly below the Window menu item. In the screenshot, since I’m rolling over the icon with my mouse, the little instruction flyout appears.

Method #4 – Using the Keyboard Shortcut​

If you’re a serious Bridge user, you surely want to use as many keyboard shortcuts as you possibly can. They’re fast and easy to remember. No really, for some strange reason, when I learn a new shortcut, I always think I’m going to forget it. Strangely enough, I never do. It’s one of those weird things. Anyway, the keyboard shortcut to open images from Bridge into Camera Raw is CTRL+R. That’s it. Please let me know what you think and if this post helps at all.
 
Newman

Newman

Member
Joined
May 11, 2021
Messages
106
Reaction Score
0
Points
23
  • #2

How to Launch Camera Raw from Adobe Bridge Preview Mode​

adobe-bridge-preview-mode.jpg

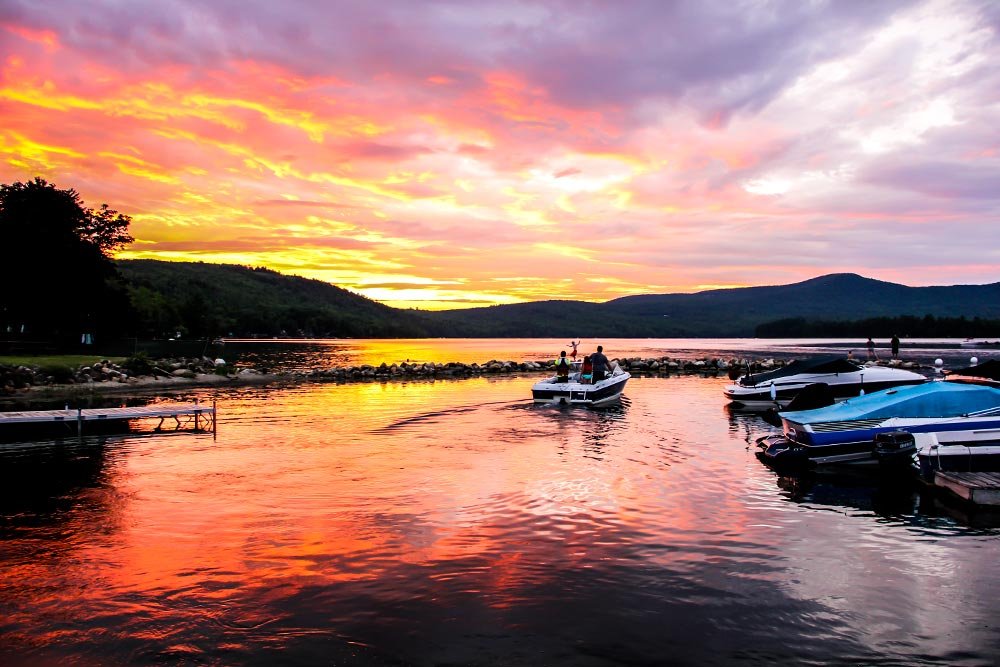
My lady and I made a quick visit to our town lake a few evenings ago. We don’t do this much, but when we do, I’ll tell you – it’s beautiful. We are very fortunate that we only have to travel about four miles to see something so striking.

While we were there, she snapped a few photos. There is the lake you see above as well as a smaller one that is followed by a water fall. There’s also an old wood mill that’s no longer used. All really great areas for photography.

She took a few photos and then she handed the camera to me. I took a few photos as well. Mine had more to do with people and boats and hers had to do with natural beauty.

When we got the photos home, I decided to download them from the camera to my computer. When I had them where I wanted them, I viewed them using Adobe Bridge. Then, after I selected one to work on, I went through my typical routine. I clicked the Open in Camera Raw icon in Bridge to launch Camera Raw, where I did my editing.

Here’s the thing – sometimes, I work with different sized windows. If I know I’m going to limit my editing to simple operations such as increasing or decreasing exposure, contrast, vibrance and things like that in the Basic panel, I’ll keep the Camera Raw window rather small. After all, I don’t need to have a great view of the intricacies of the photo and I generally like to see other applications on my computer while I’m editing my photography. Of course, if I were editing a photo and removing spots and making very detailed adjustments, I would keep the application as large as possible. But, even when the window is small, I like to have a large view of my changes, if that makes any sense.

To clarify, I’m going to give you an example of how I go about having a reduced sized application with a large view of what I’m working on.

My Photos in Adobe Bridge​

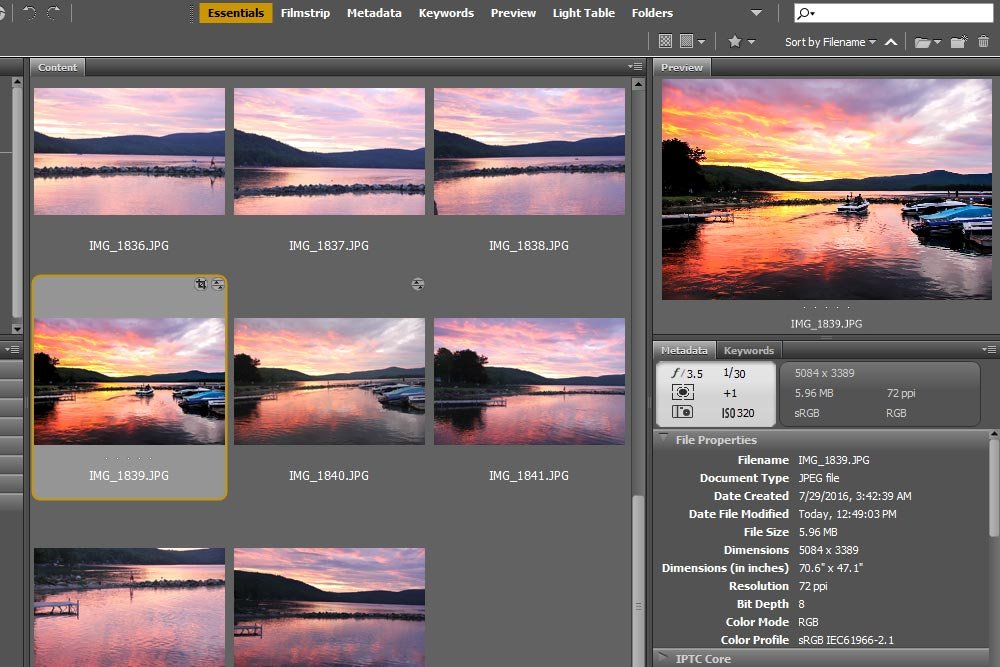
To start off, I’ll give you a screenshot of some of the photos we took of the lake last week. I’m showing you the thumbnails in Adobe Bridge.

bridge-thumbnails.jpg

As you can see, the screenshot includes the center and the right panels. Also, I’ve already selected my example photo.

Full Screen Preview Mode in Bridge​

No matter the size of the Bridge application that’s open, you can select one of the thumbnails and preview the corresponding photo so it takes up the entire size of your monitor. To do this, simply press the Space Bar on your keyboard. When I do this, the preview is giant because I’m currently working on a 27″ monitor. By the way, to scroll through the photos of a series, simply press the left and right arrows. To close the large preview, press the space bar again.

In my case, I’m going to leave the giant preview open. This will allow me to see any changes I make to the photo.

Keyboard Shortcut to Launch Camera Raw​

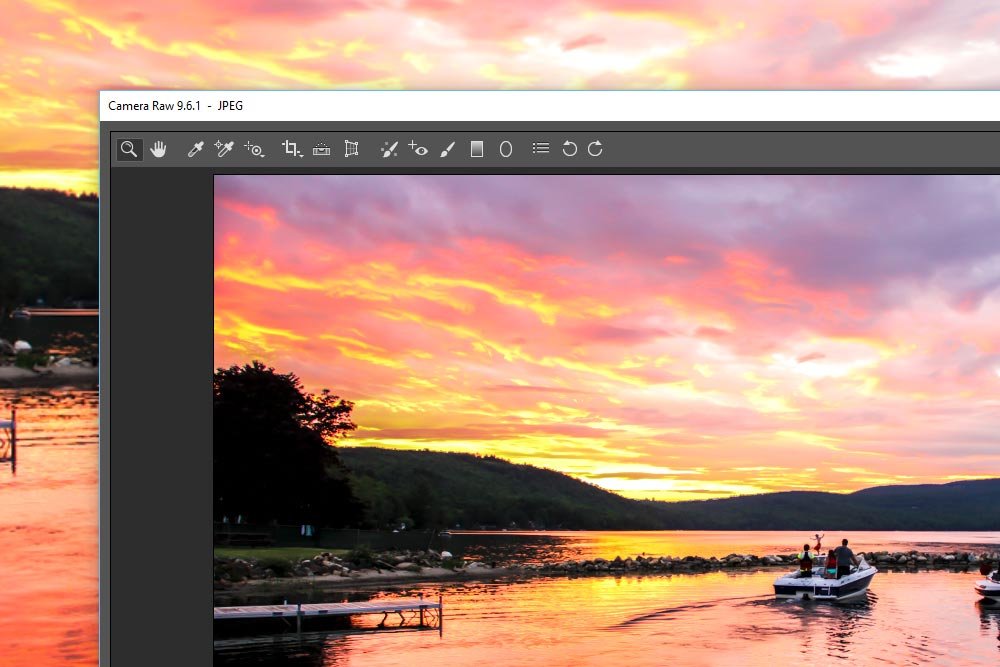
Now that I’ve got the full size preview open, I can launch Camera Raw by using a keyboard shortcut. This shortcut is Command (Mac) or Ctrl (Windows) and the letter R. So it’s Command+R or Ctrl+R. When I use this shortcut, Camera Raw opens up right over the preview. Here, take a look.

camera-raw-over-preview.jpg

Inside Camera Raw, I can edit to my heart’s content.

Closing Camera Raw & Applying Changes​

Once I’m finished with my photo edits inside Camera Raw, to apply the edits, all I need to do is press the Done button that’s located down in the lower right corner of the application. After I do this, the application will close, leaving me with the full screen preview of the image once more. I’ll notice an immediate blip and the preview will update itself with my modifications. To open Camera Raw again, if I’m not happy with the changes, I’d simply use the shortcut again. And then press the Done button. Over and over again until I’m finished editing.

I know this was a lot to say to cover one easy keyboard shortcut, but I felt that once you understand a real-world use for it, you might be able to find more uses for it in your own workflow. After all, we all edit our photos differently and what I use, you may not.

If you have any questions, please ask them below. I’d be happy to help any way I can. Thanks!
 
Top