Cameron
Member
- Joined
- May 10, 2021
- Messages
- 108
- Reaction Score
- 3
- Points
- 23
- #1

As soon as you open Lightroom and begin importing photos, you instantly start storing information in what’s called a “catalog.” A catalog is, in the most simple terms, a database that consists of records. These records hold a few key bits of data. In this post, I’ll describe what these bits of data are and why they’re so important. I’ll also cover how to create multiple catalogs as well as how to back them up so you can sleep well at night knowing all your data is safe. Finally, I’ll discuss how you can recover a catalog if you lose one of if one becomes corrupted.
What Is a Lightroom Catalog?
As I just mentioned, your catalog in Lightroom is a database that stores everything that Lightroom needs to know about your images. Some of this information is as follows:1. References to to each photo you import and where they reside on your computer.
2. All of your processing edits for each photo.
3. Metadata for your photos. This includes keywords, copyrights, ratings, etc…
4. Previews of your images.
Basically, your catalog in Lightroom is hugely important. I guess you can consider it the brain behind all your work. It’s important to note, though, that your catalog and your images are two different entities and as such, they’re stored in two different locations. You may have your images stored in the cloud or on an external drive while Lightroom has created and stored your catalog on your primary computer hard drive. Between the two is what’s called a “link.” A link is merely the relationship between your catalog and your images.
How To Create Multiple Catalogs in Lightroom
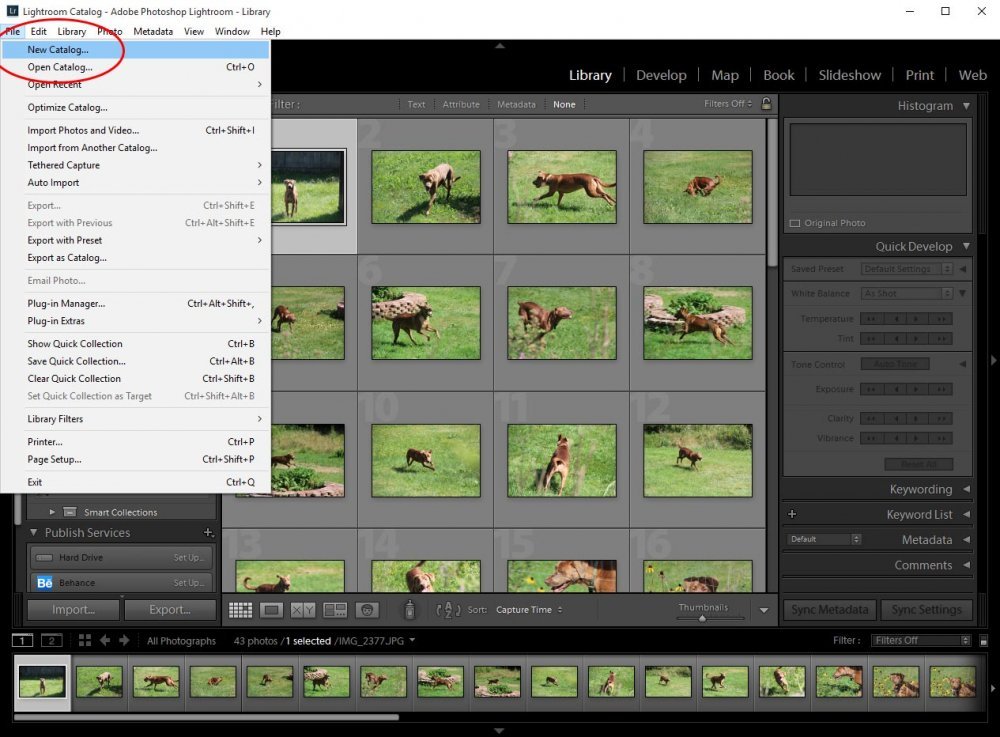
Your first catalog is created by Lightroom for you. You don’s even know it happened. By simply using the program, you’re all set. The thing is, some photographers like to create multiple catalogs to handle multiple photo shoots. While Adobe claims there is no upper limit to how many photos any one catalog can handle, word has it that dealing with catalogs that manage tens of thousands of photographs can be taxing on your computer’s performance. Imagine being a traveling photographer who takes thousands of photos on each and every shoot. Personally, I wouldn’t want all that information sitting in one place. I’d want it spread out. Probably as more of an organizational thing than a performance one. And for this reason, it’s critical to understand exactly how to create multiple catalogs in Lightroom. Below, I’ll go over the process. Luckily, it’s really easy.When creating a new catalog, the first thing you do is to move up to the upper left corner of Lightroom and click the “File” menu. From there, you’ll see the “New Catalog” selection. Click it.
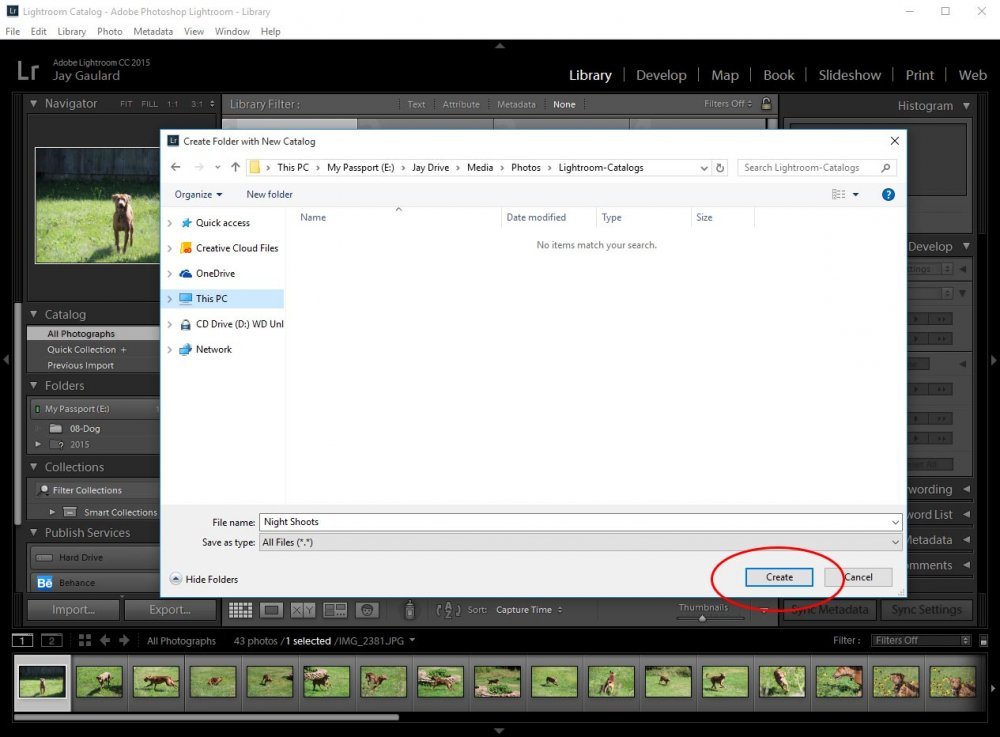
From there, navigate to the location you’s like to save your catalog file. In my case, since I never save anything to my local hard drive, I save this new catalog to my external drive in the “Lightroom Catalogs” folder I set up. I named this particular one “Night Shoots” and clicked the “Create” button down towards the bottom of the dialog box.
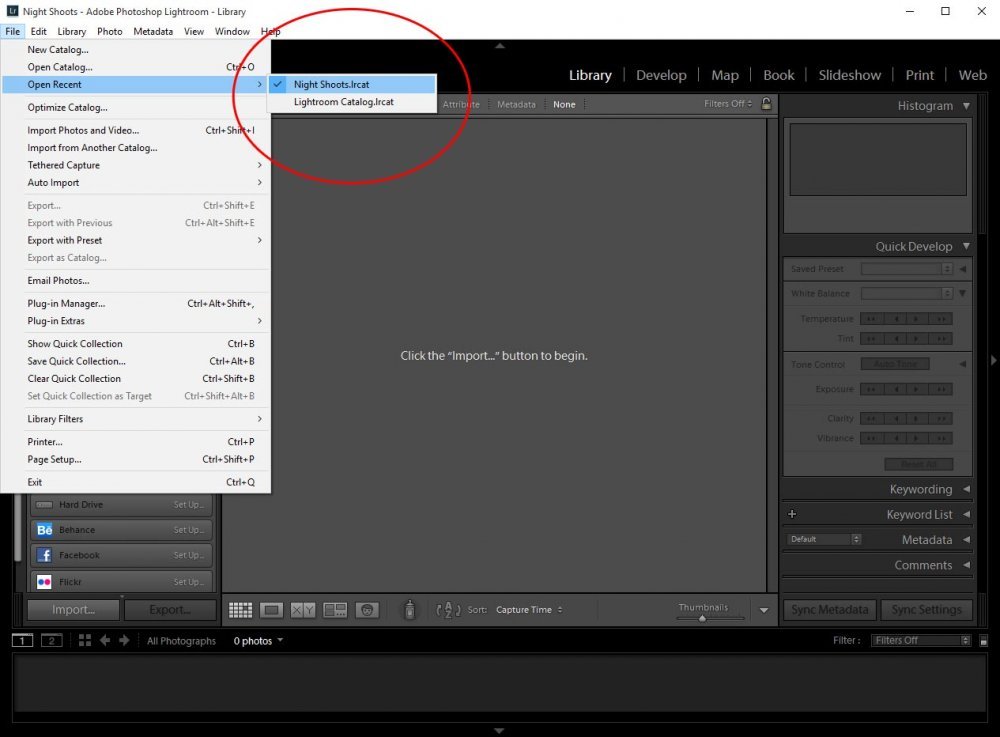
The second I click the create button, Lightroom closes and immediately relaunches with the working catalog set to the one I just created. I can verify which catalog I’m currently in by heading back up to the File menu and rolling over “Open Recent.” Whichever catalog I’m in will be checked.
After creating a new catalog and after Lightroom has relaunched, you can go about importing photographs and editing them as you normally would.
Now, if you ever want to switch back to working in your original catalog or if you simply want to switch to one you’ve created later on, you can do a few things. First, you can go to the File menu, roll over the Open Recent selection and choose your catalog from there. After you click on the catalog you’d like to work with, a small dialog box will appear confirming your choice. Click “Relaunch” and you’ll be set (Lightroom will close and relaunch again).
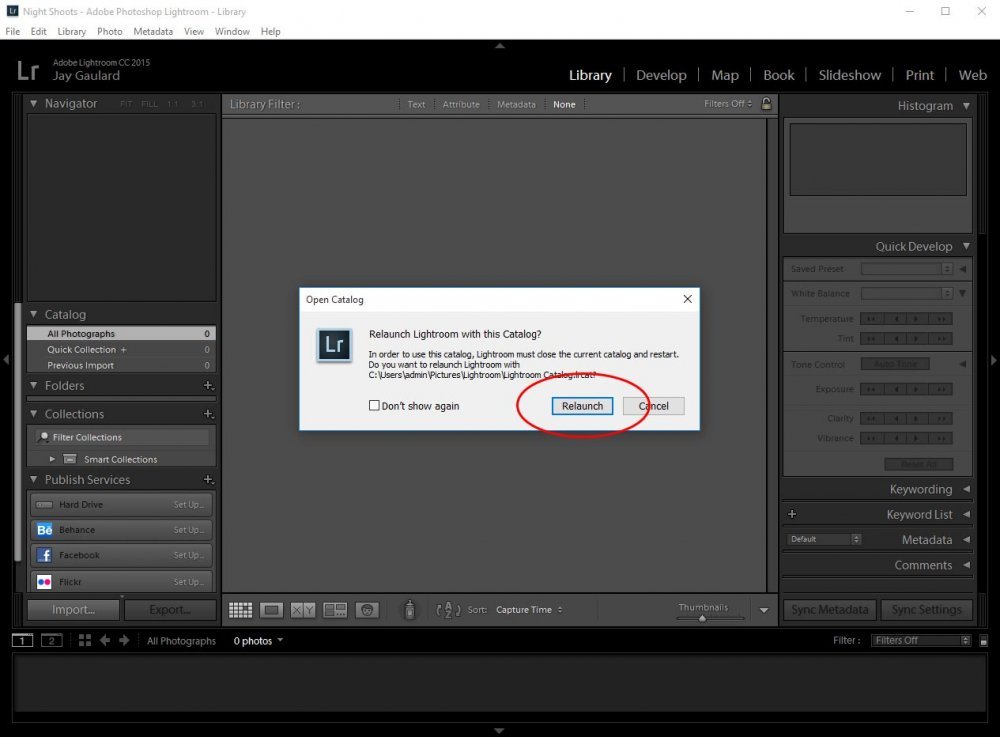
Similarly, if you’re already in Lightroom and would like to switch catalogs, all you need to do is click on File from the top menu, click “Open Catalog…,” navigate to your desired catalog, double click on it and click Relaunch. The same operation as above will occur.
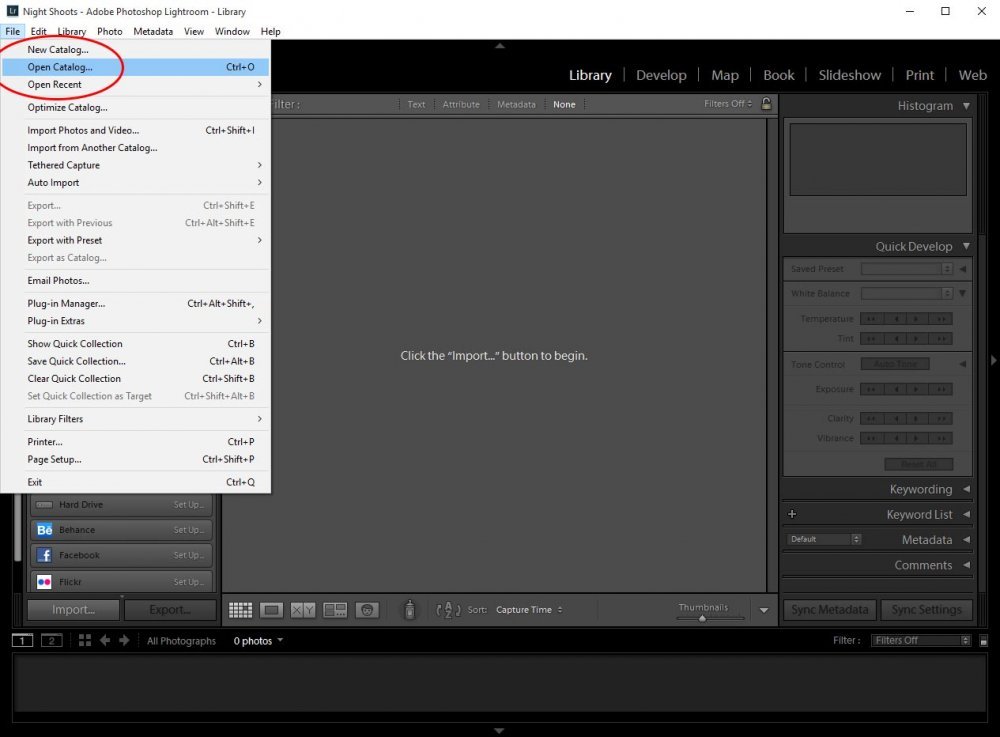
If you’ve got a lot of catalogs and if the one you want isn’t listed under the Open Recent menu, you have the option of closing Lightroom and opening it back up. Right before you click or double click the Lightroom icon to open it though, you need to hold down the Alt key (for Windows) or the Option key (for Mac). As Lightroom is opening, a dialog box will appear, giving you the option to choose which catalog you’d like to use. If you can’t find the one you want in the list shown, you can click the “Choose a Different Catalog…” button down at the bottom, navigate to your stored catalog and open it from there. This is also an excellent method for initially choosing which catalog you’d like to work in before launching Lightroom in the first place.
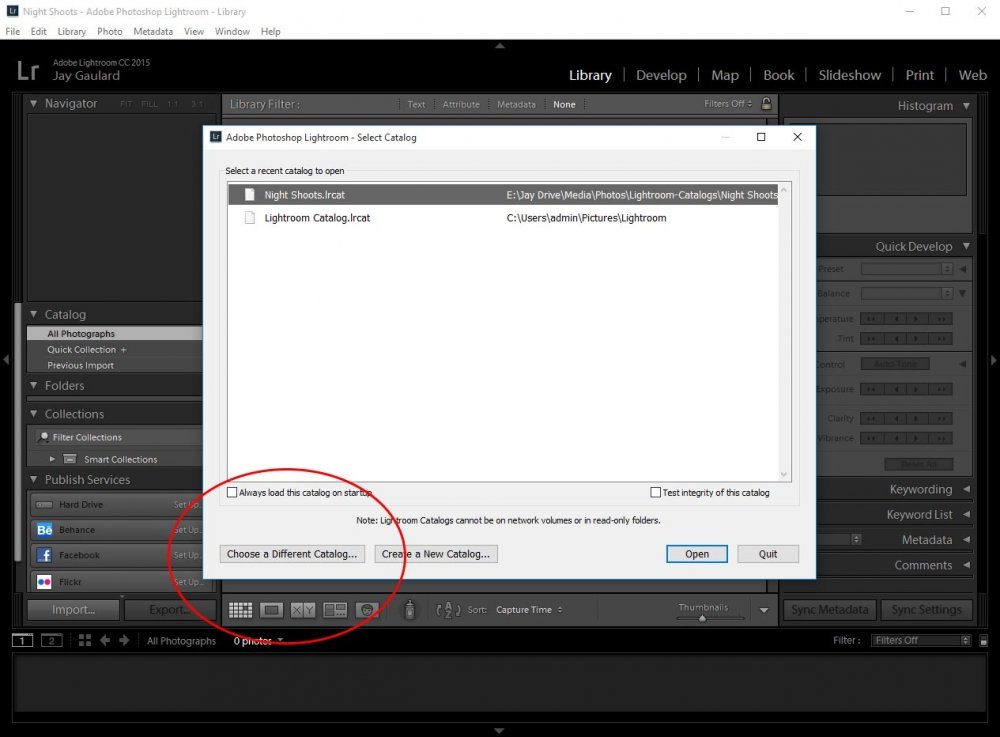
Lastly, before you go about choosing which catalog you’d like to open via this dialog box, take a look around at the other available options. Perhaps there’s one you may be interested in. Set up Lightroom the way that works best for you.
How To Backup Lightroom Catalogs
The last thing you’d want to lose, right behind your original photographs, is your Lightroom catalogs. As I mentioned above, these catalogs are the brains behind your operation. They hold everything you’ve spent your valuable time working on. The thought of having to perform all my imports and edits over again makes me shudder. With this in mind, I tell you with no uncertain terms, back up your catalogs.Backing up catalogs isn’t important only in case something happens to your computer or external hard drive, it’s also important because things can happen to a catalog file itself. Yes, catalog files have been known to become corrupted and if you’ve ever dealt with a corrupted file, you most certainly know how frustrating that can be.
Okay, to back up a catalog file, simply navigate to the “Edit” selection up in the top menu. From there, choose “Catalog Settings….”
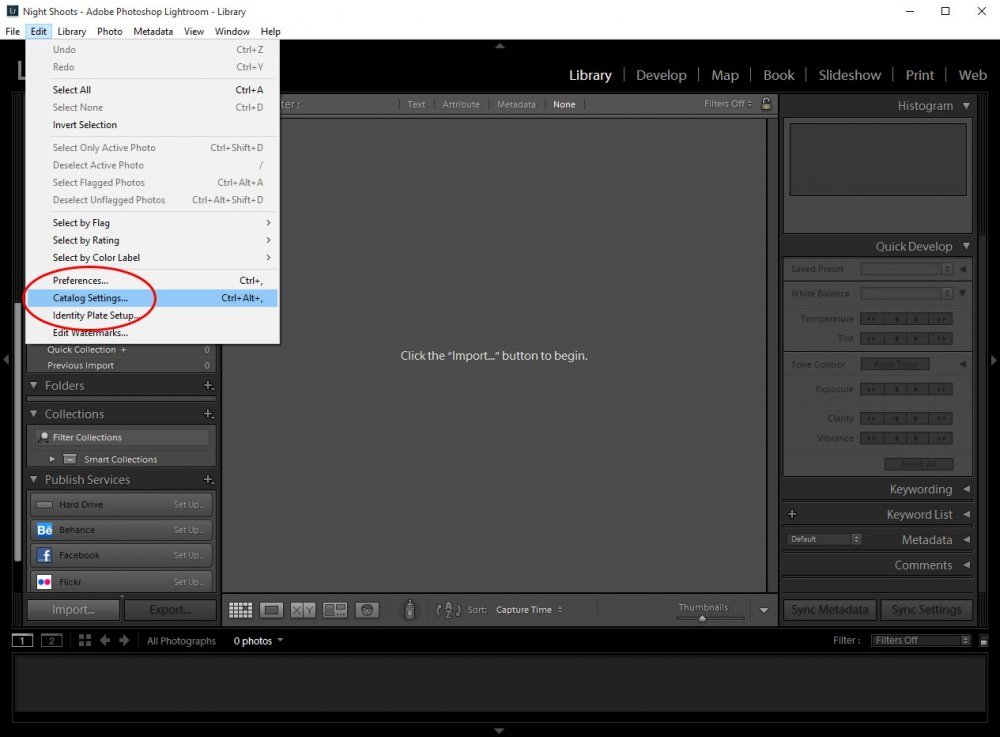
Once you do that, you’ll notice that a dialog box has appeared. If you take a look at that dialog, you’ll see all sorts of good-to-know information. Under the “General” tab, you should see the location of the catalog, the file name, the date it was created, the last back up, the last time it was optimized and its size. Right below that, you’ll see a dropdown box that gives you the schedule of when Lightroom will automatically prompt you to back the catalog file up.
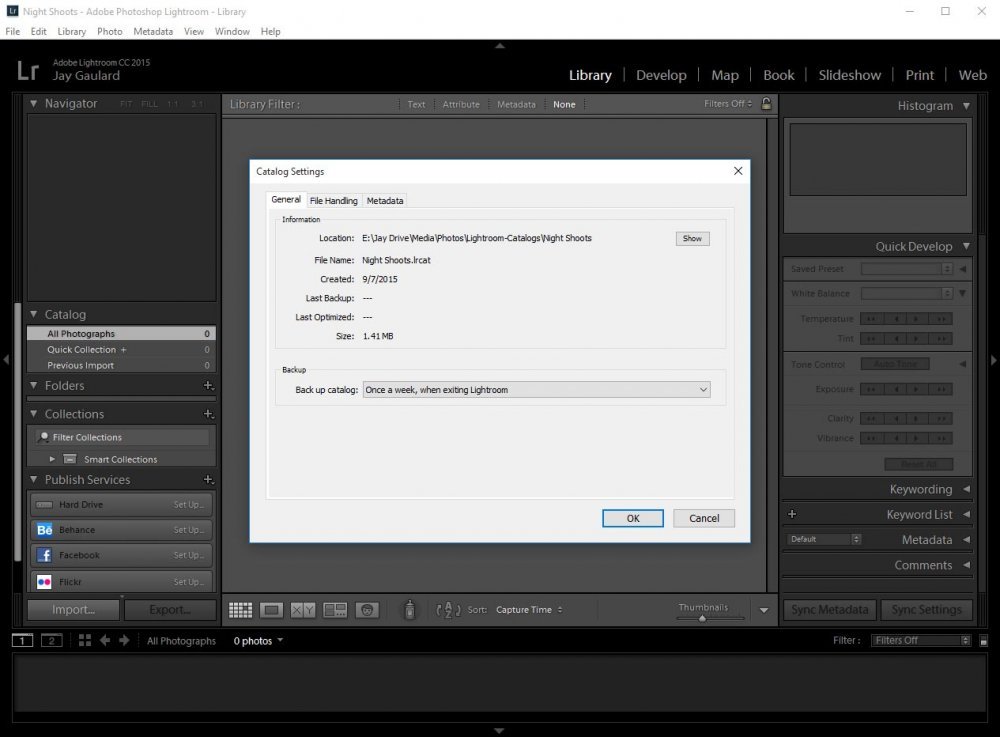
The default setting for Lightroom to prompt you about backing up your catalog is once per week upon exiting the program. If you’re serious about the work you do, you’ll change that selection to once per day when exiting Lightroom. That way, if you do tons of work in one week and something happens to your original catalog, you won’t lose all that much. Well, I guess that’s a matter of opinion.
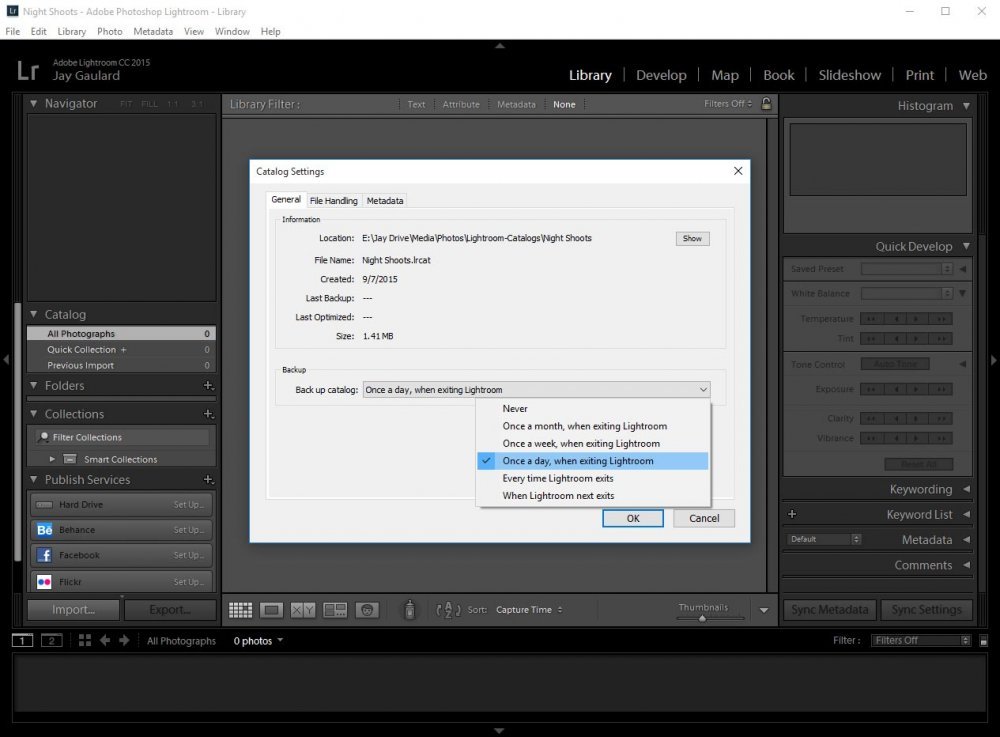
At this point, when you exit Lightroom each day, you should be prompted to back up your catalog file. Everyone will tell you to actually do it and don’t skip it and leave it for another day. Also, be sure you apply this setting for all your catalogs. This is an important one.
Restoring Backed Up Catalogs
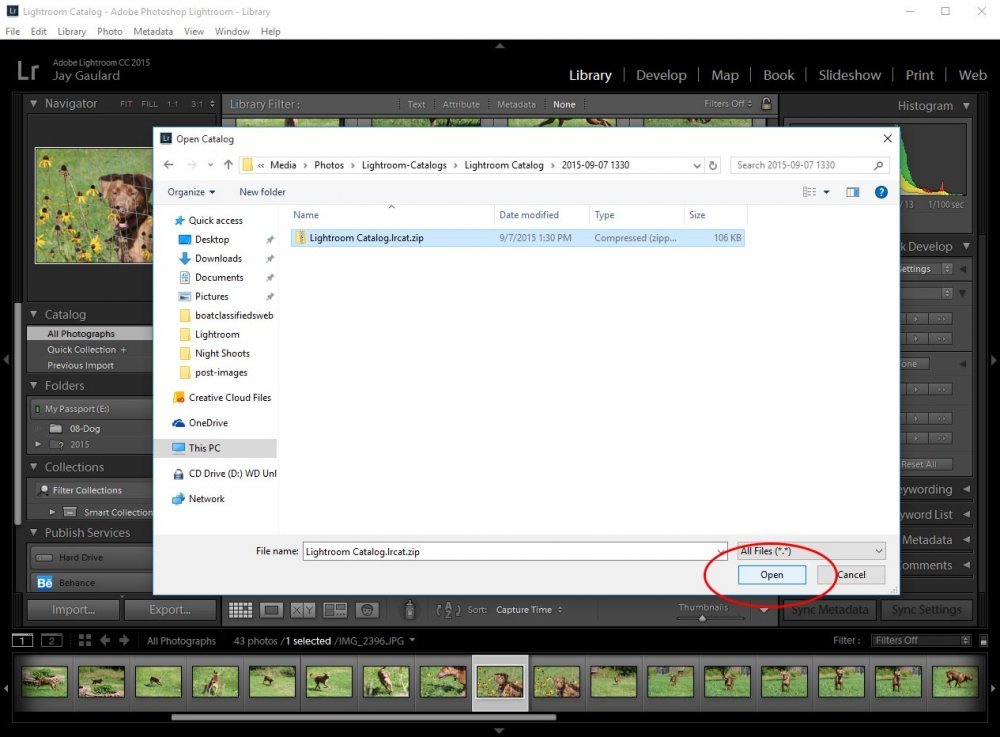
If something tragic happens and you lose either your computer hard drive or a catalog file, don’t worry, you’ve got backups. Right? If so, to recover a catalog, all you need to do is launch Lightroom and navigate to the File selection up in the top menu. After that, click on “Open Catalog” and head to the location of your catalog backup. Choose your most recent backup folder and navigate inside of it. You should see a zip file with the ending of .lrcat.zip. In order to see it, you may have to select “All Files” from the dropdown box in the lower right corner.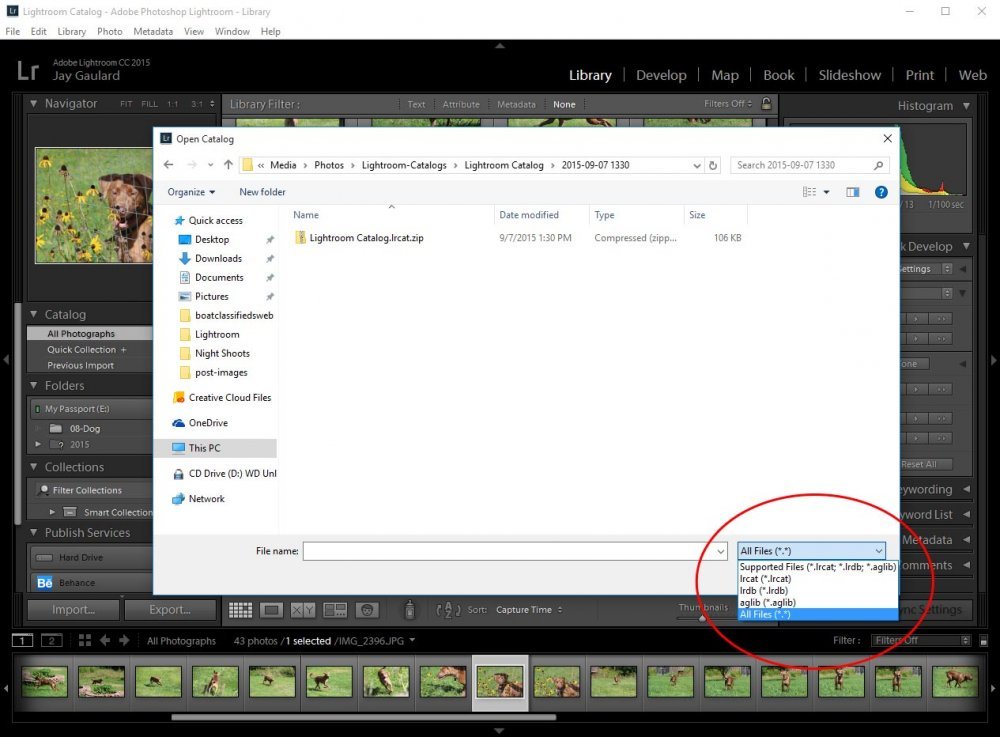
To restore your catalog, select the zip file and click the “Open” button down in the lower left corner. Once that’s complete, you should be good to go.
