Cameron
Member
- Joined
- May 10, 2021
- Messages
- 108
- Reaction Score
- 3
- Points
- 23
- #1
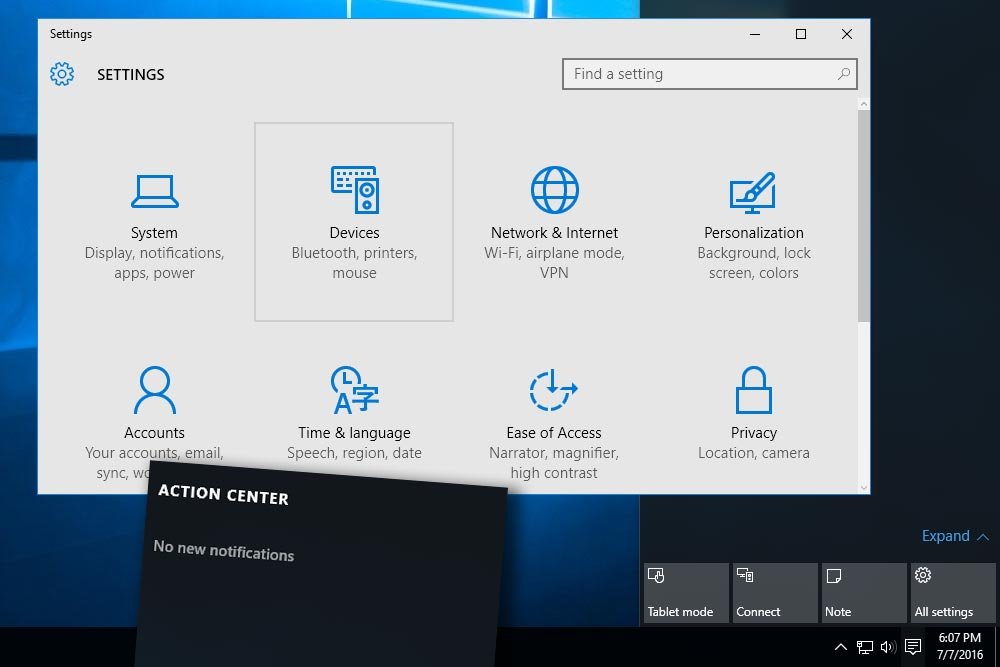
In Windows 10, there’s a really great feature that offers a lot of use. It’s called the Action Center. If you’ve used Windows 10 for a while or if you’re one of the lucky ones who woke up one morning to find that your version of Windows 7 or 8 had upgraded itself, you’ve most likely already seen this area of the operating system in operation. The most tell-tale sign of its existence is the light “ding” you hear when there’s something new you need to pay attention to. It’s sort of like an alert.
The Action Center has a few primary uses and in this post, I’m going to talk about them. I’ll also be discussing how the Windows Settings app and the Action Center are intertwined and how gracefully they work together. So, if you’re looking to learn a bit more about the computer you may be using right now, please read on.
Where to Find the Action Center
If you take a look at the lower right area of your desktop, you’ll see a few buttons located to the left of the time and date. If you roll your mouse over each button and wait for a description to pop up, you’ll likely be able to figure out what you’re dealing with. In my case, since Windows has nothing to tell me, I’m seeing No new notifications. If there was something waiting for me, such as an app or operating system update, I’d see something related to that. The icon I’m referring to here looks like one of those small cartoon blurbs you might see in the newspaper.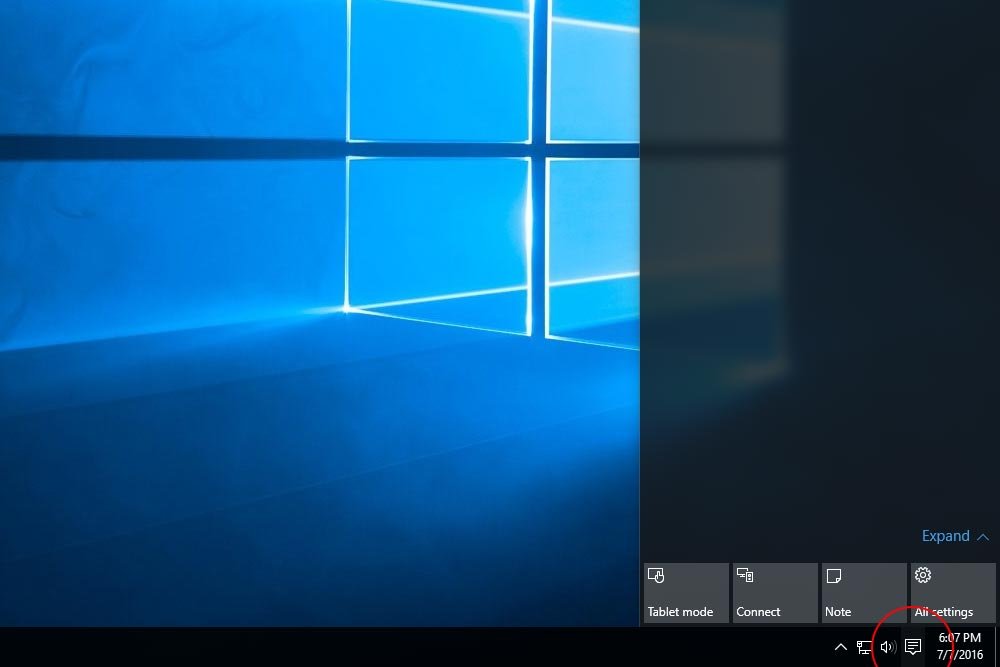
If you take a look at the above screenshot, you’ll see that I already clicked on the button. By doing this, I woke the feature up. A panel slid into the desktop area from the right of the screen. At the top of the panel (not visible in this screenshot) is the title of the feature and a list of my Windows notifications. In my case, as I already mentioned, I have no notifications waiting and am told that. If there was something waiting for me, such as an email message or calendar item, it would be listed here.
At the bottom of the panel, you’ll notice a few small gray boxes. Consider these boxes as shortcuts to some popular quick action items in your computer. Above the boxes is the word “expand.” If you click this, that small area of the Action Center will float up and more gray boxes will appear. Also, the “expand” word will change to “collapse.”
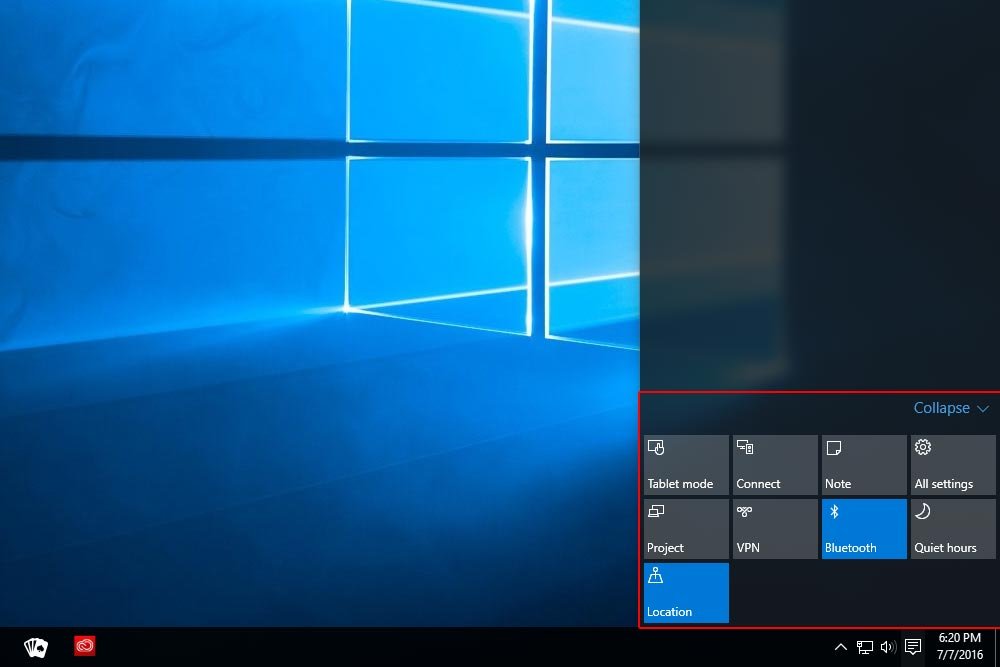
If you take a look at the titles of the controls, you’ll find the following:
– Tablet Mode
– Connect
– Note
– All Settings
– Project
– VPN
– Bluetooth
– Quiet Hours
– Location
Some of these apply to a desktop computer and some don’t. For instance, Tablet Mode doesn’t apply to me right now, but Note and All Settings do (among others).
While we’re very used to having shortcuts on our desktop that quickly lead us to our favorite programs, we now have these types of more “system” shortcuts that lead us to things we may want to alter on a day to day basis. Either that, or just areas of the computer that are often accessed by the majority of users.
Accessing Your Settings in Windows 10
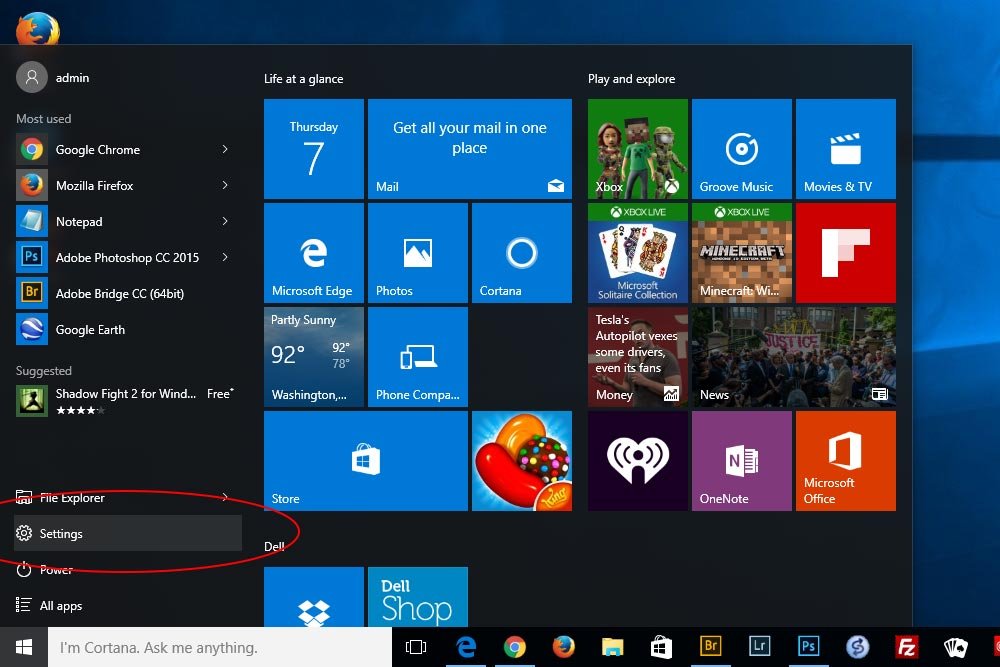
Since the All Settings app is one of those areas you’ll likely find yourself more often than not, I think that’s a good area to cover in this post. So, if I click on the All Settings box in the Action Center, the Settings application window will appear.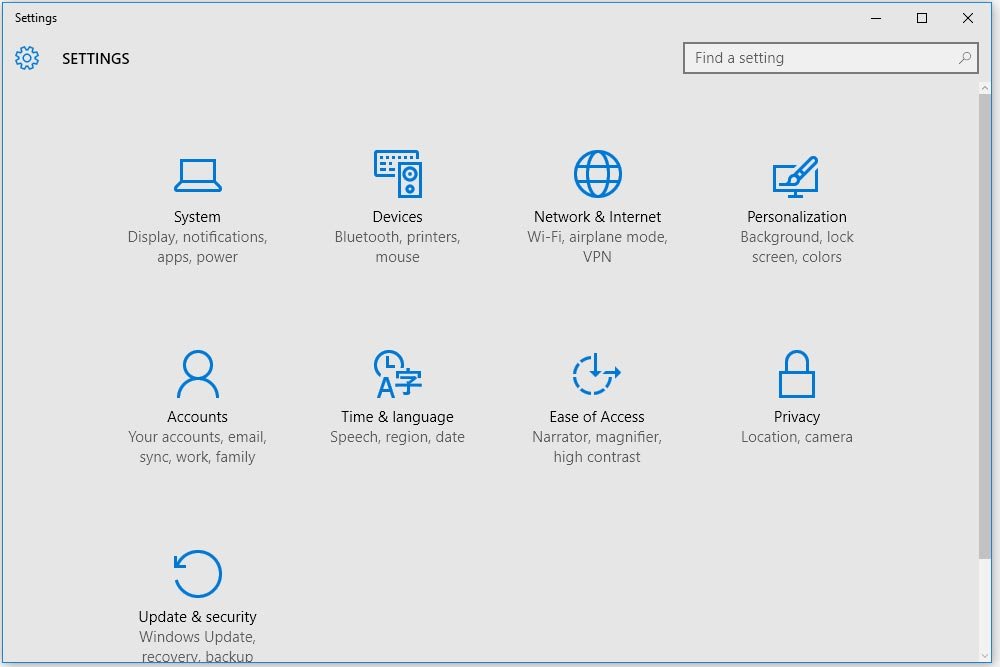
Alternatively, I could simply click the Start button that’s located in the lower left corner and click on Settings from there. Either one is fine and they’ll both bring us to the same exact window.
What Can We Control in the Settings App?
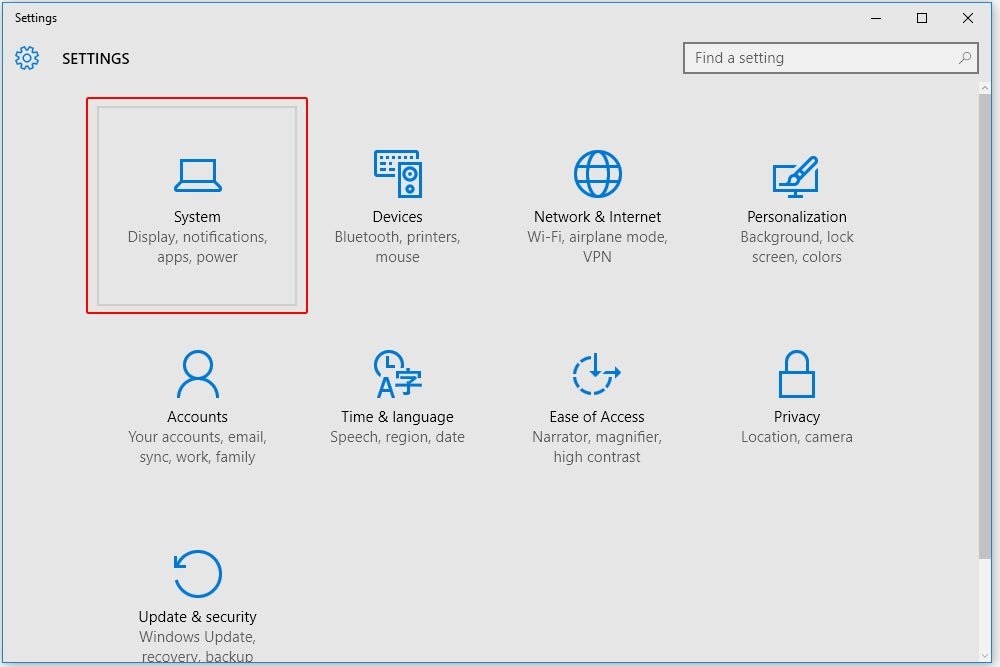
There are a good number of areas we have control over when we launch the Settings app. I’ll list them below.System – Display, notifications, apps, power
Devices – Bluetooth, printers, mouse
Network & Internet – Wi-Fi, airplane mode, VPN
Personalization – Background, lock screen, colors
Accounts – Your accounts, email, work, sync, family
Time & Language – Speech, region, date
Ease of Access – Narrator, magnifier, high contrast
Privacy – Location, camera
Update & Security – Windows update, recovery, backup
If you take a look at these items and have used Windows before, you’ll probably tell yourself that some of them look familiar – as if you’ve seen them somewhere else before. Well, you’d be correct. You’ve most likely seen a few of these access buttons in the old Control Panel of Windows yesteryear. I’ll tell you that even though we have a new Settings area, the Control Panel still exists. If you right-click on the Start button, you’ll see the menu item in this menu that appears. I won’t be covering the Control Panel in this post because I have a feeling we’ll be seeing less and less of it in the future. We really should be getting used to Settings instead.
Navigating Settings
Navigating the Settings area is totally easy. It’s actually very similar to navigating a website. There’s a window, pages and links. When you want to go back, you just click the Back arrow at the top left of the Settings window. I’ll demonstrate below.I’ll click on the System settings button.
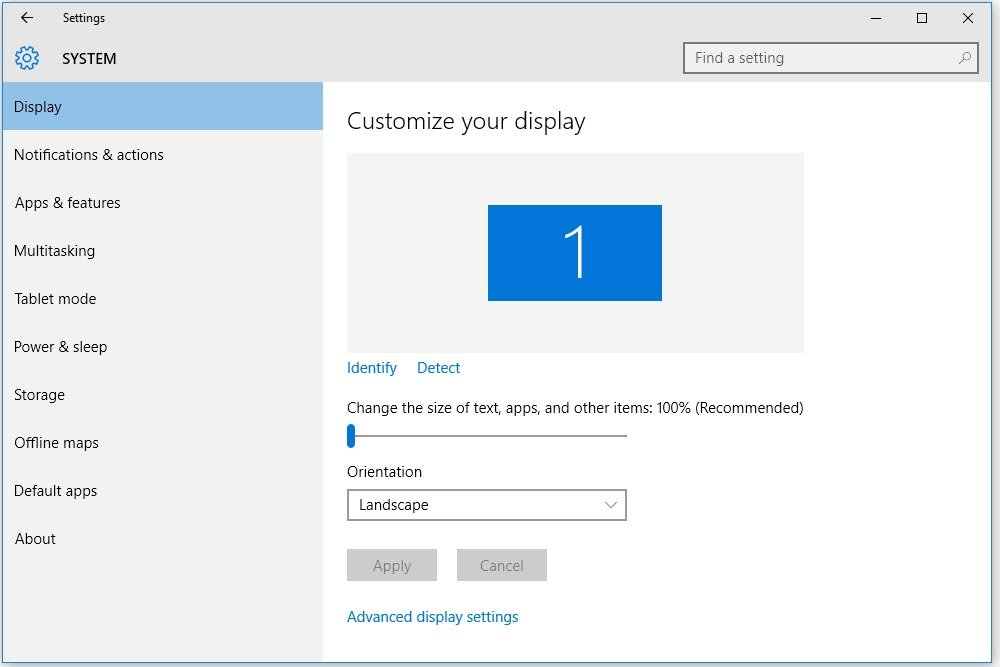
Once inside, I can see those links I just referred to above. The first “page” I land on is Display. Here, I can change some size and orientation preferences. If I look to the top left, I’ll see the Back button (arrow) I was talking about. If I click that Back arrow, I’ll go back to the Settings “homepage.” Now, you may have guessed I’m calling these areas we navigate to “pages” and “homepages” to make life easier and more understandable. I doubt they’re really called that, but it sure makes a lot of sense in my mind. I’m sure they’re called “panels.”
Customizing the Action Center Quick Action Buttons
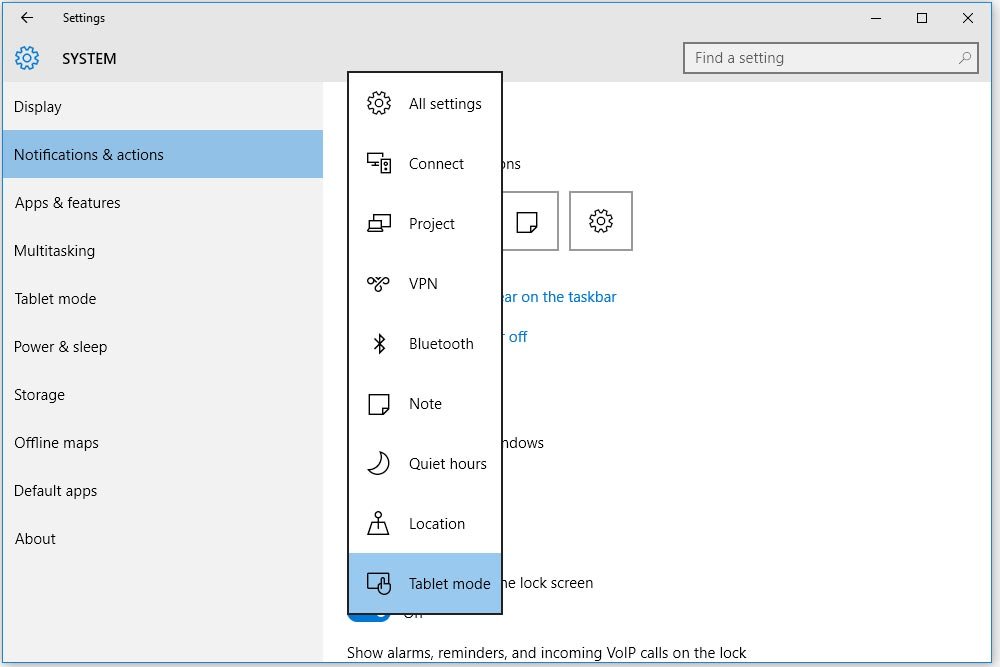
Remember those little gray squares I was talking about earlier? The ones at the bottom of the Action Center? Well guess what. The buttons that show in the top row of the Action Center are customizable, which is nice because, as I said earlier, some of them don’t apply to all of us.To customize which Quick Action buttons I want to initially see in the Action Center, I’ll click on the Notifications & Actions link in the Settings panel. Once I do that, I’ll see four squares. Those four squares represent which four items appear when the bottom area of the Action Center is in Collapse mode, meaning, only four of the buttons are visible. If I wanted to edit which buttons appear in which spot, all I need to do is click on each button in the Notifications & Actions panel and select something new. Once I do that, my choices will automatically update.
I have to say, that’s pretty cool.
Navigating to the Settings Homepage
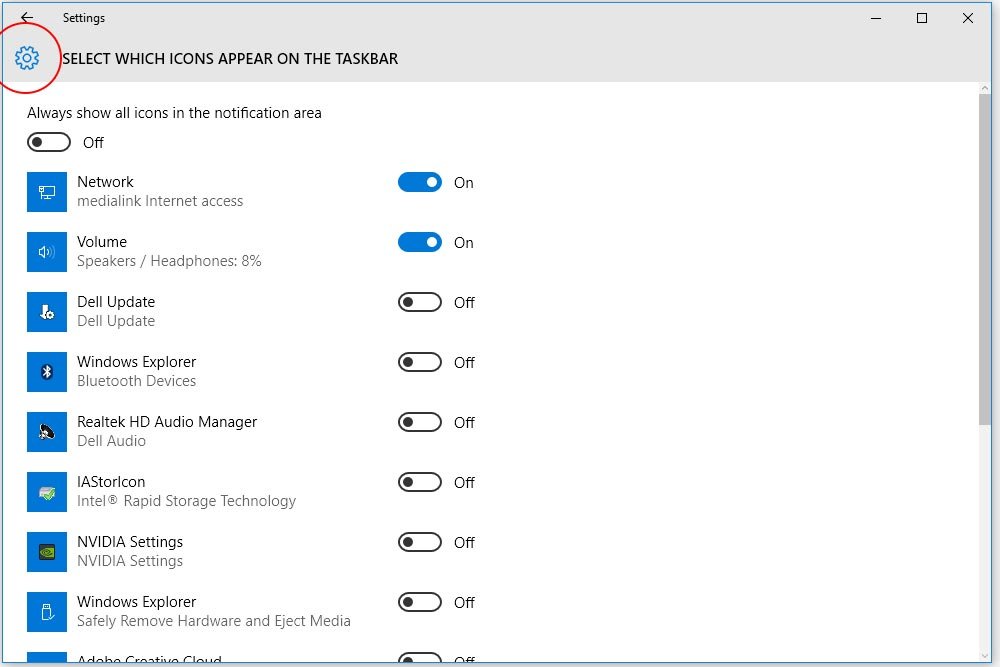
Let’s say that I’m a few pages deep in the Settings area. Generally speaking, the panel architecture is fairly flat, but there are times when we can click a few times and get lost in this area. If I were to click on the main System link and then Notifications & Actions and then the link that says Select which icons appear on the taskbar, I’d be three pages from the top.If I wanted to quickly jump straight back to the very first page without having a click multiple times on the Back arrow, all I need to do is click on the gear icon at the top of the panel. That will do the trick.
To Sum Up…
To sum things up, remember that the Action Center is an area of Windows 10 that houses notifications and shortcut links to areas in the Settings application. I’m sure you’ll become very familiar with this area once you begin hearing those dings and beeps that tell you your computer is ready for an update.To navigate the Settings application, simply click on a link. To go back, click the Back arrow that’s found at the top of left corner of whichever panel you’re in. To go to the Settings homepage, click the gear.
To customize which Quick Action boxes show in the top row of the Action Center, click on the Settings > System > Notifications & Actions navigation links and then click in each square on that page. Choose something new and you’re all set.
I’m going to be traversing through the entire Windows 10 ecosystem, so if you’re interested in this type of thing, you’re in luck. I’ll be writing many more similar posts.
