LukeLewis
Member
- Joined
- May 7, 2021
- Messages
- 134
- Reaction Score
- 0
- Points
- 21
- #1
I’m not sure which I prefer more, using the viewfinder or Live View with my Canon DSLR camera. I’ve owned many models in the Rebel line and which option I choose totally depends on the situation, and to be honest, my mood. Sometimes, when I’m trying to be creative, I’ll use the viewfinder to capture my photos. I feel like I can move around and see things better. If I’m using a tripod though, it’s Live View all the way. The reason for this is that Live View offers a few different features that the viewfinder doesn’t. And by the way, when I use the phrase “Live View,” I’m talking about using the LCD screen on the back of the camera to compose a photograph. In essence, it’s a really big viewfinder.
In today’s post, I’d like to discuss two features of Live View that can help considerably with your photography. If you’re like me and enjoy setting up a shot with a tripod, you’ll want to know about these things. They’re perfect for when you use manual focus because they help you get into your shot with as much precision as possible.
The two features I’ll discuss below have to do with zooming into a scene by a magnification of 5x or 10x and also where the focus area will actually be. You may already be familiar with the Live View magnification feature, but I’m almost certain you’ve never heard of the focus area part, so please read on.
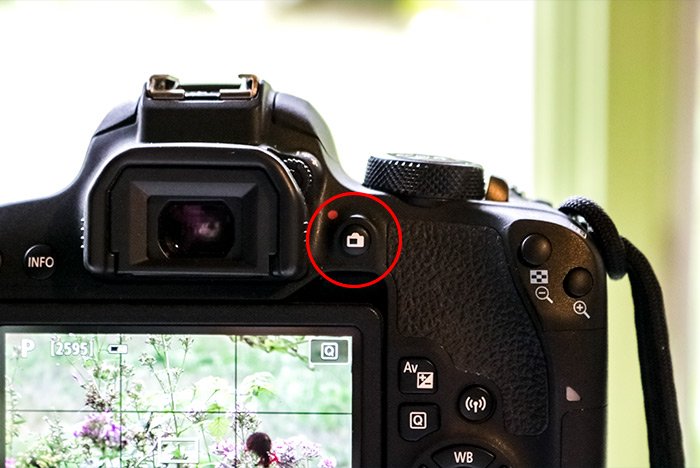
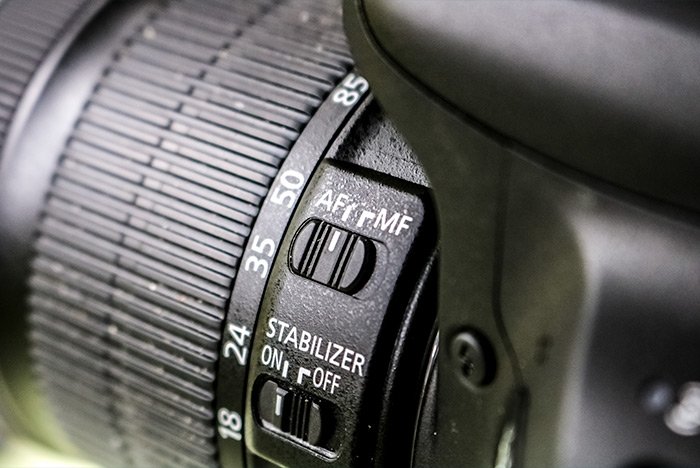
After that, I should see my scene. I’ll change my lens setting from auto focus to manual focus and then zoom in on what I’d like to take a photo of.
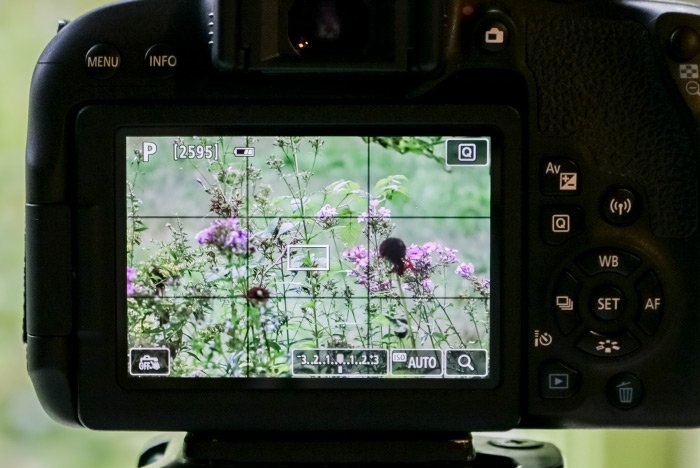
Now, through the LCD screen, it’s sort of tough to see whether the image is in focus or not and since I’m using manual focus, which is quite common in these scenarios, it’s up to me to make sure the scene is in focus. If I was using auto focus, I’d feel more confident that the camera was doing the focusing, but then again, if I were using auto focus, I wouldn’t have the flexibility that I have with manual focus. Since I want that flexibility, I’ll need to find a way to make sure the subject is sharp.
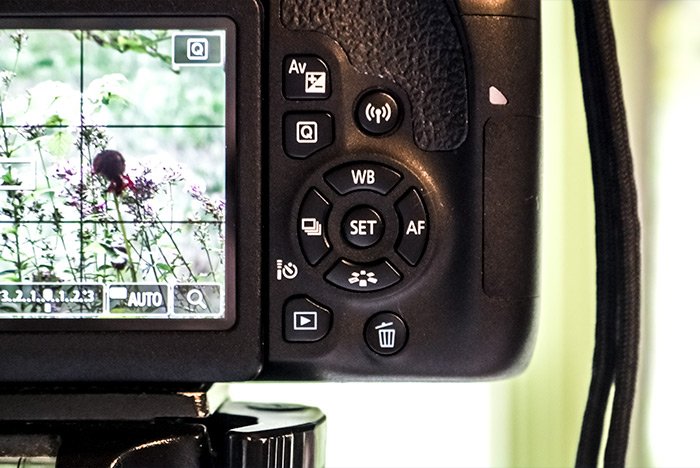
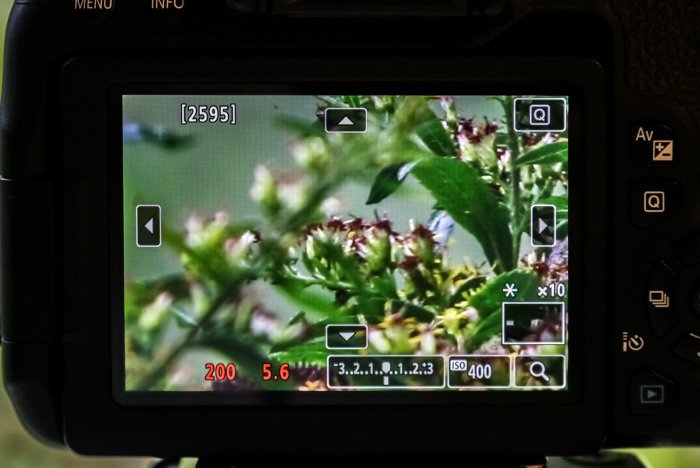
Canon cameras have a digital magnification feature that allows us to enlarge the view of the subject via the LCD screen, without touching the lens at all. For many of Canon’s cameras, this magnification comes in two steps; one at 5x magnification and the next at 10x, but some start at 6x and go all the way to 16x. As you can imagine, magnifying by these amounts can give you a very clear idea of what’s in and out of focus. To magnify a scene, or to reduce the magnification level, simply press the + button that sits in the upper right corner of the back of the camera. Pressing the button once increases the magnification by one setting and pressing that same button again increases the magnification by another step. Pressing it a third time brings it back to its original setting, which is 1x.
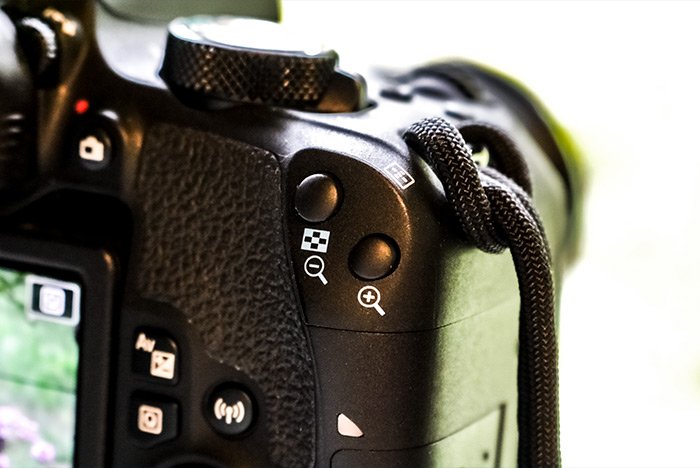
After pressing that button, it’s possible to see the subject clearly and continue on with adjusting the manual focus. When I’m ready, I can press the shutter button to capture the image.
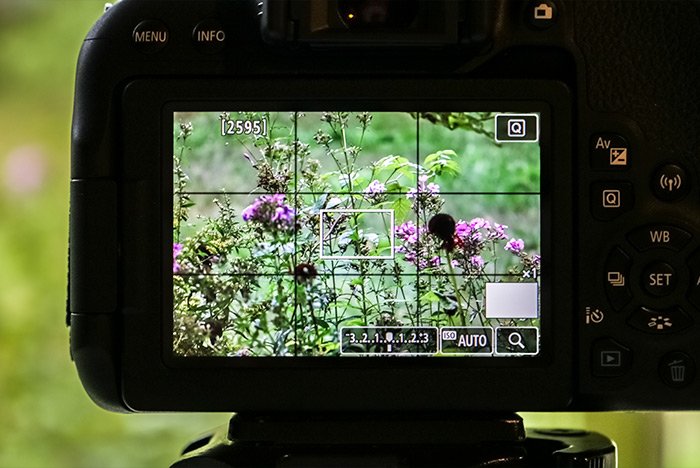
When the Live View screen is magnified as I discussed above, the visible area of the scene is displayed inside of that white box. Press the magnify button once and the white box grows in size a bit. Press it twice and the scene is magnified by 5x. Press it a third time and the scene is magnified by 10x.
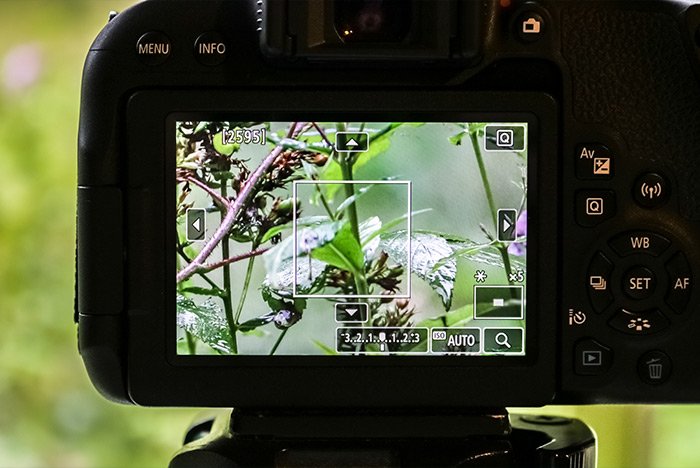
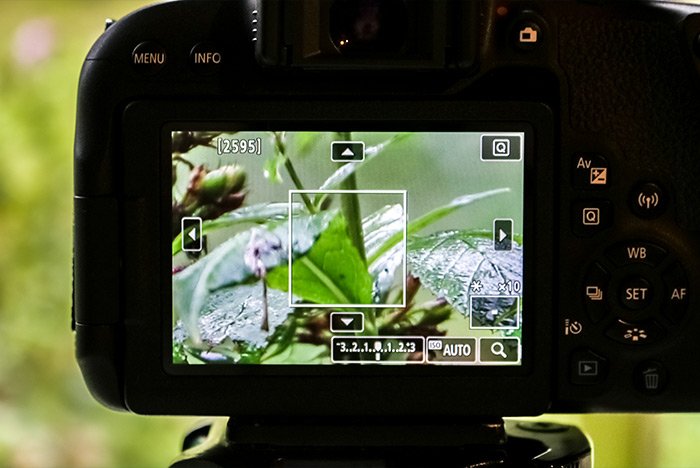
As I move that box around the rear of the LCD screen, the visible area changes. That’s the area that will be in focus, whether using manual or auto focus. So to simplify, the area inside of the white box is what’s focused on and is shown while the scene is magnified.
There’s a small issue here. When the camera lens is in auto focus mode, the white box in the LCD screen can only move so far. If you try to push it around, you’ll notice that it can never reach the edge of the screen. This is troublesome if you’re doing some sort of a creative shot and need to magnify something that sits all the way towards the edge of the scene. How can we get around this limitation?
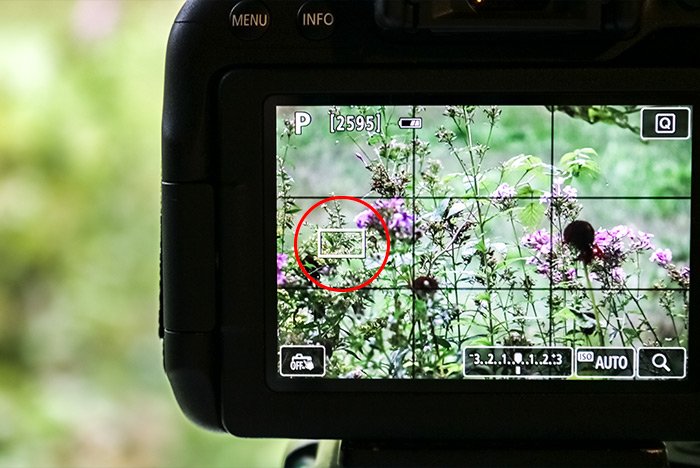
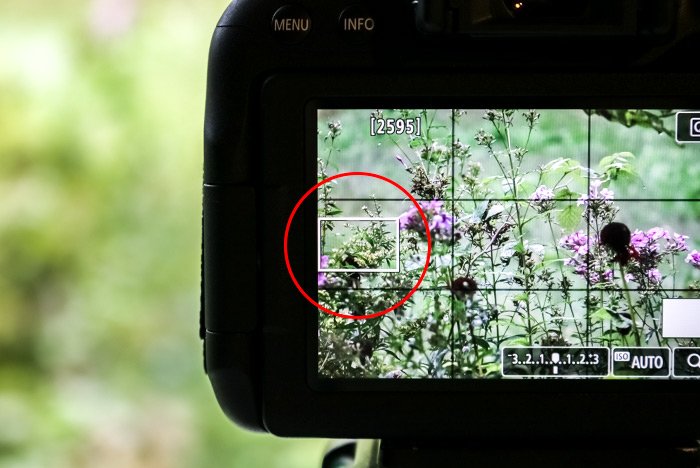
The answer is to switch the lens over to manual focus. If I do that and then try to move the white box to the edge of the screen, I’ll find that it does, in fact, move all the way over. And then, if I magnify, I’ll see that whatever it is inside of that white box is now visible for me to focus on.
I hope I clearly explained how to both magnify a scene using the digital magnification feature of Live View for Canon DSLR cameras as well as how to overcome the auto focus “white box” limitation on the same. If you have any questions regarding this post, please let me know in the comment section below. Thanks for reading!
In today’s post, I’d like to discuss two features of Live View that can help considerably with your photography. If you’re like me and enjoy setting up a shot with a tripod, you’ll want to know about these things. They’re perfect for when you use manual focus because they help you get into your shot with as much precision as possible.
The two features I’ll discuss below have to do with zooming into a scene by a magnification of 5x or 10x and also where the focus area will actually be. You may already be familiar with the Live View magnification feature, but I’m almost certain you’ve never heard of the focus area part, so please read on.
Magnifying in Live View
I’ll go through a scenario here to help you better understand what’s happening. I’m going to set my camera up on a tripod and then set the camera to Live View modes, so the rear LCD screen shows the scene with my subject in it. To switch a Canon camera from viewfinder mode to Live View mode, I’ll press the small button on the rear of the camera that sits above the LCD screen. My T7i has a picture of a camera on it.
After that, I should see my scene. I’ll change my lens setting from auto focus to manual focus and then zoom in on what I’d like to take a photo of.


Now, through the LCD screen, it’s sort of tough to see whether the image is in focus or not and since I’m using manual focus, which is quite common in these scenarios, it’s up to me to make sure the scene is in focus. If I was using auto focus, I’d feel more confident that the camera was doing the focusing, but then again, if I were using auto focus, I wouldn’t have the flexibility that I have with manual focus. Since I want that flexibility, I’ll need to find a way to make sure the subject is sharp.
Canon cameras have a digital magnification feature that allows us to enlarge the view of the subject via the LCD screen, without touching the lens at all. For many of Canon’s cameras, this magnification comes in two steps; one at 5x magnification and the next at 10x, but some start at 6x and go all the way to 16x. As you can imagine, magnifying by these amounts can give you a very clear idea of what’s in and out of focus. To magnify a scene, or to reduce the magnification level, simply press the + button that sits in the upper right corner of the back of the camera. Pressing the button once increases the magnification by one setting and pressing that same button again increases the magnification by another step. Pressing it a third time brings it back to its original setting, which is 1x.

After pressing that button, it’s possible to see the subject clearly and continue on with adjusting the manual focus. When I’m ready, I can press the shutter button to capture the image.
Magnifying the Box
As you may have noticed, the rear LCD screens of many Canon cameras display a white box, usually at its center by default. This box can be moved in any direction by pressing the arrow keys on the back of the camera.
When the Live View screen is magnified as I discussed above, the visible area of the scene is displayed inside of that white box. Press the magnify button once and the white box grows in size a bit. Press it twice and the scene is magnified by 5x. Press it a third time and the scene is magnified by 10x.


As I move that box around the rear of the LCD screen, the visible area changes. That’s the area that will be in focus, whether using manual or auto focus. So to simplify, the area inside of the white box is what’s focused on and is shown while the scene is magnified.
There’s a small issue here. When the camera lens is in auto focus mode, the white box in the LCD screen can only move so far. If you try to push it around, you’ll notice that it can never reach the edge of the screen. This is troublesome if you’re doing some sort of a creative shot and need to magnify something that sits all the way towards the edge of the scene. How can we get around this limitation?

The answer is to switch the lens over to manual focus. If I do that and then try to move the white box to the edge of the screen, I’ll find that it does, in fact, move all the way over. And then, if I magnify, I’ll see that whatever it is inside of that white box is now visible for me to focus on.


I hope I clearly explained how to both magnify a scene using the digital magnification feature of Live View for Canon DSLR cameras as well as how to overcome the auto focus “white box” limitation on the same. If you have any questions regarding this post, please let me know in the comment section below. Thanks for reading!
