WendyMay
Member
- Joined
- May 11, 2021
- Messages
- 142
- Reaction Score
- 0
- Points
- 21
- #1
I consider the taskbar in Windows 10 sort of like a home base. Everything is down there. I have the Start button, Cortana, shortcut icons for many of the more popular applications I use on a daily basis, audio volume settings, time and date and access to notifications. Without a doubt, the task bar is where it’s at.
In today’s post, I’d like to explore that area a bit. I know there are some ways to customize the taskbar; it’s position, how things are displayed on it and what size those things are shown. Basically, I would like to learn more about the taskbar, so I’d like it if you came along.
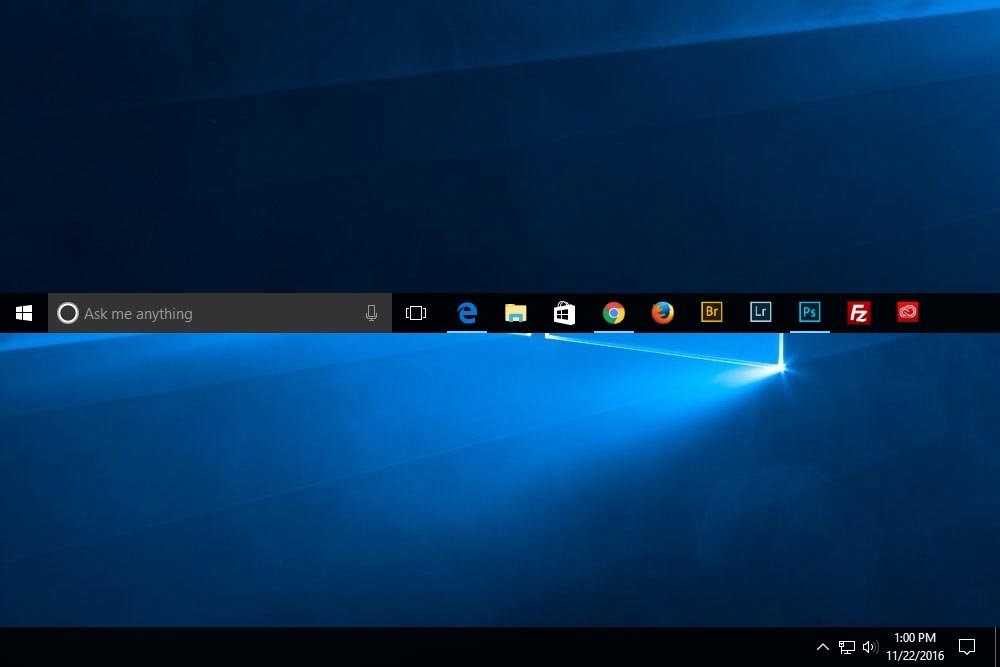
In the above screenshot, I display the taskbar. Obviously, I cut the left half off and stacked it on top of the right half so we can see the entire thing. I use a 27 inch monitor and there’s no way to get a glimpse of the entire bar in one view (without shrinking it down a lot).
So that’s what we’re dealing with.
To access the settings window for the taskbar, I’ll right-click inside the bar someplace.
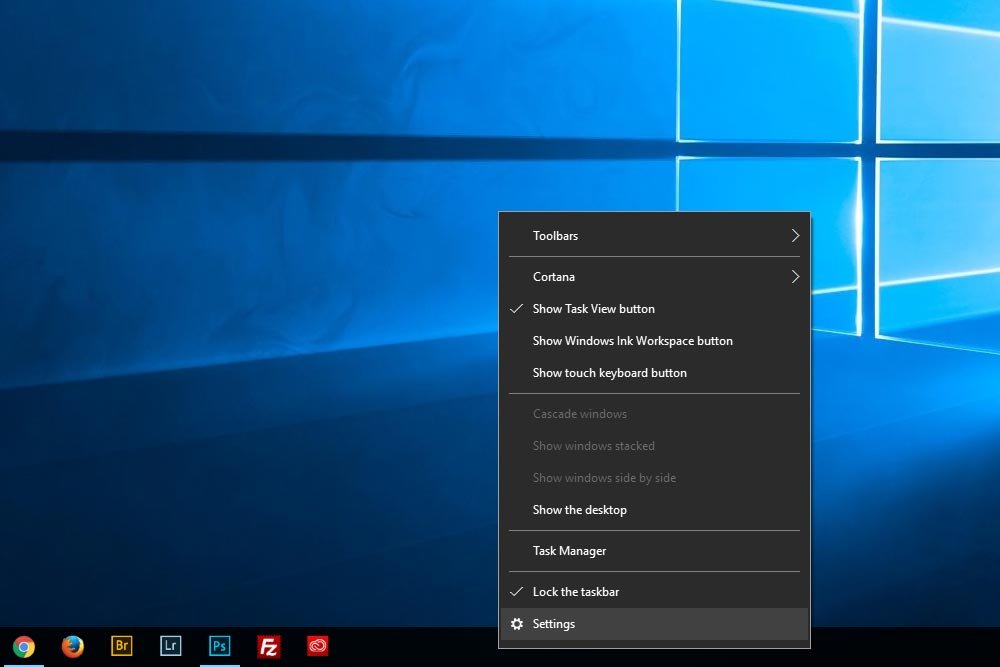
Then, I’ll click on the Settings menu item, which will open the Taskbar Settings window.
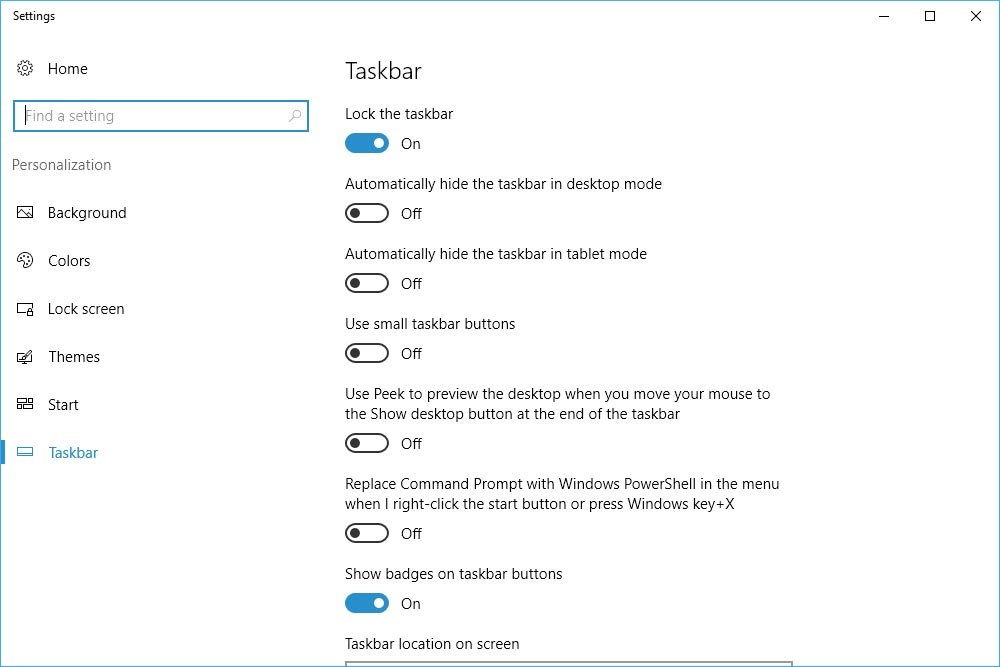
If I wanted to, I can also launch the Settings window from the Start menu and then click on Personalization. The Taskbar menu access is at the bottom of the left column.
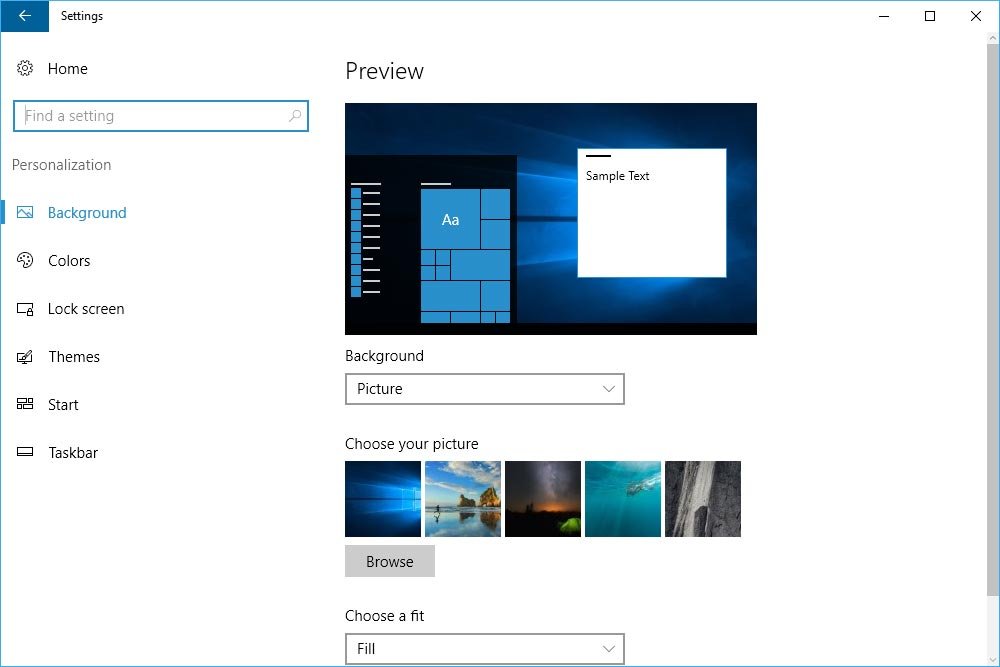
– Lock the taskbar
– Automatically hide the taskbar in desktop mode
– Automatically hide the taskbar in tablet mode
– Use small taskbar buttons
– Use Peek to preview the desktop when you move your mouse to the Show Desktop button at the end of the taskbar
– Replace Command Prompt with Windows PowerShell in the menu when I right-click the Start button or press Windows Key+X
– Show badges on taskbar buttons
– Taskbar location on screen (Left, Top, Right, Bottom)
– Combine taskbar buttons (Always – hide labels, When taskbar is full, Never)
There’s also a notification area and some settings for multiple screens that I won’t focus on today. I’d like to stay on the taskbar customization itself. I’ll talk more about some of these options next.
Here, take a look:
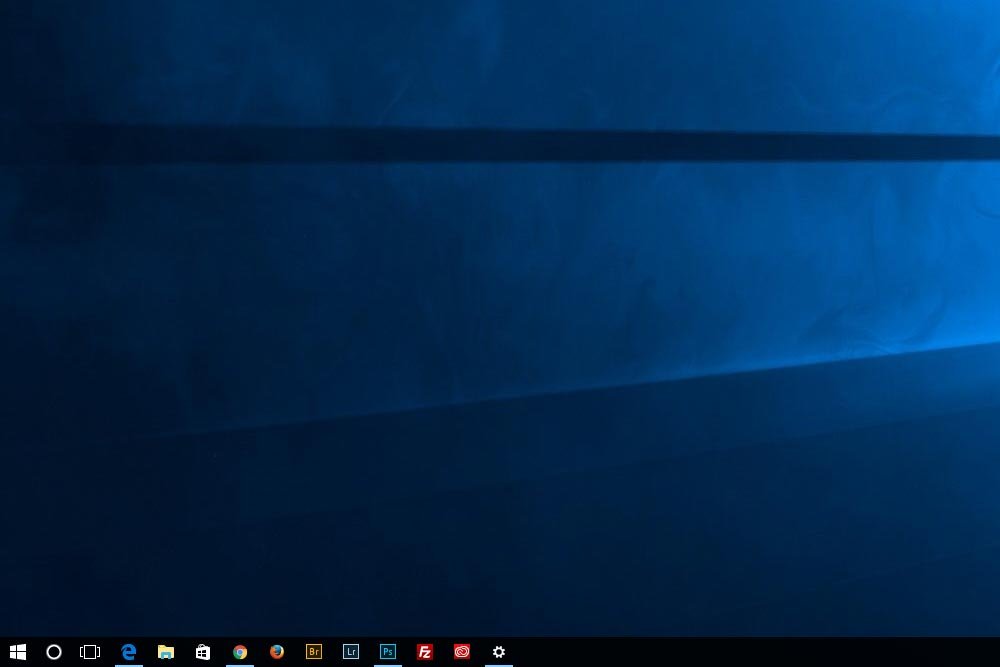
Even Cortana has been reduced to an icon as opposed to a larger search box.
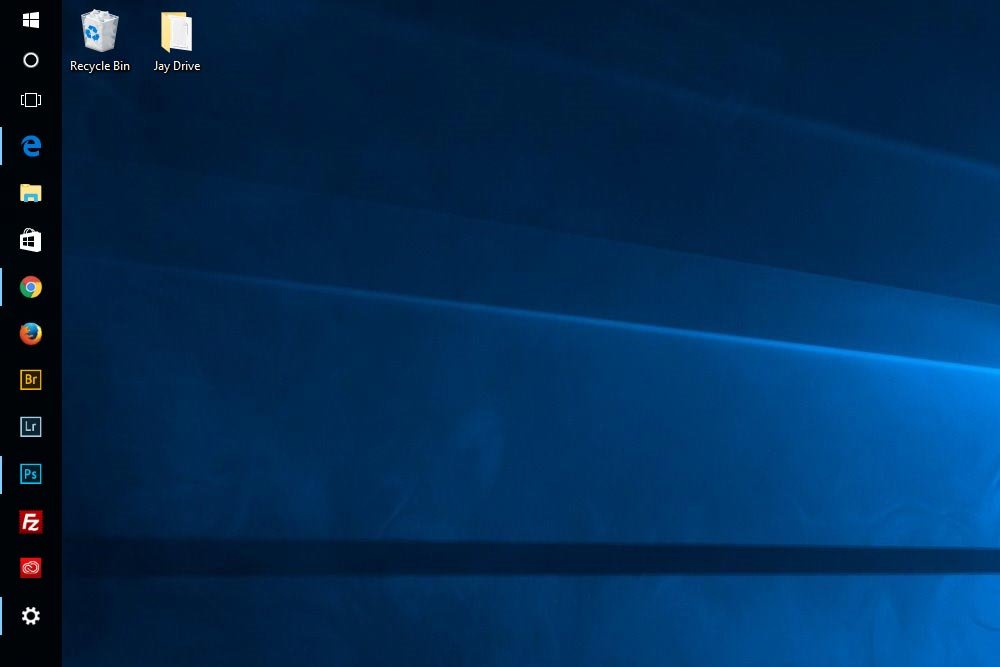
I actually kind of like it over there.
A final note about the taskbar settings. A while ago, you would change one of the settings I discussed above and would have to hit Apply to see the change. Then, to actually apply the changes and save them, you’d have to hit Save. Well, you don’t need to do that anymore. Now, all you need to do is change the position of the switch from On to Off or vice versa and exit the Settings window. Doing this will take care of everything.
There you have it. I hope I clearly introduced you to the window that handles the taskbar customization settings. If you have any questions of concerns, please leave them for me in the comments section below. Thanks for reading!
In today’s post, I’d like to explore that area a bit. I know there are some ways to customize the taskbar; it’s position, how things are displayed on it and what size those things are shown. Basically, I would like to learn more about the taskbar, so I’d like it if you came along.
The Current Taskbar
When I turned my Windows 10 machine on for the very first time, the taskbar was already set to its default view. It sits at the bottom of the screen and contains the items I mentioned above. If you’re new to all this, I’ll show you exactly what I’m talking about.
In the above screenshot, I display the taskbar. Obviously, I cut the left half off and stacked it on top of the right half so we can see the entire thing. I use a 27 inch monitor and there’s no way to get a glimpse of the entire bar in one view (without shrinking it down a lot).
So that’s what we’re dealing with.
Accessing the Taskbar Settings
Now, most people don’t know this, but there’s a lot of customization that can be done to the taskbar. It’s pretty cool, because you can make it look the way you want, within limits.To access the settings window for the taskbar, I’ll right-click inside the bar someplace.

Then, I’ll click on the Settings menu item, which will open the Taskbar Settings window.

If I wanted to, I can also launch the Settings window from the Start menu and then click on Personalization. The Taskbar menu access is at the bottom of the left column.

Current Customization Options
Since the above screenshot isn’t very clear for the Taskbar Settings window, I’ll list the current available customization options below. They are:– Lock the taskbar
– Automatically hide the taskbar in desktop mode
– Automatically hide the taskbar in tablet mode
– Use small taskbar buttons
– Use Peek to preview the desktop when you move your mouse to the Show Desktop button at the end of the taskbar
– Replace Command Prompt with Windows PowerShell in the menu when I right-click the Start button or press Windows Key+X
– Show badges on taskbar buttons
– Taskbar location on screen (Left, Top, Right, Bottom)
– Combine taskbar buttons (Always – hide labels, When taskbar is full, Never)
There’s also a notification area and some settings for multiple screens that I won’t focus on today. I’d like to stay on the taskbar customization itself. I’ll talk more about some of these options next.
Hide Taskbar in Desktop Mode
I can see a lot of people using this option. Basically, when you flip this switch to On, the taskbar will slide downward and will be hidden from view. It’s only when you move your mouse pointer to the bottom of the screen that the taskbar will slide back up to become viewable. I’d love to show you a screenshot of this, but really, it’s nothing. Remember, the taskbar is hidden. All I’d be showing is an empty desktop.Use Small Taskbar Buttons
If I ever get to the point of using so many applications often enough, I’d probably take advantage of this feature. When this switch is turned on, the application icons, among other things, reduce to about half their size. This makes way for much more room for more icons. It’s also a cleaner look, if you want to be honest.Here, take a look:

Even Cortana has been reduced to an icon as opposed to a larger search box.
Taskbar Location on Screen
This will be the final example I show in this post. It’s probably the coolest too. If you wanted, you could change the location of where the taskbar actually sits on your screen. Let’s say that you don’t really like how it runs across the bottom and would like it to climb vertically up the left side. Well, to accomplish this, all you’d need to do is to click the related drop-down box and select Left. Once you do this, the taskbar will jump to its new location.
I actually kind of like it over there.
A final note about the taskbar settings. A while ago, you would change one of the settings I discussed above and would have to hit Apply to see the change. Then, to actually apply the changes and save them, you’d have to hit Save. Well, you don’t need to do that anymore. Now, all you need to do is change the position of the switch from On to Off or vice versa and exit the Settings window. Doing this will take care of everything.
There you have it. I hope I clearly introduced you to the window that handles the taskbar customization settings. If you have any questions of concerns, please leave them for me in the comments section below. Thanks for reading!
