Cameron
Member
- Joined
- May 10, 2021
- Messages
- 108
- Reaction Score
- 3
- Points
- 23
- #1
I just finished writing a post for my other blog. For this post, I had to edit a few photos using Adobe Camera Raw. This isn’t a big deal, but it did get me thinking. Since I do so much editing in Camera Raw and part of that editing usually involves reducing noise and sharpening the images, why not talk about those two aspects of my editing over here?
Since removing noise is one of the most popular areas to work on when it comes to post-processing, I’ll cover it first. Then, in my next post, I’ll discuss how to go about sharpening photos using Camera Raw. Both of these modification control sliders are contained in the same panel, so they’re closely related and will be very intuitive to understand when dealing with one another.
In today’s post, I’ll launch a demo photo into Camera Raw. I’ll do my usual editing in the Basic panel and then I’ll move onto the Detail panel. Inside the Detail panel are two sections. The first is called Sharpening and the second is called Noise Reduction. It’s the second one we’ll be working in today.
Let’s pretend for a moment that I did things backwards and I went ahead and edited a photo by pushing some Noise Reduction sliders before pushing the sliders contained in the Basic panel. If I moved the Noise Reduction sliders to the point of maximum noise reduction and then went back into the Basic panel and moved some sliders such as Contrast or Clarity, I may undo what I had done in the other panel. In Camera Raw, certain edits are dependent on other edits. In this case, in order for the noise reduction to remain the way we think it’s going to remain, I need to work in the Basic panel first. I certainly wouldn’t want to get rid of all sorts of noise and come to realize that my increase in contrast brought it all back.
With this in mind, I’ll make some general edits in the Basic panel. Nothing huge. Just some things to get the ball rolling.
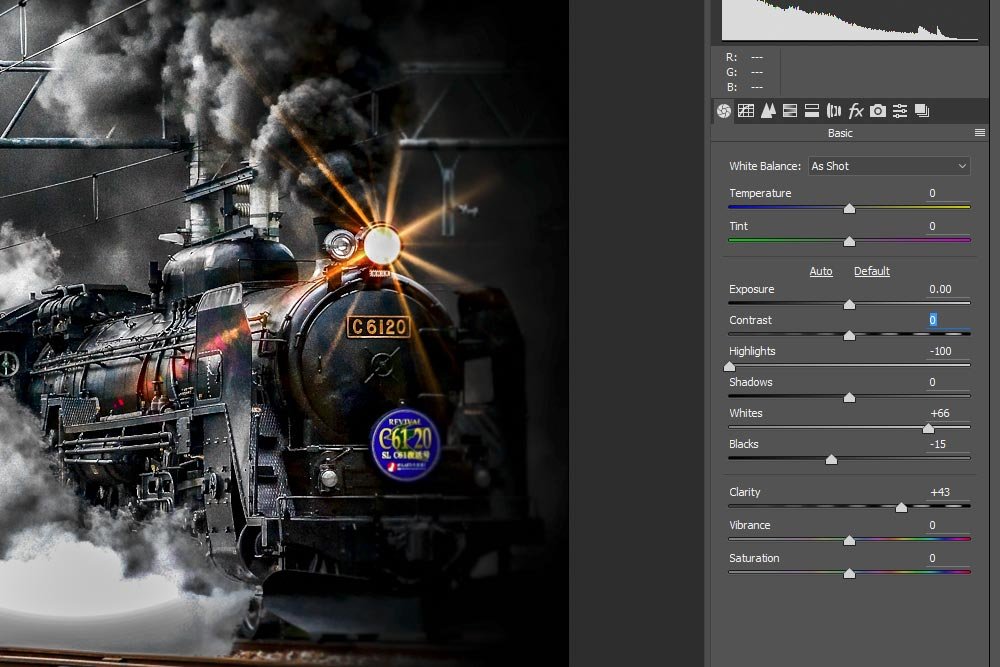
After I’m done here and the photo is looking pretty good, I’ll move into the Detail panel where I can continue on with some more minor changes.
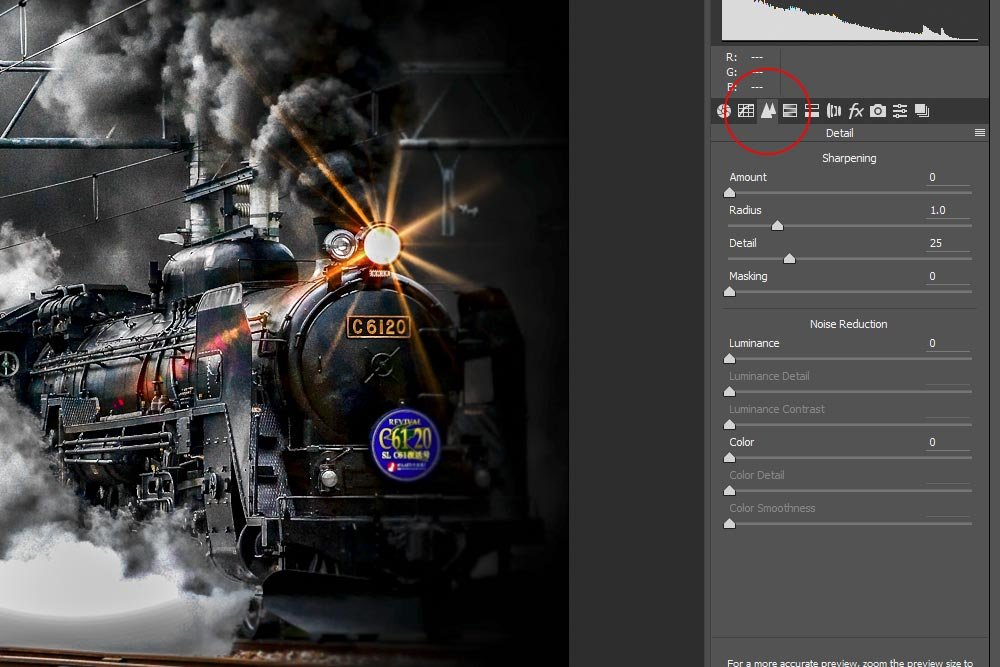
And once there, I’ll look towards the bottom at the sliders underneath the title Noise Reduction.
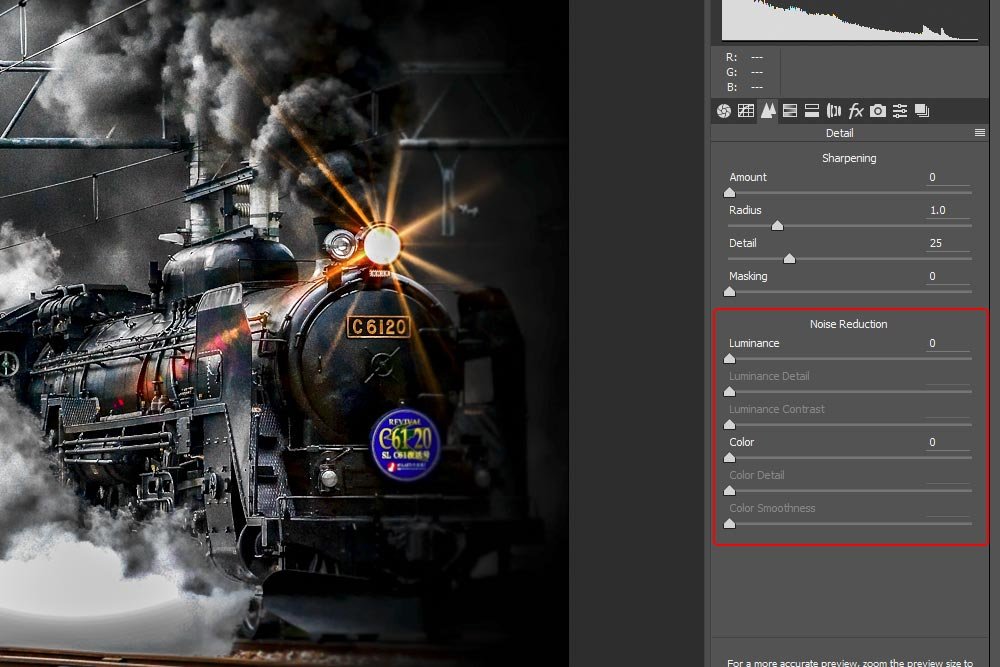
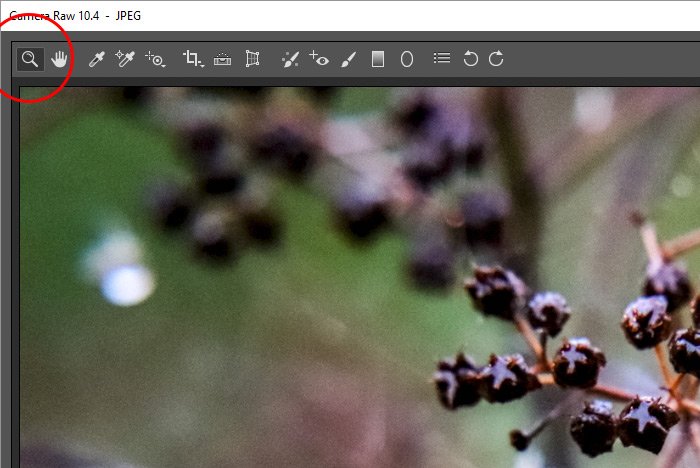
Finally, before doing anything else, I’ll increase the view to 100% so I can see what kind of noise I’m dealing with. When using the Noise Reduction sliders in any editing application, it’s common to view what you’re working on at 100%. If you didn’t enlarge the photo, you simply couldn’t see the necessary detail.
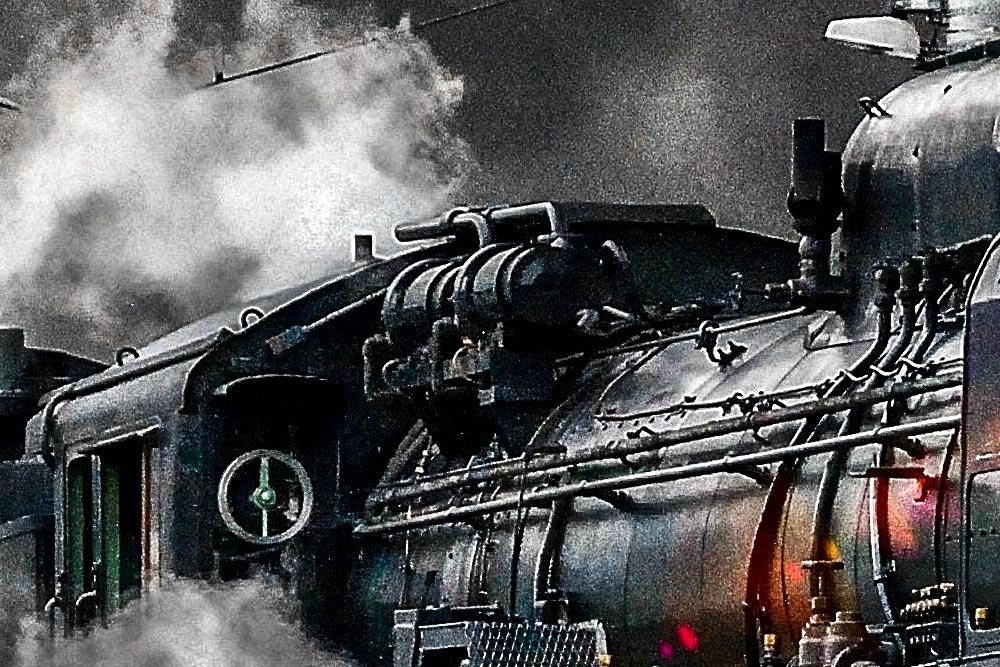
I hope you can see the noise.
Now, I want you to be aware of one thing – when I edit and reduce the size of photos for use online, I really don’t need to go nuts with the noise reduction. The reduction of the photo size removes a lot of the noise by itself. Also, you can’t really see that much detail in smaller photos anyway. It’s when the image remains very large or when you print it that noise becomes very apparent. Even though I keep most of my images for online use, I still like to stay in the habit of covering all my bases. It develops muscle memory (or something like that).
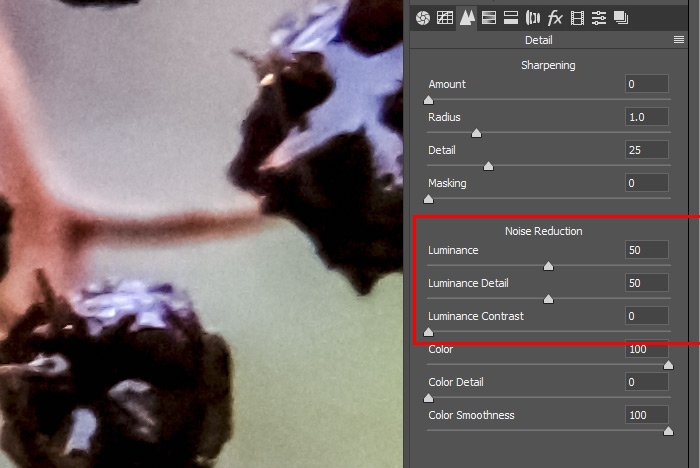
If you look at the six available sliders available in the Noise Reduction section, you should see Luminance, Luminance Detail, Luminance Contrast, Color, Color Detail and Color Smoothness. While this may seem like a lot, once you grasp an understanding of what each slider does, you’ll see that it’s not. I’ll cover what each of these sliders does now.
Luminance: Push this slider to the right to reduce luminance noise. The slider default is all the way to the left.
Luminance Detail: This slider is dependent on the previous one. If the Luminance slider hasn’t moved, you won’t be able to move this one. This slider controls the luminance noise threshold. If you push it all the way to the right, you’ll preserve much of your photo’s detail, but you’ll likely produce lots of noise. To remove noise, you’ll need to push this slider to the left. Beware though, noise reduction also removes detail, so there’s a balance here.
Luminance Contrast: This slider acts much like the previous one. It also depends on the movement of the Luminance slider to work. In this case though, the slider controls the contrast of the luminance. Again, if you push it all the way to the right, you may end up with worse results. You’ll likely see noisy blotches or mottling. And like the previous slider, pushing this one to the left will offer smooth, less noisy results, but there will be less contrast in the image.
Color: This slider is the first in the second section of sliders. This first slider is much like the first in the previous section. It can move, but the two next sliders depend on it to move as well. If you push this slider to the right, you’ll reduce color noise and if you keep it to the left, it will have no effect on the image.
Color Detail: If you push this slider to the right, you’ll end up with thin, detailed color edges, but you may increase color speckling. If you push the slider to the left, there will be less speckling, but the colors may bleed into one another.
Color Smoothness: This is a fairly new slider in the Color section. When you push this slider to the right, you’re instructing Camera Raw to look to the top, bottom, left and right of each color in the photo and to reduce the “abruptness” of each difference. Think about it this way – if you have tons and tons of colors as noise in an image and push this slider to its maximum setting, you’ll actually slightly desaturate the photo. That’s the “smoothing” the slider refers to. If you push it all the way to the left, you’ll end up with more saturated and accurate colors, but they may be very noisy.
As with any of these sliders, you’ll definitely need to experiment with your own photos. The image I’m working with doesn’t exactly have a lot of color in it. It does, however, have a lot of difference in luminance. Because of this, I’ll go ahead and push only the top three luminance sliders. I want you to realize that I’m going extreme here only for your benefit. I would like to demonstrate how strong these sliders can be. I wouldn’t do this in the real world unless I was going for the cartoon look.
I’m going to push the Luminance slider all the way to the right, so the value is 100%. Then, I’ll push the next two sliders (Luminance Detail and Luminance Contrast) all the way to the left, so their values are 0. Let’s see what happens.
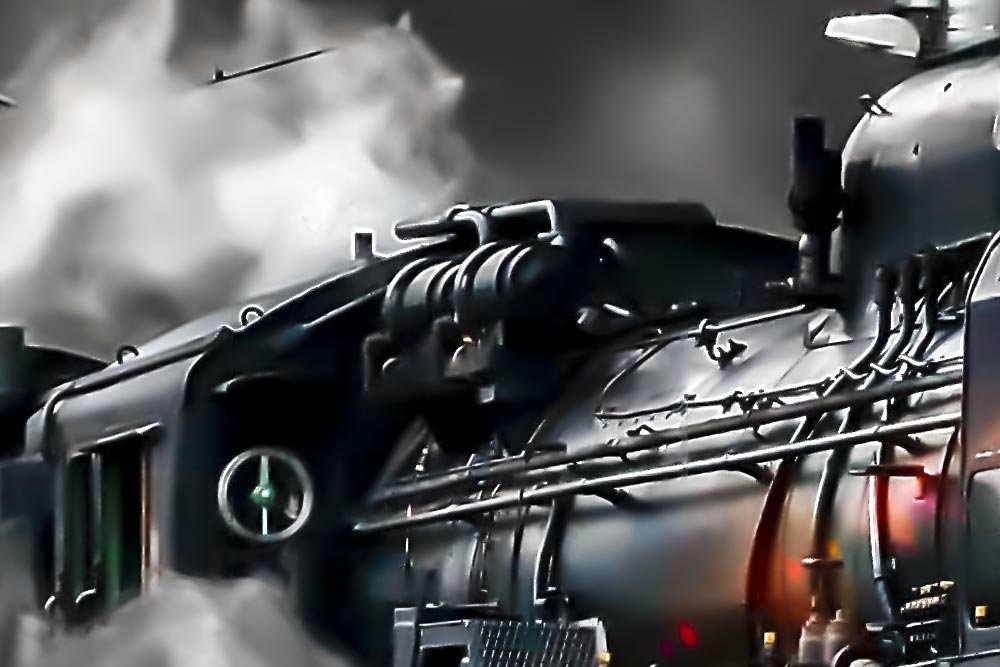
Isn’t that crazy? It looks like an Atlas Shrugged book cover. Since these controls are so dependent on the photo they’re altering and since the sliders in this panel are oftentimes difficult to see, I’m going to leave it here. What I would suggest is that you find some noisy photos to experiment with or take some photographs with your camera set to a high ISO value. That should give you some good noise to work with. Take neutral photos and some colorful ones so you can get a handle on both sections of the Noise Reduction section of the Detail panel.
I hope I gave you a clear introduction of how to remove noise in a photograph using Adobe Camera Raw. If you have any questions or concerns, please leave them in the comment section below. Thanks for reading!
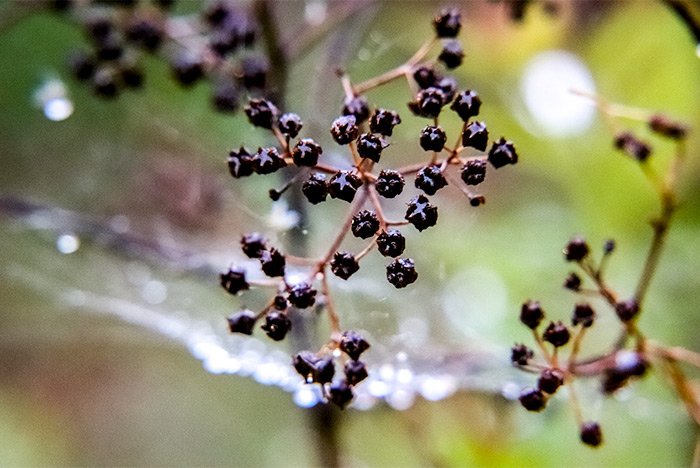
UPDATE: It has been requested that I use the photo from the next post that talks about sharpening photos in Camera Raw in this post as well. That photo has some really noticeable noise in it. Since it’s practically perfect for this post, I’d like to show you what kind of noise reduction Camera Raw is truly capable of.
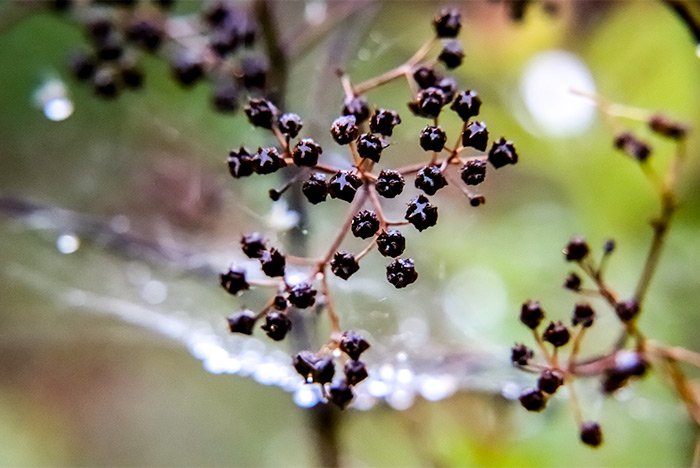
Again, I’ll open the photo into Camera Raw and enlarge it to 100%. Take a look at all this juicy noise we’ve got going on here.
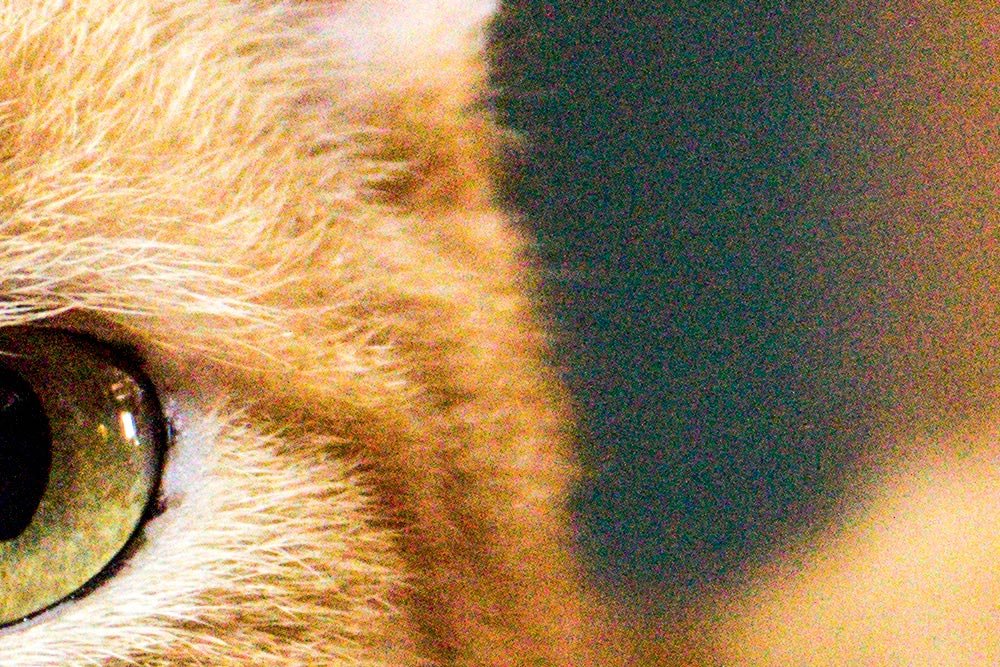
This image is full of classic Fixed Pattern Noise. There’s a heavy does of both luminance noise as well as color noise.
Right now, I’ve got each of the six sliders in the Noise Reduction section of the Detail panel pushed to the left.
For this next screenshot, I’ll push the Luminance slider all the way to the right.
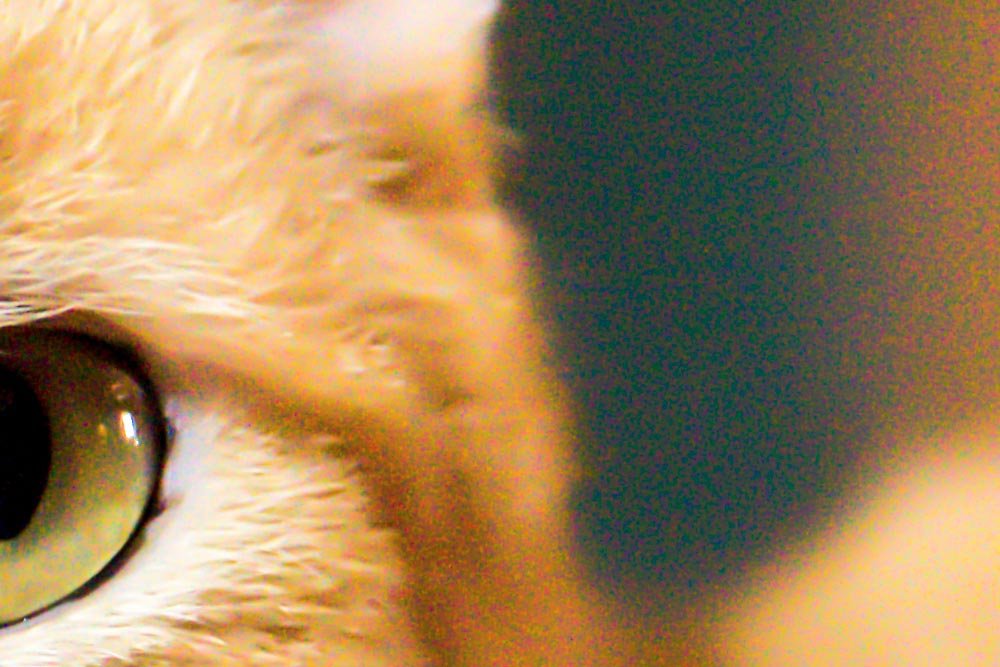
As you can see, much of the luminance noise has cleared up, but the color noise remains. That’s because we haven’t gotten to the good part yet. For the next screenshot, I’ll push the Luminance slider all the way back to the left and I’ll push the Color slider all the way to the right.
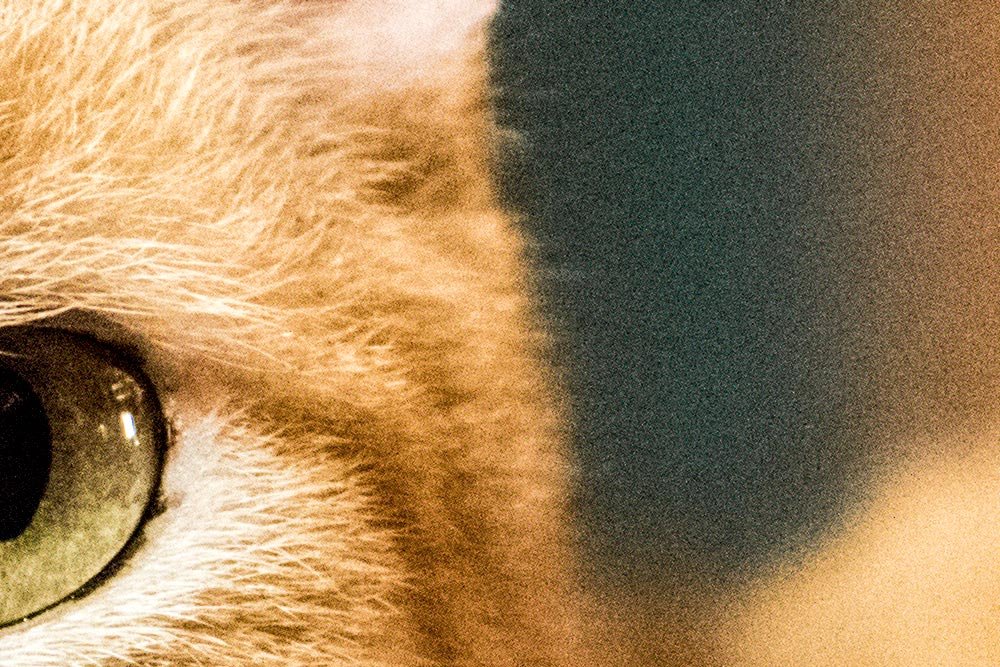
It appears that by pushing the Luminance slider too far to the right, we lost a lot of detail that used to exist in the photo. Conversely, by pushing the Color slider all the way to the right, we didn’t lose any quality and practically all the color noise in the photo has disappeared. I’d say this is the safer of the two sliders to move a great distance.
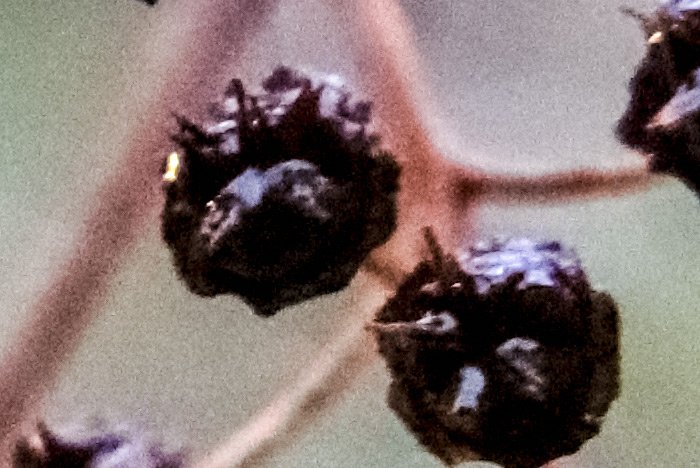
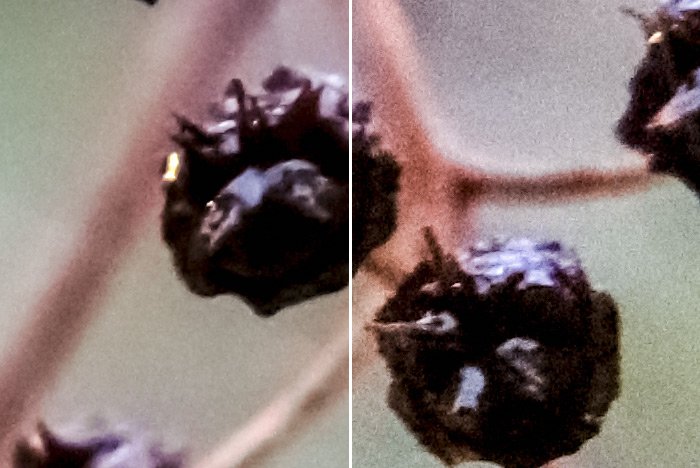
For a closer look at the color noise I’m referring to, take a look at the next screenshot. I zoomed into 300%.
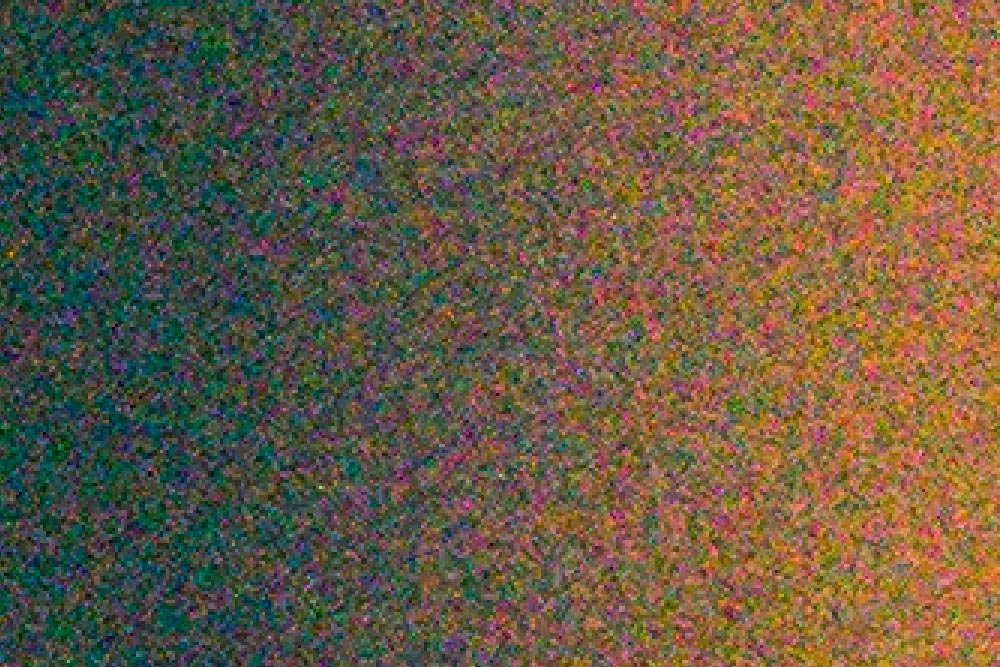
All those random red and green pixels shouldn’t be colored that way.
For this final screenshot, I’ll push the Color slider all the way to the right (because it’s safe to do so) and I’ll do my usual and push the Luminance slider so it has a value of 25. Let’s see what happens.
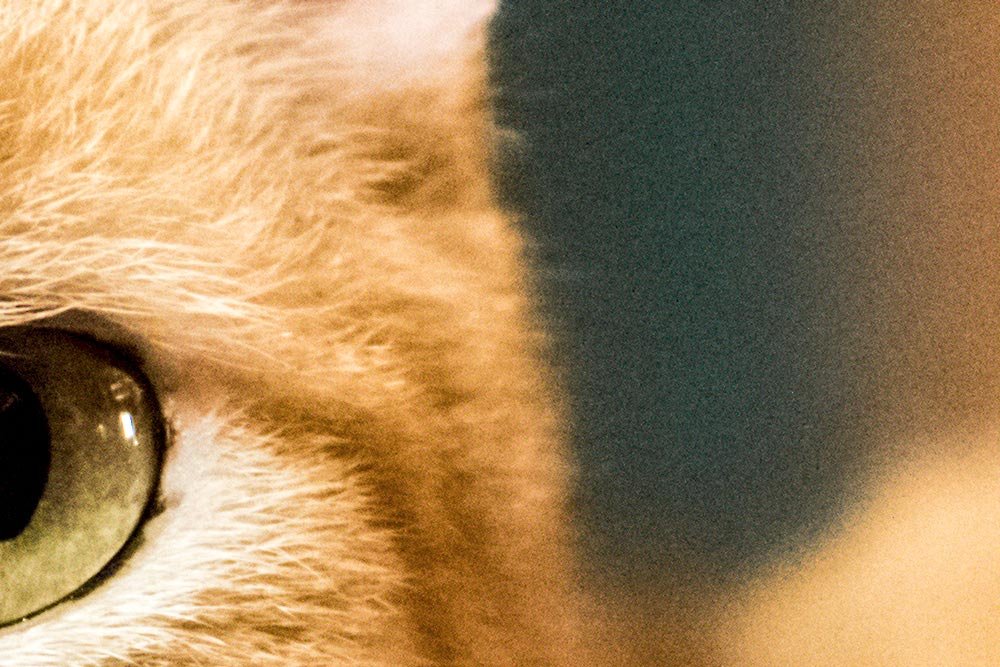
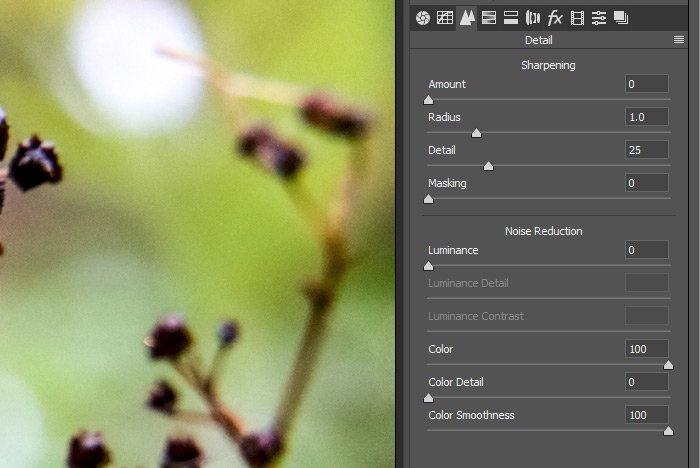
Okay, that’s much better. I did a bit of playing around with the other sliders and I ended up with these settings:
Luminance: 25
Luminance Detail: 0
Luminance Contrast: 0
Color: 100
Color Detail: 0
Color Smoothness: 100
The reason I kept both the Luminnace Detail and Luminance Contrast at 0 is because by raising their values, I only increased the grain in the photo. Also, the same was true for Color Detail. I found that when I lowered the Color Smoothness slider to 0 there were “waves” of color noise in the photo that were plainly visible. Pushing this slider to the right “smoothed” that out and got rid of the waves.
Now, I’ve got a photo that’s even better than the one I previously corrected! Getting rid of that color noise helped make this image much more crisp.
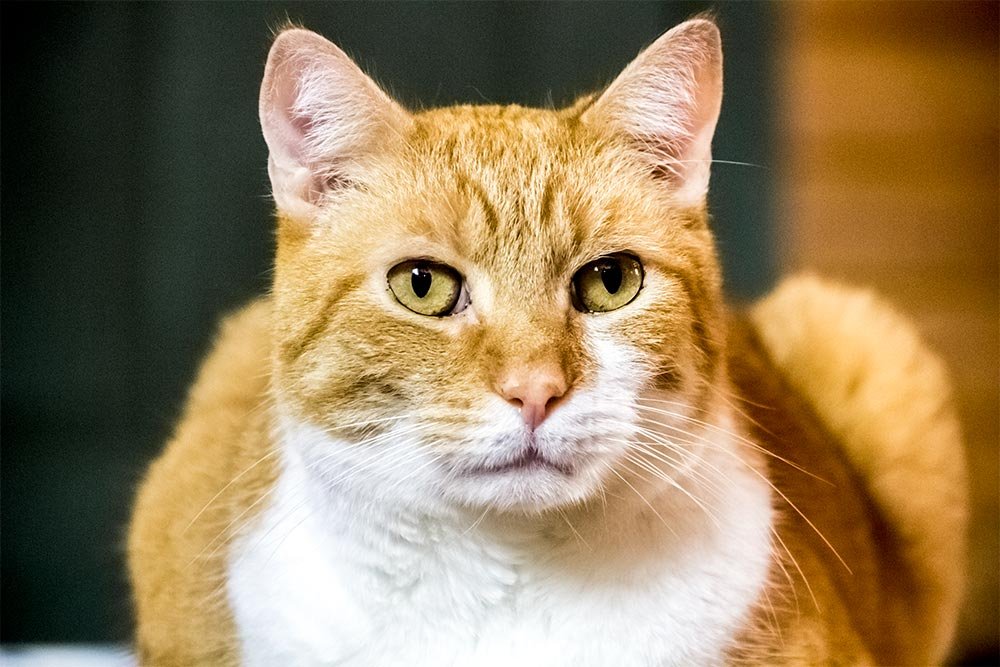
I hope this second section helped. If you have any further questions or suggestions, please let me know. Thanks!
Since removing noise is one of the most popular areas to work on when it comes to post-processing, I’ll cover it first. Then, in my next post, I’ll discuss how to go about sharpening photos using Camera Raw. Both of these modification control sliders are contained in the same panel, so they’re closely related and will be very intuitive to understand when dealing with one another.
In today’s post, I’ll launch a demo photo into Camera Raw. I’ll do my usual editing in the Basic panel and then I’ll move onto the Detail panel. Inside the Detail panel are two sections. The first is called Sharpening and the second is called Noise Reduction. It’s the second one we’ll be working in today.
The Demo Photo
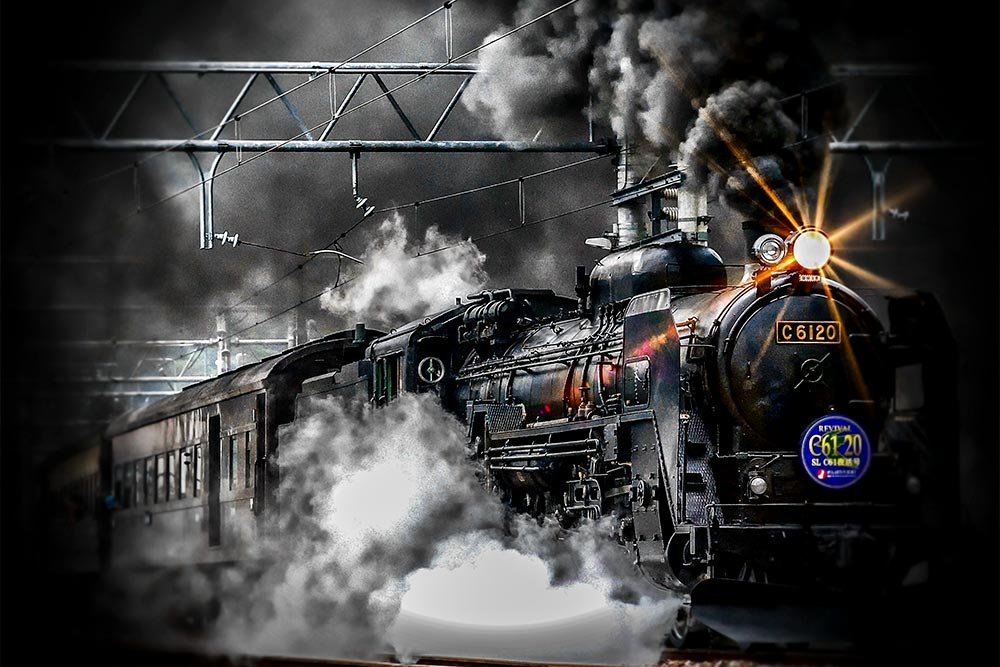
I’ll use a photo of a train below to exemplify how to use the Noise Reduction settings in the Detail panel. While it may not look like there is much amiss in the photo directly below, you’ll surely see what I’m referring to after I zoom into specific parts at 100%. The noise will appear as clear as day.
Editing in the Basic Panel
Whenever editing in Camera Raw, you generally want to begin with the Basic panel. The reason for this is simple – big changes need to be made before smaller changes.Let’s pretend for a moment that I did things backwards and I went ahead and edited a photo by pushing some Noise Reduction sliders before pushing the sliders contained in the Basic panel. If I moved the Noise Reduction sliders to the point of maximum noise reduction and then went back into the Basic panel and moved some sliders such as Contrast or Clarity, I may undo what I had done in the other panel. In Camera Raw, certain edits are dependent on other edits. In this case, in order for the noise reduction to remain the way we think it’s going to remain, I need to work in the Basic panel first. I certainly wouldn’t want to get rid of all sorts of noise and come to realize that my increase in contrast brought it all back.
With this in mind, I’ll make some general edits in the Basic panel. Nothing huge. Just some things to get the ball rolling.

After I’m done here and the photo is looking pretty good, I’ll move into the Detail panel where I can continue on with some more minor changes.
Editing in the Detail Panel
To get into the Detail panel, I’ll click on the tab that looks like two triangles are stacked on top of each other.
And once there, I’ll look towards the bottom at the sliders underneath the title Noise Reduction.

Finally, before doing anything else, I’ll increase the view to 100% so I can see what kind of noise I’m dealing with. When using the Noise Reduction sliders in any editing application, it’s common to view what you’re working on at 100%. If you didn’t enlarge the photo, you simply couldn’t see the necessary detail.

I hope you can see the noise.
Now, I want you to be aware of one thing – when I edit and reduce the size of photos for use online, I really don’t need to go nuts with the noise reduction. The reduction of the photo size removes a lot of the noise by itself. Also, you can’t really see that much detail in smaller photos anyway. It’s when the image remains very large or when you print it that noise becomes very apparent. Even though I keep most of my images for online use, I still like to stay in the habit of covering all my bases. It develops muscle memory (or something like that).
If you look at the six available sliders available in the Noise Reduction section, you should see Luminance, Luminance Detail, Luminance Contrast, Color, Color Detail and Color Smoothness. While this may seem like a lot, once you grasp an understanding of what each slider does, you’ll see that it’s not. I’ll cover what each of these sliders does now.
Luminance: Push this slider to the right to reduce luminance noise. The slider default is all the way to the left.
Luminance Detail: This slider is dependent on the previous one. If the Luminance slider hasn’t moved, you won’t be able to move this one. This slider controls the luminance noise threshold. If you push it all the way to the right, you’ll preserve much of your photo’s detail, but you’ll likely produce lots of noise. To remove noise, you’ll need to push this slider to the left. Beware though, noise reduction also removes detail, so there’s a balance here.
Luminance Contrast: This slider acts much like the previous one. It also depends on the movement of the Luminance slider to work. In this case though, the slider controls the contrast of the luminance. Again, if you push it all the way to the right, you may end up with worse results. You’ll likely see noisy blotches or mottling. And like the previous slider, pushing this one to the left will offer smooth, less noisy results, but there will be less contrast in the image.
Color: This slider is the first in the second section of sliders. This first slider is much like the first in the previous section. It can move, but the two next sliders depend on it to move as well. If you push this slider to the right, you’ll reduce color noise and if you keep it to the left, it will have no effect on the image.
Color Detail: If you push this slider to the right, you’ll end up with thin, detailed color edges, but you may increase color speckling. If you push the slider to the left, there will be less speckling, but the colors may bleed into one another.
Color Smoothness: This is a fairly new slider in the Color section. When you push this slider to the right, you’re instructing Camera Raw to look to the top, bottom, left and right of each color in the photo and to reduce the “abruptness” of each difference. Think about it this way – if you have tons and tons of colors as noise in an image and push this slider to its maximum setting, you’ll actually slightly desaturate the photo. That’s the “smoothing” the slider refers to. If you push it all the way to the left, you’ll end up with more saturated and accurate colors, but they may be very noisy.
As with any of these sliders, you’ll definitely need to experiment with your own photos. The image I’m working with doesn’t exactly have a lot of color in it. It does, however, have a lot of difference in luminance. Because of this, I’ll go ahead and push only the top three luminance sliders. I want you to realize that I’m going extreme here only for your benefit. I would like to demonstrate how strong these sliders can be. I wouldn’t do this in the real world unless I was going for the cartoon look.
I’m going to push the Luminance slider all the way to the right, so the value is 100%. Then, I’ll push the next two sliders (Luminance Detail and Luminance Contrast) all the way to the left, so their values are 0. Let’s see what happens.

Isn’t that crazy? It looks like an Atlas Shrugged book cover. Since these controls are so dependent on the photo they’re altering and since the sliders in this panel are oftentimes difficult to see, I’m going to leave it here. What I would suggest is that you find some noisy photos to experiment with or take some photographs with your camera set to a high ISO value. That should give you some good noise to work with. Take neutral photos and some colorful ones so you can get a handle on both sections of the Noise Reduction section of the Detail panel.
I hope I gave you a clear introduction of how to remove noise in a photograph using Adobe Camera Raw. If you have any questions or concerns, please leave them in the comment section below. Thanks for reading!
UPDATE: It has been requested that I use the photo from the next post that talks about sharpening photos in Camera Raw in this post as well. That photo has some really noticeable noise in it. Since it’s practically perfect for this post, I’d like to show you what kind of noise reduction Camera Raw is truly capable of.
Again, I’ll open the photo into Camera Raw and enlarge it to 100%. Take a look at all this juicy noise we’ve got going on here.

This image is full of classic Fixed Pattern Noise. There’s a heavy does of both luminance noise as well as color noise.
Right now, I’ve got each of the six sliders in the Noise Reduction section of the Detail panel pushed to the left.
For this next screenshot, I’ll push the Luminance slider all the way to the right.

As you can see, much of the luminance noise has cleared up, but the color noise remains. That’s because we haven’t gotten to the good part yet. For the next screenshot, I’ll push the Luminance slider all the way back to the left and I’ll push the Color slider all the way to the right.

It appears that by pushing the Luminance slider too far to the right, we lost a lot of detail that used to exist in the photo. Conversely, by pushing the Color slider all the way to the right, we didn’t lose any quality and practically all the color noise in the photo has disappeared. I’d say this is the safer of the two sliders to move a great distance.
For a closer look at the color noise I’m referring to, take a look at the next screenshot. I zoomed into 300%.

All those random red and green pixels shouldn’t be colored that way.
For this final screenshot, I’ll push the Color slider all the way to the right (because it’s safe to do so) and I’ll do my usual and push the Luminance slider so it has a value of 25. Let’s see what happens.

Okay, that’s much better. I did a bit of playing around with the other sliders and I ended up with these settings:
Luminance: 25
Luminance Detail: 0
Luminance Contrast: 0
Color: 100
Color Detail: 0
Color Smoothness: 100
The reason I kept both the Luminnace Detail and Luminance Contrast at 0 is because by raising their values, I only increased the grain in the photo. Also, the same was true for Color Detail. I found that when I lowered the Color Smoothness slider to 0 there were “waves” of color noise in the photo that were plainly visible. Pushing this slider to the right “smoothed” that out and got rid of the waves.
Now, I’ve got a photo that’s even better than the one I previously corrected! Getting rid of that color noise helped make this image much more crisp.

I hope this second section helped. If you have any further questions or suggestions, please let me know. Thanks!

