Search

Easy DIY Home Plumbing Projects

  • Thread starter CaptainDan
  • Start date
CaptainDan

CaptainDan

Member
Joined
May 9, 2021
Messages
113
Reaction Score
0
Points
16
  • #1
I've done a lot of simple home DIY plumbing projects in my day. Everything from installing sink faucets to under the sink plumbing to sillcock valves. Since each of these projects was so easy, I thought I'd list each one here so you can follow my directions. I'll give you lots of background information as well as tons of photos. If you have any questions, please ask them below.
 
CaptainDan

CaptainDan

Member
Joined
May 9, 2021
Messages
113
Reaction Score
0
Points
16
  • #2

Installing a New Kitchen Faucet & Under Sink Water Filter​

I have always wanted an under sink water filter. I’m not sure why, especially since we have a whole house filter. I guess it’s because the whole house filter is all the way down in the basement and I keep thinking the water gets all screwed up traveling through the pipes. I like the idea of having a filter close to the tap.

I decided that I had the capabilities to install an under sink water filter myself. I mean, I do have the brains and the patience. It’s not really a hard job, just one that you have to psych yourself into doing because you have to clean out under the sink. You know…all those bottles of who knows what and cans of what the heck it this. Throw in a few old sponges and there you have it – the area below a kitchen sink.

There was one little issue that was in the way of me installing a water filter. The faucet we had installed on the kitchen sink was a bit out dated. It was one of those “one handle” ones that sits right in the middle. Some people prefer that style, but I always liked the two handle ones. In this case, the two handles are preferred because the water filter only runs on the cold line. I like knowing that when I turn on the cold water, only the cold water is running. So, I basically needed a water filter and a new kitchen faucet. Not a problem, I’m really cheap when it comes to kitchen faucets and the filter setup was only $34. It even came with the insert.

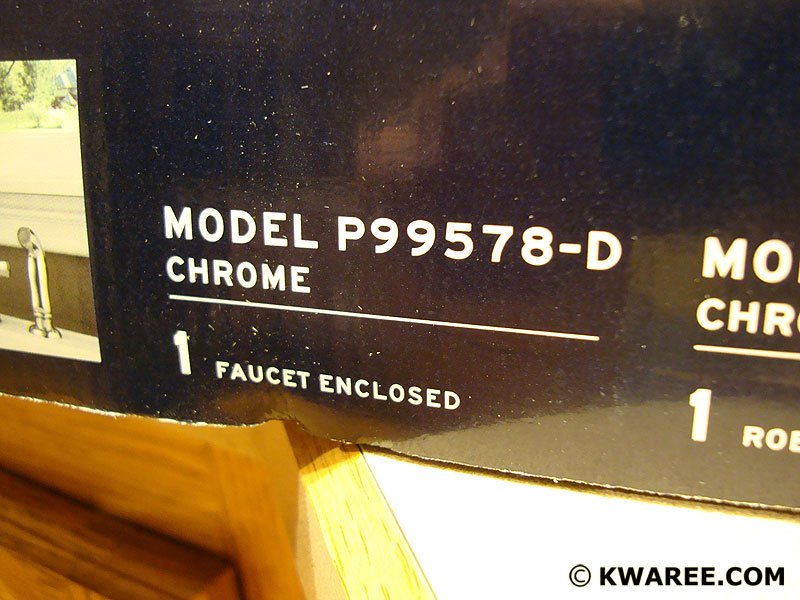
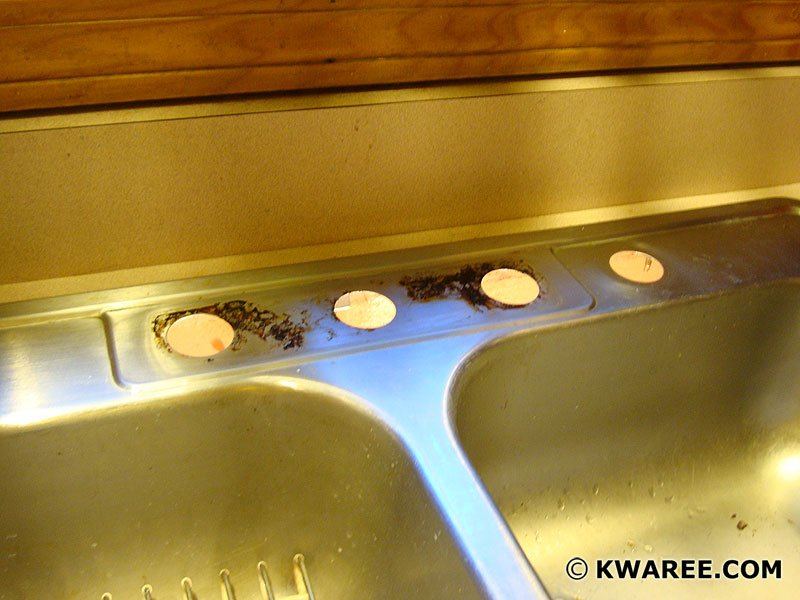
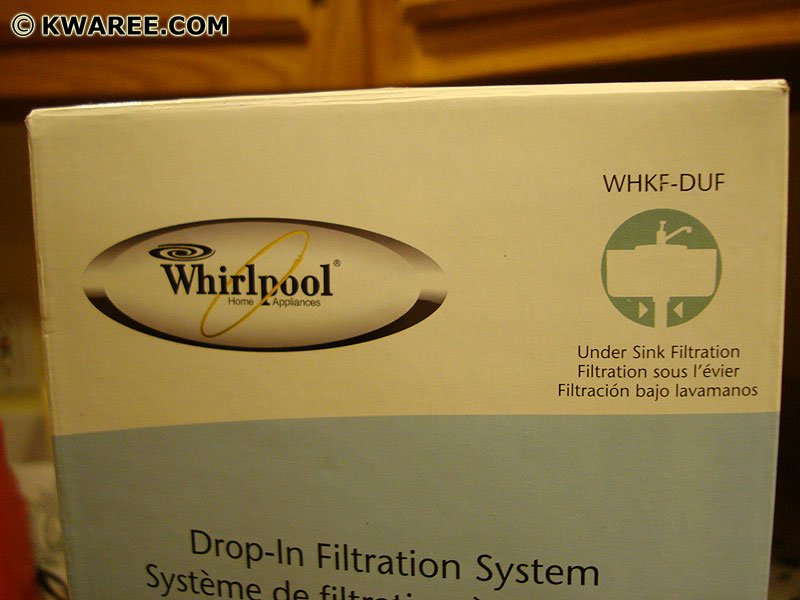
Off to Lowe’s I went. When I got there, I strolled down the filter aisle and picked out a “Whirlpool Drop in Filtration System – WHKF-DUF.” This is the $34 jobber I just told you about. I knew what to expect because I already picked it out online. I put the filter in the cart and went over to the next aisle that had all the faucets. There they were, all lined up on the wall. I knew I wanted the chrome Peerless for around $44, but I was forced to get the $68 model because we have a four hole sink. That means that we have that extra little sprayer. You know, the one that you can wrap a rubber band around and sit back in its holder. When someone comes by to turn on the sink, they get sprayed. Yeah, that one.

I picked up the model I needed and put it in my cart. Or what I thought was my cart.

Here’s a funny little story. When I rolled my cart into the faucet aisle, I saw a nice family standing there trying to pick out a kitchen faucet. I noticed that they were kind of just randomly picking things out and didn’t know why. There are differentiating factors in faucets such as the one handle or two that I spoke of above. Also, there is the height of the faucet end. Our old faucet was low, so when I tried to get a large pot filled with water, I had to angle it such a way. Anyway, I broke the ice by saying, “Boy, I feel like I’m part of the family.” They laughed and I laughed. The father just looked at me. There were three of them…the mother, the father and the daughter. Okay, on with the story. I told them about the height issue and why and they were just amazed. As far as I was concerned, they thought I was the cat’s meow. I left the aisle to go out to the garden center.

When I got out to the garden center, I picked out two trees and put them into the cart. I stood back and looked at the faucet. Then, I wondered where the filter was. For the first time in my life, I grabbed the wrong cart. I think it was the faucet aisle family’s cart that I had taken. I left the cart outside in the garden area (because I already had the trees in it) and walked back into the faucet aisle. There it was, my cart with the filter in it. I felt bad for the poor family that had to walk away with no cart, carrying the faucet in their hands. They probably thought I was just fluffing them up earlier so I could steal their cart.

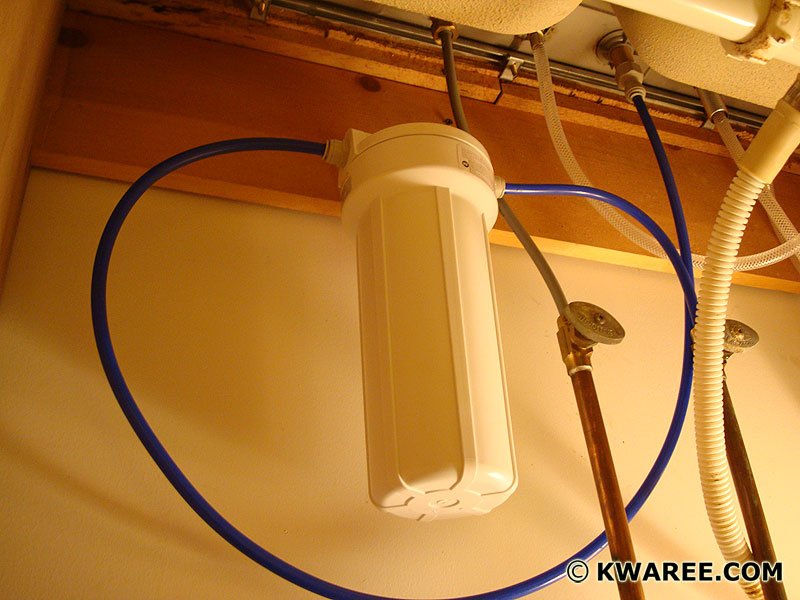
Okay, story time is over. Here are some pictures of the kitchen faucet and under sink water filter installation.
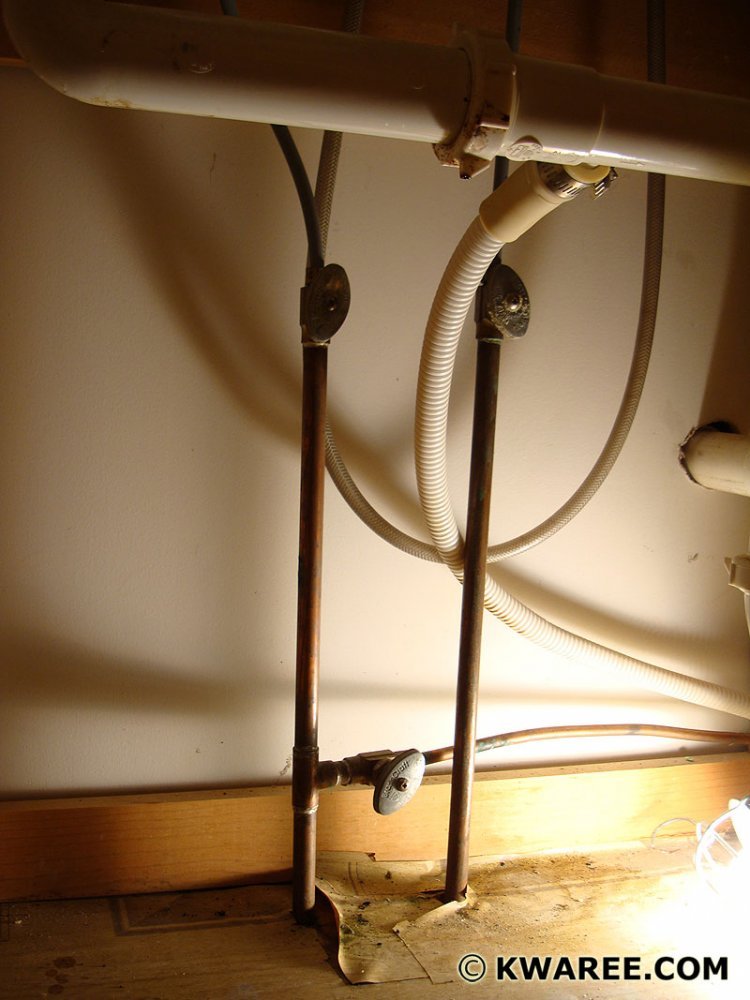
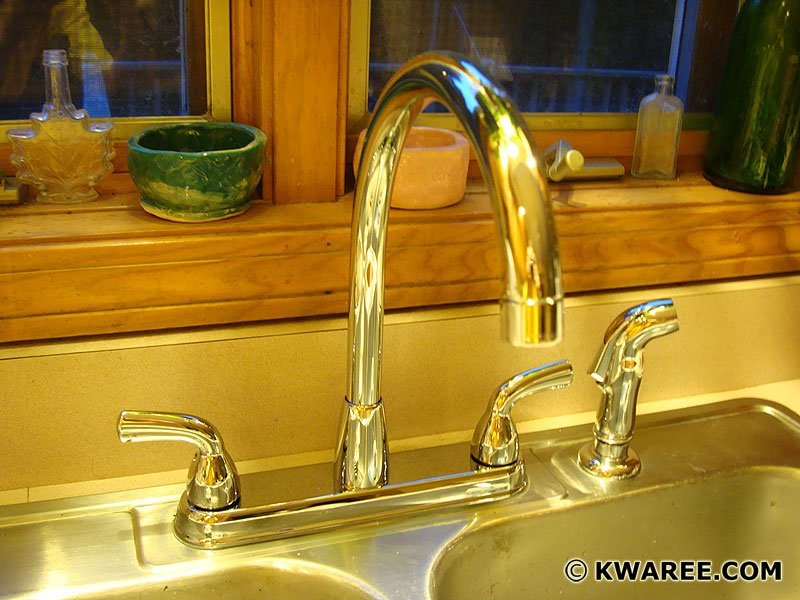
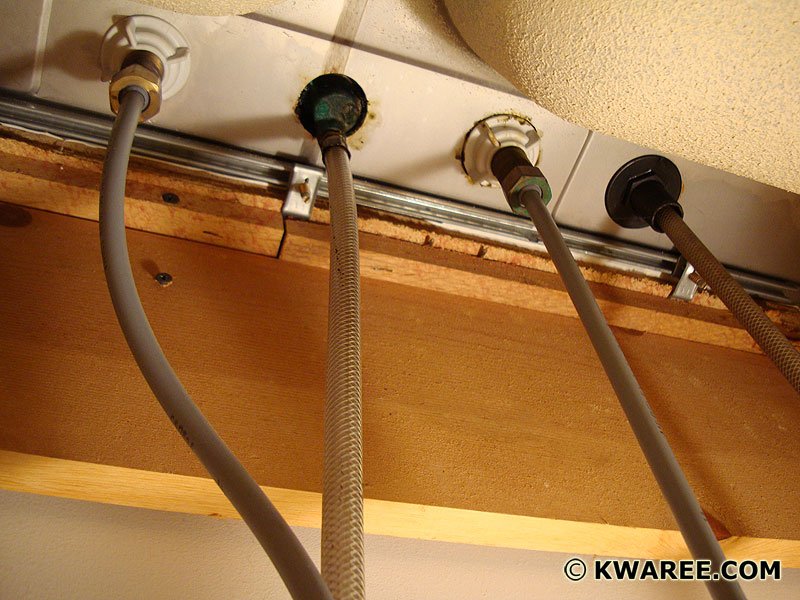
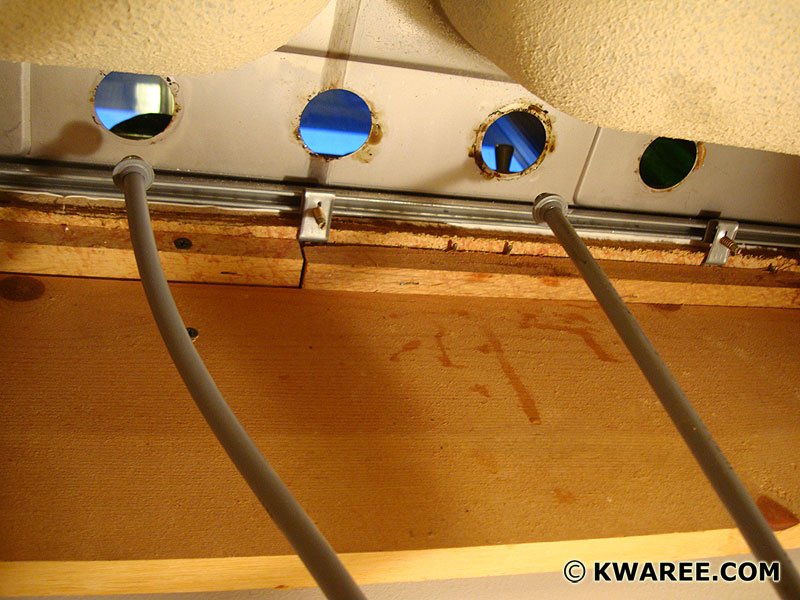
dishwater-exit-hose.jpg installed-new-kitchen-sink.jpg peerless-kitchen-sink-faucet-box.jpg peerless-model-p99578-faucet.jpg plumbing-faucet-holes-in-kitchen-sink.jpg under-sink-plumbing-connections.jpg under-sink-water-feed-hoses.jpg under-sink-water-filter.jpg whirlpool-under-sink-filtration-package.jpg

Everything works great and the installation took me about an hour and a half.

I have always wondered why there is such a big price difference between faucets, and doorknobs for that matter. Either I have never used a really high quality faucet or doorknob or I am just missing something. Every time I go shopping for either, I always get the cheapest available and find that they work just great. Maybe I am missing something. Perhaps someone can enlighten me.

COMMENT: Our kitchen faucet is loose and leaky – and kinda ugly. The way Sam and I do projects is sort of like this:
“We should replace that leaky faucet.”
“Yeah. but the whole sink is old and kinda ugly.”
“Yep. so if we’re gonna replace the faucet, we may as well replace the sink, too.”
“True. And if we’re gonna go to all that trouble and expense – let’s just hire someone and have the counters and backsplash re-done, too.”
Next thing you know – we’re refinancing and completely updating the kitchen.
See why we’re steering clear of the leaky faucet thing?

COMMENT: I used to be like that too, until I turned into a utilitarian. Now, I like it if it works. Many years ago, I was sucked into all that HGTV stuff. They got me, I’ll admit. NOT NO MO!!! Now, it’s just a new faucet. That’s it. No more. I am living like they did back in the old days (meaning the 70s). PS – I am also WAY over completely redoing the house and then losing fifty grand when I sell. Yeah, I’m over that too. Now I just live in it.
 
CaptainDan

CaptainDan

Member
Joined
May 9, 2021
Messages
113
Reaction Score
0
Points
16
  • #3

Replacing a Dirty Watts Whole House Sediment Water Filter​

Just a few moments ago, I was informed that our water was orange. Upon learning this, I said, “Oh crap. Not another issue.” It’s these little surprises that are my least favorite things. I enjoy predictability and steadiness. Not ups and downs and things I’m not ready for. Luckily, before my lady even finished her sentence, I knew how to fix the problem.

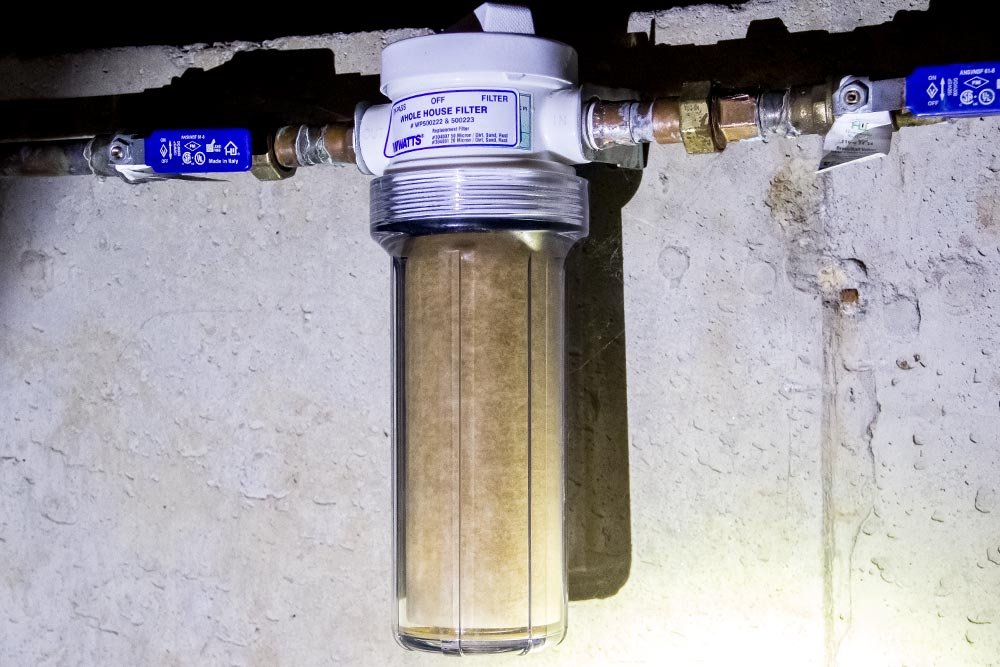
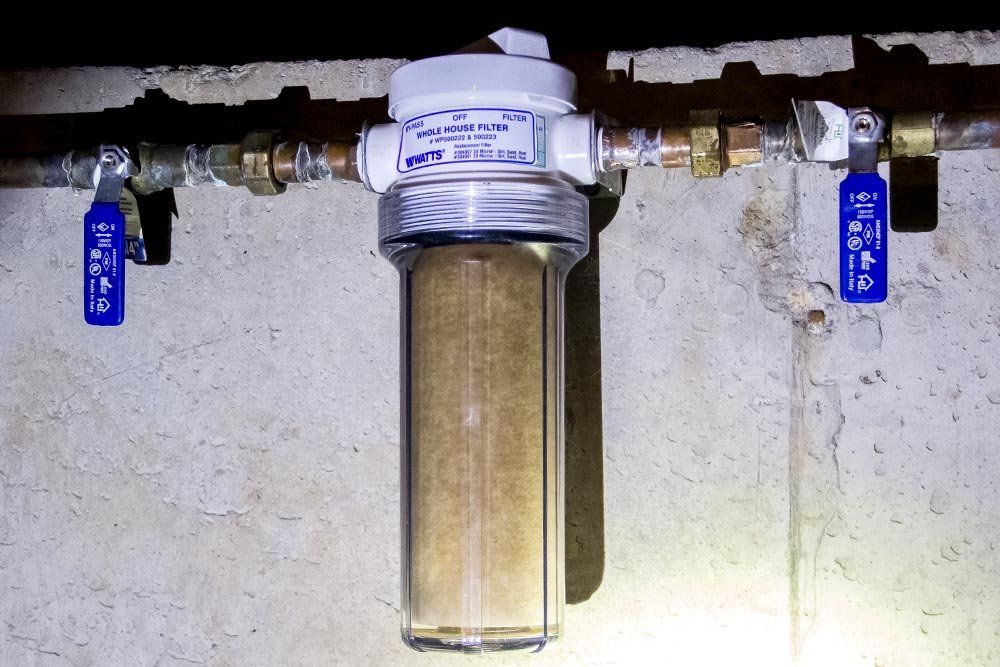
watts-whole-house-sediment-filter.jpg

I totally forget if I ever wrote about the sediment filter I installed in the basement on this website. We have a shallow well here and because of that (well, even if we had a deep well or city water), we get some sediment in the water that comes into the house. We used to deal with this issue a lot when we lived in Connecticut, so I’m familiar with what needs to be done to cure it. All that’s necessary is a bit of cutting some pipe and some plumbing. It’s sort of a challenging job if you don’t know what you’re doing, but if you do, it’s a snap.

The filter I installed is in the basement. It’s right next to the pressure tank and it’s mounted to the concrete foundation. The filter we had in Connecticut was mounted between the second floor floor joists and moved somewhat every time I had to remove the bottom clear piece to change a filter. I never liked that “movement” and because of it, I was careful to really bolt this one to the wall when I installed it.

If you take a quick look at the photo above, you’ll notice that there are two ball valves, one on each side of the filter. The reason I installed these two valves is two-fold. First, if I didn’t, my father would never let me live it down. He’s been talking about valves that control water flow since the day I was born. Second, the twist valves that come with these types of water filters aren’t very dependable. Our filter in Connecticut ended up leaking from that top valve because of over use. I thought it would be better to simply isolate the housing in its entirety when a filter needed to be changed. That way, I won’t wear out a piece of plastic and end up redoing a project that only needed to be done once.

I’m not sure when I installed this filter. I know it was over a year ago. I visited it a few times and didn’t really see much dirt, so I left things alone. That is, until today.

dirty-house-sediment-filter.jpg

I guess it was time to change the filter.

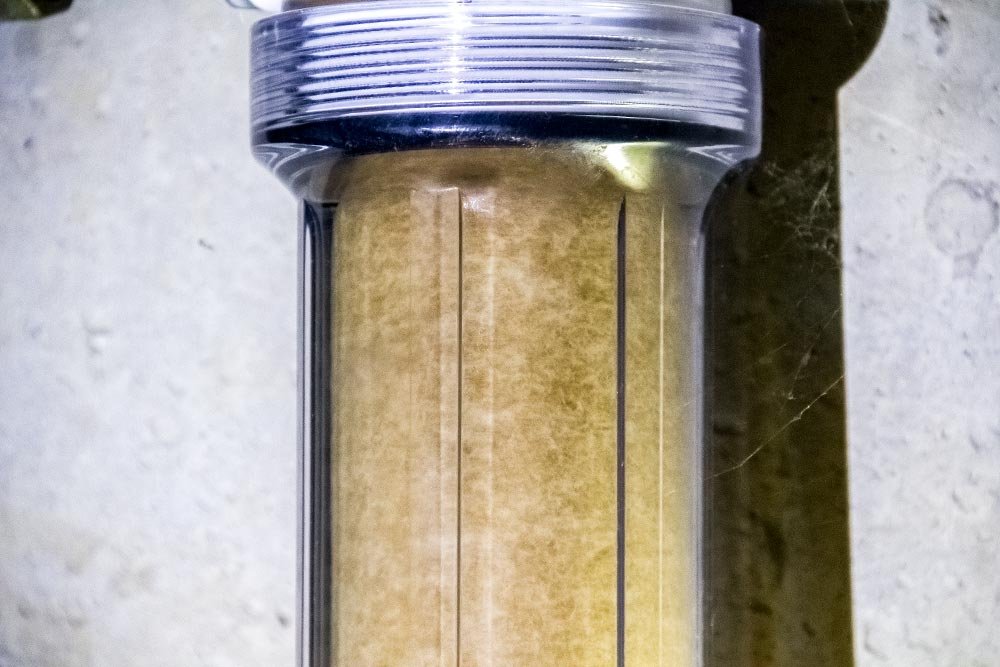
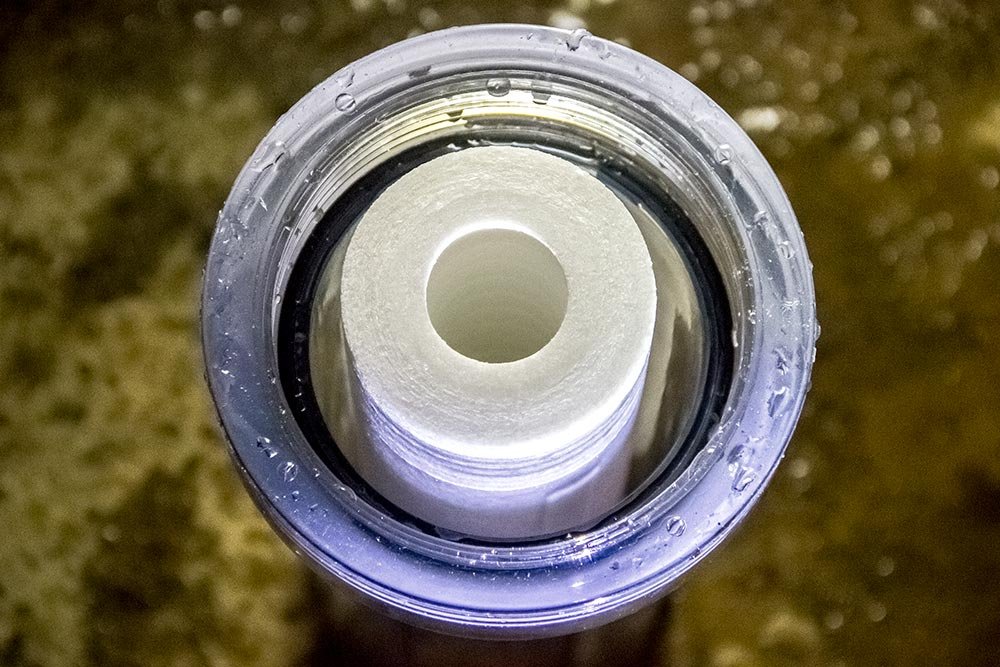
These things are a bit deceiving. I’ll show you why in the last photo of this post. Basically, the outside of the filter looks fine when quickly glancing at it. The problem is, the majority of the dirt is hiding in the filter’s insides. It’s for this reason that it’s probably best to change these things every six months or so. That is, for a regular house. If you have more aggressive problems with your well, you’ll definitely need to change them more often. I just took a look at some images on Google and boy, people surely wait far too long to change these sediment filters. I saw photos with goo and slimy coatings. It’s totally gross and can make your water taste horrible and can reduce the water pressure.

Anyway, changing this filter was simple. All I did was turn both ball valves to their “off” positions.

ball-valves-off.jpg

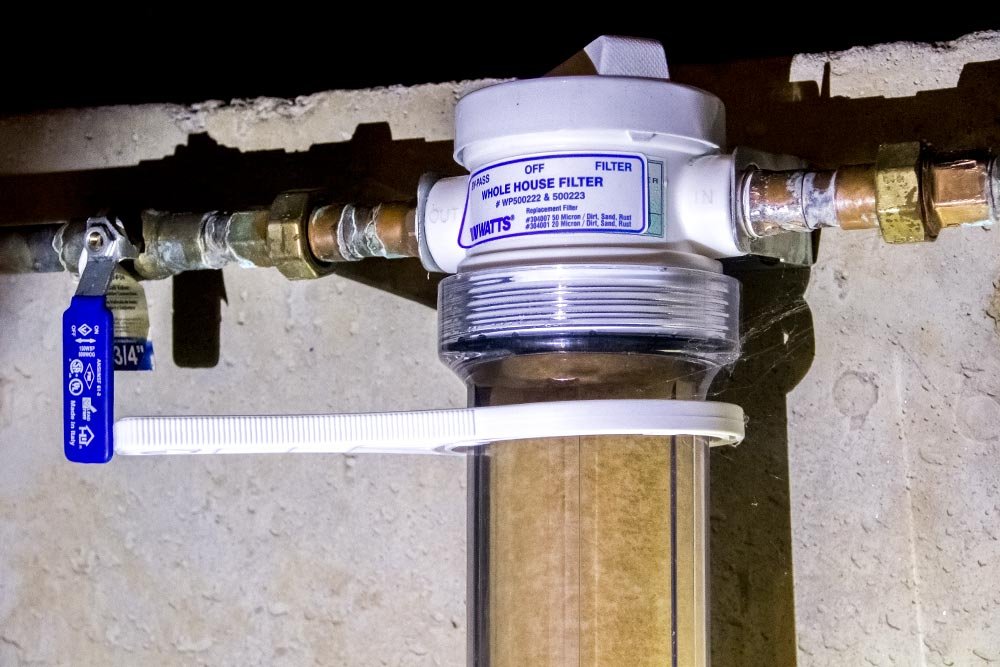
Then, I got out the wrench that came with the filter and placed it around the plastic housing.

water-filter-plastic-wrench.jpg

To unscrew the clear filter housing, I turned the wrench clockwise if I was looking down at the top of the filter or counter-clockwise if I was looking up at it. It only needed a small amount of pressure to break the seal. When it was broken, I twisted if off the rest of the way with my hand.

I took out the old filter, swirled the dirty water that was left in the clear housing and dumped it. I then installed the new filter in its place.

sediment-filter-housing.jpg

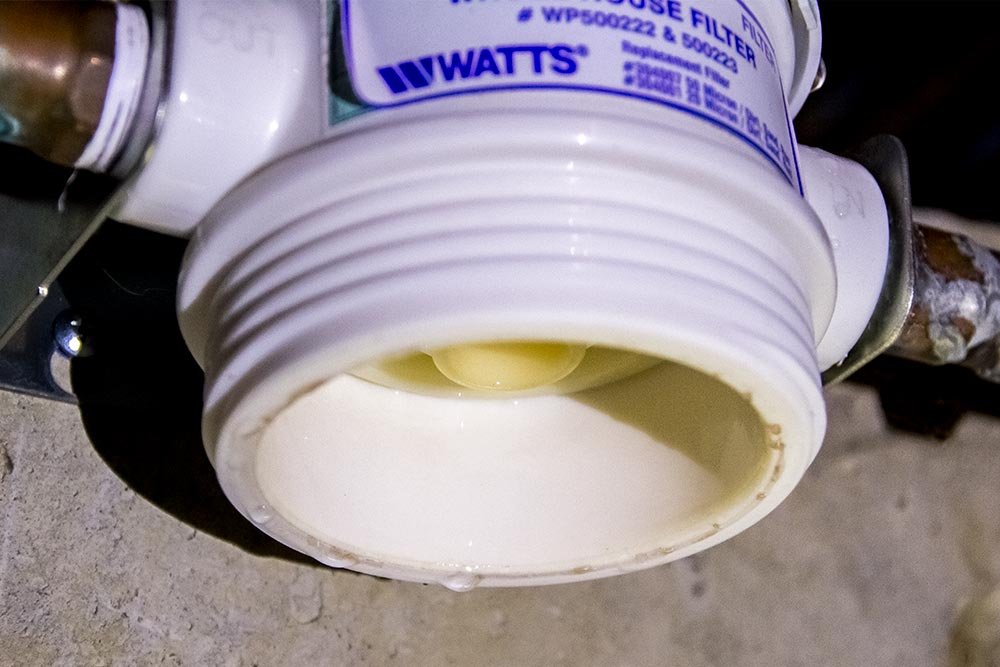
Then, I took a picture of the bottom of the valve contraption the filter connects to, just in case anyone might be interested in it.
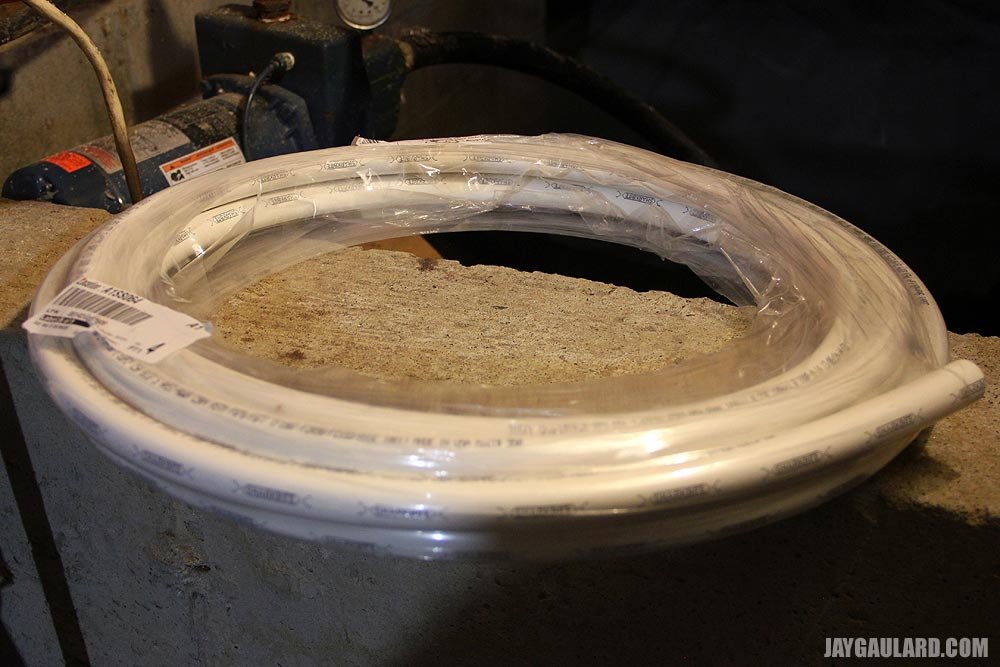
watts-water-filter-valve.jpg

Finally, I screwed the clear housing back up to the valve and gave it a quick tighten with the wrench. I turned the ball valves back on and called it a day. Problem solved.

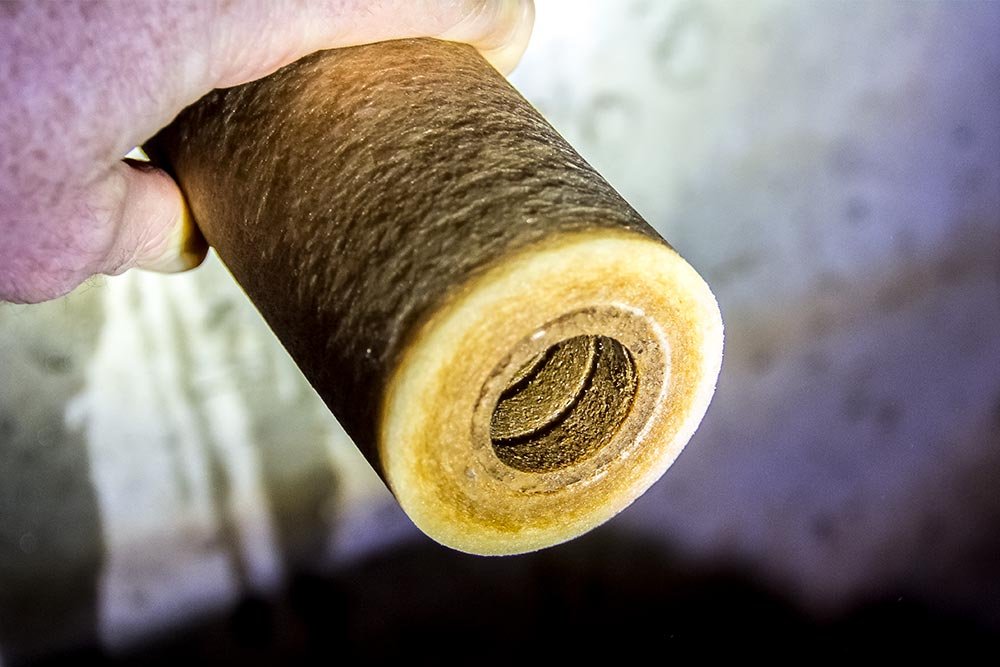
Now, let me show you what I was talking about above. This is the insidious nature of sediment filters. While they look okay on the outside, they’re filthy on the inside.

dirty-sediment-water-filter.jpg

From the photo above, you can see the gradient of dirt that travels from the exterior to the interior of the filter. Lesson learned. I’ll be changing these a lot more often.
 
CaptainDan

CaptainDan

Member
Joined
May 9, 2021
Messages
113
Reaction Score
0
Points
16
  • #4

Installing a Sillcock Valve​

Can anyone tell me what happens to a valve if it freezes with water inside of it? Okay, I’ll tell you. The seal gets ruined. Something happens when the ice expands in the valve, so after a few freeze/thaws, you get some leaks. We’ve had it happen to our kitchen sink after that froze this past winter. It also happened to the hose valve outside, most likely years ago. The hose valves are tricky. You have to remember to turn off the water source inside and open the outside valve during sub-freezing temperatures or else you’re in trouble.

The best way to deal with not having to remember to turn off the water inside before the first freeze is to install a sillcock. I’m not sure if that’s the name of just the freeze-proof hose valves or all hose valves, but from now on, I’m just going to call what I installed a hose valve.

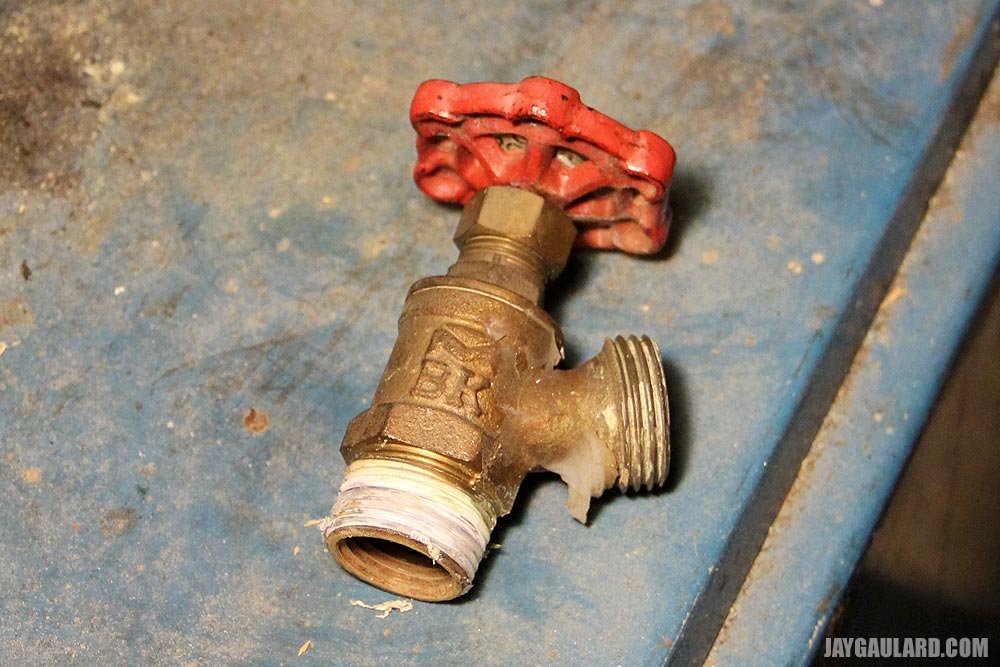
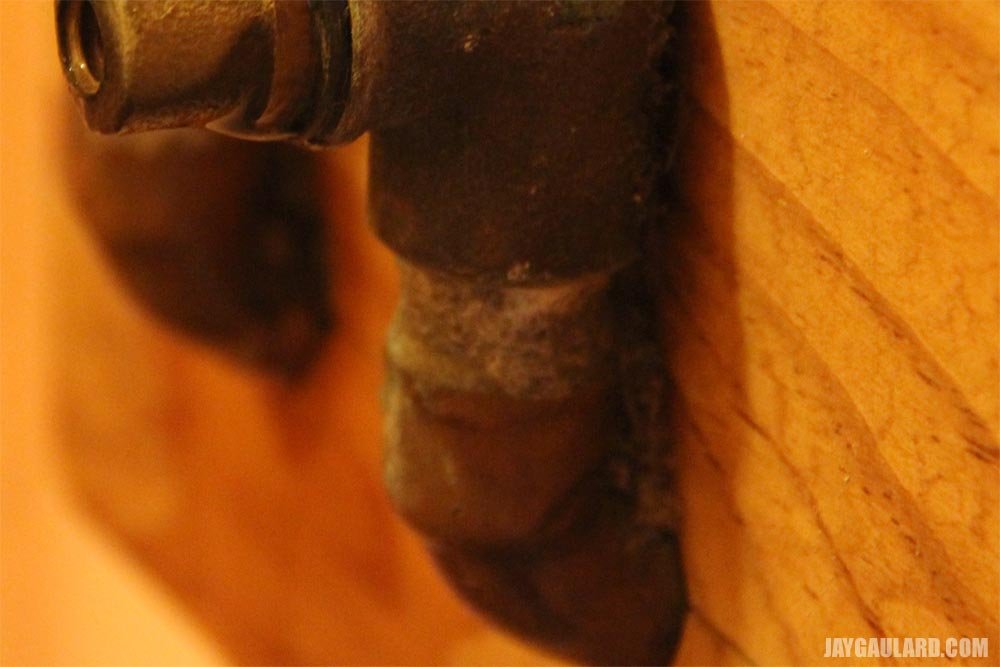
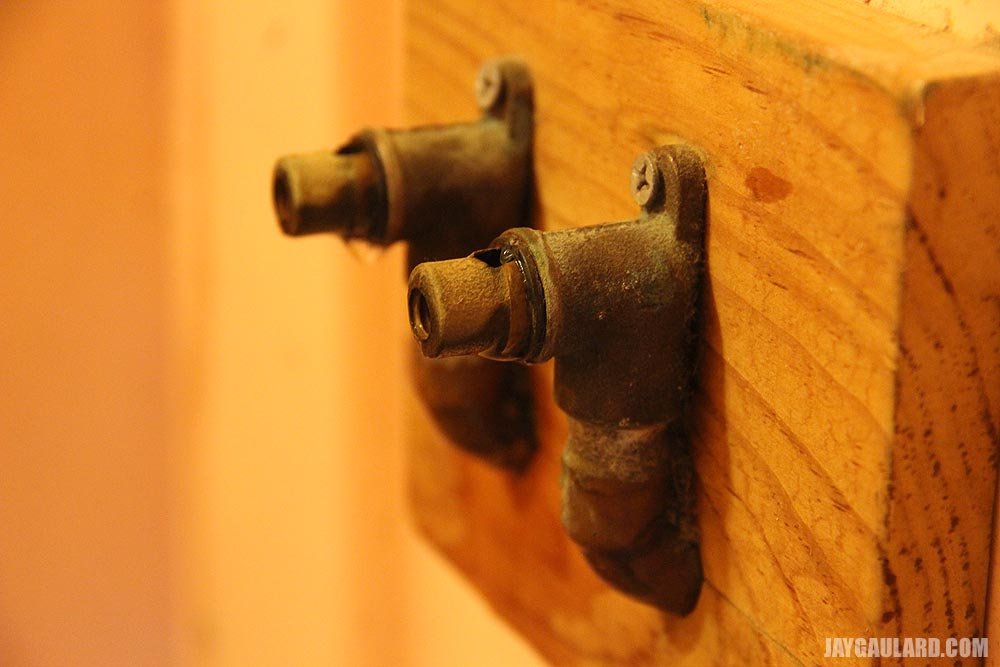
This is a picture of what we used to have hanging out of the basement wall. When we used the hose and the valve was turned on, it would drip like crazy.

old-water-valve.jpg

If you’ll notice, this valve is rather short. Any freezing that’s going to take place, is going to take place throughout the entire thing – even where the rubber seal meets the brass. That’s not good.

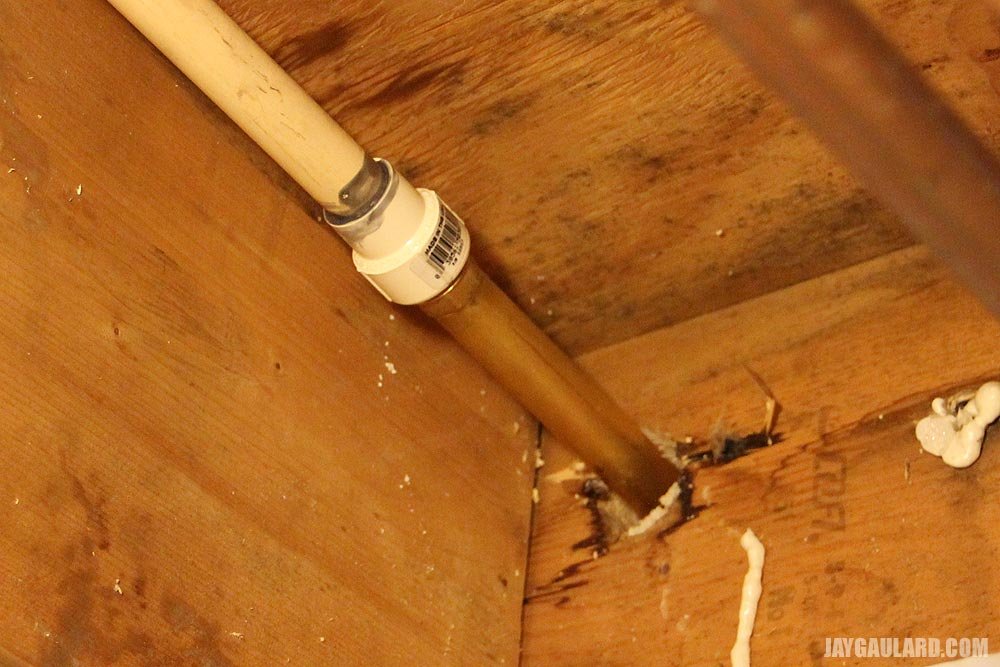
Now, check out this new valve I installed yesterday. Take a look at how far inside the basement the pipe extends. The rubber seal is all the way at the end. I left this open overnight so I could check for leaks. Now that I know it’s leak free, I can put the insulation back.

sillcock-valve-inside-connection.jpg

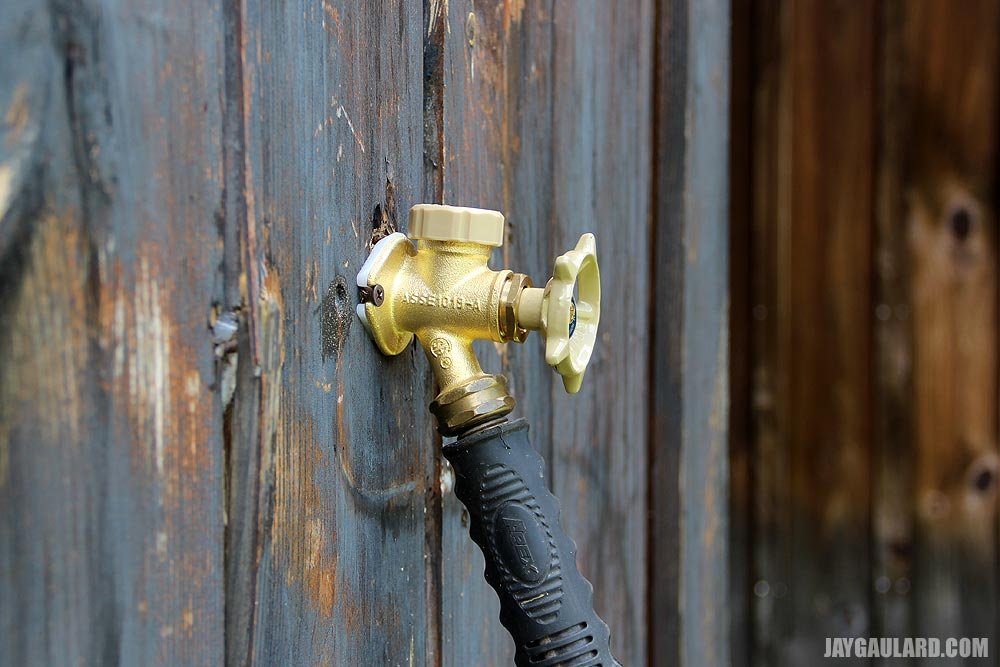
This is a picture of the new valve outside the basement. See the way it leans down. That’s not a mistake. The valve came with a plastic bushing that, if used, forces the valve to drain any water that’s left in it after the water is turned off. That way, if you use the valve in the Winter, the water exits instead of freezing inside.

mounted-sillcock-valve.jpg
 
CaptainDan

CaptainDan

Member
Joined
May 9, 2021
Messages
113
Reaction Score
0
Points
16
  • #5

Fixing a Smelly Septic Pipe With Fernco Flexible Couplings​

I’ve got a fun story for you. You probably won’t want to read it if you aren’t into smelly basements and septic pipes, but if you are, read on. You might be entertained.

When we moved into this house last November, I remember going down to the basement to check things out. One of the many issues I noticed was a slow drip coming from the main septic pipe. The way things are set up in this house is as follows: a main 3″ PVC pipe travels from upstairs all the way down into the basement via an interior wall. Almost all waste water feeds into this pipe through the walls above the basement. The only waste that doesn’t feed into the pipe is the downstairs toilet. That one heads directly into the basement and hooks into the same 3″ pipe, just below the floor. It’s very simple. After the downstairs toilet hooks into the pipe, there’s a 4″ “T” and then a 4″ PVC pipe leads all the way into the septic tank.

Now, I really didn’t give that slow drip much thought. I figured it was something, but perhaps if I didn’t look, it would go away. It would just disappear. Unfortunately, it never did. Thing is, every time I went down into the crawl space to look at the pipes, I really couldn’t see where the drip was coming from. I knew it was there, but all the PVC pipes were coated with spray foam insulation.

Here’s something for you – every time we had more than one person staying with us over the summer, the basement smelled like something died in it. I can remember a few months back, making trips into the basement looking for a mouse in the wall that didn’t make it and that was making the whole joint smell. It didn’t really smell like septic – just like something died in a wall.
Here’s something else for you – a few weeks ago, my lady visited with family for about 17 days. During that time, the basement didn’t smell at all. I hardly used any water at all during that time. Well, a small amount, but not really the big stuff such as the washer, etc…

While she was gone, I started thinking. I wondered why the smell in the basement had virtually vanished and why it was so prevalent when we had company over the summer. Just for giggles, I went down in the basement with some tools and began chipping away at the spray foam insulation. Do you want to know what I found?

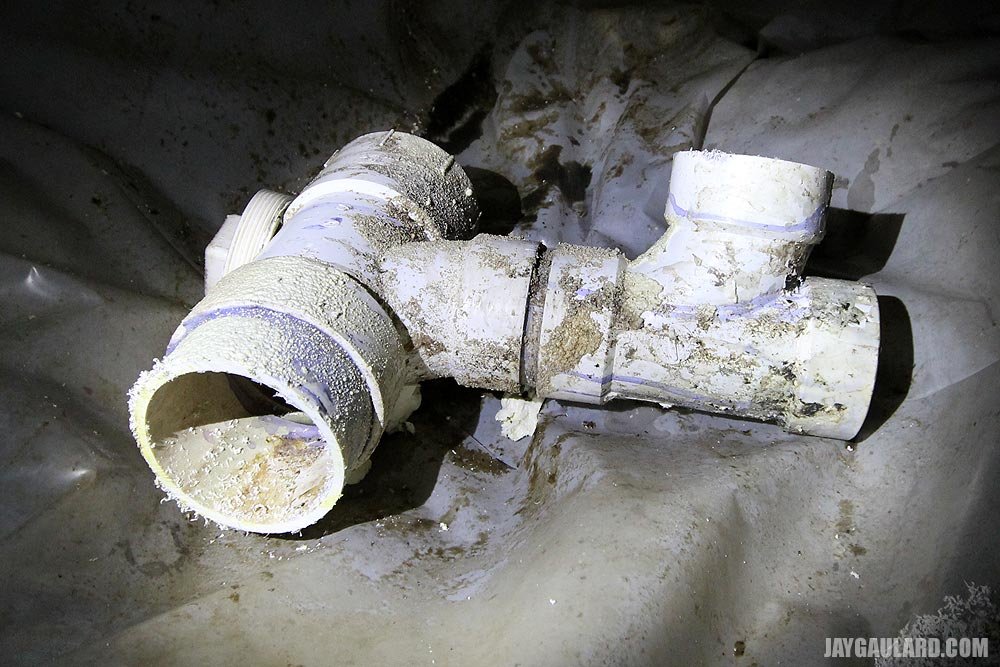
leaking-pvc-septic-pipe.jpg

That’s right, a nasty looking leaky PVC pipe that wasn’t even glued to the 3″ pipe I told you about above. The main one that went through the floor. After I removed all the hard foam, I could easily slide the coupling over the pipe. Back and forth.

Here’s my hypothesis: when we had company over the summer, much more water was being used in the house. Toilets were being flushed, laundry was being done, kitchen sinks were being used. That water usage added material volume to the main septic drain pipe and the plumbing system as a whole. Since a pipe and coupling weren’t properly glued, septic gasses and a tiny amount of waste water was escaping into the basement. Enough to smell like something died in a wall.

When my lady left, not much water was being used at all. In return, there was little to no smell in the basement. Make sense?

By the way, the pipe picture above is after I cut it out of the existing setup.

In order to fix the issue, I had to replace a few sections of pipe. The problem was, since these pipes were already rigidly installed in place, I couldn’t use traditional PVC. I would never be able to connect things. I had to turn to some flexible Fernco couplings.

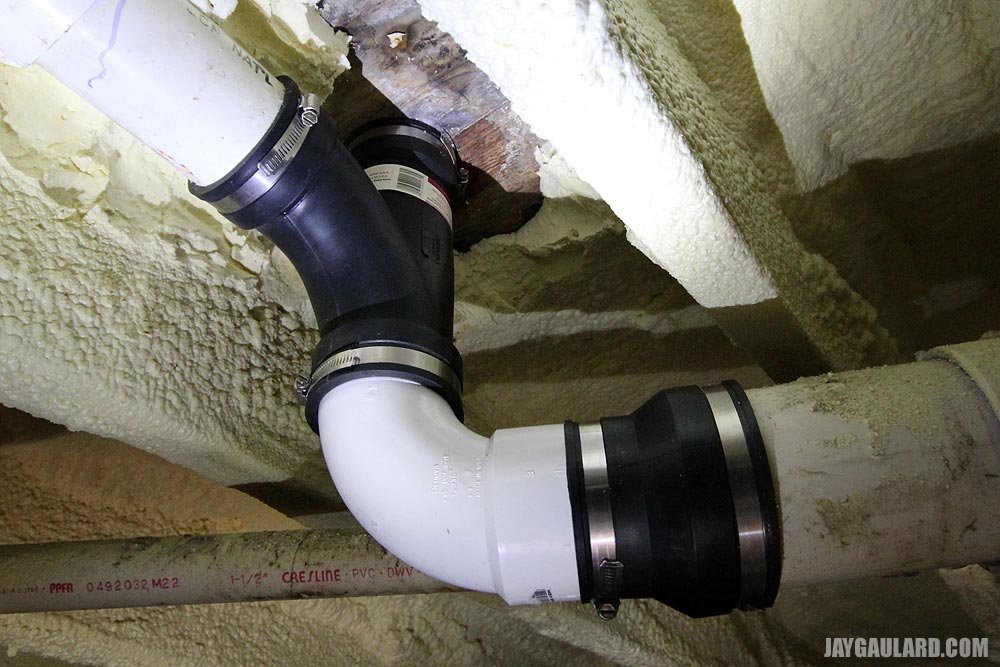
fernco-toilet-pipe-fittings.jpg

Here’s how I solved the problem – I cut out the problem area. I felt that getting rid of the whole thing and replacing new was the best way to go. There were a lot of connections there and I had no idea what else leaked. I had three pipes to deal with: one coming from the house straight down, one running horizontally and another horizontal pipe exiting through the basement through the wall. You can see this setup in the picture above.

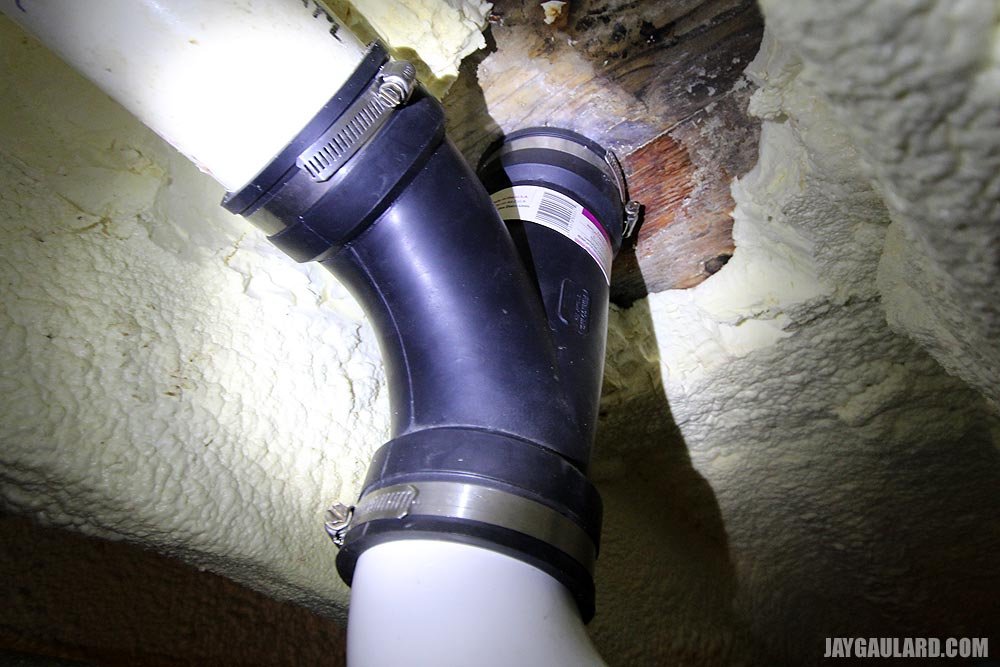
fernco-pipe-fitting.jpg

To connect the main 3″ pipe to the downtairs toilet pipe, I used a Fernco Quik Tee. I then used a PVC street elbow to lead out of the Tee and into a Fernco 3″ into 4″ coupling. From there, I connected that flexible coupling to the main 4″ PVC pipe that goes to the septic tank. If you’ll notice in the second picture above, I cemented a very short piece of 3″ PVC to the street elbow so I had something to bite onto for that lower flexible coupling. By the way, a “street elbow” is just an elbow with a male end. We’re used to seeing two female sides – well this one has a female side and a male side.

I’d say it’s a job well done. The guy in the hardware store called it “redneck plumbing” but I really don’t see what else I could have done. The connections are tight and everything is now dry down there. Also, there is no smell at all. Next to amazing.
 
CaptainDan

CaptainDan

Member
Joined
May 9, 2021
Messages
113
Reaction Score
0
Points
16
  • #6

SharkBite Vs. Traditionally Installed Water Valve​

I was doing some work yesterday that required I turn off the main water source for the house. I had to repair a few frozen broken pipes and I needed to release the water pressure in the system. I also needed to get as much water out of the pipes as possible. After fiddling with the main water valve for a while (that wouldn’t turn all the way off), I decided that it was time to replace that valve as well. Good thing I bought a few SharkBite ball valves a while back.

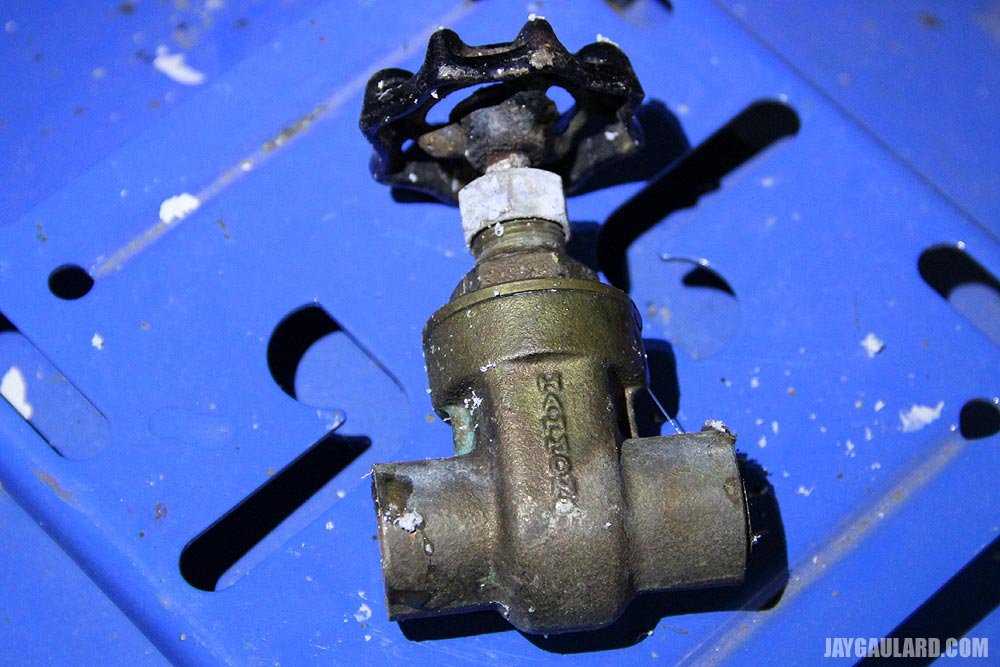
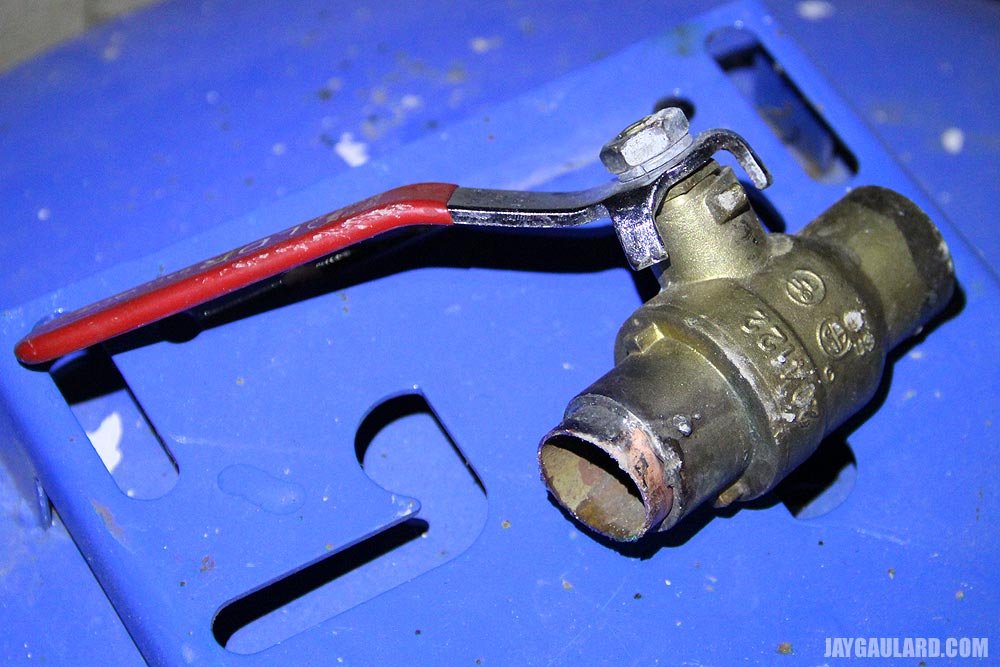
Have you ever seen these types of valves? They’re the traditional water valves that are in almost every single house that’s more than 20 years old.

old-style-water-valve.jpg

In my opinion, these types of valves are terrible. They almost always never turn off all the way, unless they’re nearly brand new. If there’s any sediment or hard water buildup, say goodbye to clean functionality. I have dealt with many, many of these valves and each time, I’ve wanted to cut them out and throw them through a window. Needless to say, I’m fed up with them.

So what’s the answer to the twist valve? Well, I’ve always had good luck with the ball valve. The only issue I’ve had with them is that they are kind of difficult to solder onto the pipe. For one reason or another, each time I try to install a ball valve, there’s water in the pipe that I just can’t seem to get out. It drips, drips, drips and we all know that water in the pipe screws up a good sweat. I also worry about melting the interior of the valve by applying so much heat for so long.

This is a ball valve I tried to install just last night. There was still a small amount of water in the system and it totally messed me up. I couldn’t even get the pipe hot enough to remove the valve once I gave up on it. I had to cut it off.
ball-valve.jpg

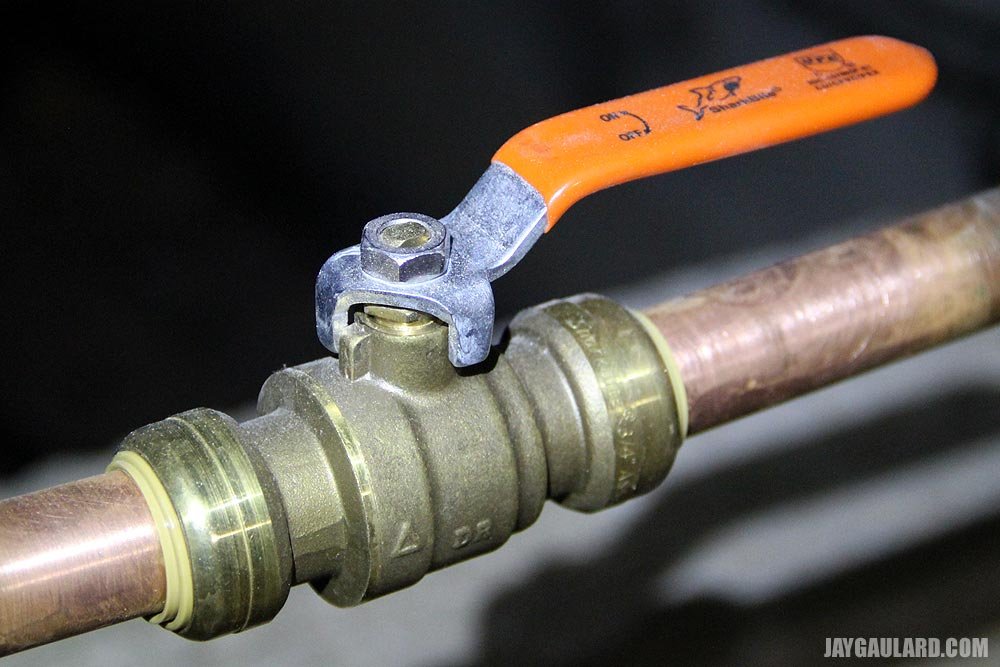
I guess the regular ball valve isn’t so hot for all installs. Good thing I had my trusted SharkBite ball valve on hand. This is the second time they’ve saved the day. The first time was when I needed to temporarily cap a few pipes that burst. This time, I just cleaned up the ends of the copper pipe I was working on and slid this sucker over them. Done

sharkbite-ball-valve.jpg

I don’t have enough experience with these valves to say how long they last. I read something about the lifespan before leaking to be five years. This was internet talk, so I’m not convinced of its accuracy. I’ll have to find out myself.
 
CaptainDan

CaptainDan

Member
Joined
May 9, 2021
Messages
113
Reaction Score
0
Points
16
  • #7

SharkBite Fittings and PEX Tubing​

I think I’ve told you about my electric hot water heater project coming up. I’ve kind of been procrastinating on this one because it’s going to cost a few bills. I’m picking up the supplies I’ll need piecemeal, so the final cost won’t be such a one-off shock. I mean, it’s not a lot of money, more like an annoying amount, if you know what I mean.

Anyway, today was the day I gathered the PEX tubing and the SharkBite valves and fittings. If you aren’t aware of what PEX and SharkBite are, you can either click the links I previously placed in those words or you can simply take my word for it that they are the best thing since sliced bread when it comes to plumbing. Goodbye rigid copper tubing. Goodbye soldering. It’s all good except for the fact that these newer style fittings cost much more than the old copper ones. But I suppose we need to pay for simplicity and innovation.

I wanted to write this post for a few reasons. The first is that I wanted to include pictures of the items I purchased so my father can see them. Mom, please show dad. Thank you. Second, I wanted to offer a price comparison for a few items between Home Depot and PexSupply.com. I bought this stuff at the Home Depot because I happened to be in the area. As it turns out, I think I could have gotten a better deal if I ordered online through PexSupply.com, even after shipping. Lesson learned. I’ll give prices after the pictures.

All right, here’s what I got today:

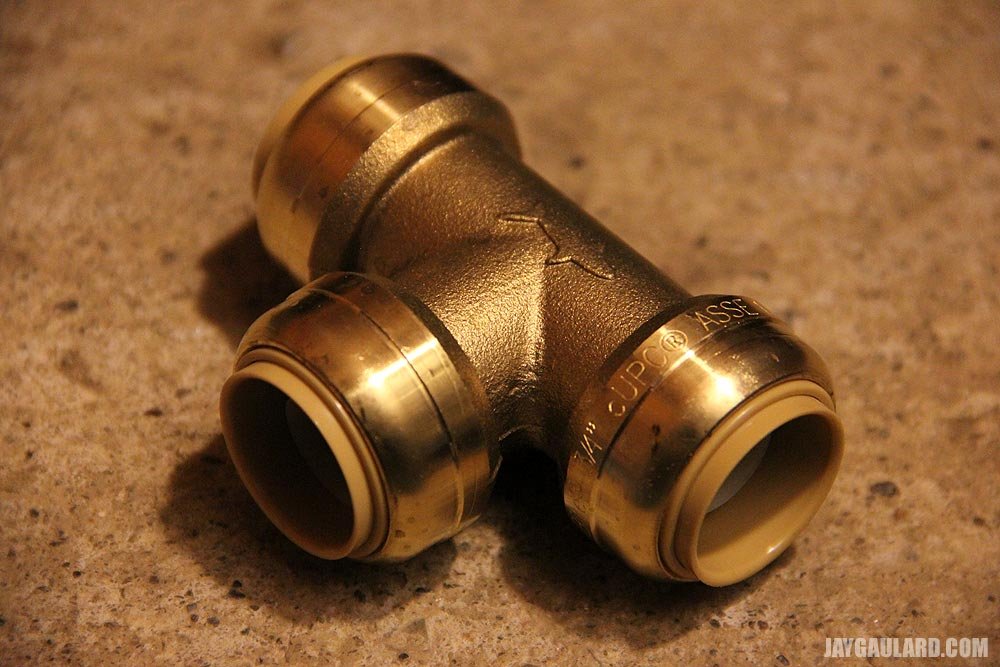
sharkbite-t-adapter.jpg

This is a “3/4″ Sharkbite Tee”. I purchased two of these. I’m going to cut the main water “in” 3/4″ copper pipe and put one of these in between the two pieces. Then, I’m going to cut the 3/4″ hot water pipe going into the house and add the other fitting.

COST (each)
Home Depot: $12.32
PexSupply.com: $9.65

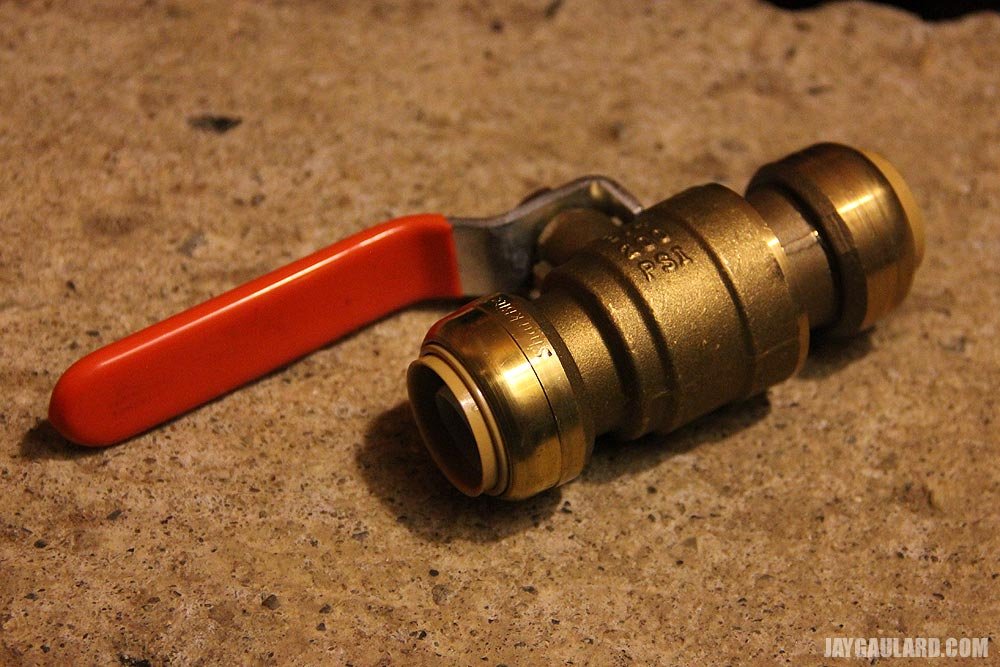
sharkbite-ball-valve.jpg
inside-sharkbite-valve.jpg

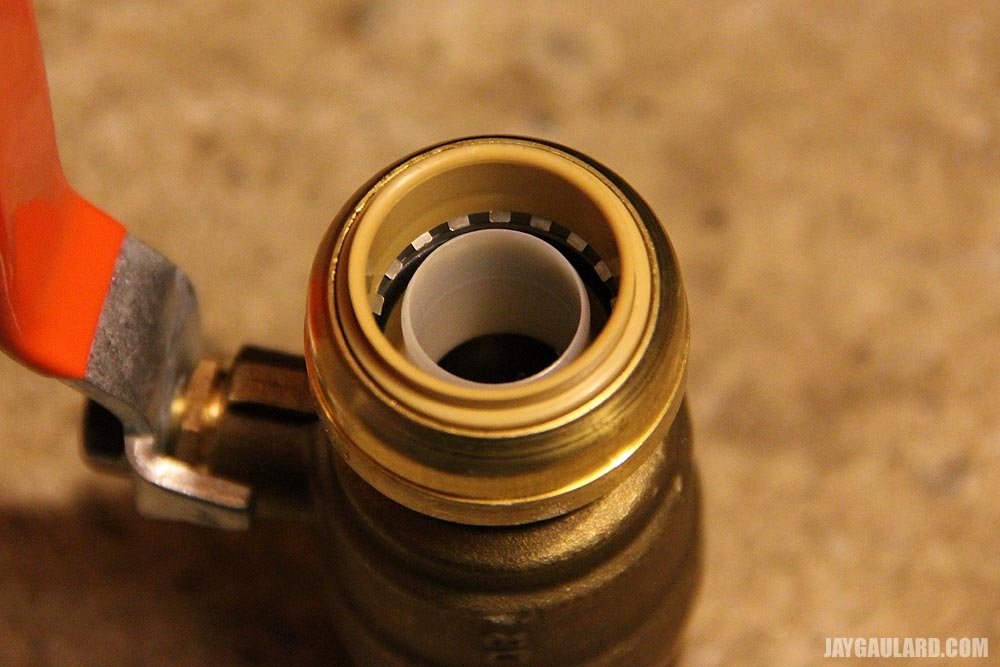
These are two different views of the same valve. It’s called a “3/4″ SharkBite Ball Valve.” These are going to go in between the copper water lines I just told you I’m going to splice into and the electric hot water heater. Since we already have a boiler with valves on the in and out lines, I’ll be able to switch back and forth between electric and oil if need be, simply by twisting some valves and hitting a switch or two. Remember, my main goal is to turn off the boiler.

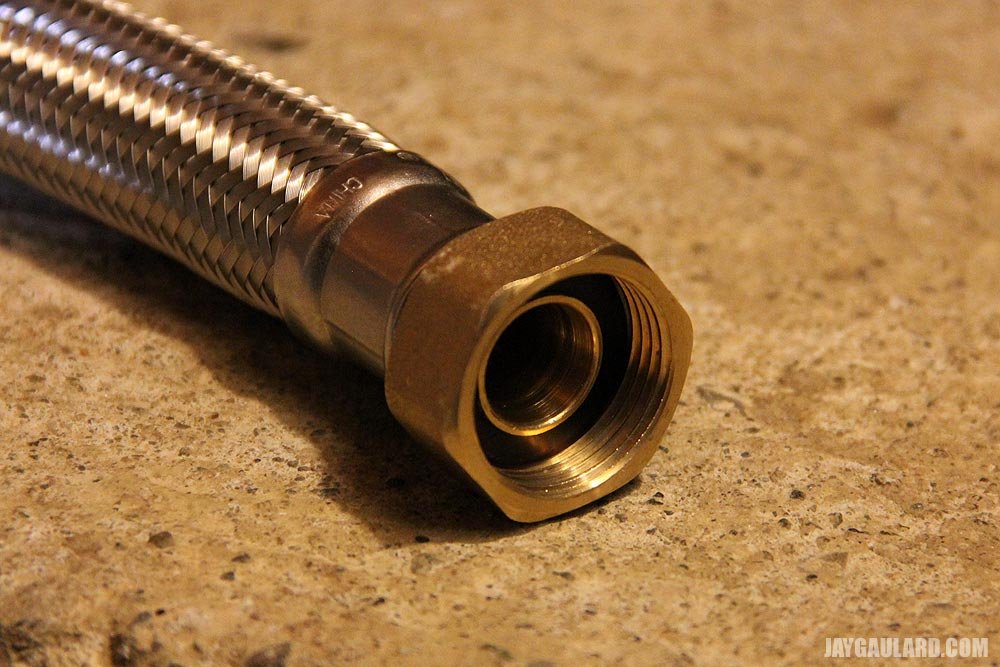
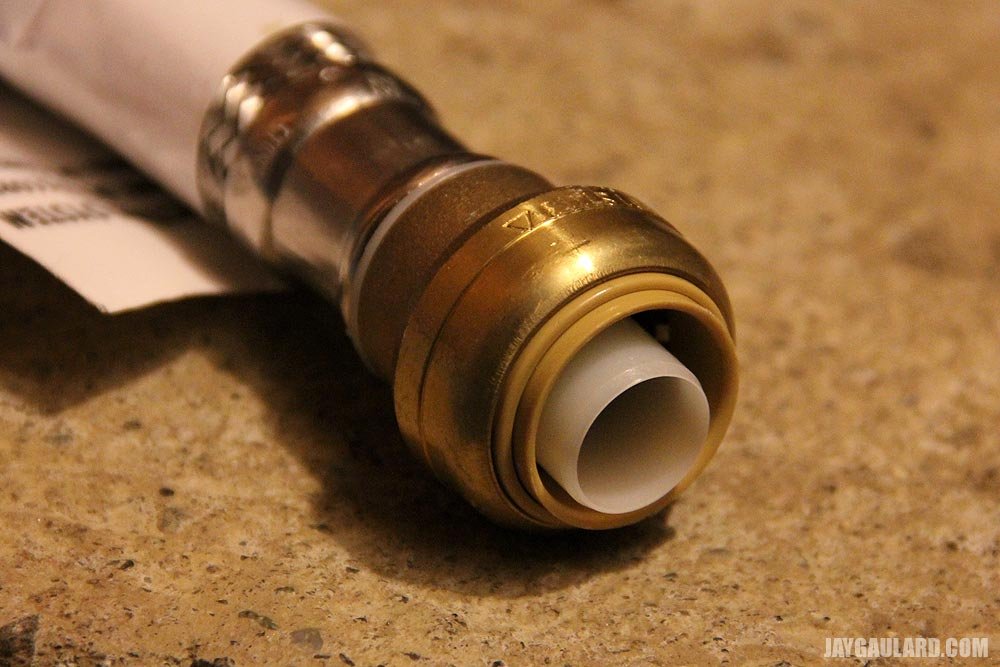
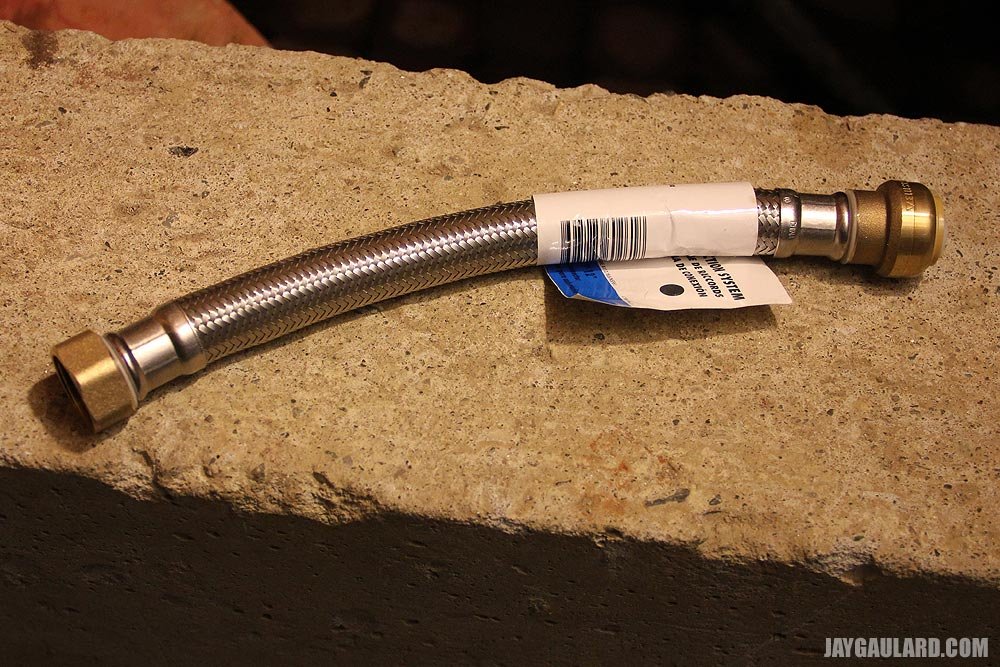
flaxible-hose-threaded-attachment.jpg sharkbite-electric-water-heater-attachment.jpg sharkbite-water-heater-flexible-hose.jpg

COST
Home Depot: $18.84
PexSupply.com: $13.85

This is a “3/4″ FIP Sharkbite Water Heater Connector 12″ Length.” I’m showing the entire piece and then both the PEX or copper tubing connection and the electric hot water heater ends. This is where I really appreciate innovation. Simple screw these onto the top of the heater and slide some tubing into the ends. Done.

COST
Home Depot: $11.34
PexSupply.com: $10.35

pex-tubing.jpg

This is “White PEX Tubing.” Obviously, I’m going to use this tubing to go in between all the other parts. Don’t worry, I’ll take pictures as I go through this project. It’s really not very difficult and I’m looking forward to it. I just have to pick up the water heater, some 10 gauge 3-wire and a 30 amp circuit breaker. Once that’s done, I’ll get my butt in gear and do things.
Unfortunately, PexSupply.com doesn’t offer the short 25 foot coil of tubing, like I bought today, so I can’t compare prices. I can tell you though that I paid $14.53 for this, which actually saved me some money because now I don’t have to have 85 feet of this stuff hanging on some nail in the basement when I’m finished doing what I’m doing. So that’s a plus.

If you have any questions, please use add them below. If you notice that I’m making an error in my logic somewhere, please (please) tell me about it. I’d like to make corrections before I begin, not after. Thanks.
 
CaptainDan

CaptainDan

Member
Joined
May 9, 2021
Messages
113
Reaction Score
0
Points
16
  • #8

Replacing a Washing Machine Valve​

This was an unexpected and especially annoying repair. I’ll start at the beginning.

About a week ago, I came up with a really good idea. I thought that if I bought an extra garden hose, screwed a big garage hook into the wall above and next to the washing machine in the laundry room and hooked up a two way valve on the washing machine cold water line, we’d have some sort of a fire hose. As it stands right now, we only have one fire extinguisher and the garden hose we already have is 75 feet long and in the garage. It’s got sections of ice in it and if fire ever broke out, I was concerned that we’d be throwing glasses of water at whatever was burning.

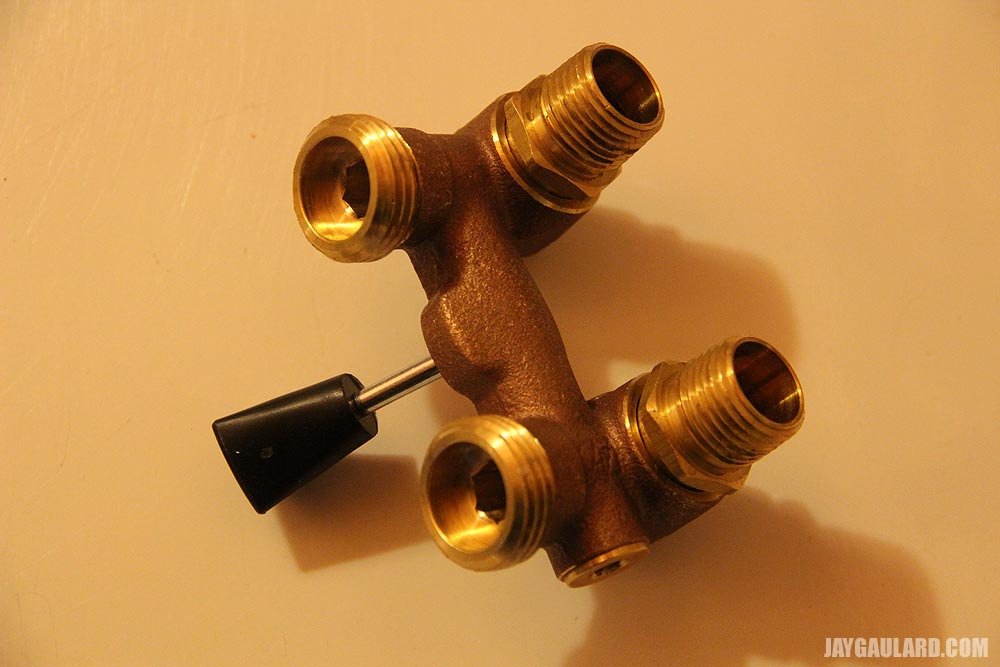
The last time I visited Home Depot, I picked up what I needed for the fire hose idea. I came home, installed the hook, turned off the washing machine water valve and hooked up the two way valve. Everything looked good. Until I turned the washing machine valve on again. That’s when I saw the dripping. Drip drip drip. Nothing annoys me more than a lousy valve. And it seems these days that every time I turn a valve, it drips. Granted, they’re all old valves, but still.

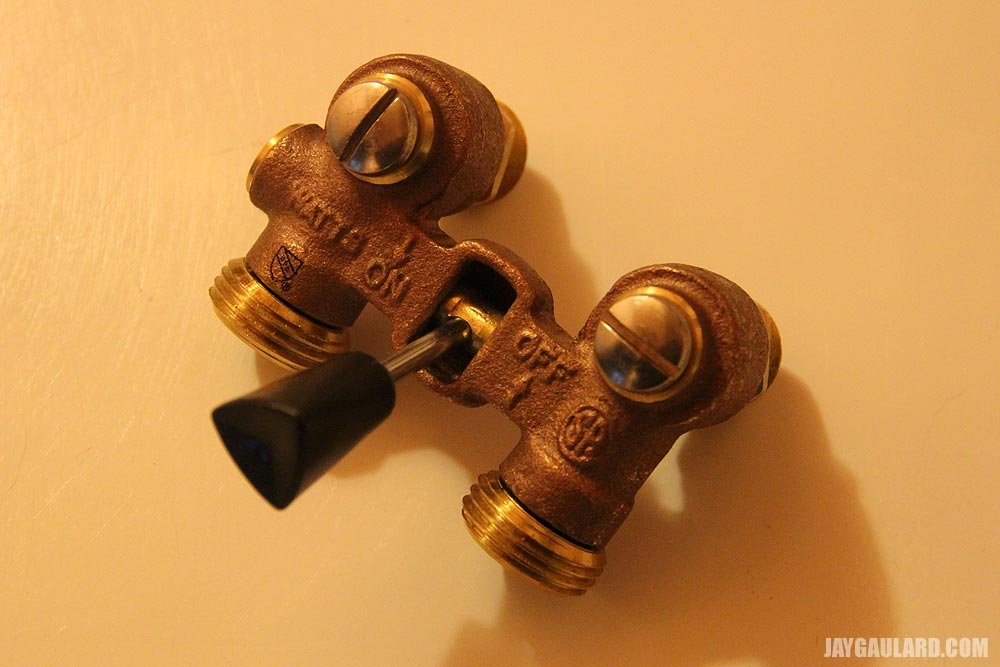
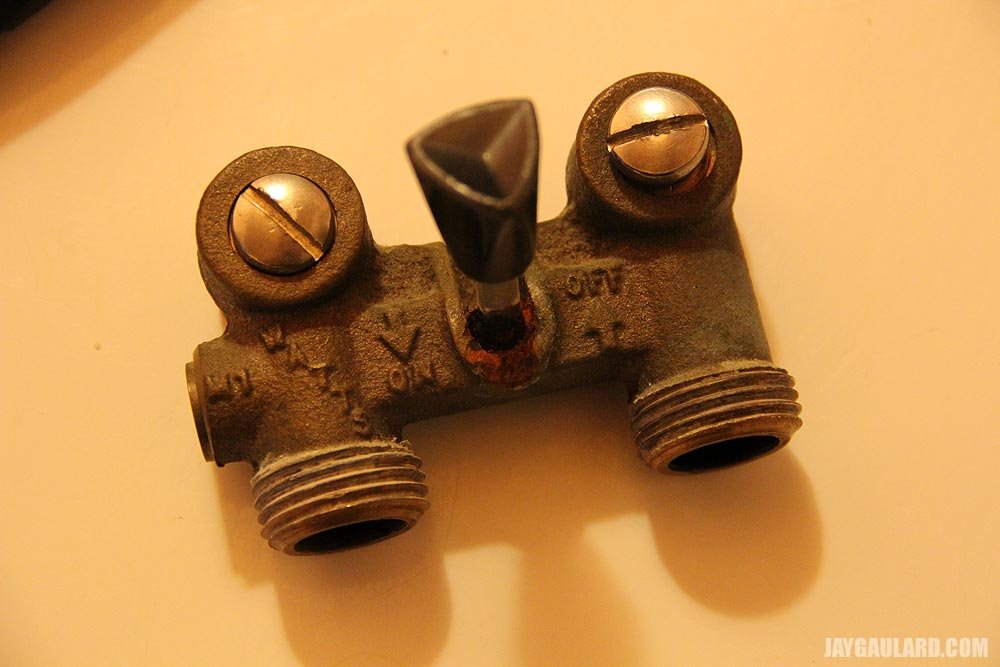
So there I was, faced with a repair. I did a quick search on the Home Depot website and saw that they sold the Watts valve I was looking for. I also checked Amazon.com. What I wasn’t sure of and what I was worried about was if I was going to have to pull out the torch to do some soldering. I was really not looking forward to that. Here, take a look at the pipes coming out of the wall to the old valve hookup.
leaking-washing-machine-valve-adapter.jpg washing-machine-plumbing-adapters.jpg

Reviews on both websites told me that it was very simple to hook up a new Watts valve. All they had to do was to unscrew the old one and screw the new one on. Let’s just say that since I was unable to find pictures of the “back” of the valve anywhere online, I was a bit skeptical.

Today, I turned the house water off and ran out to the True Value Hardware store in Madison, Maine. My lady and I made an earlier visit to that store just a few days ago. When we were there, I made a quick walk through to see what they offered. I saw a plumbing section, so I was hopeful they had what I was looking for. They did. The only problem was, Home Depot offered the part for around $29 and True Value offered it for $42. Since I wasn’t in the mood to drive 45 minutes to Home Depot in Waterville, I purchased the valve locally.

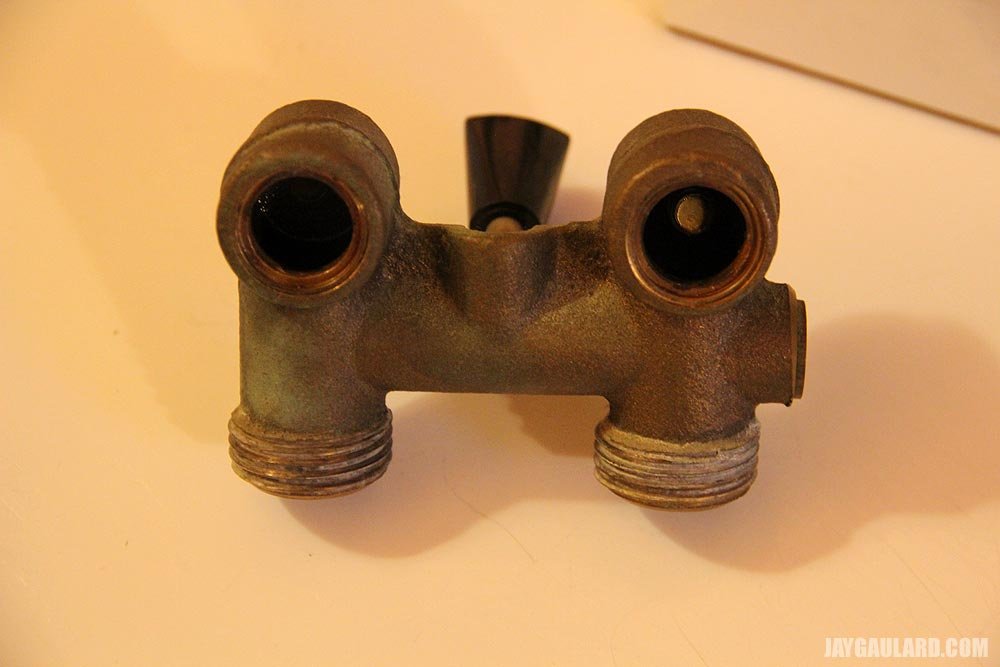
When I got back to the house, I thought it would be a good idea to take pictures of both the fronts and backs of the old and new valves. This way, if anyone else out there is looking for pictures of the back of a Watts washing machine valve to see if a new one really does screw into the old setup, they’ll see that it, in fact, does.

brand-new-washing-machine-shutoff-valve.jpg inside-washing-machine-valve.jpg replacement-washing-machine-valve.jpg washing-machine-valve.jpg washing-machine-valve-adapter.jpg washing-machine-valve-threads.jpg

That last picture was one of two unnecessary adapters that the new valve came with. I merely took the new o-rings off the the adapters and put them on the old ones that were soldered to the existing pipe and screwed the new valve to the old adapters.

The new valve works. I’d say that once I had the new valve in hand, the project would take about two minutes to complete. Turn off water to the house, disconnect washing machine hoses from valve and unscrew valve. Then, follow those steps in reverse and I’d be finished.

Here are some pictures of the installed valve.

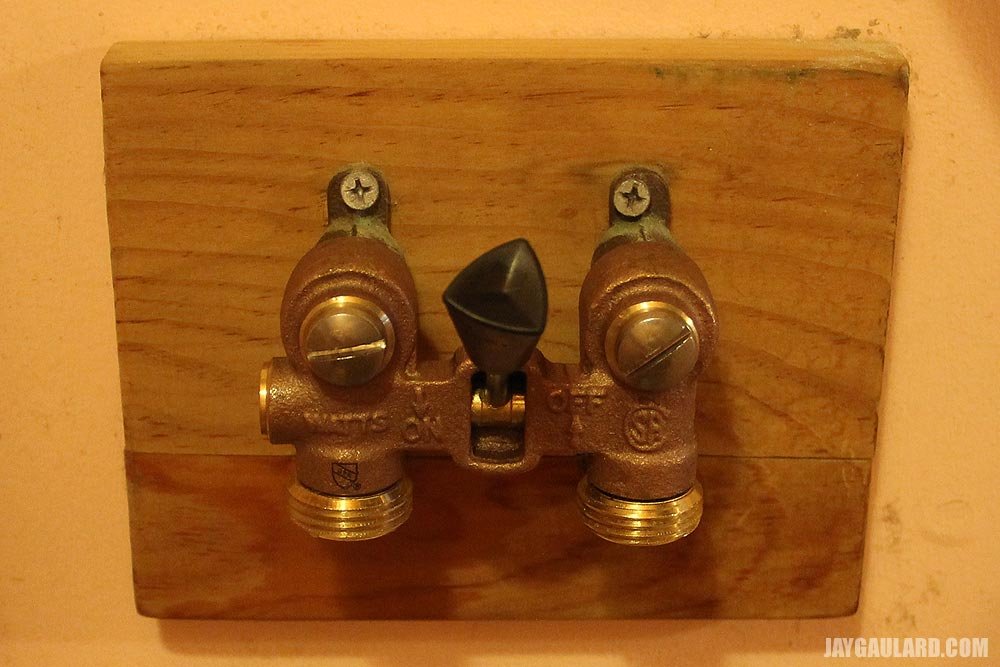
washing-machine-shutoff-valve-attached-to-wall.jpg washing-machine-shutoff-valve-installation.jpg
 
CaptainDan

CaptainDan

Member
Joined
May 9, 2021
Messages
113
Reaction Score
0
Points
16
  • #9

Washing Machine Filling Very Slowly​

Right after I fixed the washing machine water valve, I attempted to wash some clothes. After I loaded the machine and pulled the knob to start filling it with water, things got a bit strange. The water would go on and then off and then on again. I chalked it up to the machine doing its thing.

After about an hour, I went back to the washer to pull the clothes out and put them in the dryer. To my absolute horror, I found the load stuck in the rinse cycle, basically shut off. I pulled the knob again to see if I could kick it into gear. All I was able to muster was a slow drip of water.

After scratching my head in utter disbelief, I decided I knew what the problem was. I figured that the valve replacement had agitated some crud in the lines, which in turn, clogged the two screen filters in back of the machine. I was right. Take a look here.

washing-machine-water-hoses.jpg
washing-machine-water-fill-hose-screen-filters.jpg

I pulled the screen filters out of the machine and hooked the hoses back up without them. I turned the machine back on and – BAMM – the water came out like crazy. Problem solved.

My question is, why in the world do they put screen filters back there? What’s the fear of a piece of sediment getting into the washer water supply? People put muddy jeans and shoes in washing machines all day long. The only thing I can think of is that the manufacturer doesn’t want dirt getting into the water pump. I think I’m going to run things from now on taking that risk.
 
CaptainDan

CaptainDan

Member
Joined
May 9, 2021
Messages
113
Reaction Score
0
Points
16
  • #10

Washing Machine Won’t Agitate​

This is probably one of the funnier things that’s happened in my life recently. I can’t believe I’m actually writing about it because I feel a bit silly, but hey, if I can help out someone who’s having similar difficulties, then I’ve done my job as a human.

We’ve been living in this house for about six and a half months now. We’ve done, oh, I don’t know, thirty wash loads. I’m totally guessing here. Could be more, could be fewer. The number of loads really isn’t as important as the fact that each and every wash we’ve done so far – the washer wasn’t agitating. The bottom part of the thing in the middle was moving, but the top, “spiral” post thing wasn’t moving at all. No wonder my gis would have weird smells to them. Only in certain areas though. The areas that were sticking out of the water when I put the clothes in, and the areas that were still sticking out all the way through to the first spin cycle. Ugg.

I found out we had an issue after doing a bit of research. I had a gut feeling – or perhaps my lady had a gut feeling that something was wrong. I put a load in, closed the top, only after taking notice of the clothing arrangement. I’d let the washer run for about a minute and then look at the clothes again. It didn’t take long to realize the the spiral post wasn’t moving one iota. I wondered what could be wrong.

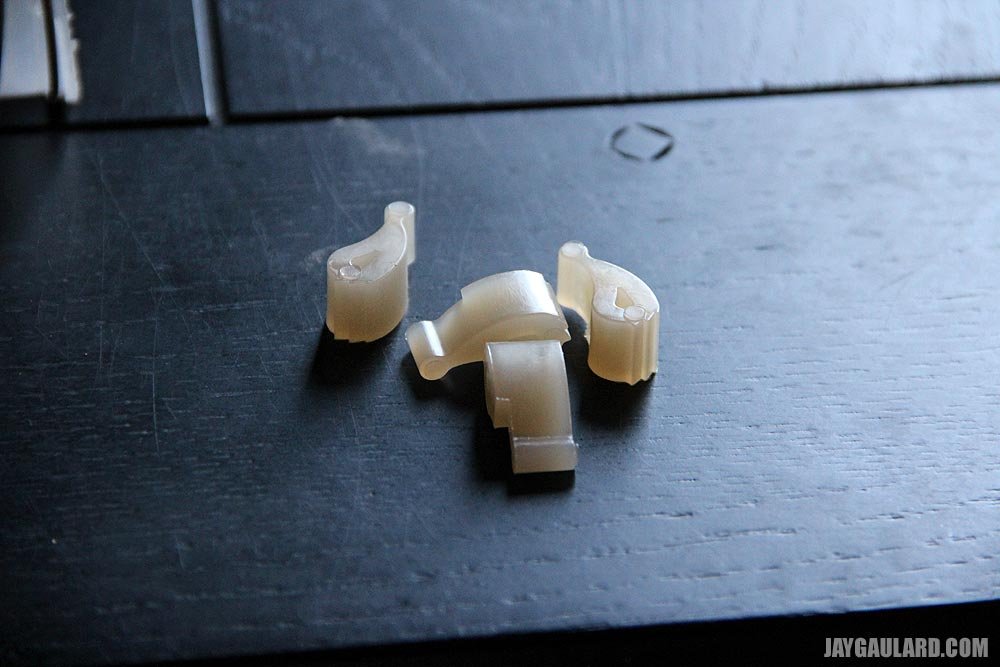
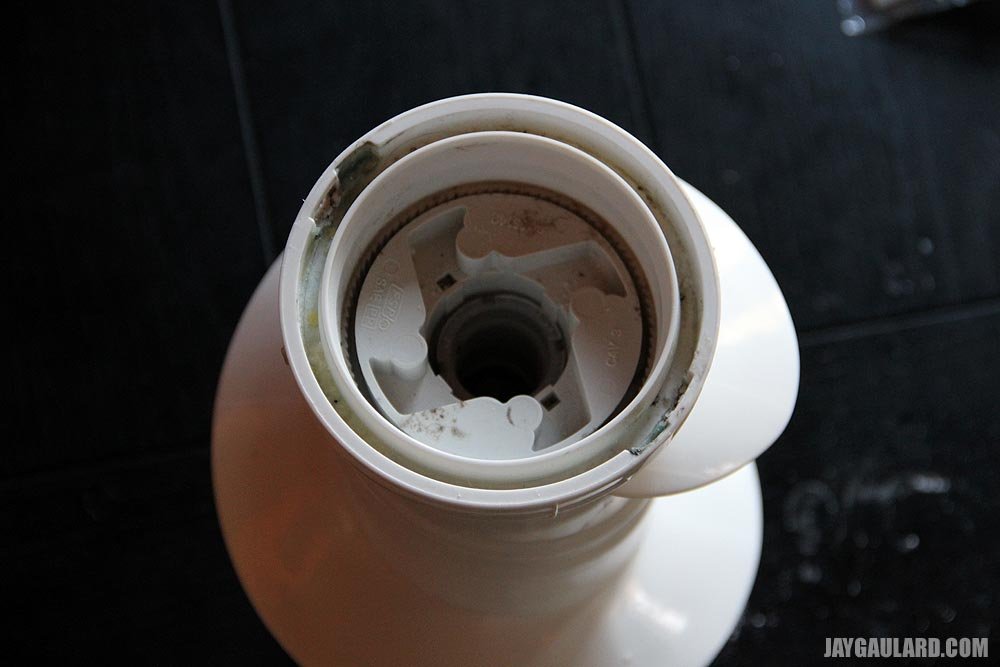
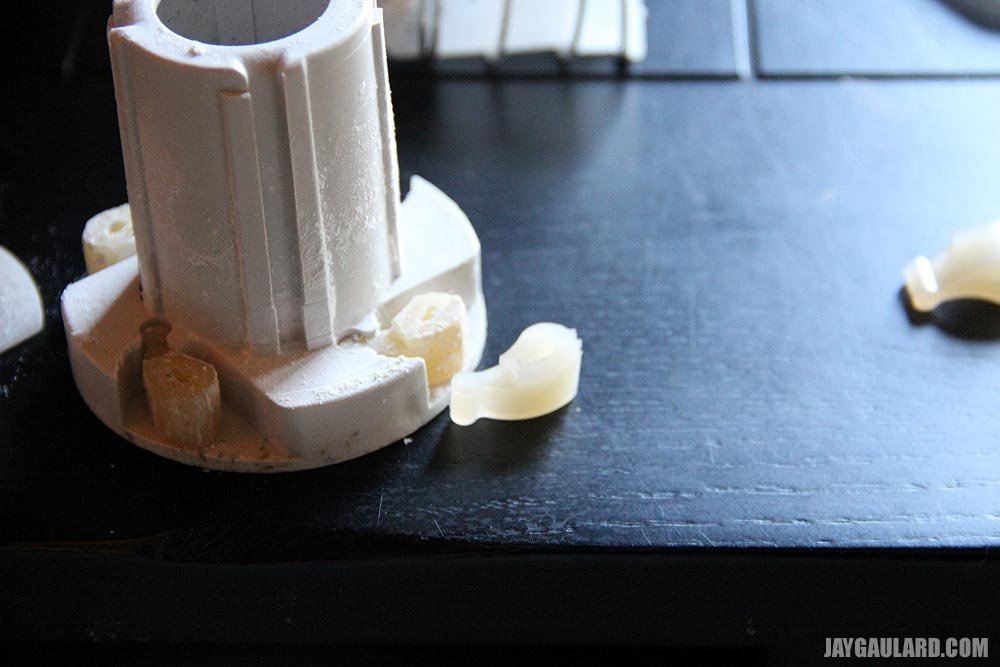
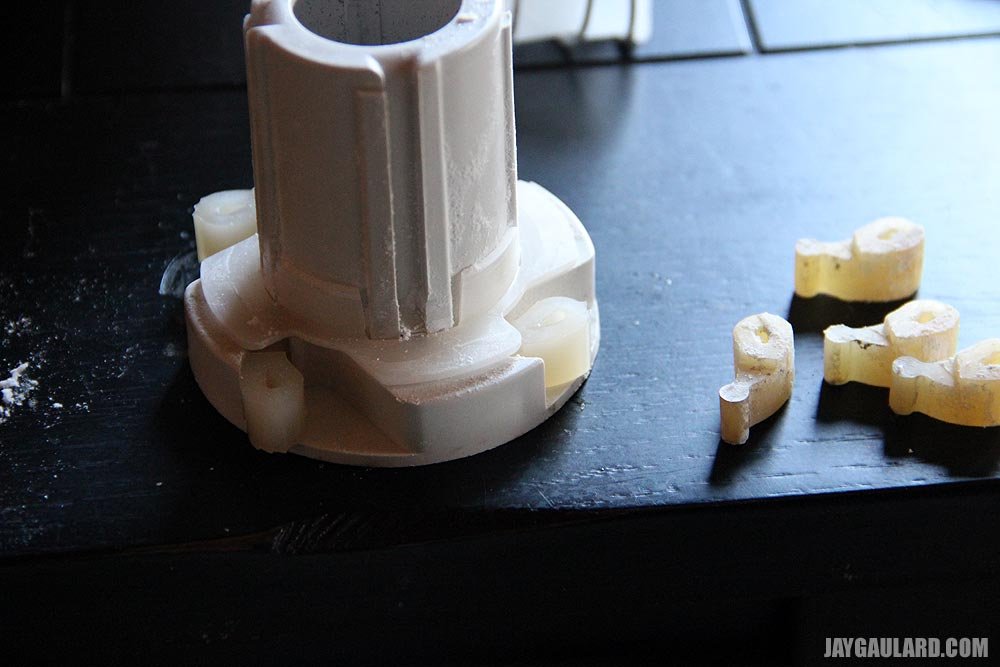
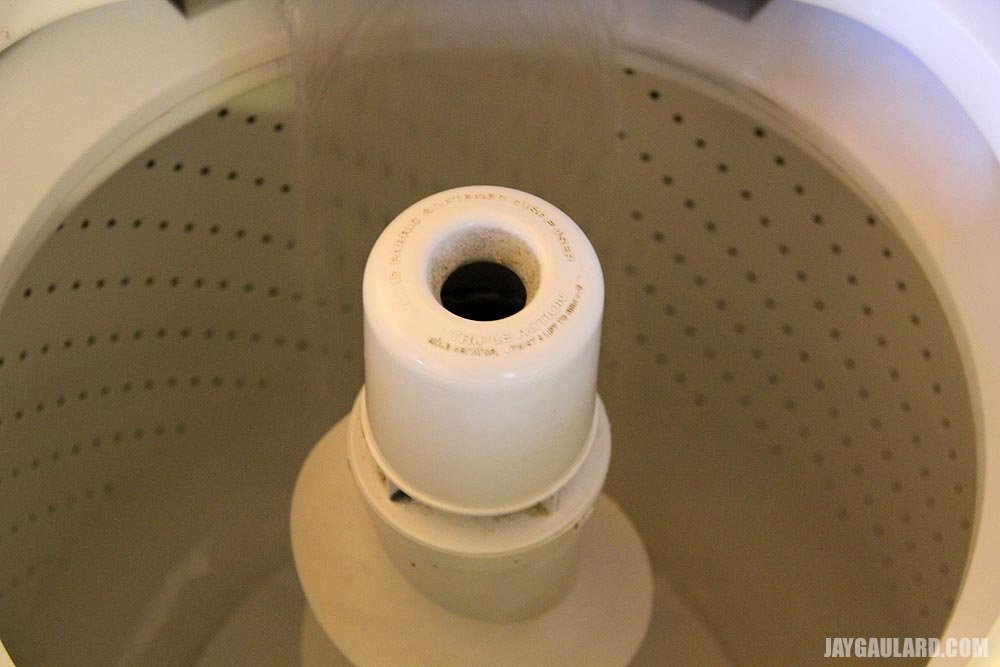
I brought my quandary to the ever expansive internet and punched in the proper keys. Just a few moments later, I learned that my dogs were bad. That’s right – my dogs. Did you know there’s a part in your washer that someone has named, “dogs?” Here’s what they look like:

washing-machine-dogs.jpg

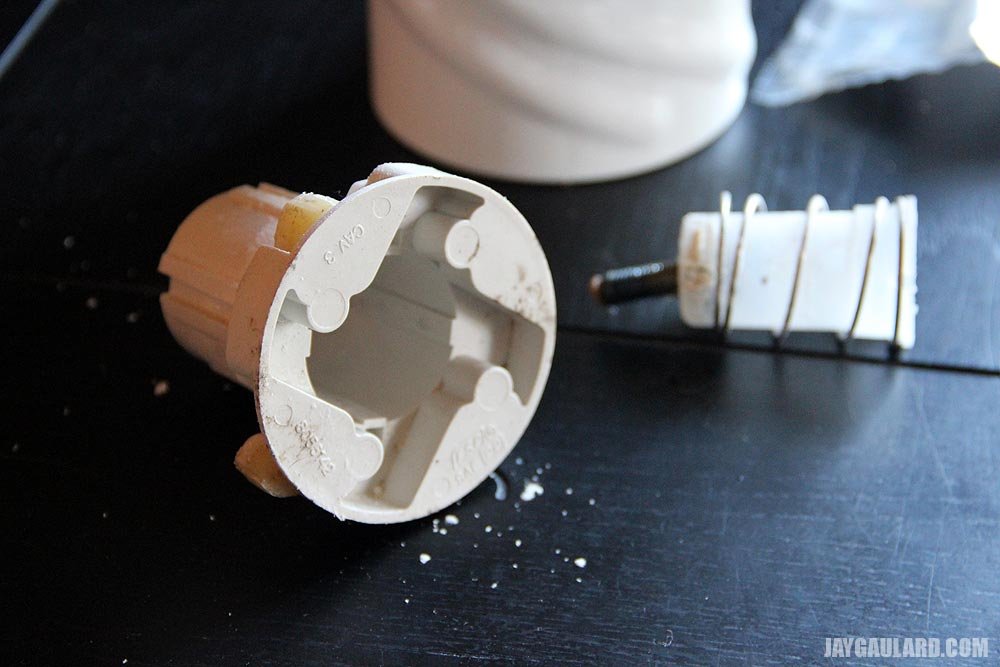
These little suckers fit right into the cap area of the center agitator. Don’t worry, I have many pictures to show you just what I’m referring to here. What I want to share with you before I post them is that right after I realized we had a problem, my very first thought was, “Oh, we need a new washer.” I almost jumped at the chance to head out and spend hundreds of dollars. I’m not quite sure why I do that, but I do. After relaxing and considering what was going on for just a few minutes, and after I did some searching on none other than Amazon.com, I decided a better and more reasonable route would be to order the $4 part and fix the washer myself. Yes, that’s right – $4. I want to impress that upon you. The part was only $4. I fixed it myself. Do you see what I’m saying here? I was going to buy a new washer, but after thinking for a while, I learned that I could really do this myself and make everything right in the world. I’m repeating myself because I’ve got pride jiggling all over the place. $4. I can’t believe it.

Anyway, I took some pictures during the repair, so if your washer won’t agitate, check these out. It’s such a simple operation.

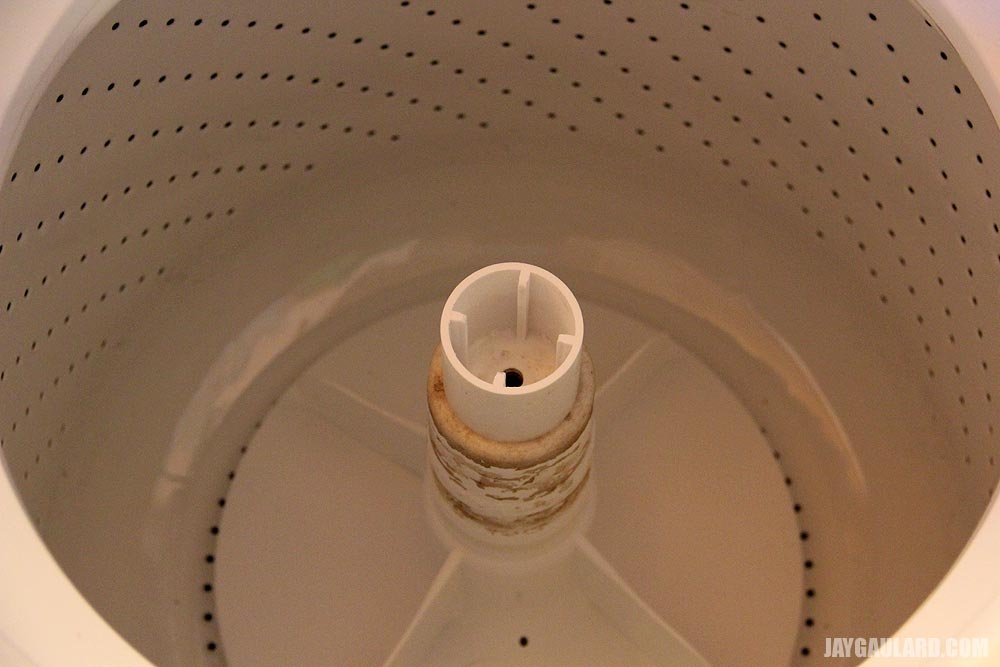
First, I took the agitator out of the washer. It was only one bolt. I think it was a 12 millimeter. Use a socket.

washing-machine-tub.jpg

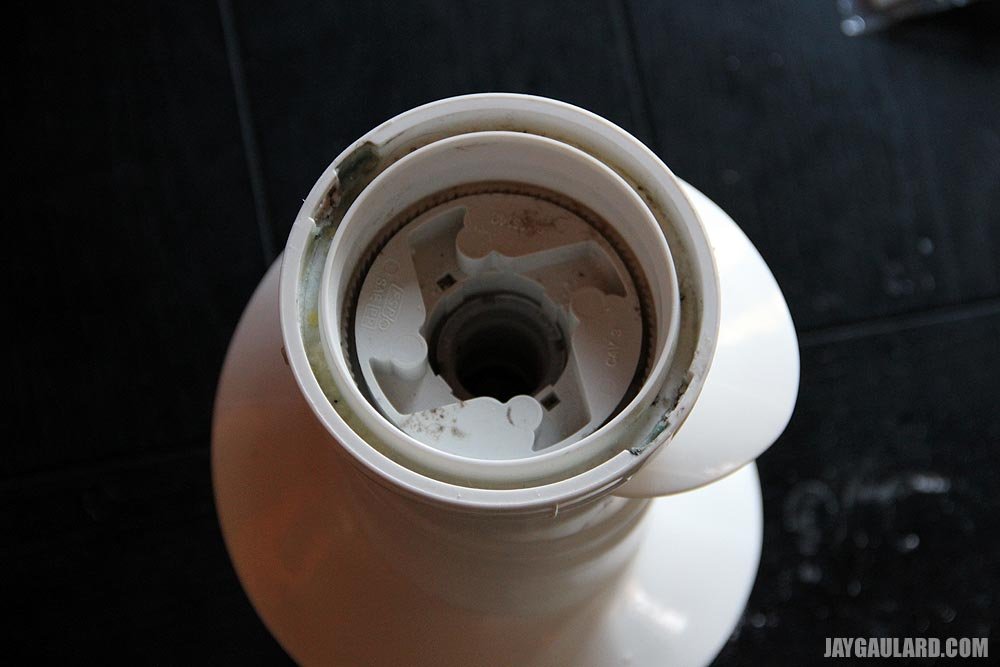
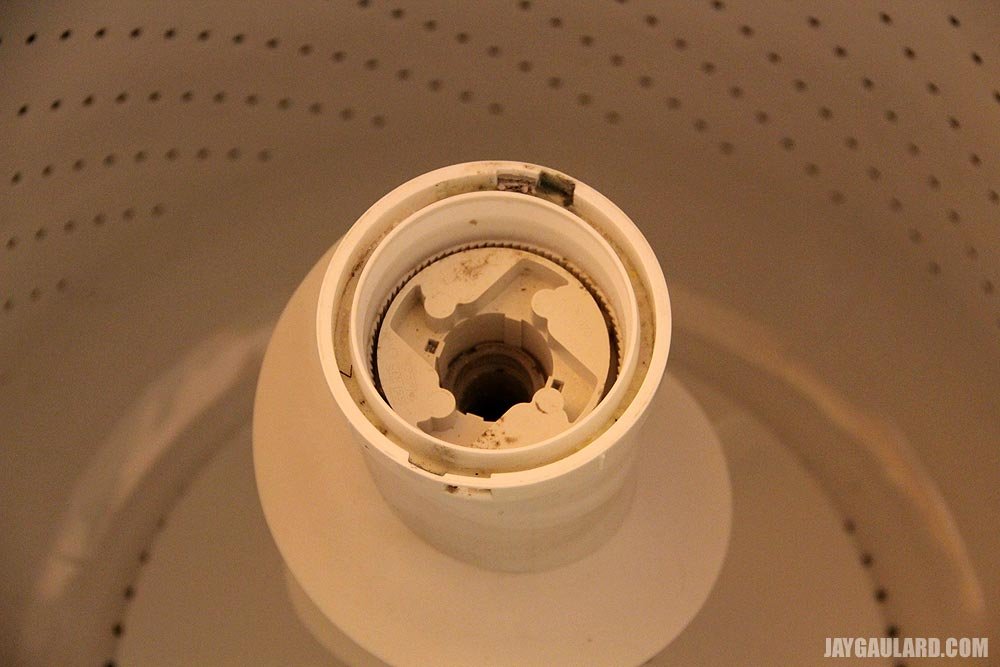
All right. I now that I had the agitator out, I looked at it. I saw that the center portion could be removed as well.

washing-machine-spindle-repair (1).jpg

And then I noticed that the center part came apart as well.

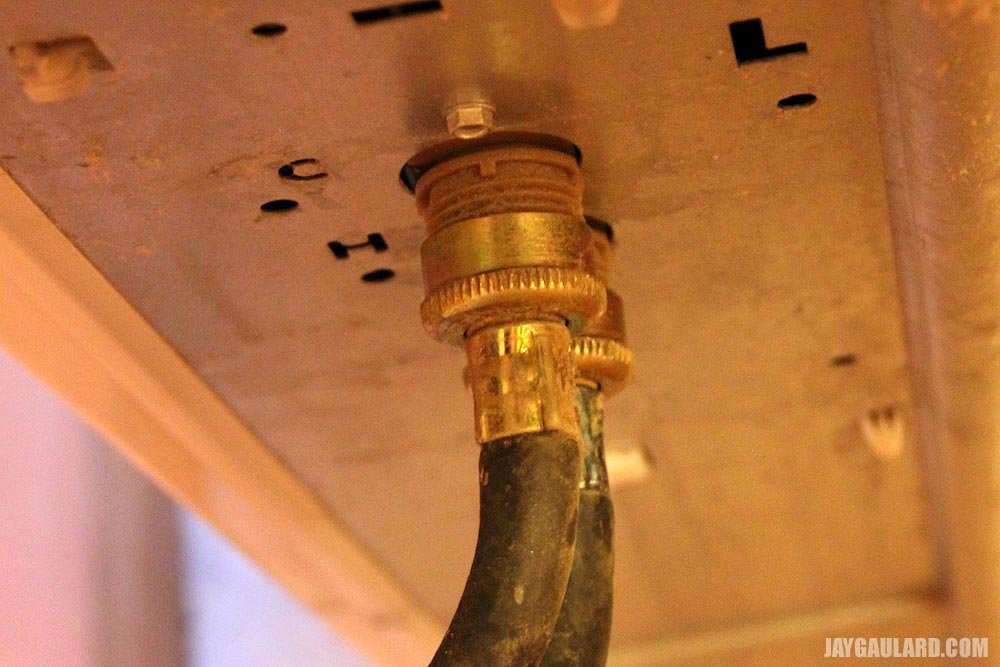
washing-machine-agitator.jpg

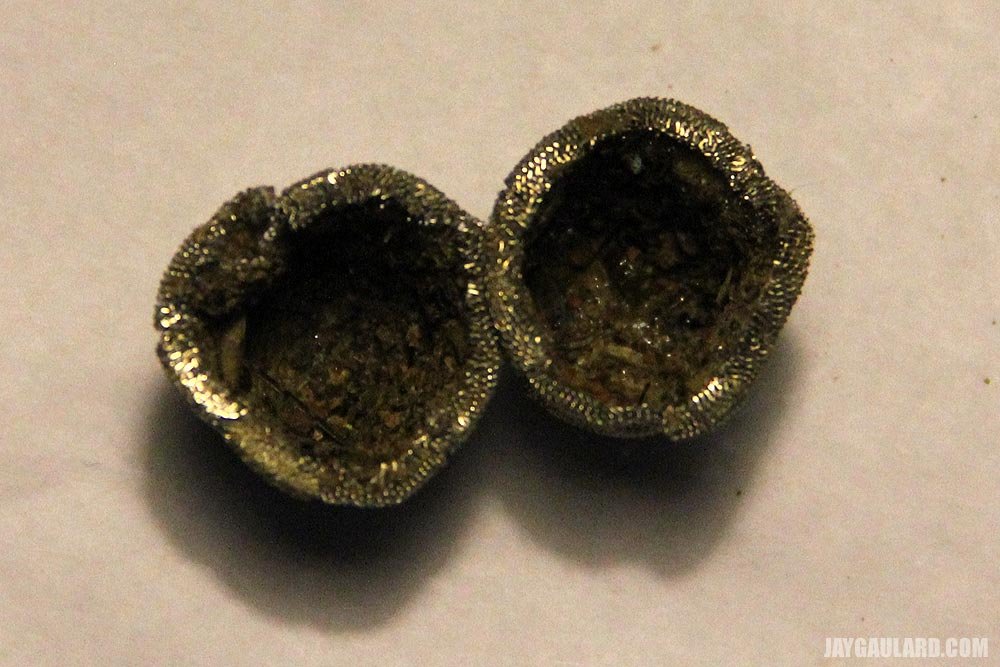
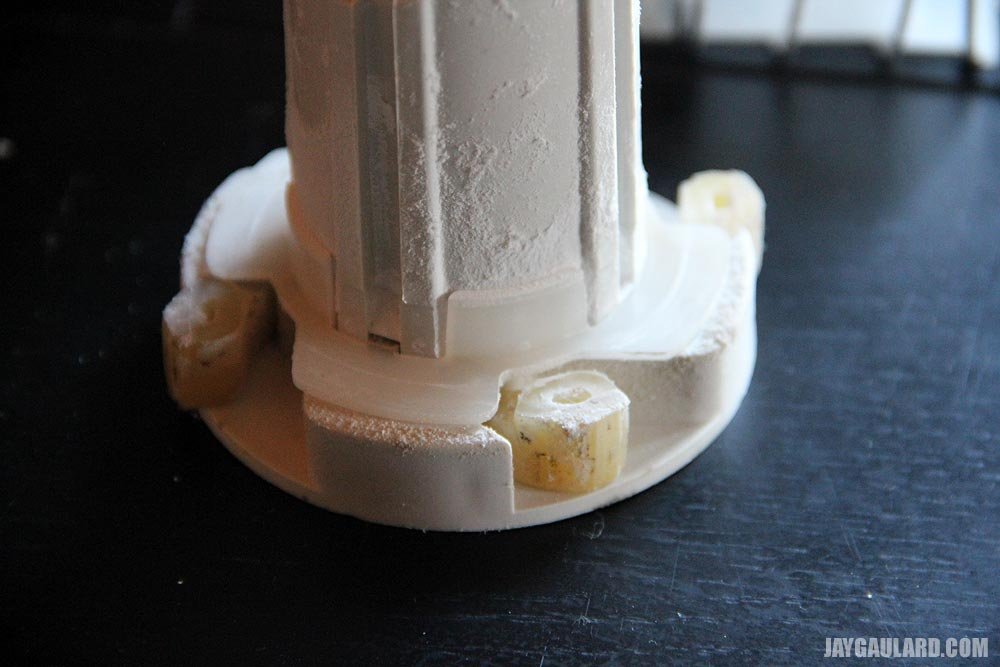
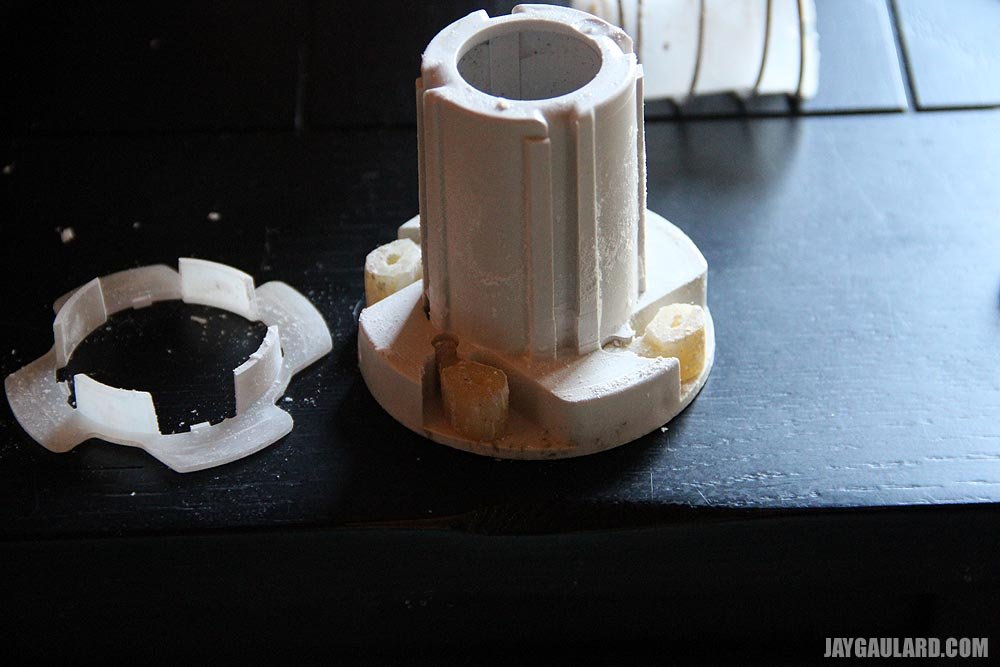
Well, would you look at that. The washing machine dogs were worn out. I told you. You can see the edges of the little yellowish pieces have rounded edges. There are supposed to be teeth there.

worn-out-washing-machine-dogs.jpg

Okay, pop the little plastic cover off…

worn-washing-machine-agitator.jpg

And then switch out the old dogs for the new ones.

replacement-washing-machine-dogs.jpg

Then pop the plastic cover back on.

removing-old-dogs.jpg

After that, I put that center part back in the agitator.

washing-machine-spindle-repair.jpg

And then I put the agitator back in the washer.

inside-washing-machine-tub.jpg

Lastly, I popped the plastic over back on the washer agitator and ran the first load.

washing-machine-repair.jpg

I’d have to say I did a perfect job because once the washer was full and the clothes started moving around, I noticed that the ones on top were being pulled down to the bottom like they were supposed to. What a miracle. Thank you internet!
 
CaptainDan

CaptainDan

Member
Joined
May 9, 2021
Messages
113
Reaction Score
0
Points
16
  • #11

Bleaching My Dug Well​

I'm not exactly what to call my well. I've referred to it as both dug and shallow. Either way, it's about 12 feet deep and three feet wide. There are three 4 foot cylinder sections that stack on top of one another. It's a common setup.

The reason I'm writing this post is to determine if I bleached (or shocked) the well correctly. I was never sure how to bleach a well, but I read some articles about it and just went ahead and did it. The bleach smell has finally disappeared from my sink faucets and the chlorine level is reading zero on my pool test kit, so I guess the water is okay to drink. Actually, it's never smelled so good.

This was my process. I first removed the lid from the well cap and poured in about a half gallon of bleach. I used an online calculator to figure out how much water was in the well. It said about 220 gallons. I poured the bleach in and then ran my garden hose into my pool. It needed some water and the additional chlorine didn't hurt. I only ran the hose water until I began smelling the bleach. Once that occurred, I turned that water off.

I then went inside and ran all the faucets, both hot and cold, until I smelled bleach. I turned them off and let everything sit for about 12 hours. I also tested the indoor water with a pool test kit and determined that there was tons of chlorine in the system killing any bacteria that may have been living in the well or in the pipes inside the house. The maximum level for chlorine to be measured by the kit showed yellow and the sink water showed dark orange.

I think I should have turned off the hot water heater, but I didn't. Oh well.

The next day, it was time to flush the bleached water out of the well and the plumbing. I did a few dishwasher loads as well as a few laundry loads (white only). That helped. Then I ran the garden hose into the pool again. I did this for a few hours. I took a shower and did a few other things. By the end of the day, the pool test kit showed a light trace of chlorine. The next day, after running some more water, the chlorine was all but there. Today, it's completely gone. There's a hint of smell still coming from the faucets, but I'm sure that'll disappear soon.

When I first ran the bleach through the system, I made sure to run everything that could run water in the house, including the bathtubs and showers. I think I did a pretty good job. I'm not sure what else I could have done. I did read that when beginning the process, you should run the garden hose back into the well to mix the water up thoroughly. I didn't do that, but it seems to have mixed up sufficiently. I was actually surprised at how fast it happened.

Any thoughts?

COMMENT: You did a good job. Any suggestions would just be splitting hairs at this point. You disinfected your system and that's what mattered. As long as you stored fresh water to drink throughout the process, you're fine.

I learned to disinfect my well many years ago. My parents used to own a house in New York state. When they tried to sell it to retire to North Carolina, the buyers had the well water tested. The tests showed that the level of coliform bacteria was too high. They were told to disinfect the well water with bleach. To do so, they opened the top of their deep well and poured two cups of straight bleach down. A week later, the water was tested again and showed the same level of bacteria. In my opinion, the bleach never even made it down to the water. It hit the sides of the well as it was falling down and that was that. The next time, they poured an entire gallon of bleach down the well. That made it to the water and they told me that it completely stunk for about a week. It cleared up the problem though and the next time the water was tested, it passed with flying colors. No more bacteria. I guess a gallon of bleach will do that. It'll kill any bacteria there is.

I used to own a house with a deep well. I would disinfect it once a year. I'd use two cups, but I would mix that bleach with 5 gallons of water and pour it all down the well. Yes, the water would smell slightly for a few days, but it wasn't bad. It really depends on how much bleach you add. The important thing is to run the water inside the house until it starts to smell. Then shut it off and wait until the next day. Then flush it out. Don't just run the water inside because you don't want all that bleach going into your septic system, if you have one. It'll kill the good bacteria that breaks down the waste. Run the water out of a hose as much as you can. Run it into the back yard, but not next to bushes and trees. Try to run it where nothing matters.
 
CaptainDan

CaptainDan

Member
Joined
May 9, 2021
Messages
113
Reaction Score
0
Points
16
  • #12

Frigidaire Dishwasher Installation​

Today was a good day to install a new dishwasher. Good thing too, because our new one showed up this morning. I would say this has been a long time coming and something that almost didn’t happen. Luckily, while we were in the kitchen place in December, we made the decision to get one. I think it was the right choice. The strangest thing is now I feel like I’m living in my mother’s house. The kitchen feels so “legitimate.” I mean, we are so used to washing dishes by hand…I guess I just feel spoiled, that’s all. Even the sound of the dishwasher feels like when I was growing up. You know the feeling…having a conversation while wiping down the counter tops at night, listening to the hum of the dishwasher. It’s weird.

Okay, so here are some photos of the installation. I would first like to say thank you to my friends who offered to come over and help install this beast. It needed to be wired and plumbed, but when I found out how easy everything easy to do myself, I just couldn’t help it. Onto the pictures…

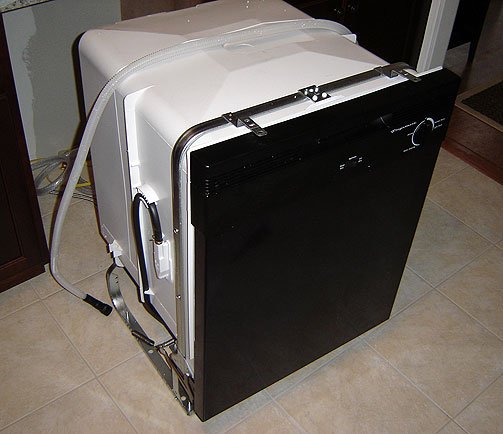
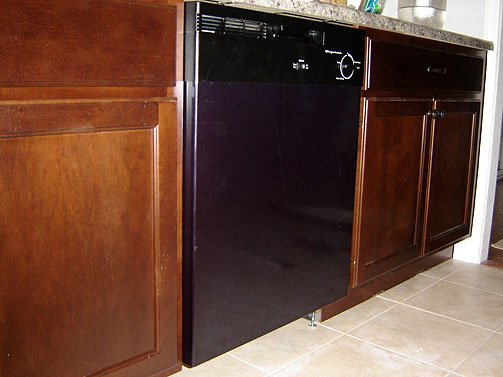
frigidaire-dishwasher.jpg

This is the Frigidaire dishwasher we got. It is a no frills model. We got it for $230, which was the cheapest one in the store. I asked the sales guy what the difference was between this one and the others and he told me basically features and sound dampening. I told him we would take this one. I don’t need the thing to scratch my back, I need it to clean the dishes.

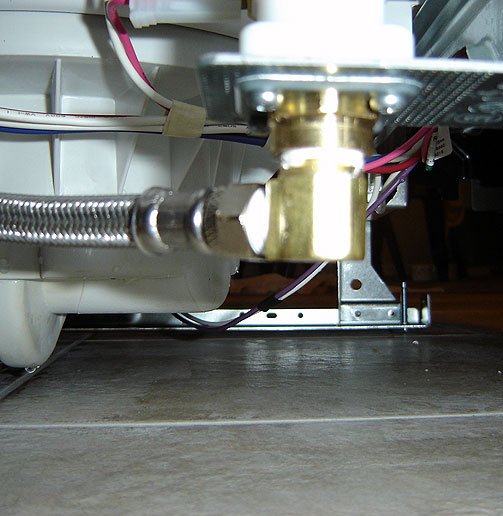
dishwasher-water-inlet-feed.jpg

This is the hot water feed that comes from under the sink right next door. This fitting came with the dishwasher installation kit I bought from Home Depot.

dishwasher-water-feed-connection.jpg

This is the rest of the kit (braided hose) after it is all together. Sorry for the blurriness.

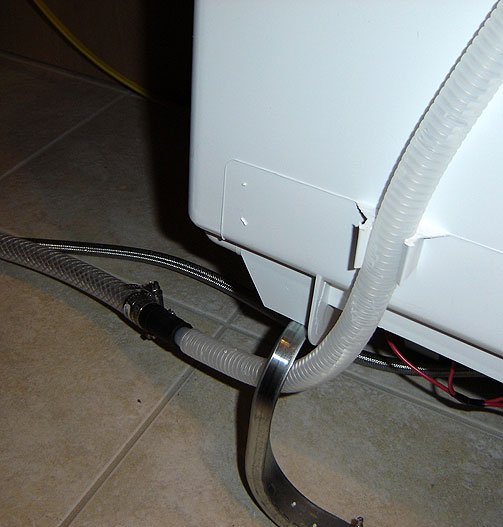
dishwasher-drain-hose.jpg

This clear hose is the drain hose that goes up and over the dishwasher and then attached to my drain hose I bought last week. I clamped the two together with a fitting.

dishwasher-wiring.jpg

This is the wiring I ran from the breaker box, under the house and up through the floor in back of the dishwasher. The wires just attach to the two wires that come with the dishwasher. The ground gets screwed right to the dishwasher. The wiring is attached to a 20AMP circuit breaker in the box. It’s very simple.

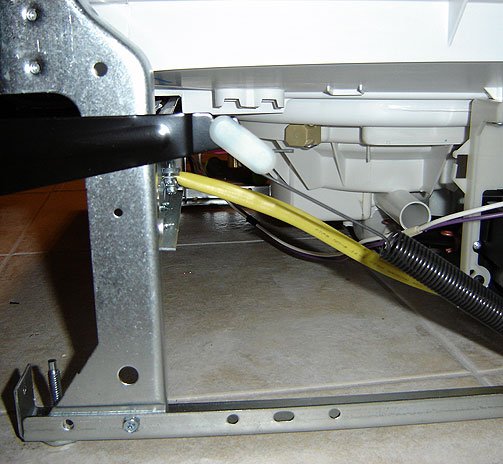
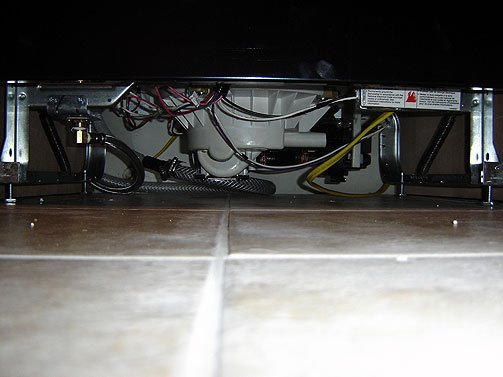
underneath-dishwasher.jpg

Here is a nice view of underneath the dishwasher, if anyone cares.

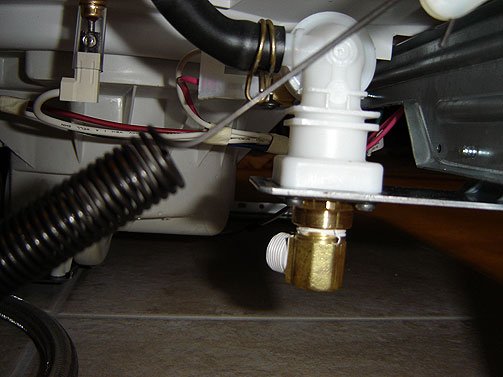
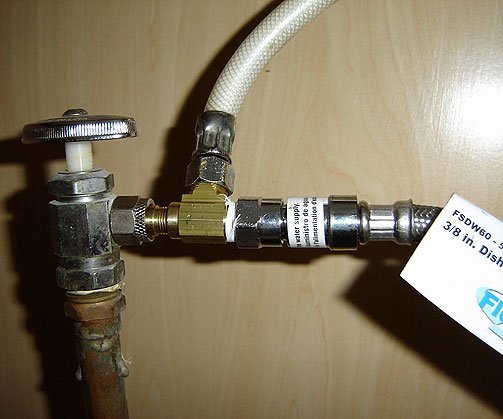
dishwasher-water-feed-fitting-valve.jpg

This is the fitting I got the other day. I talk about it in this post.

installed-frigidaire-dishwasher.jpg

This is the almost finished product. All I have to do now is to put the base plate back on and peel the protective film off the black door. We already ran two loads in this bad boy and are very pleased. For a dishwasher with virtually no sound insulation, it’s fairly quiet. It doesn’t use much water at all and does a great job cleaning the dishes and silverware.
 
CaptainDan

CaptainDan

Member
Joined
May 9, 2021
Messages
113
Reaction Score
0
Points
16
  • #13

Dishwasher Under Sink Plumbing​

This post should have gone first above, as what I shared is earlier in the sequence of events.

Ever since I went out this past Saturday and purchased a new dishwasher, I have been preparing for its delivery and installation. The appliance store will be doing the delivery and I will be doing the installation.

Setting everything up is actually pretty fun. This post is about the plumbing part of it. Here are a few photos to get things kicked off. It’s simpler than one might think…

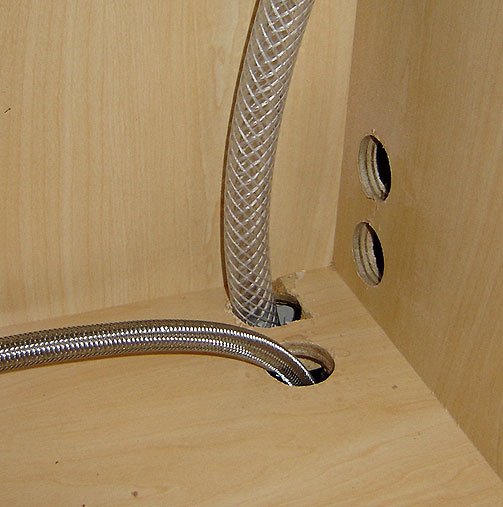
dishwasher-water-feed-drain-hose-under-sink.jpg

The first thing I did was to drill two holes in under the sink in the wall facing the dishwasher. In this photo, you see four holes. That’s because I drilled the two upper holes first. Then, I thought for a little while. I figured that I had no idea what the back of this new dishwasher was going to look like and how tight the fit was going to be. Those two first holes may be too high and go right into the side of the dishwasher “tub.” I then thought that it would be a better idea to drill two holes in the floor of the sink cabinet and then out the side down below. I know the tub part sits up a few inches, so this should clear everything. For now, these two hoses don’t go to anything, since the dishwasher isn’t here yet, but just in case you were curious, the fat hose is the drain hose and the braided one is the hot water feed.

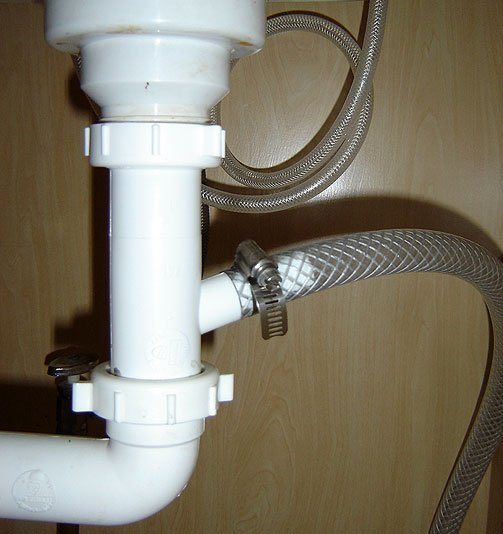
dishwasher-drain-hose-attached-to-pipe.jpg

This next picture is of the drain hose hooked up to the sink drain. This was pretty simple to install. Lowe’s and Home Depot sell these pieces of pipe with the drain spout sticking out. All I did was to remove the existing pipe and trim (cut) the new one to length. Then, I popped it in and hooked up the hose with a hose clamp. On the inside of the pipe is sort of a “shield” so the water will only go in one direction. Pretty nifty.

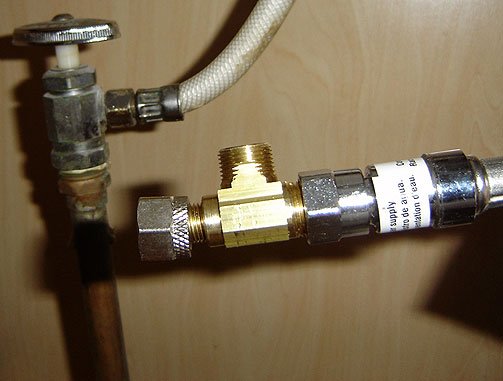
dishwasher-t-fitting.jpg

This is a photo of the hot water feed that is currently connected and the new braided hose with the “T” connector. Lowe’s and Home Depot sell these connectors especially made for this. I am going to connect the white hot water hose in the back to the top part of this T. That will also give that white hose some slack.

That’s about it for the plumbing part of the dishwasher preparation. All that’s left is the electrical and the actual dishwasher installation. I will share when they are finished.

COMMENT: I found this page on google when trying to get help on installing my frigidaire dishwasher. I know it was a while ago that you installed the dishwasher, but I wonder if you remember how you secured the dishwasher to the countertop? I am a novice installer doing it myself, and the instructions are not clear to me on this step. There are those two long metal pieces protruding from the top of the dishwasher (as seen in your first picture) and I can’t figure out how you screw those things in underside of the countertop when the dishwasher is already pushed in. If you recall, please let me know!

COMMENT: If memory serves, you need to open the dishwasher door to have access to those. Once the door is open, you will have the room to screw them to the underside of the counter top.

COMMENT: I just bought one of these (exact model) – a bit surprised your post was so long ago since I bought mine new. I did get the 5 year extended warranty (we have a black cloud and have used them on all three of our previous new appliances and its paid for itself time and time again). This however is our first new dishwasher so we’re excited. I’d just like to know how you like it and how its worked for you. Our main reasons for this model was the price, it was black and as far as features, we are an easy family, we just wanted one that was a quieter runing unit, had heat or air dry funtions (I was suprised how many didnt offer both), delay switch as our family needs this for teenage boy shower time so we load early and run after everyone is in bed, and mostly, gets the dishes clean. We replaced a Frigidaire Gold Quite Clean and loved it, we bought our home 6 years ago and it worked perfect until a few days ago when it the main pump got LOAD and stopped working, we don’t know how old it was, just that it was here when we moved in so we can’t complain about it. Please give me your honest opinion.
 
CaptainDan

CaptainDan

Member
Joined
May 9, 2021
Messages
113
Reaction Score
0
Points
16
  • #14

Tempering Valve to Stop Toilet From Sweating​

If you starting seeing my hand in magazines, don’t be surprised. As you can see, my hand is model quality and I hope you appreciate it.

Back when I was taking up the tile in my bathroom, I noticed that the sub-floor to the side of the toilet was a little wet. I thought this could be caused by two things…the water that shoots out of the shower because of having a lousy shower curtain setup or from the toilet tank sweating. I have recently come to the conclusion that most of the moisture is coming from the shower, so when we put the tile in, I will make sure things are nice and caulked back there.

I did notice a small ring mark around the toilet tank feed pipe as well. This leads me to believe that during the summer, that pipe (and maybe the toilet tank) sweats due to the heat and humidity. There are a few ways one can deal with this type of issue. You can insulate the inside of the toilet tank, insulate the feed pipe, run hot water into the toilet or install a tempering valve. I think the best thing to do is to purchase a pre-insulated toilet tank and wrap some pipe insulation around the feed pipe. There are mixed views on the tempering valve.

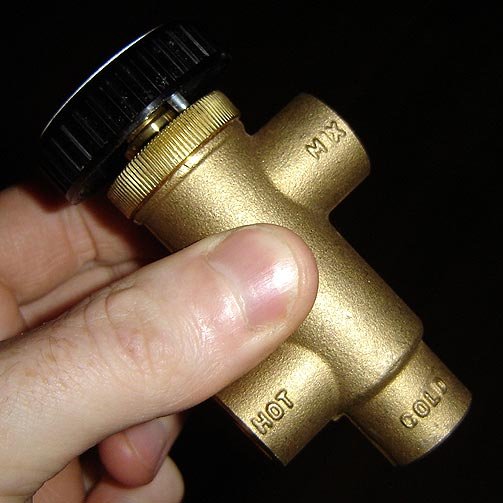
tempering-valve.jpg

My friend was kind enough to give me a tempering valve that he was not using. I think he said he changed the size of his piping, or something like that. That’s fine with me, because I wouldn’t mind giving the tempering valve route a try.

Some people have claimed that after installing a tempering valve, they didn’t notice any difference and their tank still sweat. I hear that more often than not and I think it is because of the length of pipe from the hot water heater and the toilet tank. By the time the warm water gets to the tank, it’s already full. What’s the way around that? I would guess it would be to hook the hot water up directly to the toilet tank. That way, when the toilet is flushed, the cold water in the pipe will partially fill the tank and then the rest will be filled by the hot water. I am not sure if I have ever heard of anyone recommending that, so don’t do it. Actually, you can do it and then leave a comment here letting us know how it worked out. Just don’t yell at me if it turns out bad.

When I get a chance, I am going to install the tempering valve. I think that having it is better than not and I also want to use my new torch again.

COMMENT: Having the toilet operate solely off the hot water line is a bad bad idea for several reasons. Yes your theory is sound at first glance but here is the problem:

1. Assuming this is the first time you flushed the toilet today, you’ll get a mixture of cold and hot water = warm water. Which is good.

Now say you flush the toilet again, only this time all you get is hot water at what ever temperature your water heater operates at.

2. If you have several people living in your home, and assuming everyone is using the toilet, the water heater will be taxed even higher which will mean a higher electricity bill.

3. If it is only the one temperature line, you have no adaptability to change according to the current environment. Meaning you still have to use hot water when its not necessary, and again wasting money.

4. If your water temperature is set too high, there is the possibility of damaging the rubber portions of the mechanics that are only meant for cold water.

5. If you get toilet water splashed on you, ouch.

6. If you have a kid playing with the toilet, which every kid does at a certain age…that’ll be a problem.

7. If your toilet floods? Sometimes you have to stop a toilet from flooding by messing with the tank while its overflowing with water. Impossible to do that while it is super hot.

So you best be installing an adjustable temp valve.
 
CaptainDan

CaptainDan

Member
Joined
May 9, 2021
Messages
113
Reaction Score
0
Points
16
  • #15

Water That Smells Like Rotten Eggs​

Here's a story about when I used to live in Ulster County New York. After moving into a new house (for me), I realized that we had water that smelled like fart, or eggs. I had to buy a special filter to fix the problem. To learn all about it, please read below.

------

I happen to live in a very beautiful area of New York. The Shawangunk Ridge is absolutely spectacular and visiting the Mohonk Preserve has become a favorite activity. Unfortunately, it seems that the western side of the Hudson River has water that smells like rotten eggs. I know there are towns on the eastern side that have this problem, but I know of more over here.

We moved in to this house on the hottest day of 2005. I am not exaggerating. It was honestly the hottest day. I remember it well. We unpacked half the truck and I was sweating bullets. I stopped because I was out of breath. I asked anyone if they would like a glass of water, they accepted and I walked in the house to get some out of the faucet. I filled three glasses and walked back outside and handed my friends the glasses. We put them to our lips at the same time…and all at once we said…”Eeewwww, rotten eggs!” Boy, what a delight! We had sulphur in our water!

As with any problem I am confronted with, I immediately say that I can fix it and then my mind starts to go. I thought of the biggest and the best carbon filter I would get. After I put that baby in, there would be no more smell. Well, my friend Craig tried that up in Oneonta, NY, to no avail. My father also tried that in Wilmington, NC and he is always changing the filters. If that doesn’t work, what was I supposed to do?

We lived with the smell in the water for about a week. We weren’t too far past the closing on the house, so I wasn’t thrilled with dropping a bunch of additional money. I asked around at work and got a nice wide variety of answers. No one seemed to know what they were talking about. Things were getting worse because when we got out of the shower, the smell would follow you until you completely dried. This had to change FAST!

The next day I got on the phone with a few water purification companies that I found in the yellow pages. Most of them said that there was iron in the water. I said, “No, you must be mistaken, I have Sulphur in the water.” They said, “Yes, but Sulphur is created by Iron.” What? Well, apparently, they were correct. The way it works is this: Water with small traces of iron enter the house through the well. Then, the water sits in the hot water heater. Somehow, the heat changes the iron in the water to sulphur and then, whalla, stinky sulphur water! I am not too sure of how this works. My friend Paul wrote a much more informative entry in his blog about water treatment.

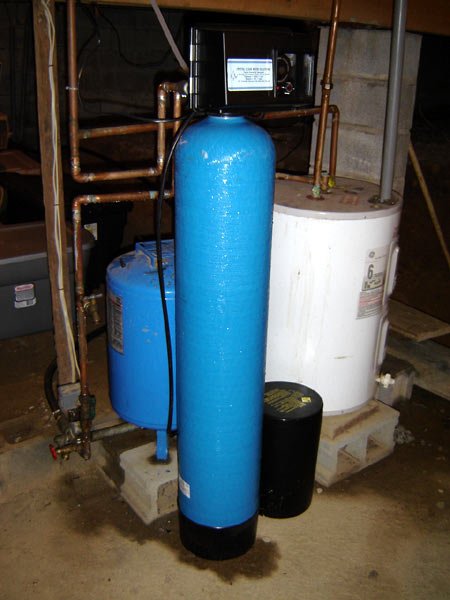
The answer to my problem was to get a Whole House Iron Filter – a Manganese Greensand Filter. I was talking with my neighbor about this problem and he recommended a local water guy to do the job. He said he was the most reasonably priced in the area and new what I needed. I gave this fellow a call and he came out and tested my water. He said, “Yep, your water isn’t hard, but you do have iron in it.” I said, will the filter you install get out 100% and make every thing perfect?” he said, “No, but about 95% will be taken out and you won’t have the smell anymore.” That sounded good to me. My only concern at this point was how much I was going to have to give this guy to fix my problem. I had to have him install it because I didn’t know the first thing about it, didn’t know where to get the filter and had no way to get it to my house. He told me it would cost $1100, said and done. I told him that was fine, just get over here and do it ASAP. The picture below is the actual filter he installed.

greensand_filter_1.jpg

The water guy told me that this filter was one of the best on the market. No shortcuts were taken and it would last for about 20 years.

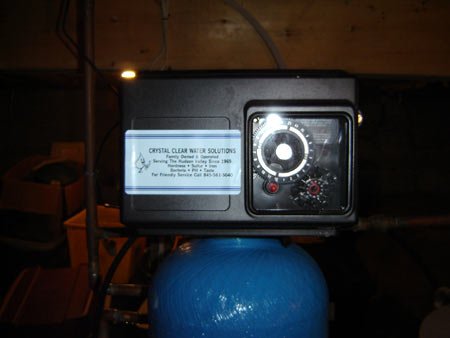
greensand_filter_2.jpg

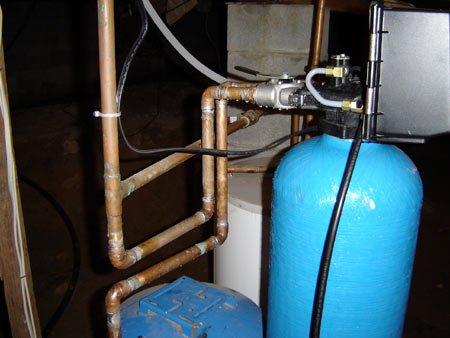
He did a great job installing the filter. The soldering of the copper pipes looked good and he ran the backwash line to the septic pipe in the basement so it wouldn’t make a mess outside when it backwashed the greensand with the Potassium – water mixture. It does this about every 4 days at 2AM.

greensand_filter_3.jpg greensand_filter_4.jpg

He also flushed out my electric hot water heater and put some bleach in there to kill any bacteria. He told me to put about 2 cups of bleach in our well every year. I have done this and it’s amazing how good the water smells after I do it. I am happy to say that ever since this very maintenance free water filter was installed, my rotten egg smell has just about disappeared!

COMMENT: Well it looks like that worked well. That was a tough plumbing problem. I don't think you should put bleach in your well. That sounds not so good to me.

COMMENT: Actually, I have had quite a few people recommend that I put bleach in the well every so often, like twice a year. This keeps any bacteria to a minimum and also helps out the greensand filter, water heater and piping throughout the house.
 
Top