KristinaW
Member
- Joined
- May 7, 2021
- Messages
- 127
- Reaction Score
- 0
- Points
- 18
- #1
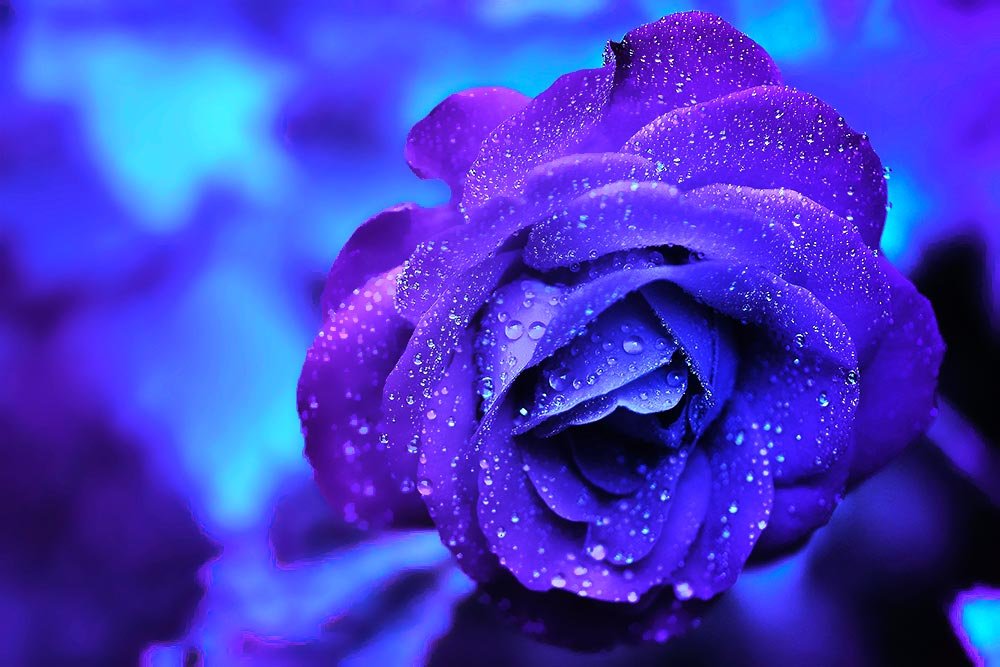
I’ve got some seriously cool tricks for you today. Adobe Photoshop is known for some really neat tools that not too many folks know about. Usually, it’s not until you toy around with one tool long enough that you discover a golden nugget of beauty. And in what I’ve covered below, there are a few of those nuggets. Play with the Gradient Tool – check. Play with some adjustment layers – check. Modify colors using the Targeted Adjustment Tool – check. That last one is going to knock your socks off.
In today’s post, I’m going to work on an image of a flower that’s of the violet color inside of Adobe Photoshop. I didn’t want to say a violet flower, because that’s not what it is. Violet is just the color. The flower is a rose. I’m going to add some adjustments to the flower layer and then alter those adjustment masks by using the Gradient Tool. Three topics will be covered today; adjustments, targeted adjustments and then gradients. It’s going to be awesome, so be sure to read through until the end.
Original Photo
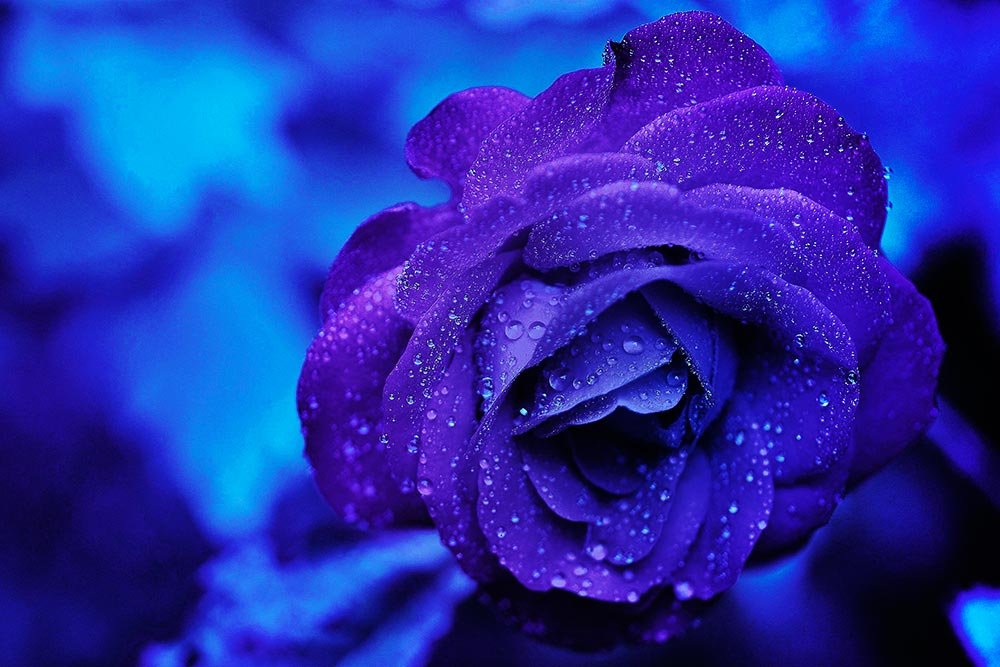
Below is the original photo that I’ll be using in this post. As you can see, the color of the flower is fairly solid. The entire image is also somewhat dull. I’d like to add some interest to the overall photo.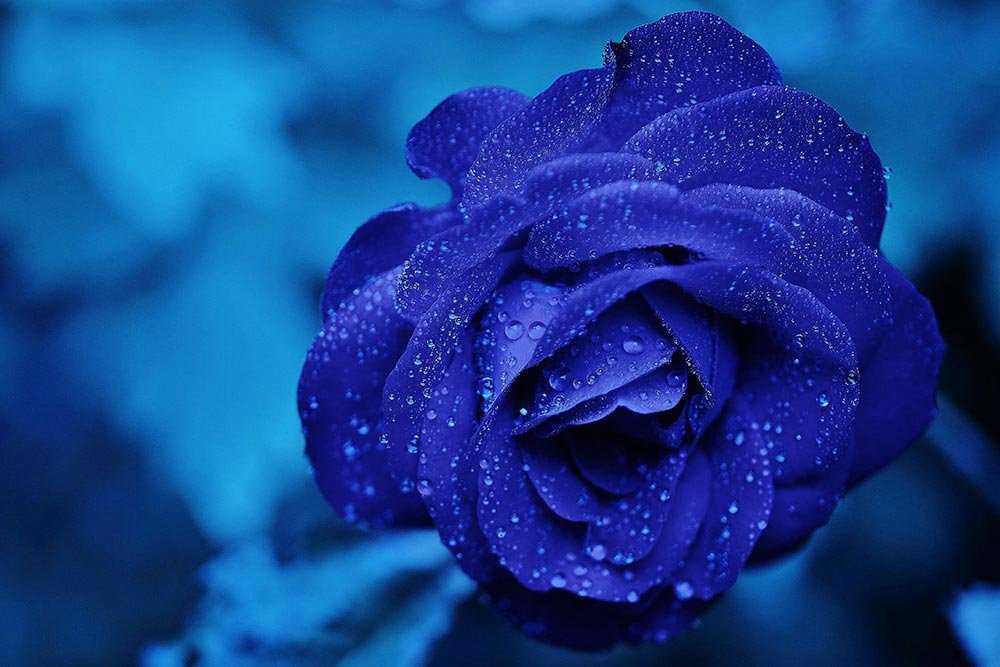
Brightness/Contrast Adjustment with a Linear Gradient
The first area of this photo that I’d like to clean up is its dark dullness. To accomplish this, I’m going to click the Brightness/Contrast icon in the Adjustments panel. From there, I’ll push the Brightness slider to the right until it reaches 25 and the Contrast slider to the right until it reaches 60.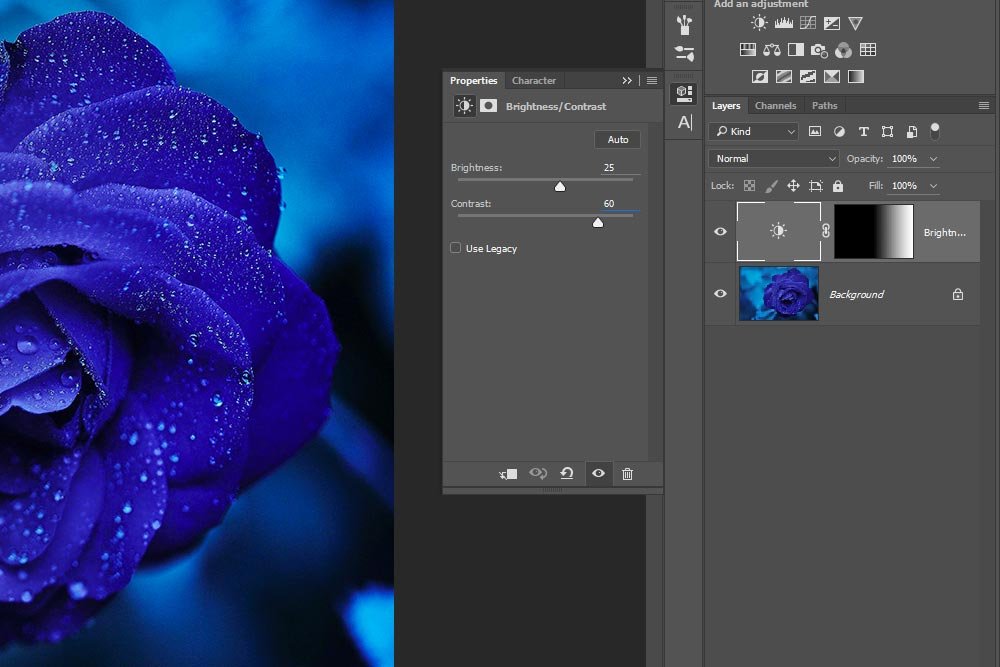
The thing is, I don’t want to apply this adjustment to the entire image. I only want it to cover the right side of the flower, just to brighten things up and give some character to that side. So, to make this happen, I’ll click on the mask in this first adjustment layer and then select the Gradient Tool. I’ll also make sure that black and white are the colors that are active as foreground and background colors. From there, I’ll make sure the Linear Gradient option is selected from the options bar and click on the 50% (center) mark of the photo. I’ll hold my mouse key down and drag over to the right edge of the photo and let go. This will give me a gradient that looks like the one in the mask thumbnail in the screenshot above.
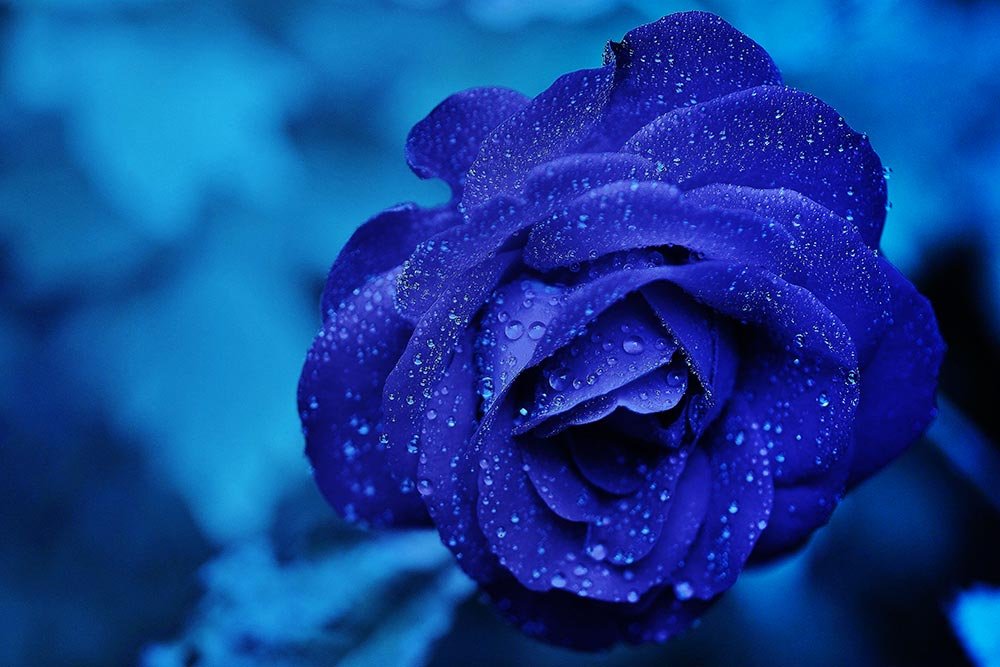
Here’s the outcome of this operation:
Hue/Saturation Adjustment with a Radial Gradient
This is where things begin to get fun. What I’d really like to do is change the color of the outer edge of the flower from violet to more or a purple. And then I want to slightly increase the flower’s saturation. To do this, I need to follow a few steps.First, I’ll click the Hue/Saturation icon in the Adjustments panel. Then, once the Properties panel for this adjustment opens, I’ll click the small icon that has a picture of a finger in it. This is the Targeted Adjustment Tool. It resides to the left of the drop-down box that says Master (initially – after I select a color, that drop-down box will change).
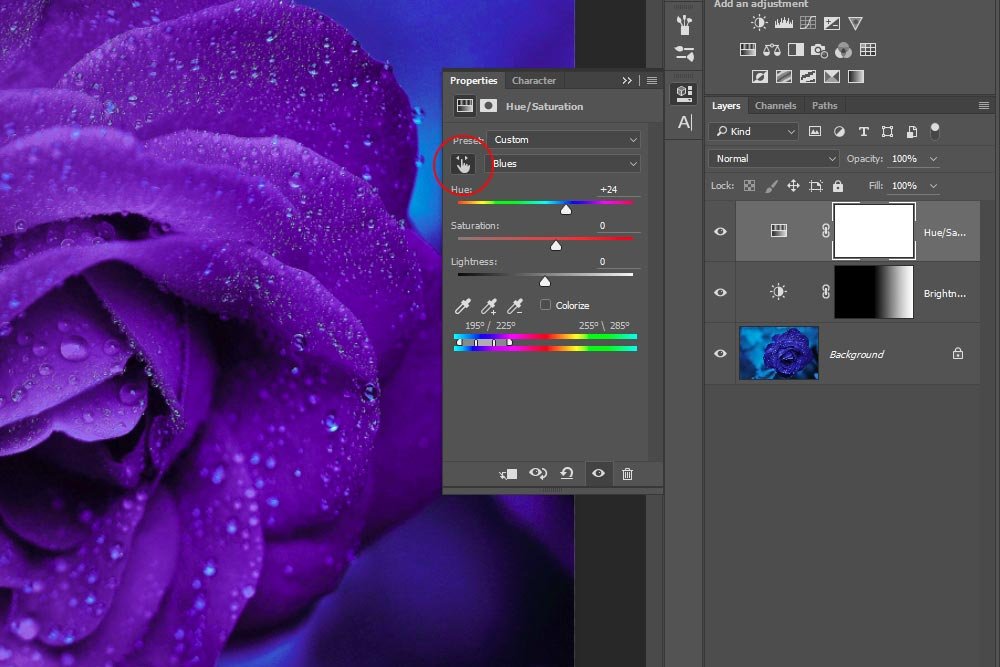
Once I select that icon, my mouse turns into a dropper. Basically, this dropper takes a sample of any color in the photo that I’d like to change. So, if I had an image with only for solid colors in it; red, blue, green and pink, and I clicked on the red, only the red would be selected and up for alteration. The tool selectively targets colors for change. Typically, when using the Hue/Saturation adjustment, the entire image gets altered, but when you use this tool, only specific color get altered. It’s really awesome.
I’ll go ahead and click on this tool and then click somewhere on the outer edge of the flower. Once I do that, the indicator in the two bottom hue sliders moves to where the blue resides. Please refer to the screenshot directly above to see this. This means that only the blue that I clicked on will change. From there, I’ll move the Hue slider to the right until I’m happy with the color of the outer leaves of the flower. I’ll also bump the Saturation slider to the right a bit.
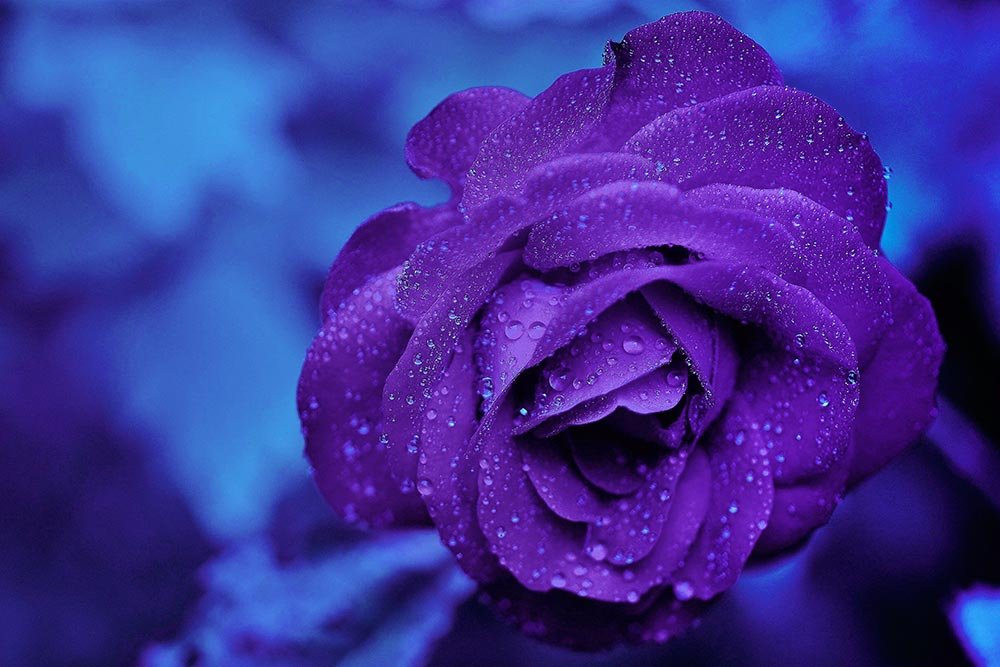
Now, to edit this mask so only the outer leaves are affected by this color change, I’ll need to use the Radial Gradient tool. I’ll once again select the Gradient Tool from the left vertical toolbar and then click on the Radial Gradient icon in the options bar. From there, I’ll make sure the mask in the Hue/Saturation adjustment layer is selected and I’ll click right at the center of the flower with my mouse pointer. I’ll drag out to approximately the edge of the outer leaves and let go. This is the result:
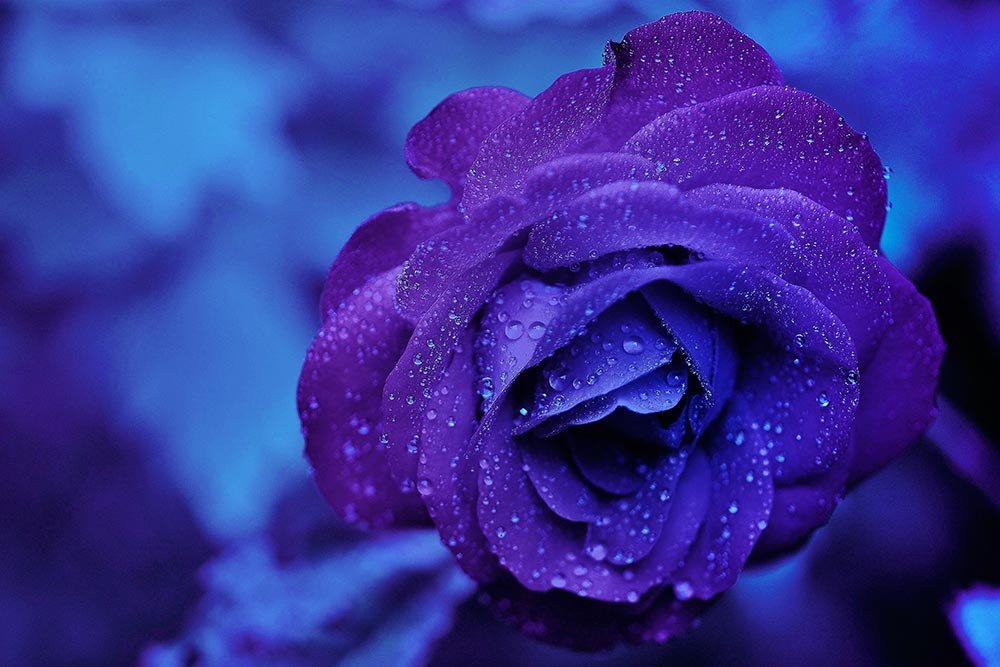
Now, the mask for the Hue/Saturation adjustment layer shows white with a soft black circle in it that covers the area of the flower. This means that the adjustment is visible over the entire layer except for the center of the flower area. It’s just what I want.
Curves Adjustment with a Radial Gradient
The next thing I’d like to do is add some slight contrast to everything in the image except for the center of the flower. This is a lot like the previous adjustment, but this time I’ll use Curves. I click the Curves icon in the Adjustments panel and change some targeted areas. Based on the look of the histogram, I know that if I pull down the line that’s in the lower left, the image will darken. I’ll do that. I’ll also lift up the line that’s over to the upper right to get some brightness. By doing this, I’m adding some differentiation between tones.Finally, I’ll choose my Gradient Tool again and keep it tied to the Radial Gradient option. Again, I’ll click at the center of the flower and pull the gradient line out towards the edge of the flower and let go. This will apply the adjustment to everything in the image, except for the center of the flower.
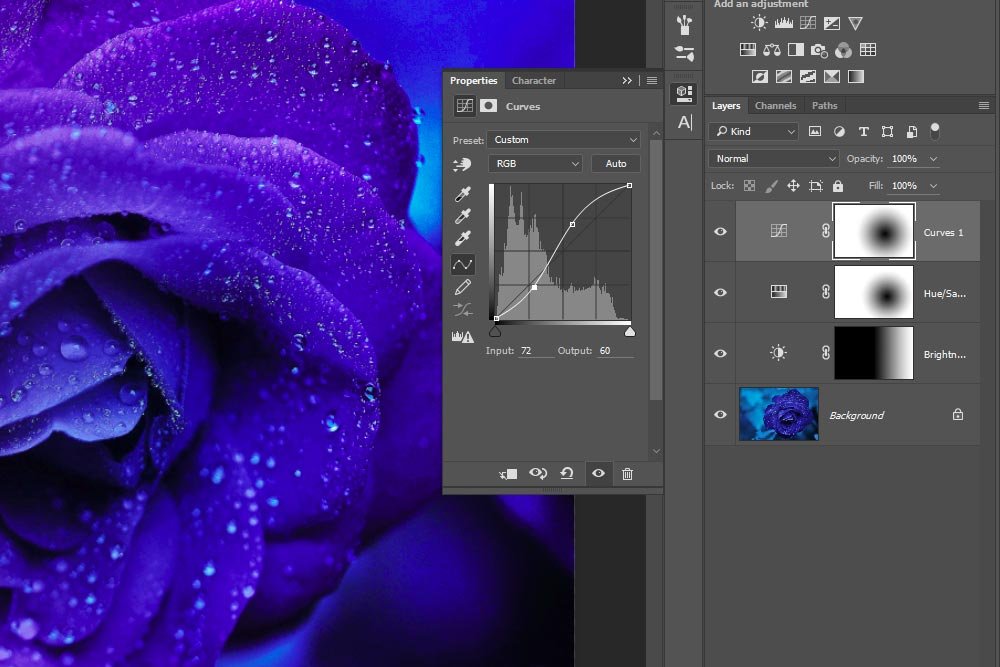
This is the outcome:
I don’t want you to get nervous at this point. I recognize that the image still looks fairly dark. What I’ve done so far is to lay the groundwork for what I’d like to ultimately see. With some minor exposure adjustment and blurring, the project will be complete.
Exposure Adjustment
This section is fairly straightforward. What I’d like to do is increase the exposure so all the adjustments I already made are magnified. To accomplish this, I’ll click on the Exposure icon in the Adjustments panel and when the Properties panel for this adjustment appears, I’ll push the Exposure slider to the right until it reaches +1.05. That’s bright enough.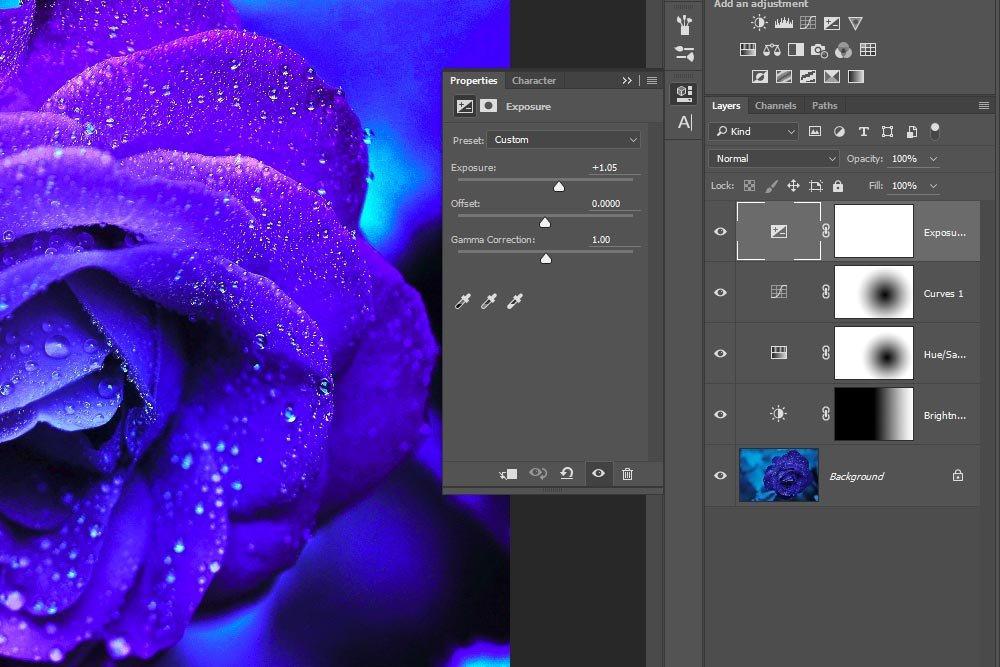
I’m not going to use any gradient for this step because I want this adjustment applied to the entire image. Here’s the outcome of this change:
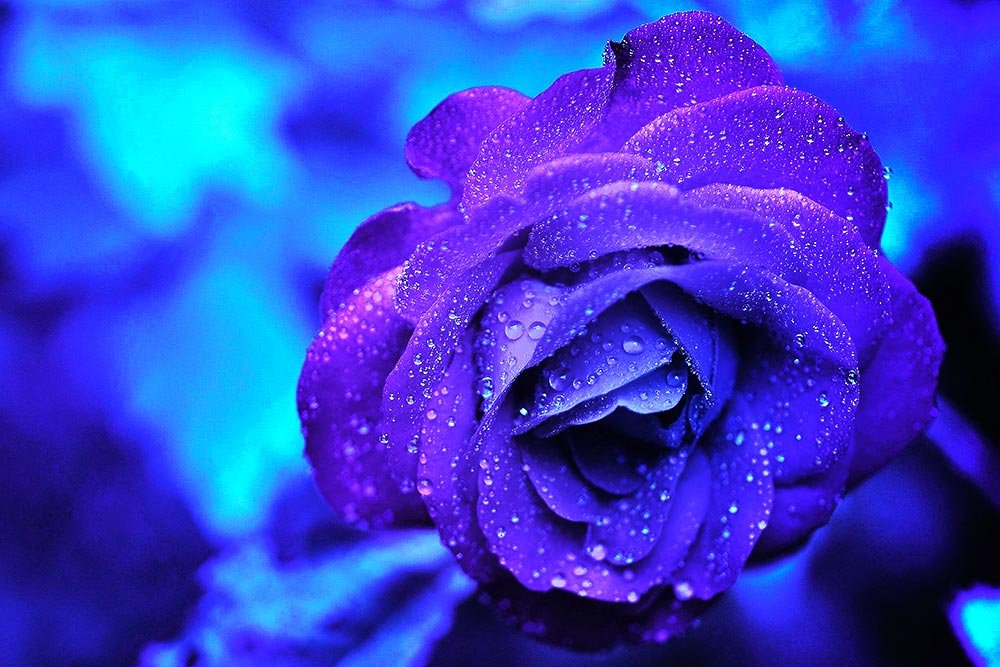
See how everything brightened right up?
Adding Gaussian Blur, a Layer Mask & a Radial Gradient
As I was working through this project, I realized that there were some lower quality areas of the image that I didn’t want to show (primarily the background). I’d rather hide them behind some blurring, if at all possible. I didn’t want to blur any of the focal area through. This would be the center of the flower. So, to blur everything but the flower, I had to employ a little trick.I knew that if I added a mask to the flower layer, used the Gaussian Blur filter and then tried to use a radial gradient to hide the blur from the center of the flower, it wouldn’t work. After I used the gradient, the center of the flower would actually disappear because the blur was applied directly to the flower layer itself. What I did instead is as follows.
First, I duplicated the flower (background) layer by dragging the layer down to the Create New Layer icon at the bottom of the Layers panel and letting go.
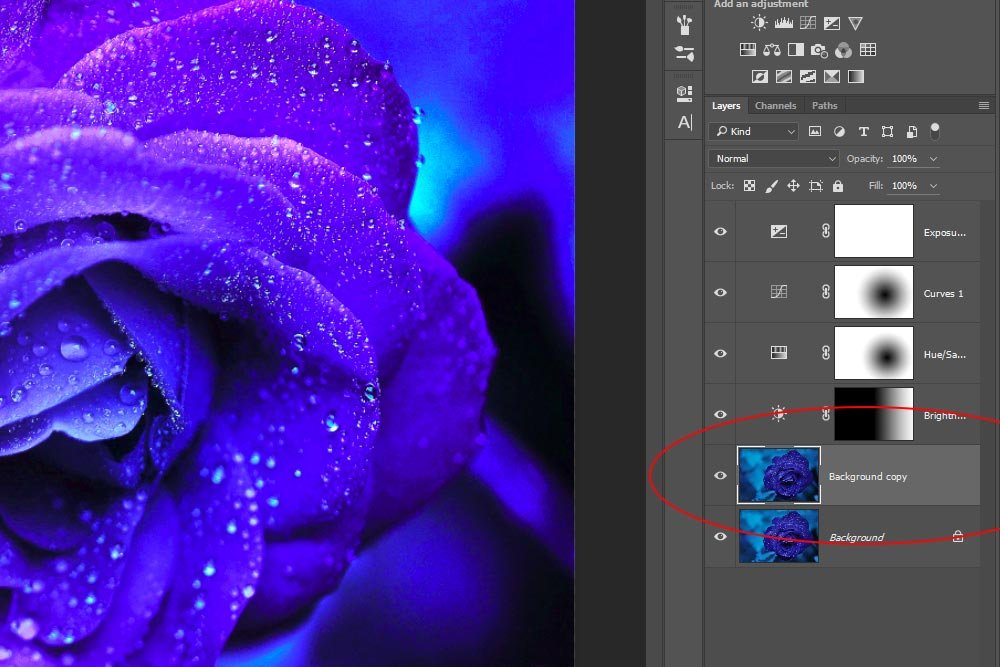
Next, I applied some Gaussian Blur to this new layer – the one that’s on top of the other flower layer. To accomplish this, I clicked the Filter > Blur > Gaussian Blur menu item from the top menu.
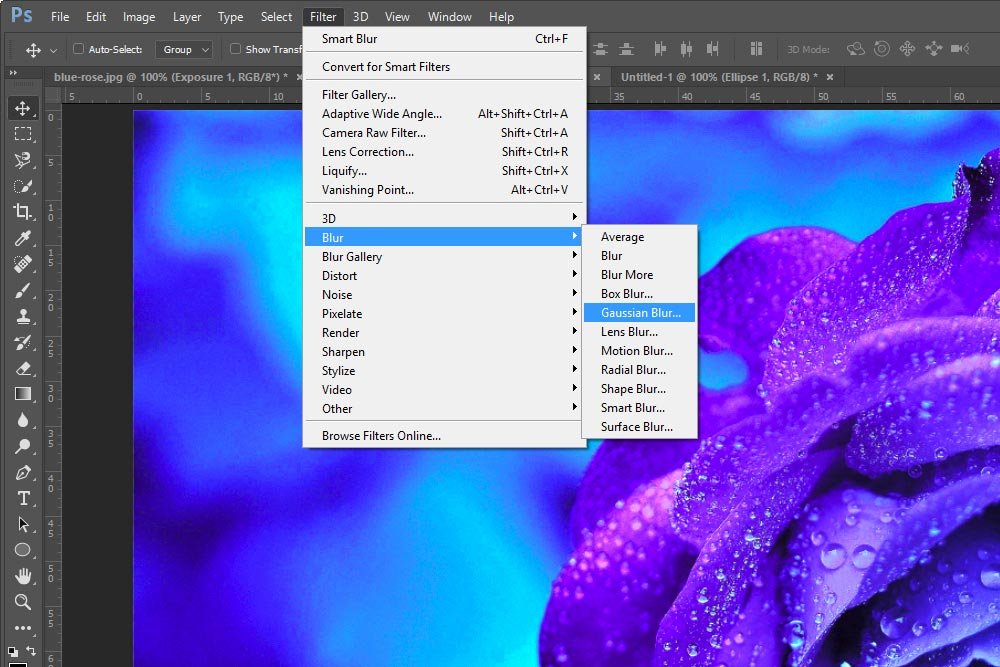
After that and when the Gaussian Blur dialog box appeared, I increased the Radius value to 9. This gave a really solid blur to the entire photo.
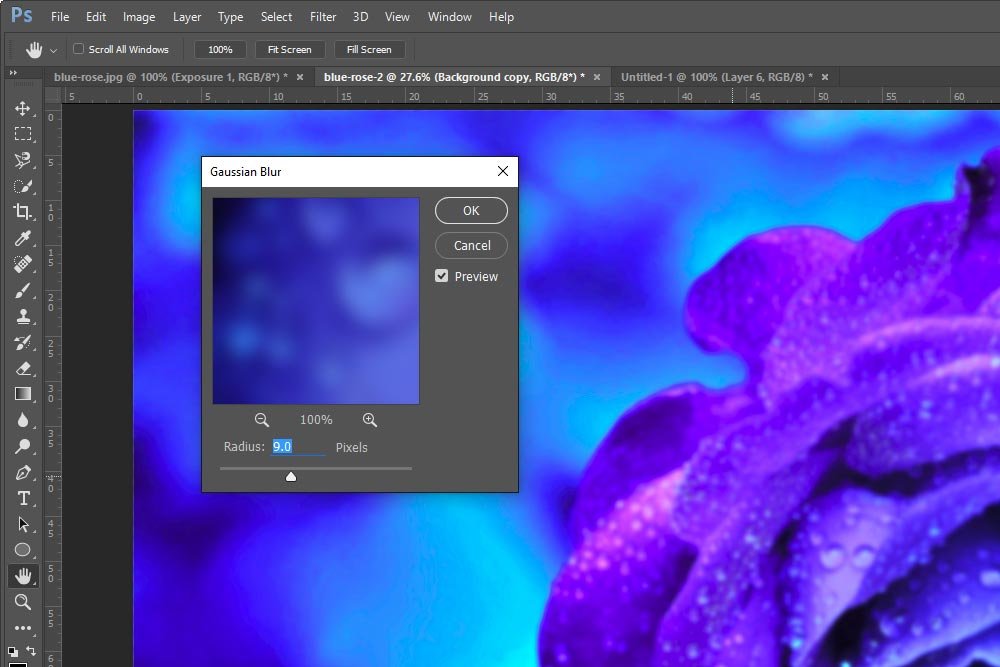
The issue I had at this point was that the entire layer had a blur applied to it. If you remember, this isn’t what I wanted. So, to softly remove the blur from the center of the flower, I would first make sure the top (blurry) flower layer is selected and I’d then click the Add Layer Mask icon at the the bottom of the Layers panel. After that, I’d draw the same exact Radial Gradient as I did for the above adjustment layers.
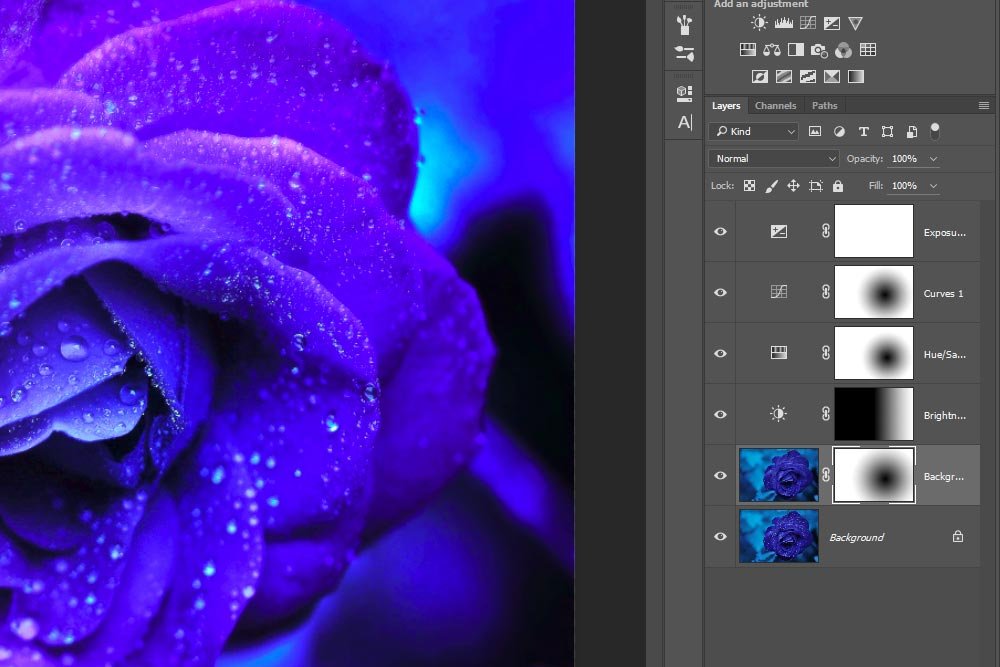
The effect of this layer mask and radial gradient is perfect. It removed the center part of the layer, where the flower is, from the top layer, revealing the sharp layer beneath. Sometimes in Photoshop, you have to get crafty.

And that’s it. I like it.
If you have any questions about today’s post, please feel free to ask them in the comments section below. I absolutely love questions and comments.
