KristinaW
Member
- Joined
- May 7, 2021
- Messages
- 127
- Reaction Score
- 0
- Points
- 18
- #1
In some cases, there’s more to Adobe Photoshop than meets the eye. When the application is initially installed, it goes through the process of placing files onto your computer’s hard drive and loading various things, such as brushes, gradients, shapes and many more items to work alongside those files. The thing is, when Photoshop is finished being installed, not everything is loaded. Only some brushes are visible through the workspaces and panels. The same is true for gradients and shapes, among other things.
In today’s post, I’m going to quickly walk through the process of adding to the set of gradients that are visible with a regular install of this program. I’ll show you how to go about loading more gradients that are hiding behind the scenes, just waiting to be let loose. It’s really easy, so read on below.

It doesn’t matter what photo I open – all that matters is that I have a file in the workspace so the panels show. This makes things more realistic and easier to understand for this tutorial.
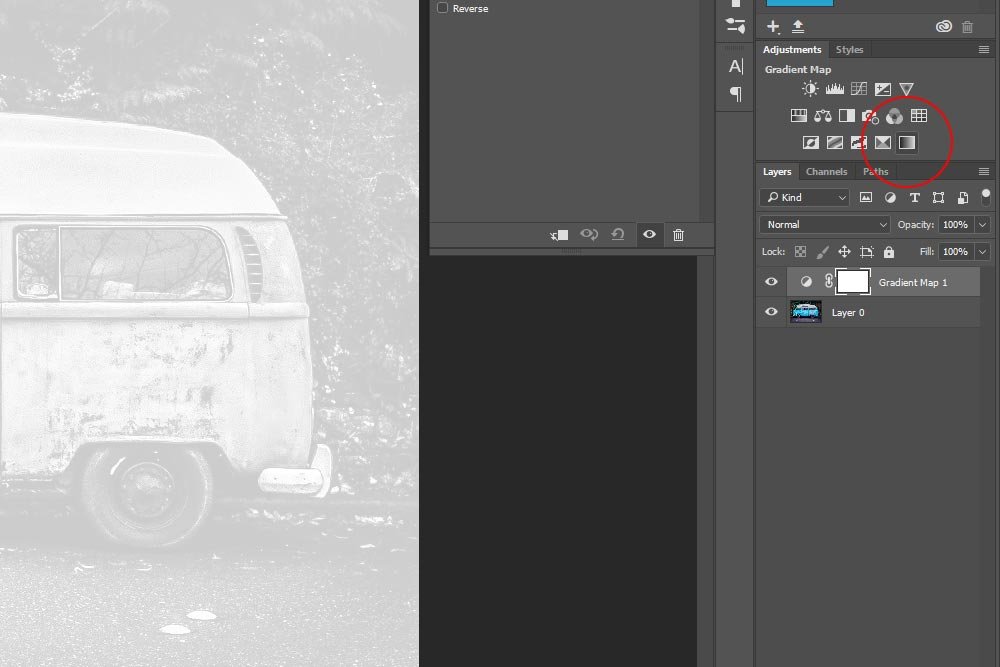
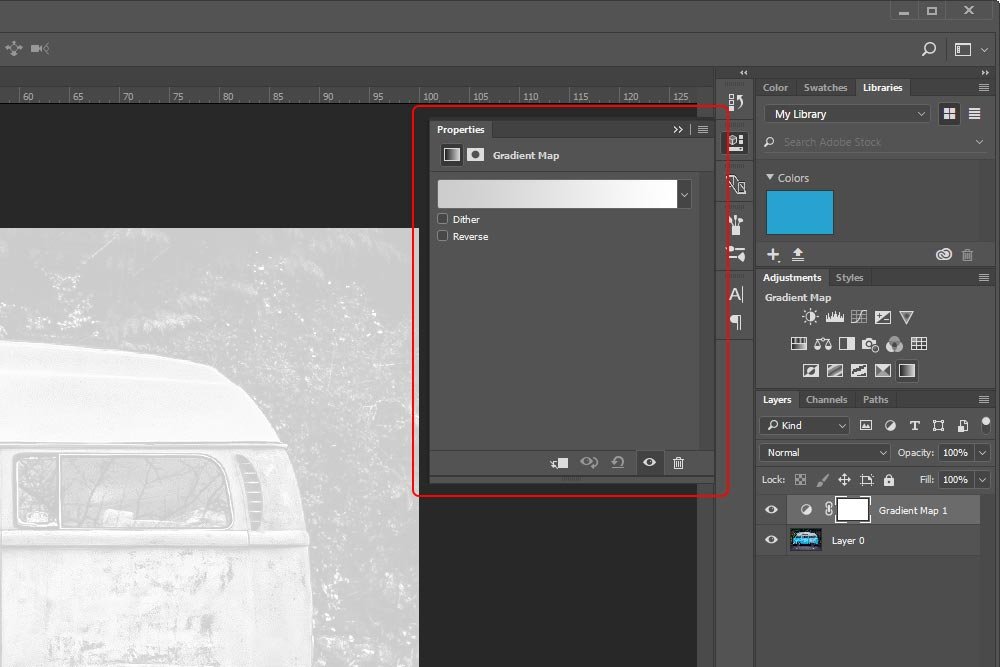
Next, I’ll click on the Gradient Map button in the Adjustments panel. Doing this will add an adjustment layer right above the image layer in the Layers panel. It will also open up the Gradient Map Properties panel, which is where we want to be.
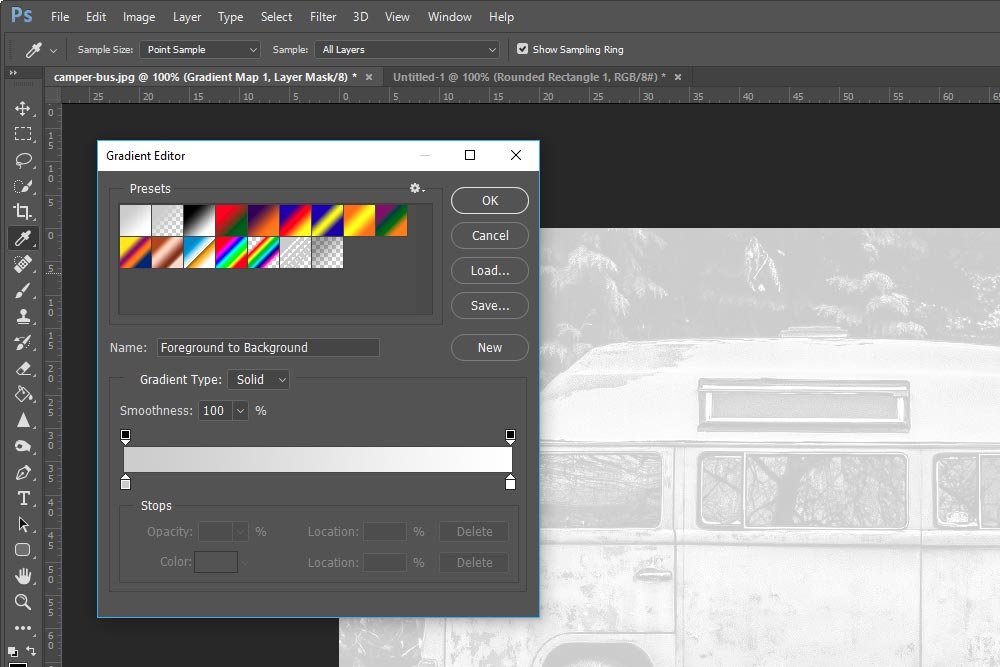
If you take a close look at the available gradients inside the editor, you’ll see that they’re pretty much useless. Sure, they came installed with Photoshop, but I’m not sure if anyone has ever used this collection in particular. Let’s go ahead and add some more that might be more helpful with a project we might work on in the future.
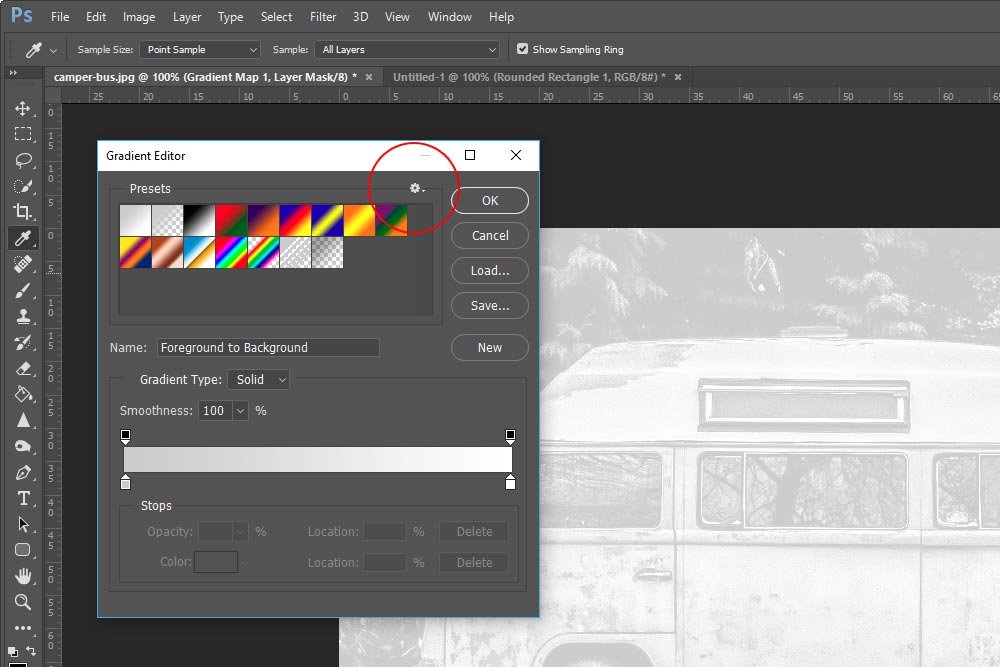
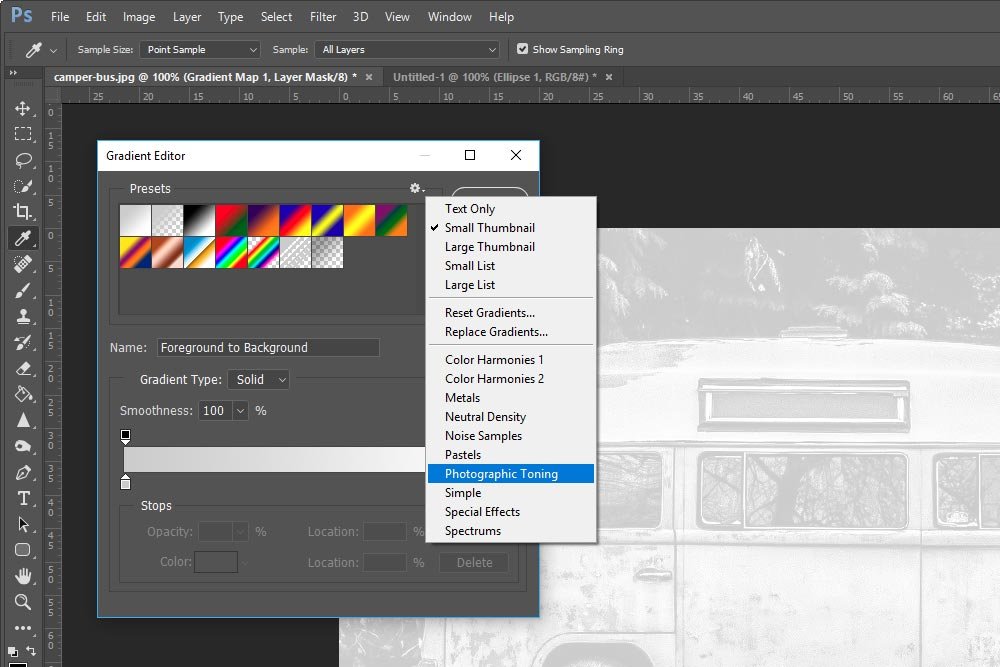
When the menu opens, I’ll select the type of gradients I’m interested in. In this case, I’ll select the Photographic Toning ones, since I’m working on a photo and I want to change its tone up a bit.
When I click that selection, a small confirmation box appears. It asks if I want to Replace the current gradients, Append them or Cancel the process and forget about the whole thing.
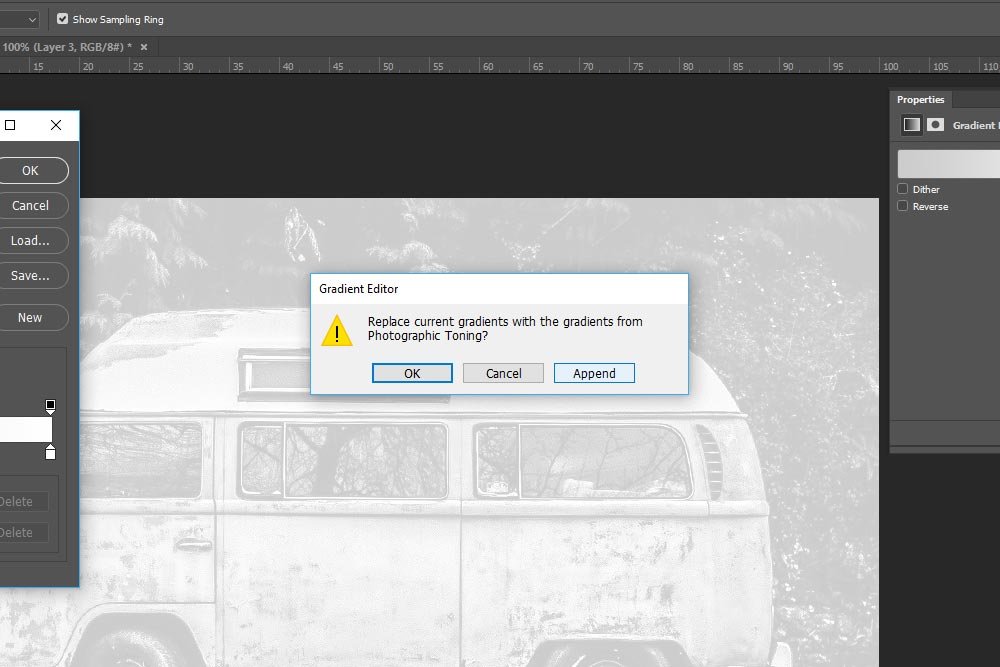
Since I want to add to the current selection, I’ll click the Append button.
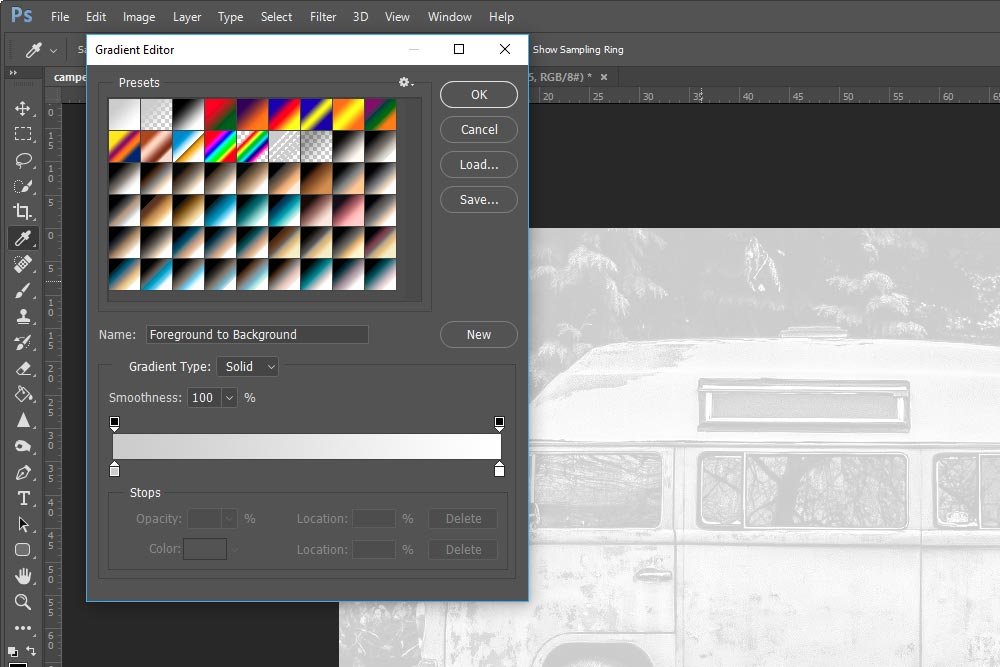
If you look at the above screenshot, you’ll see the new gradients that were just imported. Now these look like gradients I can work with.
I’ll click a few of the new gradients to see how each one looks and when I find something I like, I’ll click on the OK button in the editor. That will apply the new gradient to the photo and I’ll have a nice newly styled image to look at. Check it out.

And that’s it. In the future, I’ll cover more methods that import resources into Adobe Photoshop that it doesn’t have readily accessible in it’s default workspaces.
If you have any questions or concerns, please let me know in the comment section below. As always, thanks for reading!
In today’s post, I’m going to quickly walk through the process of adding to the set of gradients that are visible with a regular install of this program. I’ll show you how to go about loading more gradients that are hiding behind the scenes, just waiting to be let loose. It’s really easy, so read on below.
The Process
To import more gradients into the Gradient Editor, I’ll open a photo into Photoshop. This is that photo.
It doesn’t matter what photo I open – all that matters is that I have a file in the workspace so the panels show. This makes things more realistic and easier to understand for this tutorial.
Next, I’ll click on the Gradient Map button in the Adjustments panel. Doing this will add an adjustment layer right above the image layer in the Layers panel. It will also open up the Gradient Map Properties panel, which is where we want to be.


The Gradient Editor
So far, I’ve completed all the necessary steps to get to the Gradient Map Properties panel. Next, I’ll need to make my way to the final panel, which is the Gradient Editor itself. To open this editor, I’ll simply click on the gradient that’s in the Properties panel. Once I do that, the editor will pop right open.
If you take a close look at the available gradients inside the editor, you’ll see that they’re pretty much useless. Sure, they came installed with Photoshop, but I’m not sure if anyone has ever used this collection in particular. Let’s go ahead and add some more that might be more helpful with a project we might work on in the future.
Importing Additional Gradients
To import additional gradients, I’ll click on the small menu button that sits to the upper right of the gradients that are currently installed.
When the menu opens, I’ll select the type of gradients I’m interested in. In this case, I’ll select the Photographic Toning ones, since I’m working on a photo and I want to change its tone up a bit.

When I click that selection, a small confirmation box appears. It asks if I want to Replace the current gradients, Append them or Cancel the process and forget about the whole thing.

Since I want to add to the current selection, I’ll click the Append button.

If you look at the above screenshot, you’ll see the new gradients that were just imported. Now these look like gradients I can work with.
I’ll click a few of the new gradients to see how each one looks and when I find something I like, I’ll click on the OK button in the editor. That will apply the new gradient to the photo and I’ll have a nice newly styled image to look at. Check it out.

And that’s it. In the future, I’ll cover more methods that import resources into Adobe Photoshop that it doesn’t have readily accessible in it’s default workspaces.
If you have any questions or concerns, please let me know in the comment section below. As always, thanks for reading!
