EmeraldHike
Member
- Joined
- May 10, 2021
- Messages
- 133
- Reaction Score
- 0
- Points
- 21
- #1
This wasn’t the easiest title to come up with. Basically, I’m talking about how to keep layer effects in line with (scaling with) the size of objects in a layer inside of Adobe Photoshop. If you’ve ever double-clicked on a layer before to add different effects to it via the Layer Style palette, you know how things can get all screwed up if you attempt to scale the size of objects in that layer down or up. For example, let’s say you added some text to a layer using the Horizontal Type Tool and then added a shadow and a stroke to it by using the Layer Style palette. After adding those two effects, you might want to reduce the size of the text. You’d go ahead and do that by transforming it with the Free Transform too, but right after you applied that transformation, you would notice that the effect sizes don’t match the new size of the text. The effects are either too large or too small, which really makes things look not as intended.
There are a few other ways that effects can get screwed up and in today’s post, I’d like to discuss them. I’ll talk about how effects can seemingly grow and shrink so they don’t match the host object’s size any longer as well as some tips on how to deal with this dilemma. After reading today’s post, you should have a good handle on how to keep any effect you add to text and other objects matching the objects they were added to.

Let’s see how that looks.

To apply the effects, I’ll double click somewhere in the text layer in the Layers panel. This will open up the Layer Style palette.
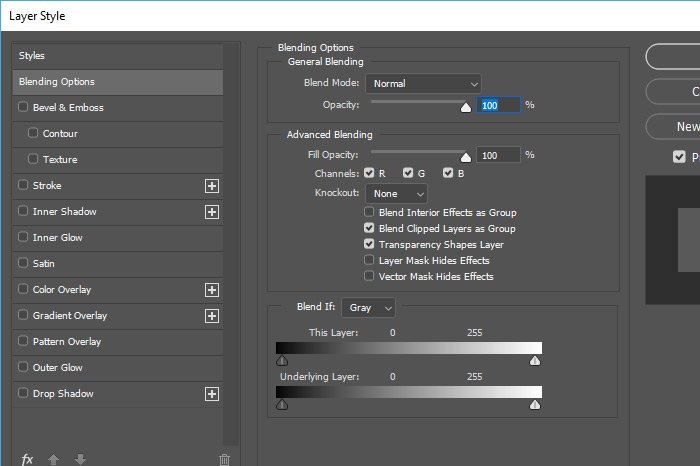
I’ll access the Stroke and Drop Shadow areas and I’ll apply effects that I think look appropriate. Here’s the output of that.

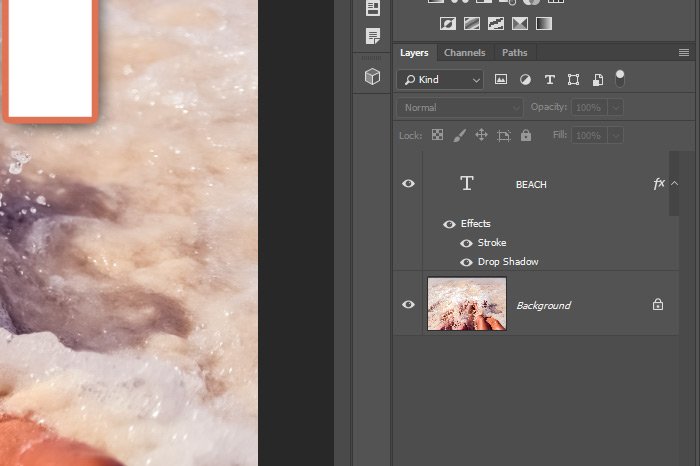
As you can see, I have a text layer with some effects applied to is as well as a background image layer. If I were to export this image just as it is, I would have no difficulties at all. Let’s suppose that I wanted to resize the image though. What if I were to resize the image so instead of width of 6936 pixels, it had a width of 700 pixels. I’ll head up to the Image > Image Size menu item and make that change right now.
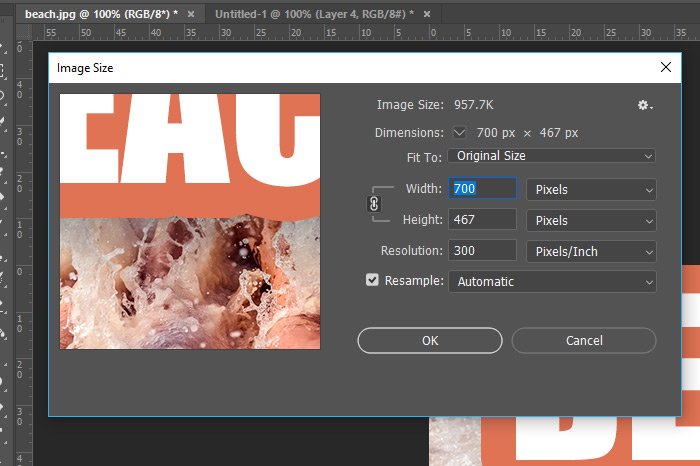
Here’s the result of that change.

What happened? The shadow is huge and the stroke is even worse than the shadow. Well, I can tell you what happened right now. The effects didn’t scale with the image. The image size was reduced, but the effect variables stayed the same. That’s why the effects are so blown out of proportion.
For years, when this happened, I went back into the Layer Style palette and changed the effect variables so they looked good with the new image size. As you can imagine, this wasn’t the best route to take. Today, there’s a better way.
I’m going to undo that resize and bring the image back to it’s original look. Then, I’ll go back into the Image > Image Size palette and make one small change that will help out immensely.
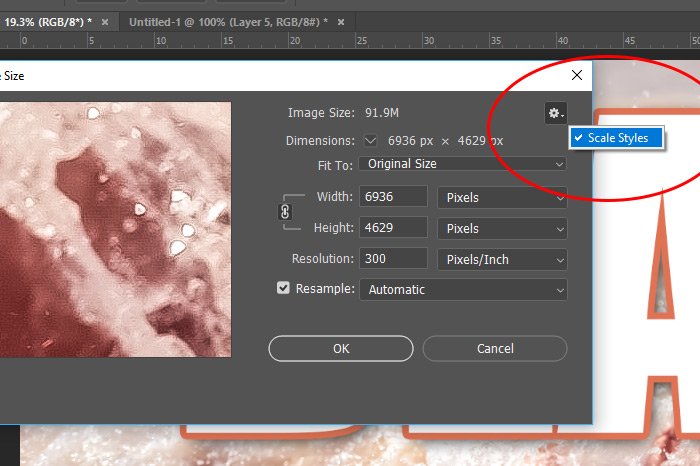
If you look at the above screenshot, you’ll see a small menu button in the upper right corner of the Image Size palette. I clicked on that button and was presented with just one option. That was to either turn the Scale Styles option on or off. Checked is on and unchecked is off. The previous example was given with the Scale Styles option turned off. If it were on, the effects would have scaled perfectly so no matter what size the image ended up, the styles would look identically to those I originally applied.
When I choose that option, a small window will appear. It’s called the Scale Layer Effects dialog.
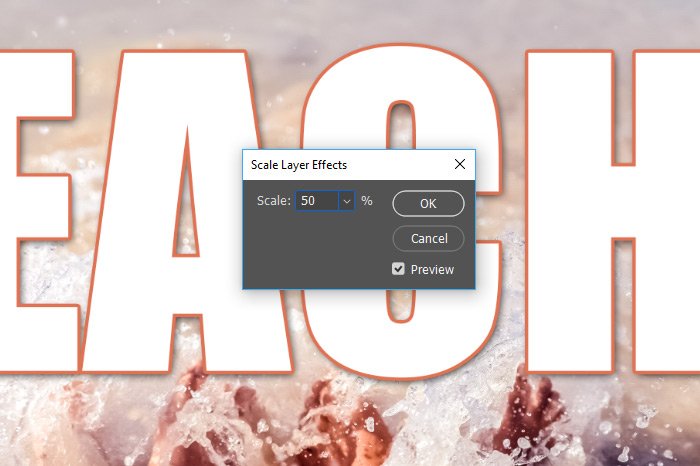
Inside of that dialog, I can type a new percentage to reduce or increase the values of the layer effects. This is a really cool option. When finished, I’ll click OK and be done with it.
The problem with this solution is that not all of us enjoy doing math as we’re working in Photoshop. The workflow should be faster than that and we shouldn’t have to stop to calculate percentages. Because of this, I’ll show you one final option to deal with this issue and this option will work with pretty much any scenario, from resizing the image to cropping to transforming. The solution is to…get ready for this…to convert the text layer into a Smart Object.
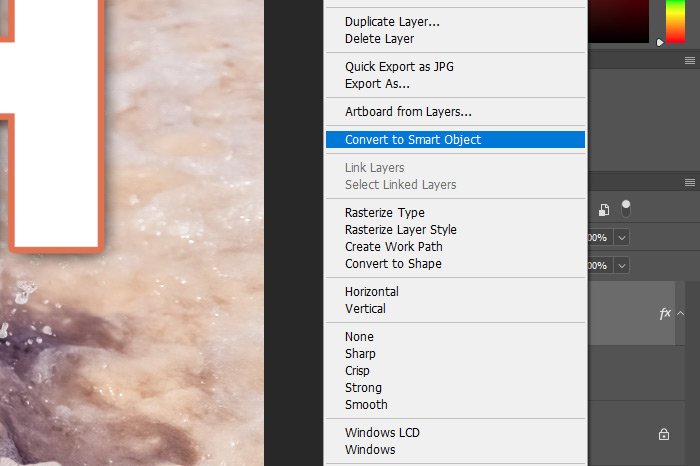
That’s right. If I head back into the Layers panel, right-click on the text layer and then choose Convert to Smart Object from the menu that appears, the effects will always stay scaled with the image, no matter what size I change it to or what method I decide to use.
How’s that for super easy?
——
I hope I clearly explained how to automatically scale layer effects and styles with an image, no matter what size the image originates or is changed to. If you have any questions or concerns regarding this post, please leave them in the comment section below. Thanks for reading!
There are a few other ways that effects can get screwed up and in today’s post, I’d like to discuss them. I’ll talk about how effects can seemingly grow and shrink so they don’t match the host object’s size any longer as well as some tips on how to deal with this dilemma. After reading today’s post, you should have a good handle on how to keep any effect you add to text and other objects matching the objects they were added to.
Demo Image
For this post, I’ll be using an image of some feet in the water at a beach. I’ll type the word BEACH out above the feet and will then apply some effects to the text. Those effects will likely be a stroke and a drop shadow. This post won’t be about how to apply those effects per se, but merely how to deal with scaling them.
Applying the Text & Effects
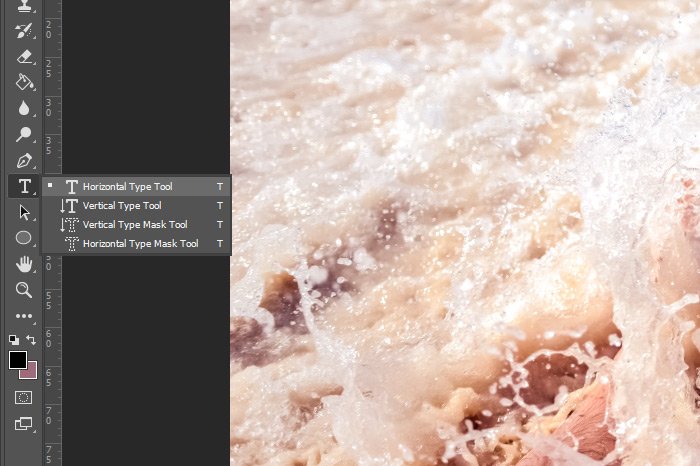
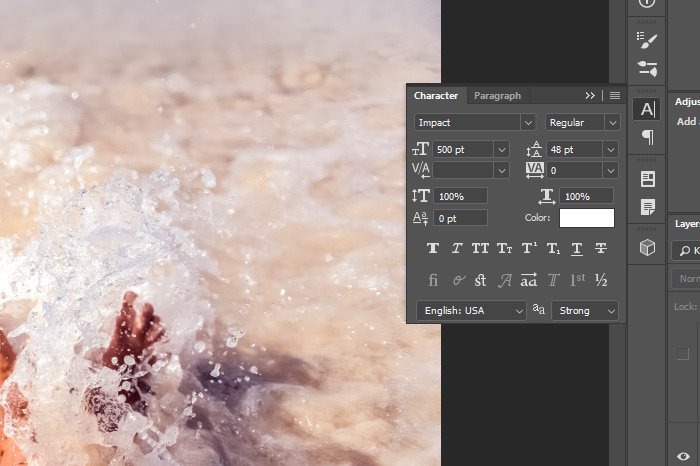
I already have the photo opened up inside of Adobe Photoshop. From here, I’ll head over to the Horizontal Type Tool, set a few variables in the Character panel and then type out the word BEACH in the image.

Let’s see how that looks.

To apply the effects, I’ll double click somewhere in the text layer in the Layers panel. This will open up the Layer Style palette.

I’ll access the Stroke and Drop Shadow areas and I’ll apply effects that I think look appropriate. Here’s the output of that.

What’s the Problem?
To start this section off, let’s take a look at the current Layers panel.
As you can see, I have a text layer with some effects applied to is as well as a background image layer. If I were to export this image just as it is, I would have no difficulties at all. Let’s suppose that I wanted to resize the image though. What if I were to resize the image so instead of width of 6936 pixels, it had a width of 700 pixels. I’ll head up to the Image > Image Size menu item and make that change right now.

Here’s the result of that change.

What happened? The shadow is huge and the stroke is even worse than the shadow. Well, I can tell you what happened right now. The effects didn’t scale with the image. The image size was reduced, but the effect variables stayed the same. That’s why the effects are so blown out of proportion.
For years, when this happened, I went back into the Layer Style palette and changed the effect variables so they looked good with the new image size. As you can imagine, this wasn’t the best route to take. Today, there’s a better way.
I’m going to undo that resize and bring the image back to it’s original look. Then, I’ll go back into the Image > Image Size palette and make one small change that will help out immensely.

If you look at the above screenshot, you’ll see a small menu button in the upper right corner of the Image Size palette. I clicked on that button and was presented with just one option. That was to either turn the Scale Styles option on or off. Checked is on and unchecked is off. The previous example was given with the Scale Styles option turned off. If it were on, the effects would have scaled perfectly so no matter what size the image ended up, the styles would look identically to those I originally applied.
Cropping & Smart Objects
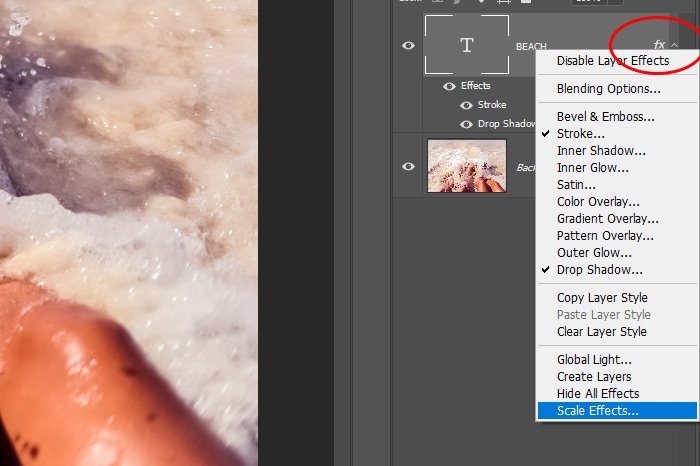
I don’t really resize images all that much. I much more frequently crop images to a preferred (reduced) dimension. The problem with cropping though is that the same blown out image style issue rears its ugly head again. And what’s worse is that the Scale Styles option that’s found in the Image Size palette doesn’t apply to cropping, or transforming for that matter. So, to counter the effects of cropping or transforming, we have two options. The first is to calculate the percentage change of the crop or transform. So let’s say I have an image that originates at 1000 pixels wide and I crop or transform it to 500 pixels wide. I reduced the width by 50%. In this case, I can right-click on the FX symbol in the text layer in the Layers panel and choose Scale Effects from the menu that appears.
When I choose that option, a small window will appear. It’s called the Scale Layer Effects dialog.

Inside of that dialog, I can type a new percentage to reduce or increase the values of the layer effects. This is a really cool option. When finished, I’ll click OK and be done with it.
The problem with this solution is that not all of us enjoy doing math as we’re working in Photoshop. The workflow should be faster than that and we shouldn’t have to stop to calculate percentages. Because of this, I’ll show you one final option to deal with this issue and this option will work with pretty much any scenario, from resizing the image to cropping to transforming. The solution is to…get ready for this…to convert the text layer into a Smart Object.
That’s right. If I head back into the Layers panel, right-click on the text layer and then choose Convert to Smart Object from the menu that appears, the effects will always stay scaled with the image, no matter what size I change it to or what method I decide to use.

How’s that for super easy?
——
I hope I clearly explained how to automatically scale layer effects and styles with an image, no matter what size the image originates or is changed to. If you have any questions or concerns regarding this post, please leave them in the comment section below. Thanks for reading!
