Cameron
Member
- Joined
- May 10, 2021
- Messages
- 108
- Reaction Score
- 3
- Points
- 23
- #1
Have you ever wondered how people get their photos to take on certain shapes? Like, how someone turns a square photograph into a circle one or even something much more complex? Well, I’m here to tell you that the process for doing something like this is so very simple. What these people are using to accomplish this small feat are called vector masks. Basically, they’re drawing shapes over their images and applying masks. That’s it. Of course, there’s a bit more that goes into it, but to get this “cutout” effect, they’re using a special type of mask.
In today’s post, I’ll walk through the process of drawing a shape, duplicating that shape and applying a vector mask to the original and the duplicates so only the area inside of the shapes continues to be shown. Anything outside the shapes will be hidden. This type of thing is helpful for graphics, brochures, business cards and so much more. The possibilities are endless.
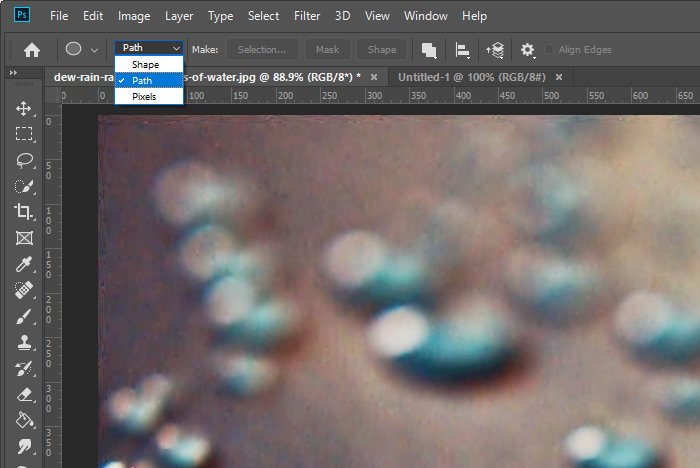
I’ll go ahead and click to select the Ellipse Tool and then, up in the options bar, I’ll select Path from the drop-down on the left. This is important. I need to make sure I’m drawing a path.
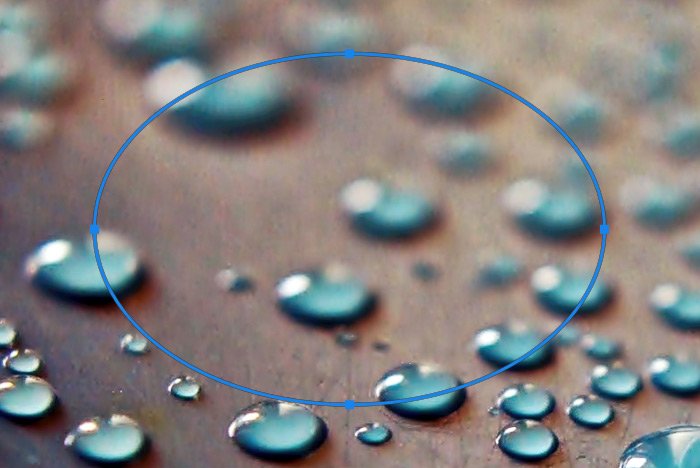
After that, I’ll click and drag to draw an oval on the image.
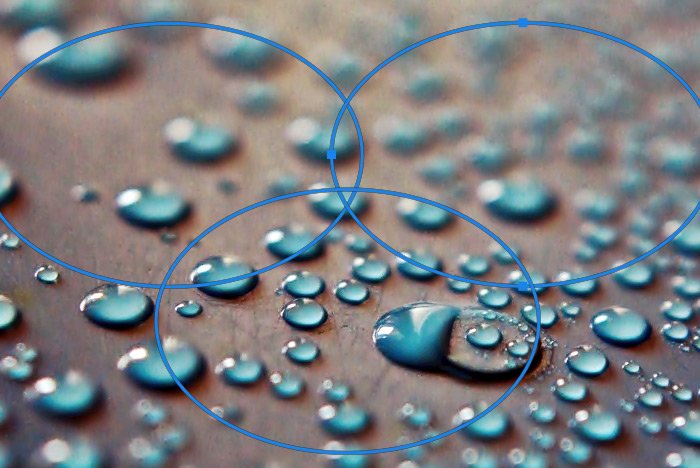
After that, I’ll hold down the Alt key on my keyboard and click and drag the path to the right. This will automatically create a duplicate of the path. Then, I’ll do the same thing once more and drag the path downward. This is what I’ll end up with.
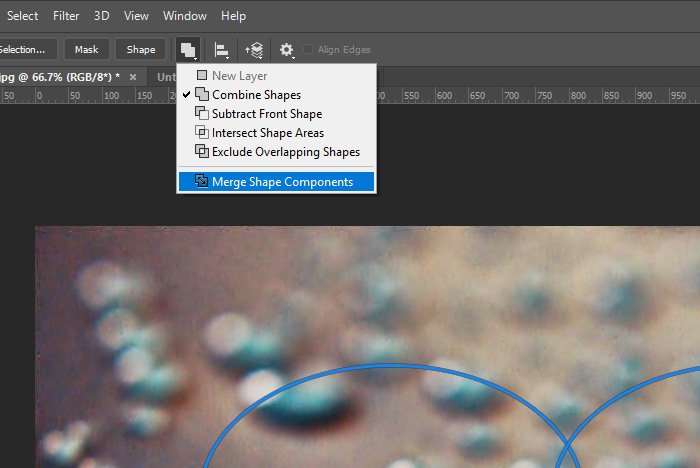
Now that I have the three ovals drawn, I think I’ll merge them all together so they make up one shape. To do this, I’ll activate the Ellipse Tool from the left toolbar again and then I’ll go up to the options bar. There, I’ll click on the Path Operations drop-down and then I’ll select the Merge Shape Components option.
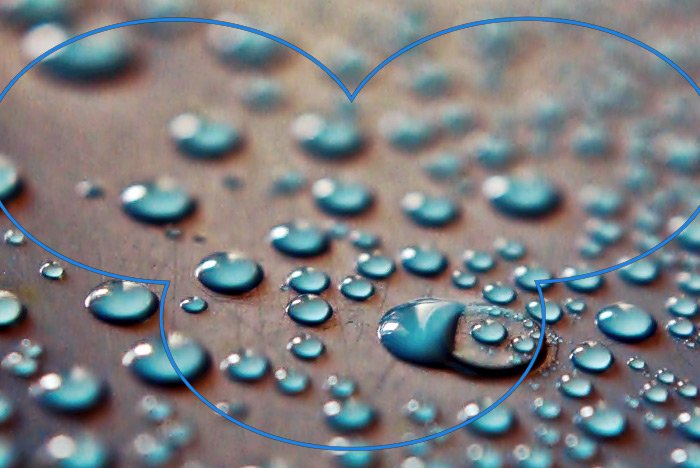
After I do that, the shapes will combine as one.
When I click that menu item, everything outside of the shape will disappear.
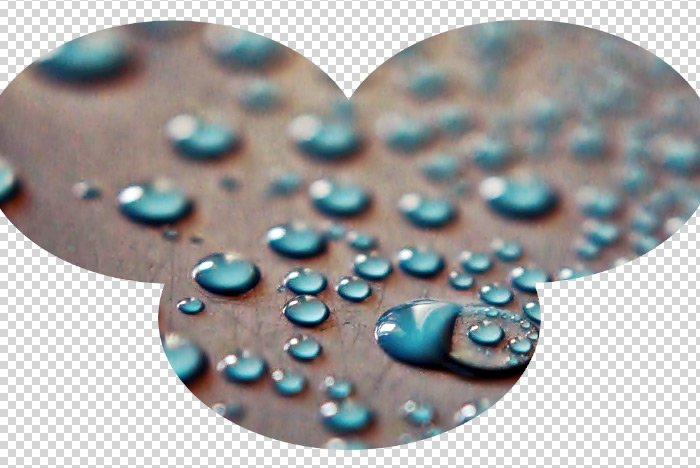
If I wanted a colored background, I can add another layer underneath the image layer and fill it with anything I’d like. But as far as applying a vector mask goes, it’s really this easy. I added a few steps along the way to keep things interesting, but those were totally optional.
I hope you got something out of this post. If you have any questions or concerns, please leave them down below in the comment area or in the Photoshop discussion board. Thanks for reading!
In today’s post, I’ll walk through the process of drawing a shape, duplicating that shape and applying a vector mask to the original and the duplicates so only the area inside of the shapes continues to be shown. Anything outside the shapes will be hidden. This type of thing is helpful for graphics, brochures, business cards and so much more. The possibilities are endless.
Original Photo
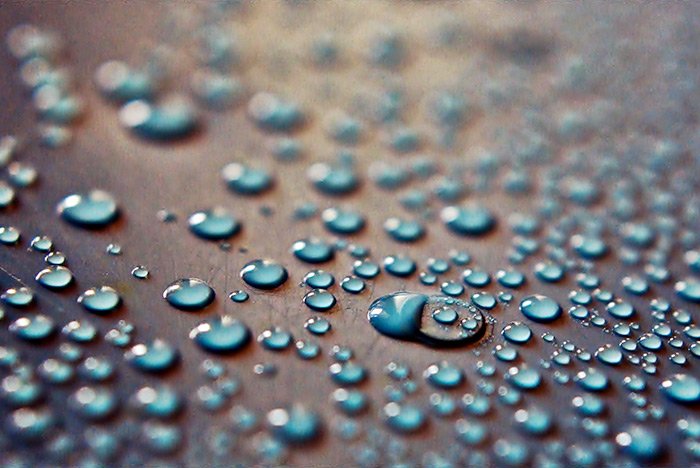
I could have used any image for this post, but I decided to go with an appealing pattern of water droplets.
Drawing a Path
Okay, just so you know, I can draw out any type of shape here. I can use the Rectangle Tool, Ellipse Tool, Custom Shape Tool or anything that has the capability of drawing paths. For this tutorial, I’ll use the Ellipse Tool because that’s pretty easy to work with. If you’d like to know how to use these other shape tools, including the Custom Shape Tool, please use the search box at the top of this site to search for what you’re interested in. I’ve written extensively on the many different tools.I’ll go ahead and click to select the Ellipse Tool and then, up in the options bar, I’ll select Path from the drop-down on the left. This is important. I need to make sure I’m drawing a path.

After that, I’ll click and drag to draw an oval on the image.

Duplicating a Path
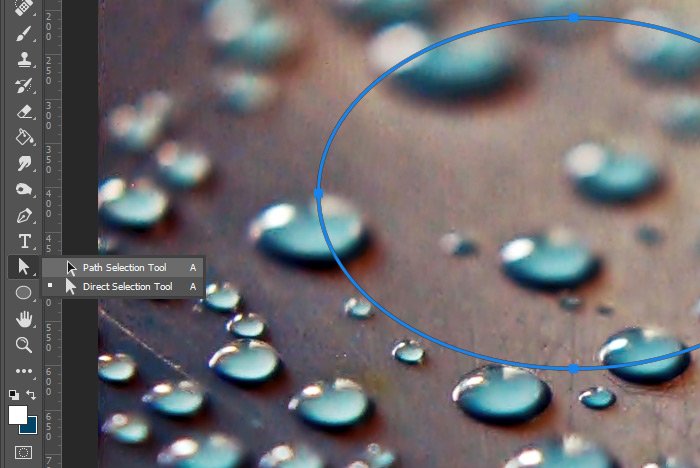
I could have finished up at the end of the previous step, but I decided to jazz things up a bit. I’m going to duplicate this shape twice until I have something that looks like Mickey Mouse ears. To duplicate the path, I’ll first select the Path Selection Tool.
After that, I’ll hold down the Alt key on my keyboard and click and drag the path to the right. This will automatically create a duplicate of the path. Then, I’ll do the same thing once more and drag the path downward. This is what I’ll end up with.

Merging the Shapes
Remember, you can do what I’m doing here with any type of shape. I’m just working with what’s easiest for this demonstration. You can even draw out any type of shape you want by hand. The sky is the limit.Now that I have the three ovals drawn, I think I’ll merge them all together so they make up one shape. To do this, I’ll activate the Ellipse Tool from the left toolbar again and then I’ll go up to the options bar. There, I’ll click on the Path Operations drop-down and then I’ll select the Merge Shape Components option.

After I do that, the shapes will combine as one.

Applying the Vector Mask
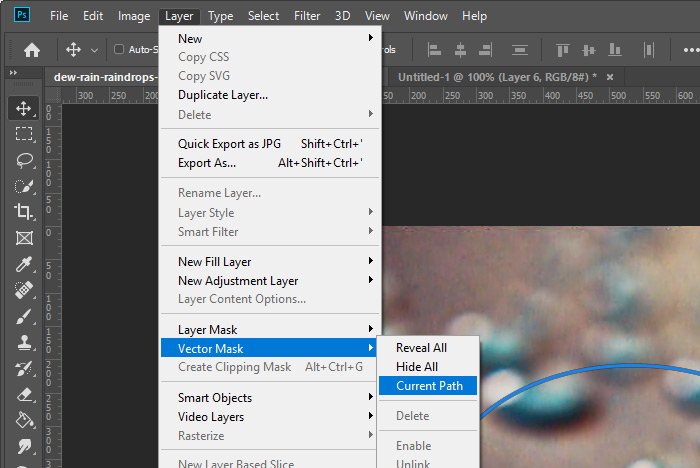
At this point, I can mask out anything other than the shape. To do this, I’ll go to the Layer > Vector Mask > Current Path option and click.
When I click that menu item, everything outside of the shape will disappear.

If I wanted a colored background, I can add another layer underneath the image layer and fill it with anything I’d like. But as far as applying a vector mask goes, it’s really this easy. I added a few steps along the way to keep things interesting, but those were totally optional.
I hope you got something out of this post. If you have any questions or concerns, please leave them down below in the comment area or in the Photoshop discussion board. Thanks for reading!
