15Katey
Member
- Joined
- May 10, 2021
- Messages
- 130
- Reaction Score
- 0
- Points
- 23
- #1
I love writing this post because what I’m about to cover is a very popularly searched topic online. Many, many photographers and enthusiasts need to know how to smooth skin in their favorite photo editors. In just a few moments, I’ll demonstrate exactly how to go about doing it.
Before I get into that though, I want to talk about the Clarity slider that’s available in both Adobe Camera Raw and Lightroom. In the most basic sense, Clarity adds mid-tone contrast to an image, which, in turn, makes the image look sharper. The cool thing is, in both of these applications, Clarity begins at a zero value, meaning it can go negative or positive. If you push the slider to the right, you add contrast to the photo and if you push it to the left, you reduce it. When it comes to smoothing skin, reducing clarity is what we’re after.
In today’s post, I’ll be using two example photos to demonstrate how someone can go about softening the skin of a subject in a photo using Adobe Camera Raw. The first photo will be an all-around “how-to,” while the second photo will be used as more of an up-close Clarity comparison. You’ll see – it’s going to be great.
Now, I want to warn you about something – using the Clarity slider to alter how someone looks is a very minor edit. This technique doesn’t remove blemishes or spots. What it does do is reduce the visibility of pores in the skin as well as some other small imperfections. You’ll see this much more clearly in the second demo photo I use below.
Enhancing Photos with the Adjustment Brush in Adobe Camera Raw
In the post, I explain how to select the tool and then enhance different areas of a photograph using different zones. After that, I demonstrated how to activate the Mask view over all the adjustments so the changes are more visible. Today’s post is actually quite similar to that previous post in that similar adjustments will be made. This post merely refines what I’ll be working on and limiting it to one topic.
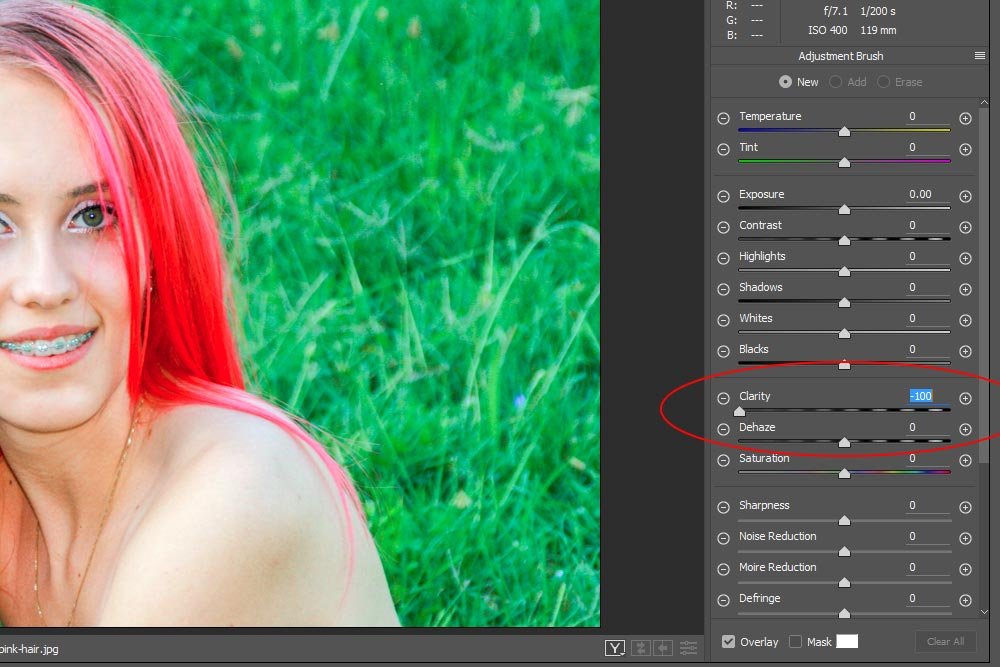
I’ll select the Adjustment Brush and then move the slider I just talked about. Next, I’ll have to decide which of two methods are best for this particular photo:
1. Paint the entire face at once and then erase any areas I don’t want softened, such as the eyes, teeth, lips, eyebrows, etc…
2. Carefully paint only the skin I want softened, being sure to avoid the facial features I don’t want sharpened.
In the case of this photo, I think painting everything and then backtracking to erase the areas I don’t want softened is the best route to take. I’m saying this because this model’s face isn’t too up-close and it would be a challenge to paint carefully. In the next photo, I’ll show how you can spot soften.
I’ll size the brush accordingly, add some feather to the edges and brush all the visible skin.
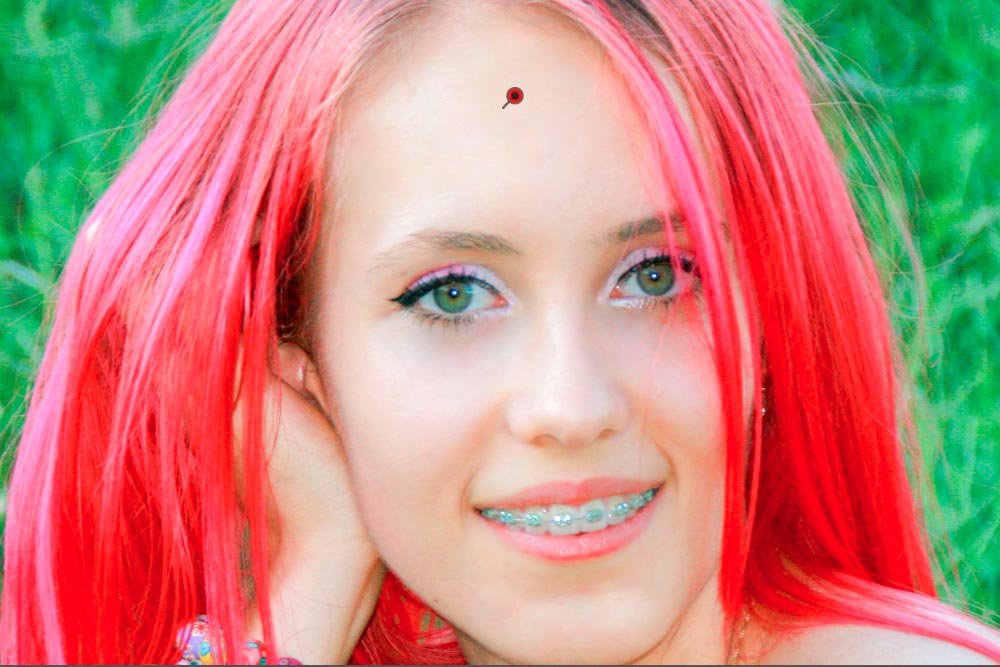
As you can see, this is some fairly smooth skin. What you can’t see is that everything else on the face is smooth as well. In order to keep the eyes and the rest sharp and clear, I’ll erase those areas. I’ll click on the Erase radio button that’s located at the top of the Adjustment Brush panel, resize my brush so it’s a bit smaller and then erase what I need erased. After that, I’ll click in the check box that says Mask at the bottom of the panel so I can see what I’ve done more clearly.
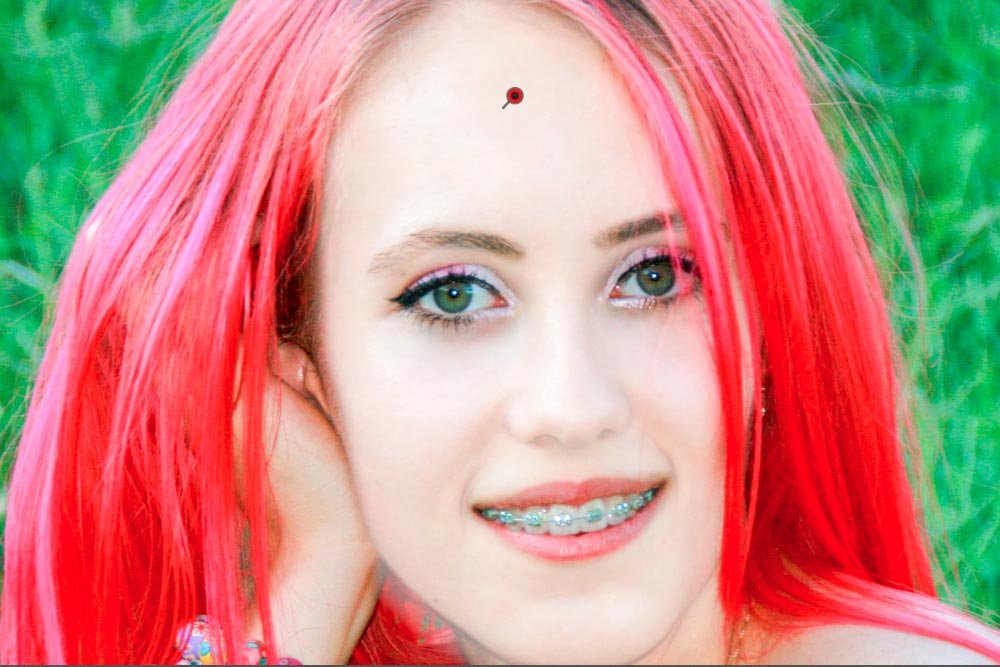
I’m not sure if you can see it or not, but the mask is just a white, hazy fog. Now, for the final photo. I’ll just uncheck the Mask box.

This is the softened photo.
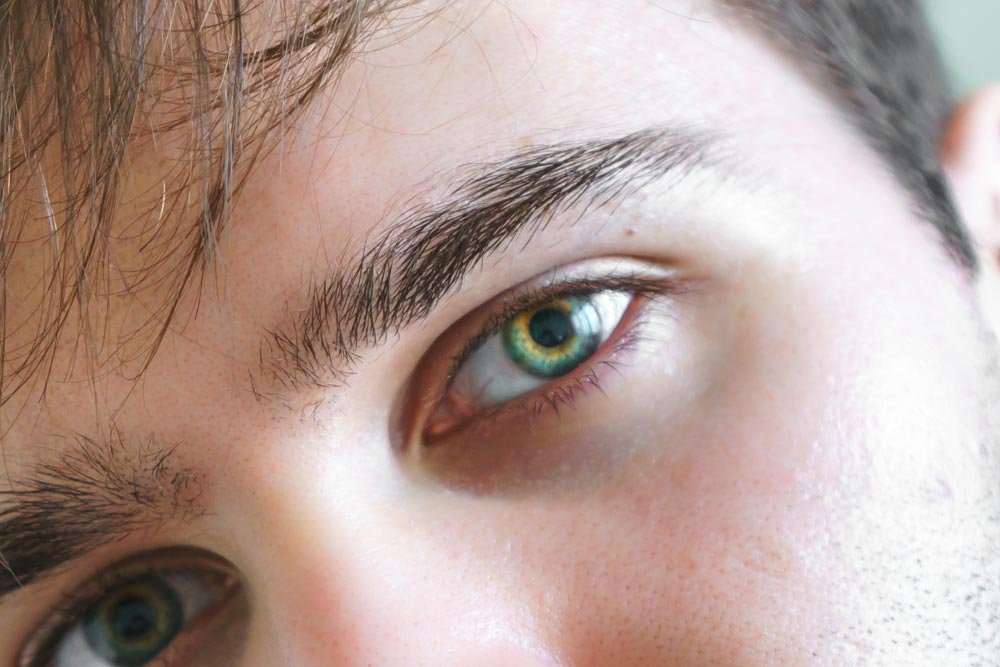
This is the original untouched photo.
This is the final photo – the one with the slider pushed all the way to the right.
By looking at these three photos, I’m confident you can see the value of softening someone’s skin in a photo. This technique is perfect for portrait, wedding, engagement and senior photos.
If you have any questions or comments, please leave them below. Thanks!
Before I get into that though, I want to talk about the Clarity slider that’s available in both Adobe Camera Raw and Lightroom. In the most basic sense, Clarity adds mid-tone contrast to an image, which, in turn, makes the image look sharper. The cool thing is, in both of these applications, Clarity begins at a zero value, meaning it can go negative or positive. If you push the slider to the right, you add contrast to the photo and if you push it to the left, you reduce it. When it comes to smoothing skin, reducing clarity is what we’re after.
In today’s post, I’ll be using two example photos to demonstrate how someone can go about softening the skin of a subject in a photo using Adobe Camera Raw. The first photo will be an all-around “how-to,” while the second photo will be used as more of an up-close Clarity comparison. You’ll see – it’s going to be great.
Now, I want to warn you about something – using the Clarity slider to alter how someone looks is a very minor edit. This technique doesn’t remove blemishes or spots. What it does do is reduce the visibility of pores in the skin as well as some other small imperfections. You’ll see this much more clearly in the second demo photo I use below.
The Model
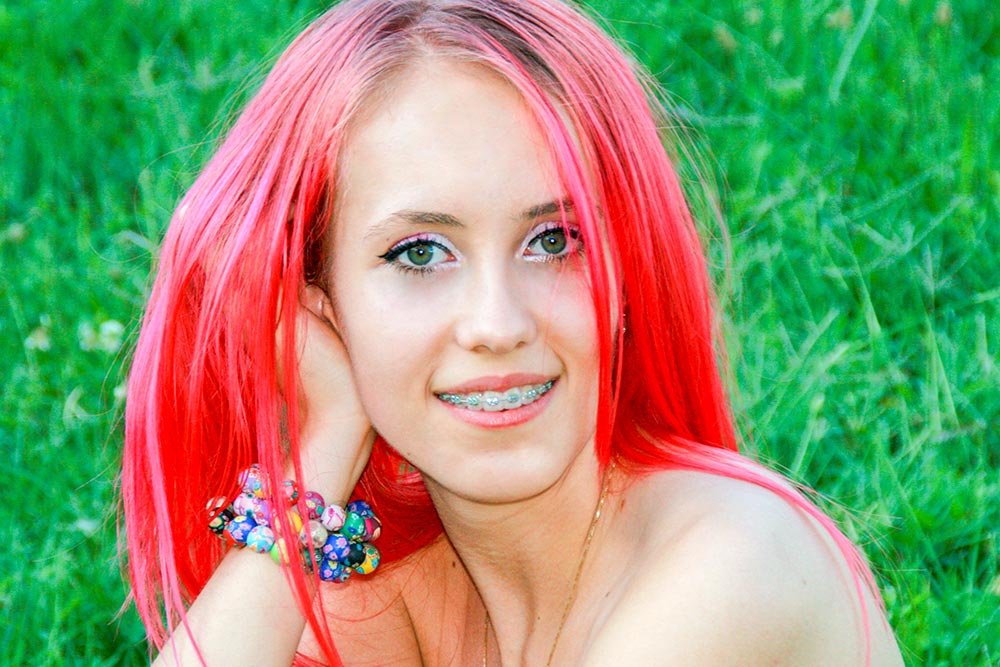
While there’s not much that’s visibly wrong with this model’s skin, I felt that the photo would be helpful later on when I show you the Mask view. In general, I think you’ll get a good idea of what’s happening by using this photo.
The Adjustment Brush
A while back, I wrote a post that talked all about the Adjustment Brush tool in Camera Raw. If you haven’t read it yet, I suggest you do because I jam packed it with tons of good stuff.Enhancing Photos with the Adjustment Brush in Adobe Camera Raw
In the post, I explain how to select the tool and then enhance different areas of a photograph using different zones. After that, I demonstrated how to activate the Mask view over all the adjustments so the changes are more visible. Today’s post is actually quite similar to that previous post in that similar adjustments will be made. This post merely refines what I’ll be working on and limiting it to one topic.
Softening the Skin
To soften skin in a photo, I only need to push one slider to the left. That slider is the one I mentioned earlier – the Clarity slider. Pushing it left will reduce the mid-tone contrast of any area I touch with the brush.
I’ll select the Adjustment Brush and then move the slider I just talked about. Next, I’ll have to decide which of two methods are best for this particular photo:
1. Paint the entire face at once and then erase any areas I don’t want softened, such as the eyes, teeth, lips, eyebrows, etc…
2. Carefully paint only the skin I want softened, being sure to avoid the facial features I don’t want sharpened.
In the case of this photo, I think painting everything and then backtracking to erase the areas I don’t want softened is the best route to take. I’m saying this because this model’s face isn’t too up-close and it would be a challenge to paint carefully. In the next photo, I’ll show how you can spot soften.
I’ll size the brush accordingly, add some feather to the edges and brush all the visible skin.

As you can see, this is some fairly smooth skin. What you can’t see is that everything else on the face is smooth as well. In order to keep the eyes and the rest sharp and clear, I’ll erase those areas. I’ll click on the Erase radio button that’s located at the top of the Adjustment Brush panel, resize my brush so it’s a bit smaller and then erase what I need erased. After that, I’ll click in the check box that says Mask at the bottom of the panel so I can see what I’ve done more clearly.

I’m not sure if you can see it or not, but the mask is just a white, hazy fog. Now, for the final photo. I’ll just uncheck the Mask box.

An Up-Close Look
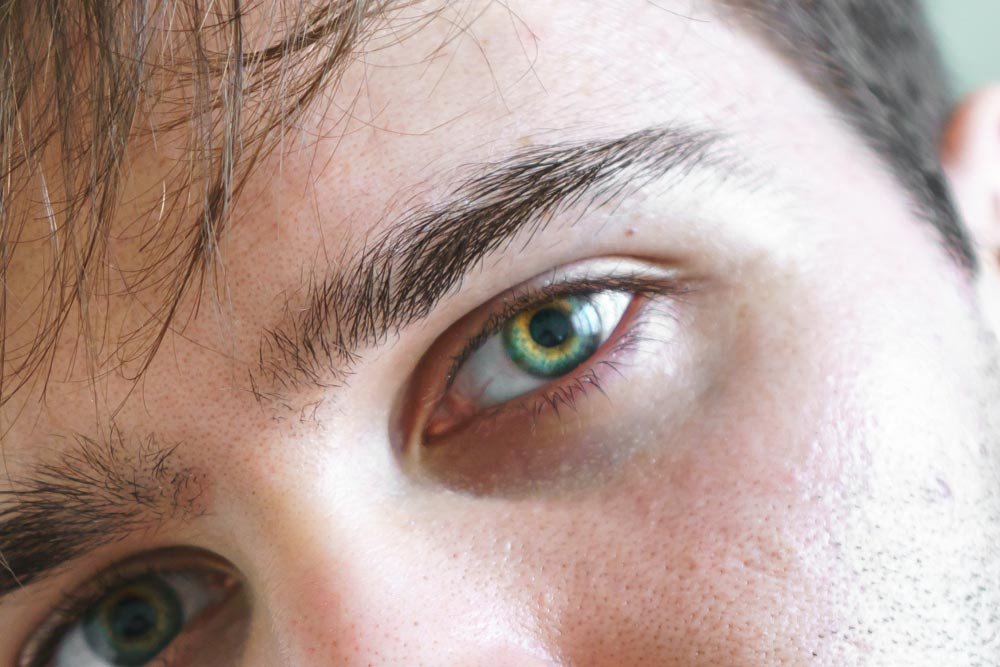
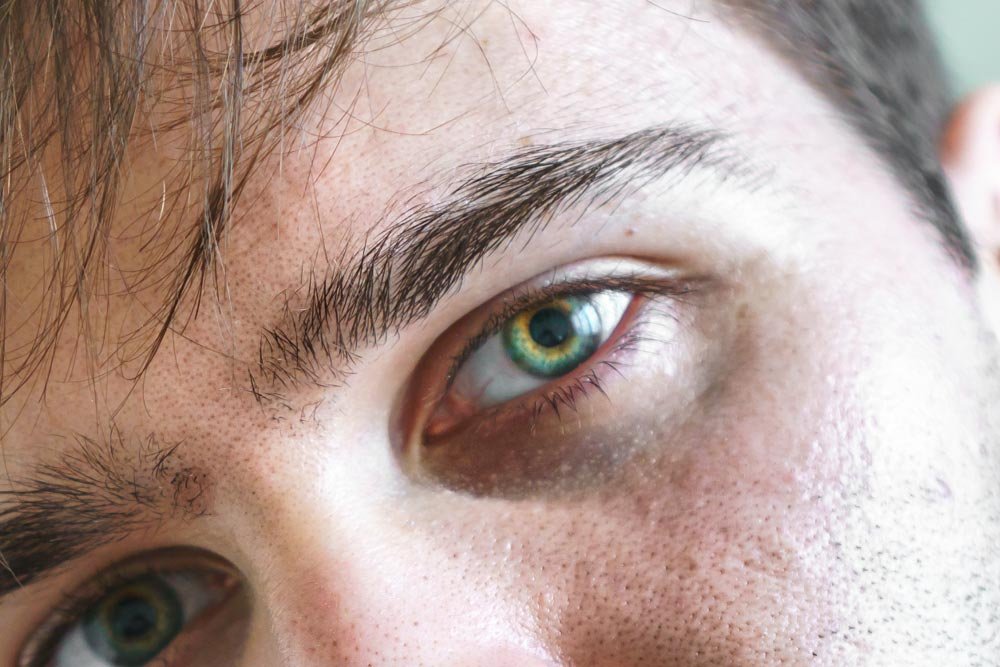
Now that I’ve got the instructions out of the way, I’d like to give you a comparison using another photo. This photo is a much more up-close shot of someone. I’ll give you three versions; the first will be with softened skin using the exact same method I just outlined above, the second will be the original photo and the third will be the same as the first, but instead of pushing the Clarity slider all the way to the left, I’ll push it all the way to the right. This will increase mid-tone contrast. For this section, I’m only interested in you seeing the differences between settings of the Clarity slider.This is the softened photo.

This is the original untouched photo.

This is the final photo – the one with the slider pushed all the way to the right.

By looking at these three photos, I’m confident you can see the value of softening someone’s skin in a photo. This technique is perfect for portrait, wedding, engagement and senior photos.
If you have any questions or comments, please leave them below. Thanks!
