CaptainDan
Member
- Joined
- May 9, 2021
- Messages
- 113
- Reaction Score
- 0
- Points
- 16
- #1
I’ve been thinking a lot about website marketing lately. I don’t do much of it because I’m so busy writing. Currently, between this site and my other one, I produce about five posts per week. If you’re not in the blogging world, let me tell you – that’s sort of a lot. I know folks who write one post per week or even one per month. Conversely, I know people who post more than once per day, which makes me very jealous. I wish I had that sort of tenacity. Five is good though and I’m happy with that number – for now.
I feel as though the posts I write are informative. I think I share my personality as well as some good information in each and every one of them. It’s a shame that the content I manage doesn’t just magically fly out into the interland by itself, because I think many would benefit from it. Alas, I must market, which is, if you haven’t noticed, not one of my strong suits. At least it’s easier to accomplish today than it’s ever been.
Currently, I have a few social media profiles active for this blog. They are on Facebook, Twitter, Pinterest, Google+ and now, just today, Instagram. Feel free to follow me on any and all of them. Hint, hint.
It’s taken a while for me to jump into the social media pond. I’ve been blogging since 2006 and I’m not from the school of being “popular.” The way things used to work is that I would write something interesting and helpful, the search engines would find it and index it and people would visit my site through them. Although that still happens, it takes a lot longer these days and the competition is fierce. While I’m confident in my posts being helpful and having them indexed, I’d like to take advantage of every marketing channel I have at my disposal. And to be honest, it would be rather foolish of me not to share content with those who may be interested on their turf, not mine. They’re on social media, so that’s where I should be too.
As I just mentioned, I set up an Instagram account this morning.

As I’ve done with my other accounts, I’ll be posting the leading photos for each post I write. When I came up with this idea, I thought it was great. That was…until I ran into a bit of a snag.
Apparently, Instagram was created as a mobile app. The developers worked around the premise that if you had a smartphone in your pocket, it would be super easy to snap a photo of something and zoom that photo off to Instagram. And in theory, that works perfectly for the everyday user. The thing is, I’m not an everyday user and I don’t take many photos with cell phones. The most I do is photograph our gardens in our back yard with my Samsung tablet to send out to family members. But those photos aren’t what I’d like to share on Instagram. I’d like to actually upload images from my desktop computer that represent the blog posts I produce.
It took a few moments to gather my thoughts after I read the following statement on Instagram’s help page:
Note: You can’t take or upload photos from a desktop computer.
I told myself that couldn’t be true. Who in the world creates something like this? Honestly, there are still folks out there who use computers, whether they be Windows users or Mac users. That’s a huge market that they’re making things difficult for. I’m not sure of the reason, but I think it’s silly.
Anyway, I discovered a method that makes it extremely simple to upload photos or images from your desktop computer to Instagram and I thought I’d share it with you. It’s through an app called Deskgram.
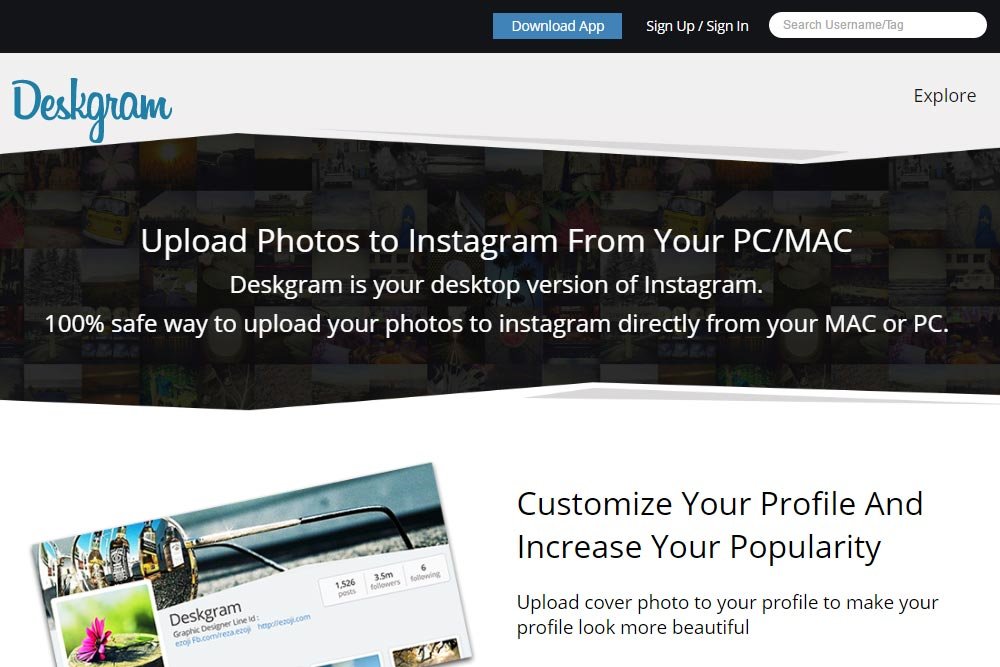
This tiny app basically gives you the power to log right into your Instagram account and manage it from your computer. It’s genius. Let’s go over the steps of what’s necessary to get rolling with this. It’s really easy.
First, you’ll need to visit Deskgram and download their app. After you download it (I downloaded the .EXE file because it uses an auto-installer), you’ll need to install it. Simply double-click on the installer icon and off you go. Follow the directions and, when finished, you should see a shortcut on your desktop. I deleted that and created a shortcut from my Start menu.
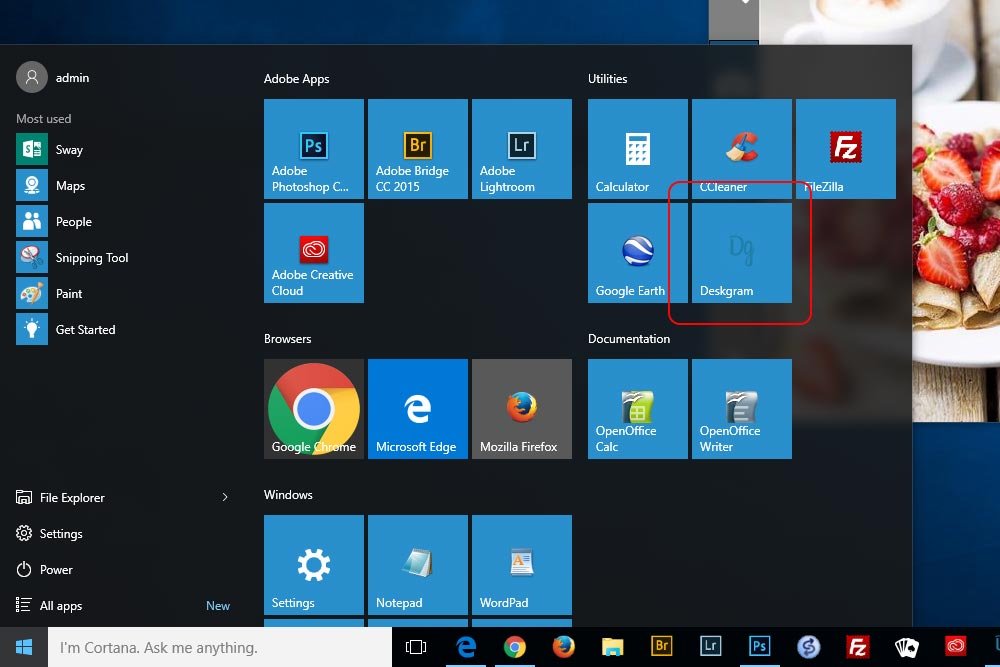
If you’d like to know how to create this shortcut, please read this post:
How to Customize the Start Menu in Windows 10
Anyway, after you have the shortcut in working order, go ahead and double-click it to launch the program. When you do, you’ll be presented with the login dialog box.
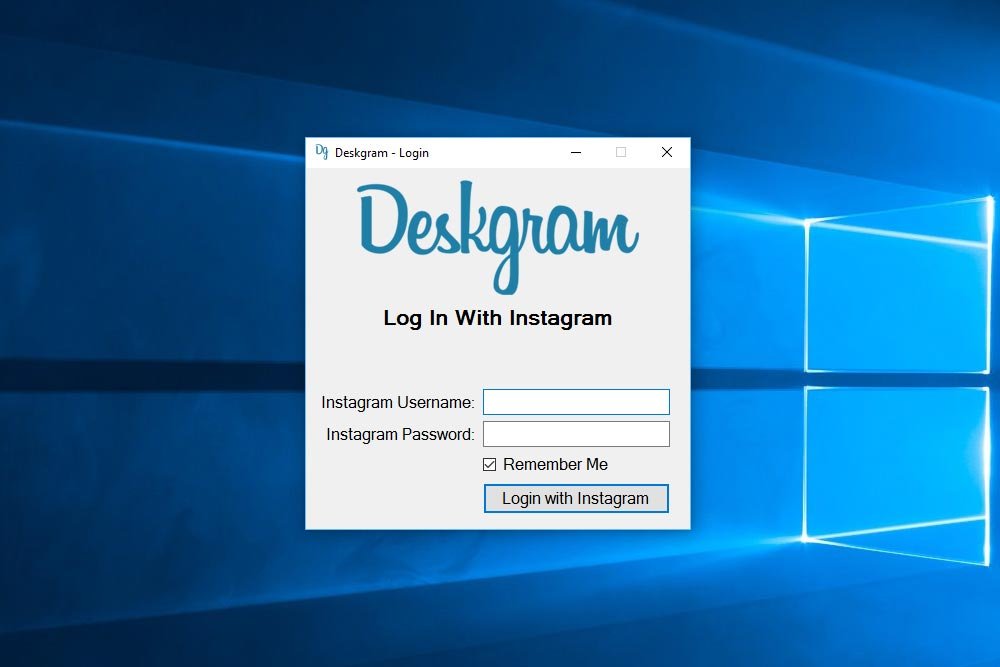
Simply log in with your Instagram credentials, click the Login with Instagram button and when that’s done, you should see your start screen.
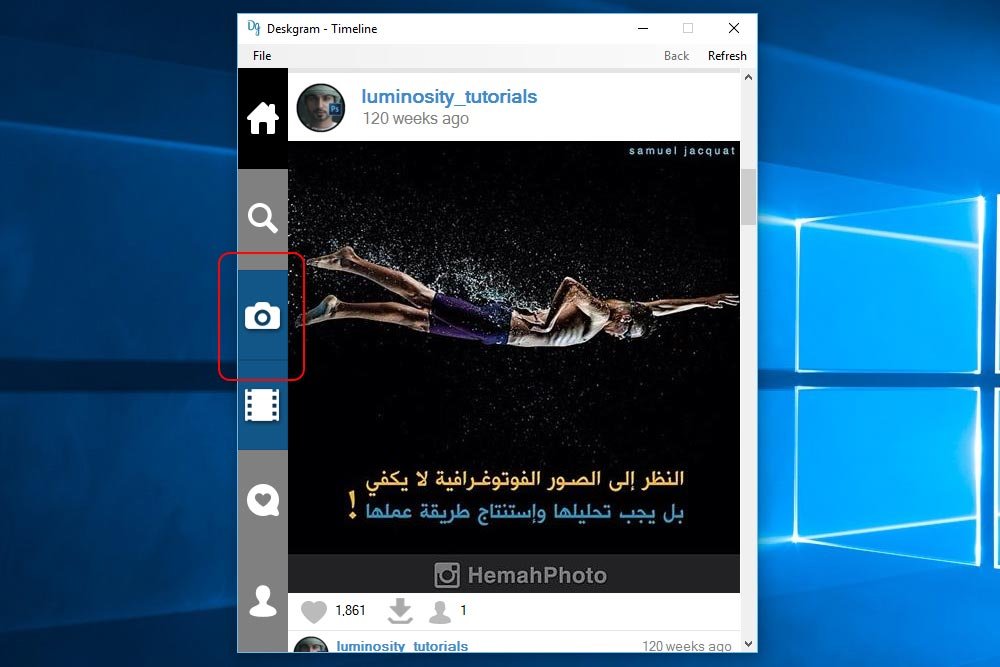
Click the Upload Photo icon (outlined above) and you’ll see another window. This time, you just drag your photo into the box at the center of the window or click the center box to browse your computer for the photo.
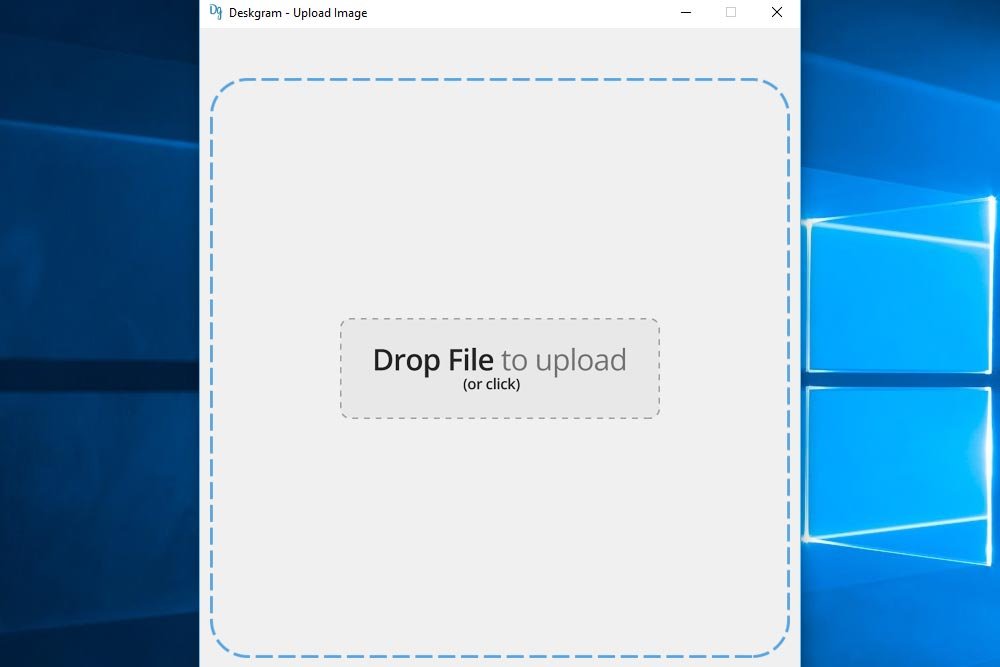
Once the photo is selected and uploaded, it will appear in the window.
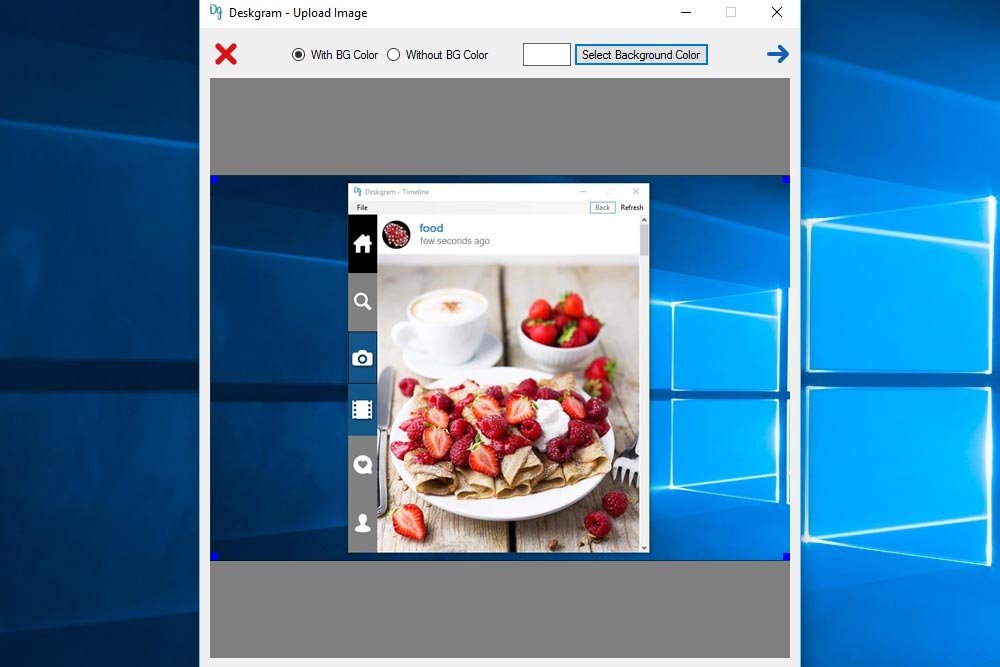
Yes, I’m uploading the leading image for this post.
When the picture appears in this window, there will be a “resizer” overlaying it. You can grab the corners of this resizer to dictate the visible areas of the image after it’s applied to your Instagram account. In my case, I would like as much visible as possible, so I dragged the corners to show everything. When finished sizing the image, click the blue arrow in the top right corner of the window. When you do this, the next screen will appear.
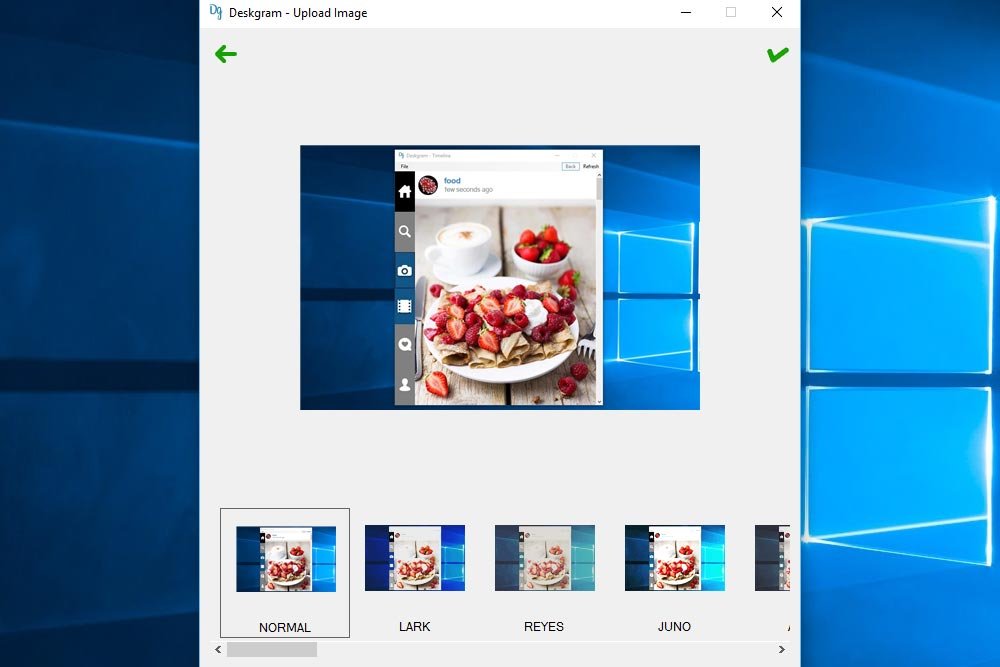
On this screen, you can select an effect for the photo, if desired. I’m not a fancy man, so I didn’t choose anything other than Normal. After this, click on the green check box at the top right of the window to bring you to the Caption screen.
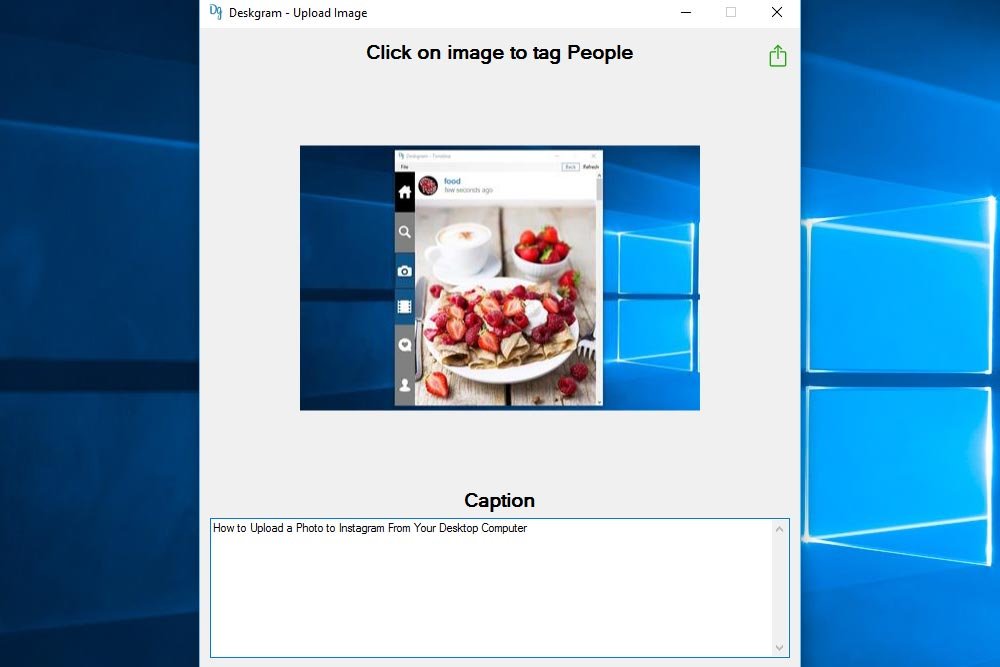
Since I’m uploading an image for this post, I merely filled in the post title. When done with this, I clicked the small Upload arrow in the upper right corner of the window to complete the process. When I do that, a small box appears that tells me my image is being uploaded. After a few seconds, it will complete and I’ll need to X out of the box to close it. That’s it!
Now, if I visit my Instagram page and refresh it, I’ll see the image I just uploaded. And if I click on that image, it’ll pop up to show the entire thing.
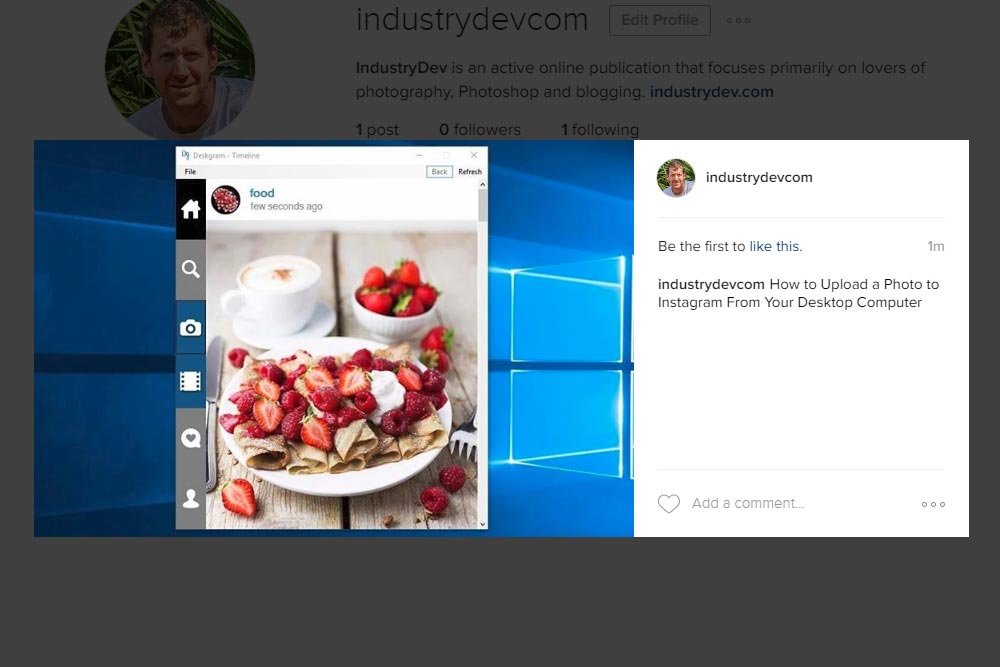
And that’s the entire process. Do you have other methods to upload pictures from your desktop computer to your Instagram account? If so, please share them in the comment section below. Thanks!
——
UPDATE: Apparently, the software I recommended in this post only lets you use it for a specific period of time before it stops functioning and asks you to pay for the premium or pro edition. I don’t recommend using it anymore. I now have a new method for uploading to Instagram:
1. Post your photo, description and hashtags to Google+ via your desktop.
2. From a smart phone or tablet, access your Google+ account and download the photo to your device.
3. In Google+ edit your post and copy all text to your device clipboard.
4. Access your Instagram account and use the image from your gallery to begin your post.
5. Then, paste the text from your clipboard and save your post to Instagram.
