JodyBuchanan
Member
- Joined
- May 10, 2021
- Messages
- 138
- Reaction Score
- 0
- Points
- 21
- #1
In my last post, I talked about how to best remove noise from photos using Adobe Camera Raw. In today’s post, I’m going to follow up with a discussion that covers how to best sharpen photos in the same application. Both of these tasks are quite similar to one another, so if you haven’t read my previous post, you may want to do that to get a handle on what’s going on. In reality though, both of these features somewhat stand on their own, so it’s not critical that you know about both. I just figured that I wrote it, so you may as well get some benefit from it.
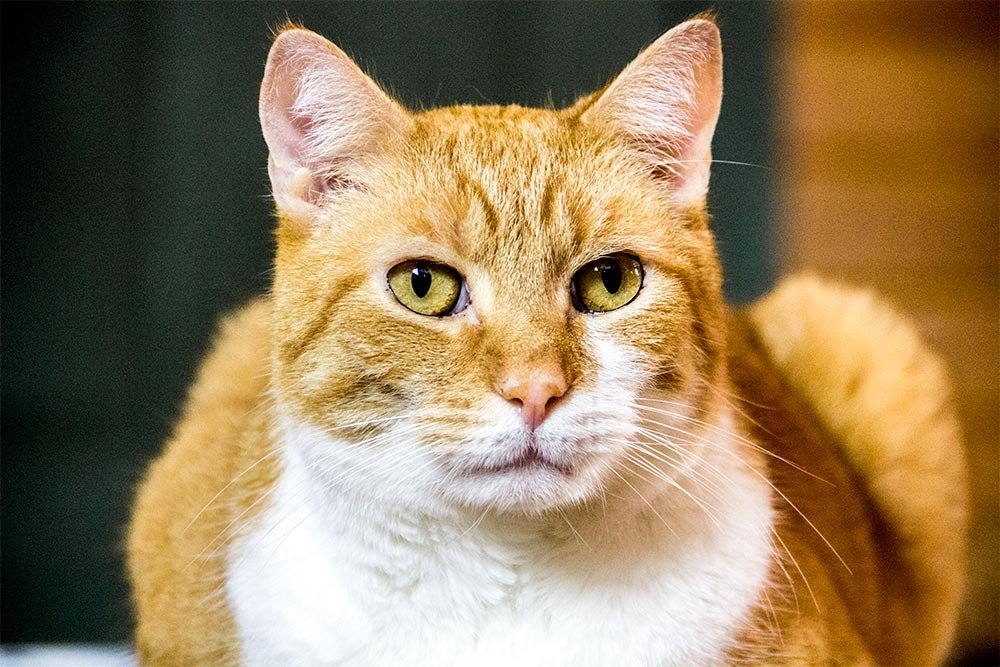
I think this image will be perfect for this post because there are open areas as well as very detailed ones. I think the sharpening aspects I demonstrate will show clearly.
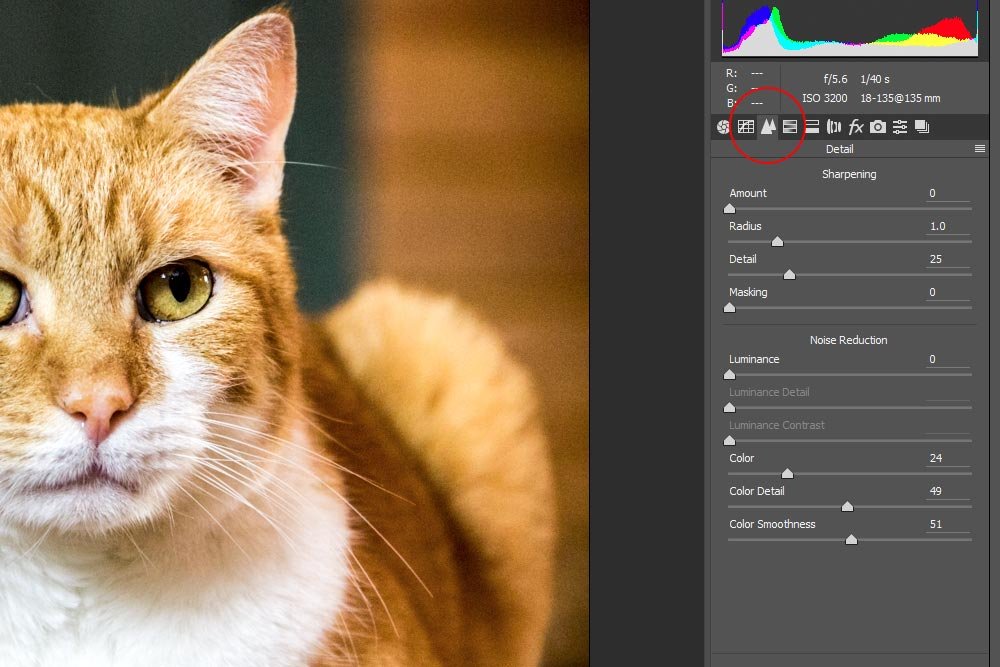
Now that I’m in the right panel, I’ll focus only on the top section that’s titled Sharpening.
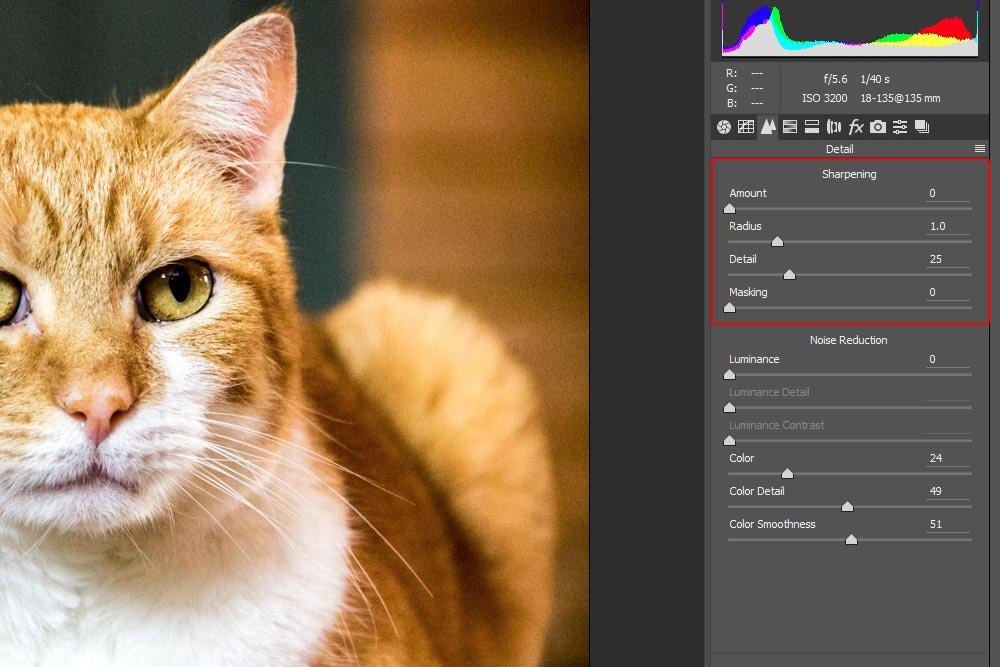
I’m going to go about this post the same way I went about the noise reduction one. I’ll explain what each of the four sliders does and then offer an extreme example of what the photo looks like up close when I sharpen way too much. First, let’s tackle some definitions.
If you look inside the Sharpening area of the Detail panel, you’ll see four slides. They are Amount, Radius, Detail and Masking. I’ll go over what each means next.
Before I do that though, I’ll make sure to zoom into 100% so I can see any changes I make more clearly. If you look at the bottom of the Detail panel, there’s even a reminder for that. It says, “For a more accurate preview, zoom the preview size to 100% or larger when adjusting the controls in this panel.”
Now, let’s get to those definitions.
Amount: This is the primary slider and the one I generally use when I’m sharpening my photos. In the most basic sense, it adjusts the definition of edges in a photo. To increase the amount of sharpening, push the slider to the right. To decrease it, push the slider to the left. If you push the slider all the way to the left, you’ll turn this feature off in its entirety. As with noise reduction, there are risks associated with this slider. If you increase the value too much, you may increase the definition and noticeability of the noise itself. If you prefer cleaner images, you may want to keep this feature set to a lower value.
The Amount slider locates pixels that surround the specific pixel that’s being sharpened and contrasts them. This contrast depends on the threshold you set.
Radius: This slider controls the size of the details that are sharpened in your photo. If your photos are very finely detailed, you would generally keep this slider pushed to the left. If you have a less detailed photo, you can push this slider to the right. If you go too far to the right, you may end up with weird looking results, like the cartoony ones I showed you in the noise reduction post.
Detail: This slider controls how the high-frequency information in a photo is adjusted. It also controls how the sharpening engine in Camera Raw deals with edges in an image. To keep areas of a photo a bit more tame and smoother looking, keep this slider to the left. To make background and more detailed areas look much more accentuated, push this slider to the right.
Masking: This slider controls what is actually sharpened in the photo. If you have the slider turned off in the leftmost position, the entire image will be sharpened evenly across the board. The more you push this slider to the right, the more the sharpening will be limited to areas near edges. Again, if you have noise in your photo, the grains in the image may be considered edges, so be careful.
Quick Tip: If you hold down the Option (Mac) or the Alt (Windows) key while clicking and pushing any of these four sliders, you’ll see the photo in a different view. For example, if you do this and then click on the Amount slider, the image will turn grayscale. If you do this with the Masking slider, the photo will turn all white when the slider is all the way to the left and get more black around the edges in the photo as the slider is pushed to the right. This will need experimentation as well, so grab a photo and start playing around with this section.
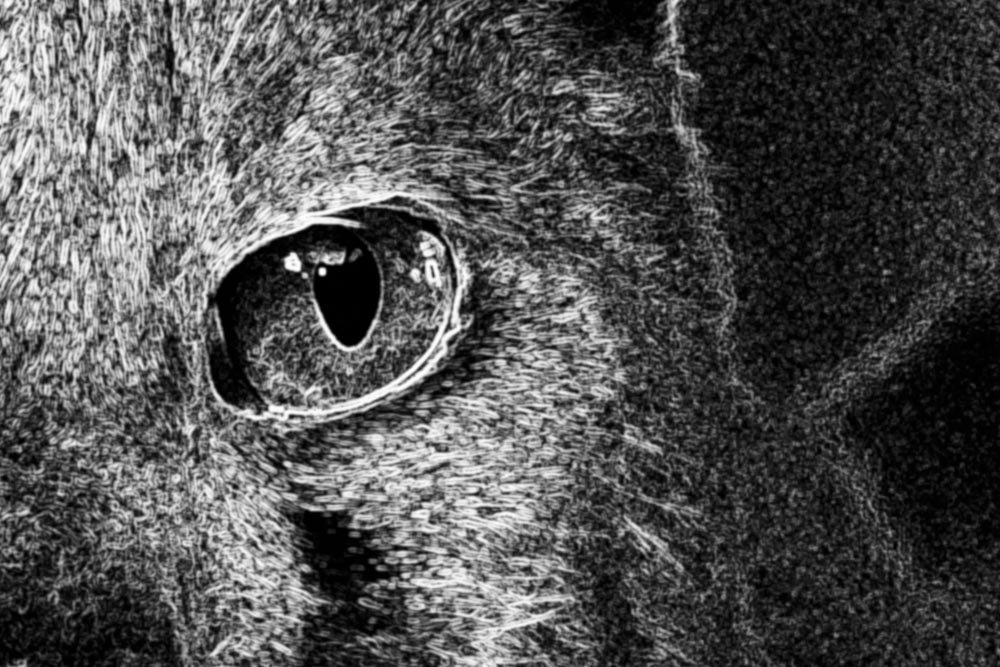
If you look at the photo closely (right click and open in new tab for a larger view), you’ll notice that the more the photo was sharpened, the worse the noise in the background got. At the same time, the fur on my cat’s face looks better. This is why I say there’s a trade off when using these tools. You can easily make things look worse.
In general, when I’m working on a photo, I’ll push the Amount slider in the Sharpening section to the 100% position and the Luminance slider in the Noise Reduction section to 25%. I’ve found a good balance there for many of my photos.
I hope I gave you a good background for how to go about sharpening a photo while using Adobe Camera Raw. If you have any questions or concerns, please leave them in the comment section below. Thanks for reading!
Original Photo
For today’s post, I’ll be using a photo of my cat. I just took this picture last week, so it’s very current. I actually should have used this photo for my last post because it’s got tons of noise in it, so I may just have to save it for later use in another post on the topic.
I think this image will be perfect for this post because there are open areas as well as very detailed ones. I think the sharpening aspects I demonstrate will show clearly.
Sharpening the Photo
I’ve already gone ahead and edited the photo in the Basic panel for the reasons I outlined in this post. Since that’s finished, I can head directly into the Detail panel. I’ll do that by clicking on the Detail tab inside of Camera Raw.
Now that I’m in the right panel, I’ll focus only on the top section that’s titled Sharpening.

I’m going to go about this post the same way I went about the noise reduction one. I’ll explain what each of the four sliders does and then offer an extreme example of what the photo looks like up close when I sharpen way too much. First, let’s tackle some definitions.
If you look inside the Sharpening area of the Detail panel, you’ll see four slides. They are Amount, Radius, Detail and Masking. I’ll go over what each means next.
Before I do that though, I’ll make sure to zoom into 100% so I can see any changes I make more clearly. If you look at the bottom of the Detail panel, there’s even a reminder for that. It says, “For a more accurate preview, zoom the preview size to 100% or larger when adjusting the controls in this panel.”
Now, let’s get to those definitions.
Amount: This is the primary slider and the one I generally use when I’m sharpening my photos. In the most basic sense, it adjusts the definition of edges in a photo. To increase the amount of sharpening, push the slider to the right. To decrease it, push the slider to the left. If you push the slider all the way to the left, you’ll turn this feature off in its entirety. As with noise reduction, there are risks associated with this slider. If you increase the value too much, you may increase the definition and noticeability of the noise itself. If you prefer cleaner images, you may want to keep this feature set to a lower value.
The Amount slider locates pixels that surround the specific pixel that’s being sharpened and contrasts them. This contrast depends on the threshold you set.
Radius: This slider controls the size of the details that are sharpened in your photo. If your photos are very finely detailed, you would generally keep this slider pushed to the left. If you have a less detailed photo, you can push this slider to the right. If you go too far to the right, you may end up with weird looking results, like the cartoony ones I showed you in the noise reduction post.
Detail: This slider controls how the high-frequency information in a photo is adjusted. It also controls how the sharpening engine in Camera Raw deals with edges in an image. To keep areas of a photo a bit more tame and smoother looking, keep this slider to the left. To make background and more detailed areas look much more accentuated, push this slider to the right.
Masking: This slider controls what is actually sharpened in the photo. If you have the slider turned off in the leftmost position, the entire image will be sharpened evenly across the board. The more you push this slider to the right, the more the sharpening will be limited to areas near edges. Again, if you have noise in your photo, the grains in the image may be considered edges, so be careful.
Quick Tip: If you hold down the Option (Mac) or the Alt (Windows) key while clicking and pushing any of these four sliders, you’ll see the photo in a different view. For example, if you do this and then click on the Amount slider, the image will turn grayscale. If you do this with the Masking slider, the photo will turn all white when the slider is all the way to the left and get more black around the edges in the photo as the slider is pushed to the right. This will need experimentation as well, so grab a photo and start playing around with this section.

An Extreme Example
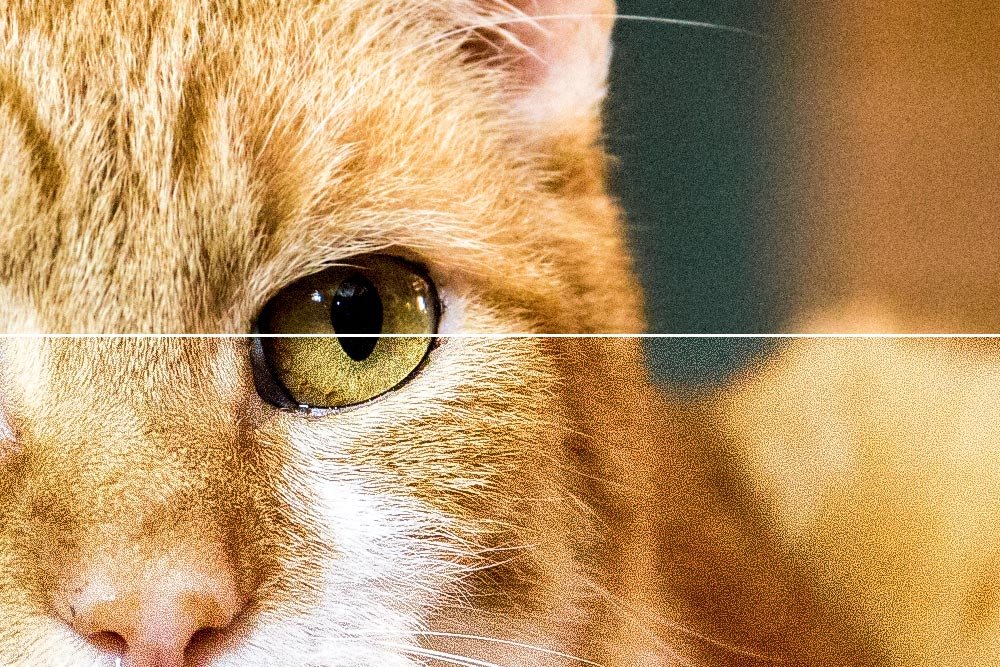
Since all photos are different and there are a wide variety of conditions in which photographs were taken, I’m going to show you just one screenshot. In this screenshot, the photo is zoomed into 100%. The top half has no sharpening done at all. All the Sharpening sliders are pushed to the left. In the bottom half, the Amount, Radius and Detail sliders are pushed all the way to the right. The Masking slider is kept to the left because it actually reduced the sharpening when I pushed it to the same position as the ones above.
If you look at the photo closely (right click and open in new tab for a larger view), you’ll notice that the more the photo was sharpened, the worse the noise in the background got. At the same time, the fur on my cat’s face looks better. This is why I say there’s a trade off when using these tools. You can easily make things look worse.
In general, when I’m working on a photo, I’ll push the Amount slider in the Sharpening section to the 100% position and the Luminance slider in the Noise Reduction section to 25%. I’ve found a good balance there for many of my photos.
I hope I gave you a good background for how to go about sharpening a photo while using Adobe Camera Raw. If you have any questions or concerns, please leave them in the comment section below. Thanks for reading!
