KristinaW
Member
- Joined
- May 7, 2021
- Messages
- 127
- Reaction Score
- 0
- Points
- 18
- #1
I’d like to look at something a bit closer today that has to do with the video timeline and Layers panel in Adobe Photoshop. The two areas are connected in that they house and control how video is arranged inside the Timeline panel. This is one of those things folks have a tough time figuring out when they’re brand new to editing video in Photoshop, but it’s actually a very simple concept. In just a few minutes, you’ll be much more familiar with things than you were before you began reading this post.
Today’s goal is to help you become comfortable working with multiple clips of video in the Timeline panel. As you may already know, sometimes certain clips sit side by side each other (sequentially) and other times, clips sit stacked upon one another. I’ll show you how you can modify these types of situations.
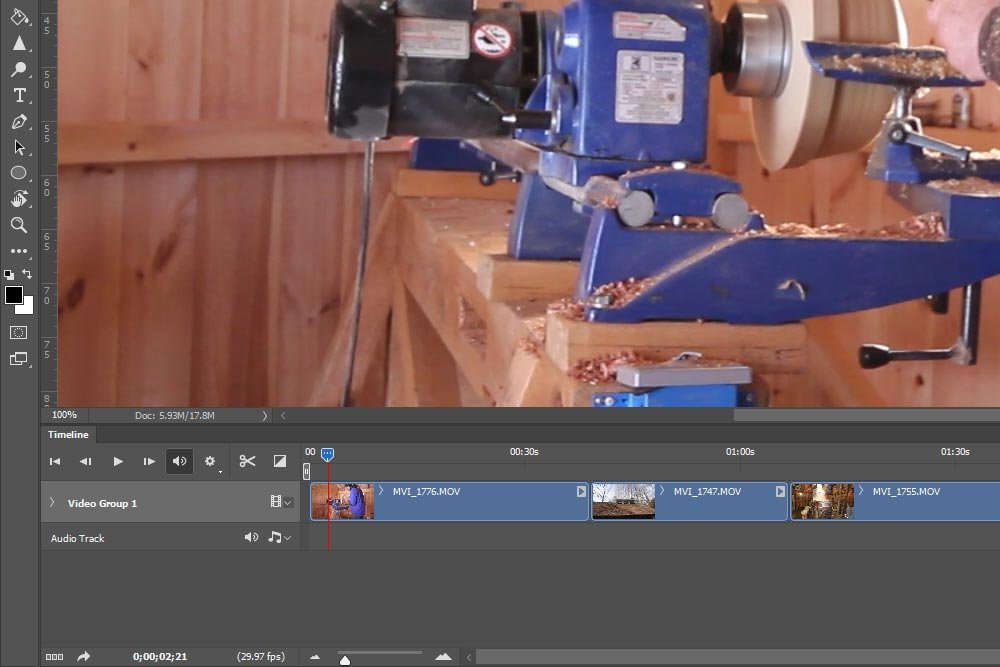
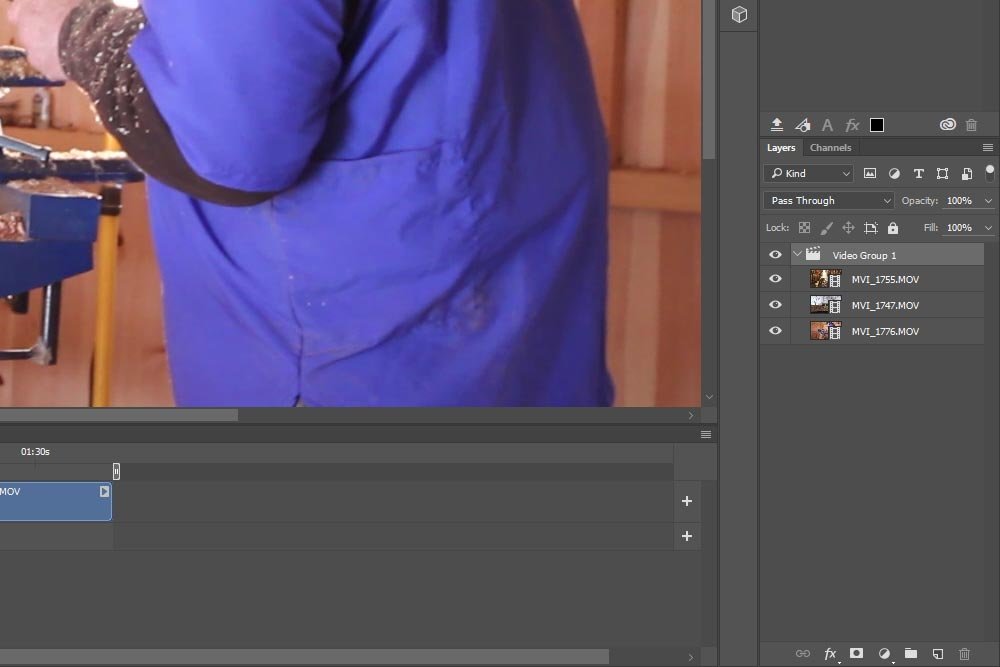
Now, if you look inside the Timeline panel, you’ll notice that the three video clips are set up in a sequential manner, meaning one will play, followed by the next and finally by the last. The reason they are set up this way is because of how they’re arranged in the Layers panel. If you take a look there, you’ll see that each of the three clips are collected under a group. This group is currently named Video Group 1.
Just to be clear, because I know this can be confusing at times, the three clips you see in the Timeline panel are equal to the three layers you see in the Layers panel. The names correspond with one another. They are one and the same. Also, be aware that when you make a change in the Timeline panel, a corresponding change will take place in the Layers panel and vice-versa.
In the screenshot below, I clicked on one of the video layers in the Layers panel. Notice how the clip in the Timeline panel is now highlighted.
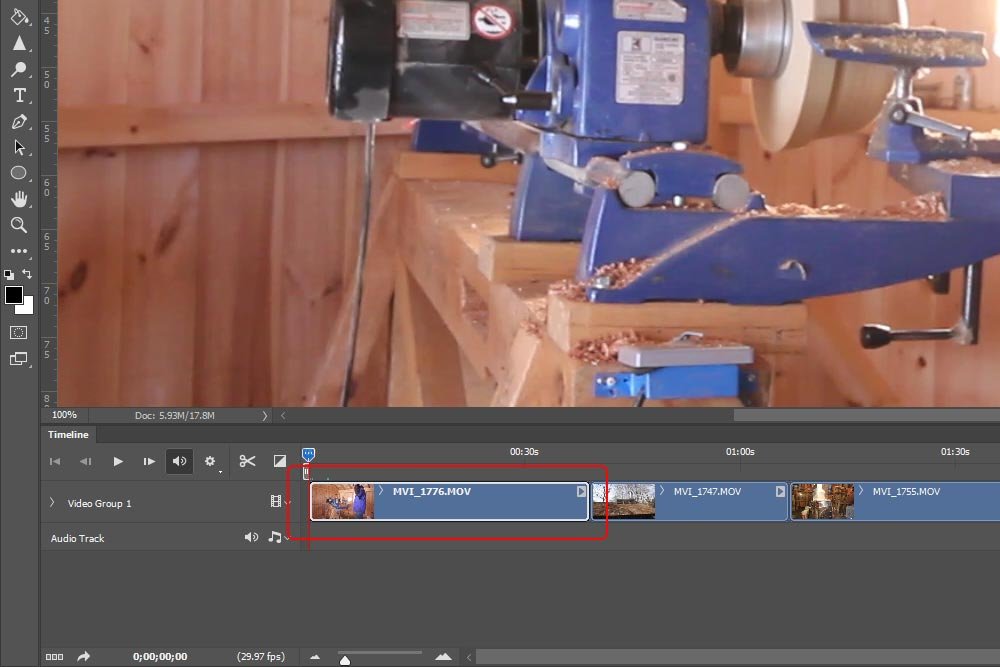
In the above screenshot, the red box is what I added to accentuate the highlighted clip. You can see that it’s highlighted because it’s outlined in white.
To remove a video clip from a group, all you need to do is to click and drag the layer from inside the group to outside of it. In my case, I’ll click on one of the layers and drag it up until I can see that it’s no longer held inside the group folder.
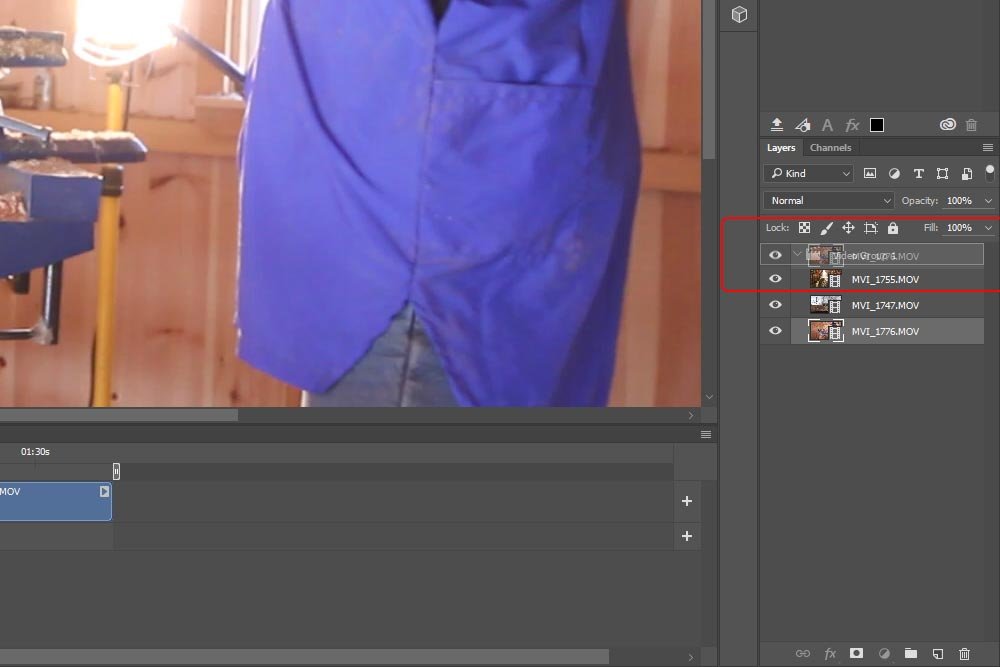
If you look at the screenshot above closely, you’ll see that I’m dragging one of the clips directly above the group folder. Once a thin line appears above the folder, I can let go. Let’s see how this affected the timeline.
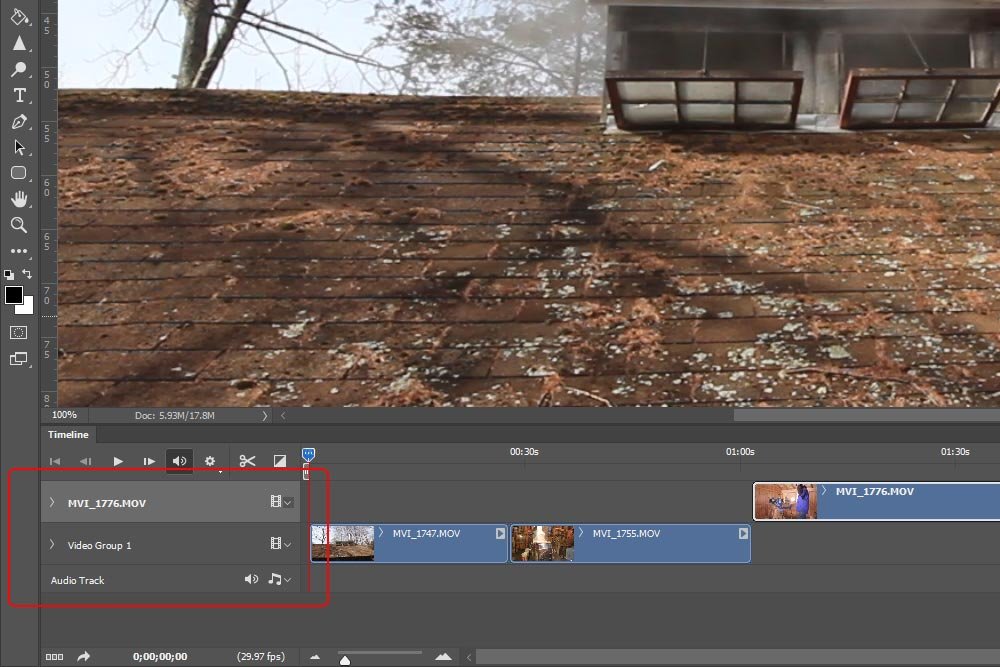
If you look inside the Timeline panel, you’ll see an independent layer as well as a group with the remaining two clips. Now I can drag the one layer back and forth to dictate when it plays in comparison to the other layers.
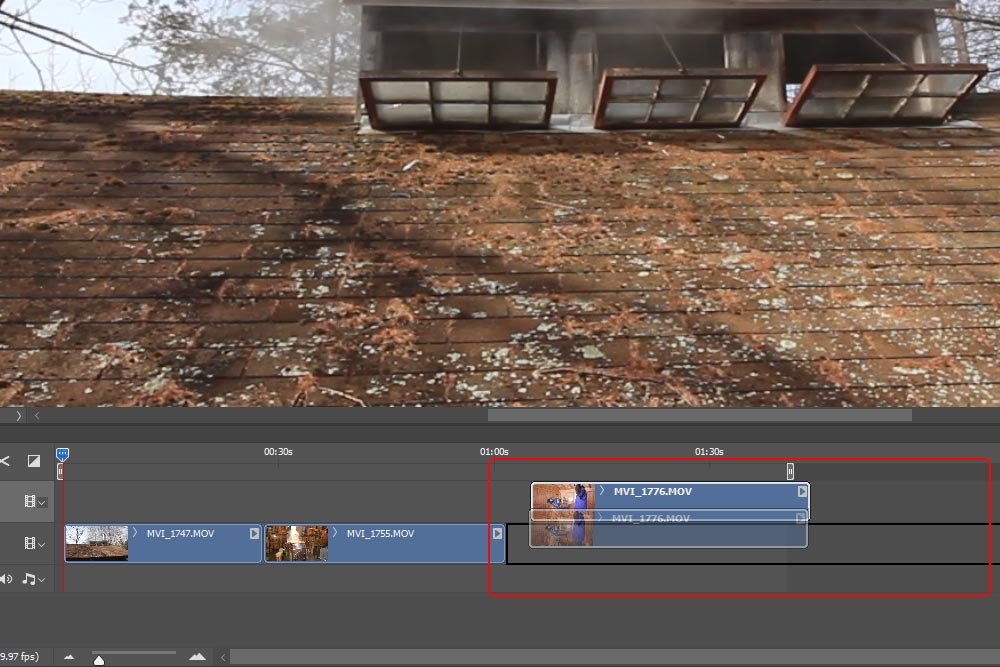
Once I let go, each clip will be in the same group and they’ll all play sequentially once again.
I think this was a good introduction into grouping and ungrouping video clips in Adobe Photoshop. In later posts, I’ll be getting into the nitty gritty of editing itself. It’s in these posts that I’ll introduce many more concepts of the Timeline panel. I want to wait until I’m doing something practical before I discuss those further topics.
Anyway, if you have any questions or concerns, please leave them in the comment section below. Thanks for reading!
Today’s goal is to help you become comfortable working with multiple clips of video in the Timeline panel. As you may already know, sometimes certain clips sit side by side each other (sequentially) and other times, clips sit stacked upon one another. I’ll show you how you can modify these types of situations.
Looking at the Current Setup
To start things off, let’s take a look at what I’ve currently got going on inside of Photoshop. I already set my workspace to Motion and imported my video clips. You can see them both in the Timeline panel as well as the Layers panel. In the screenshots below, the Timeline can be seen first, followed by the Layers.

Now, if you look inside the Timeline panel, you’ll notice that the three video clips are set up in a sequential manner, meaning one will play, followed by the next and finally by the last. The reason they are set up this way is because of how they’re arranged in the Layers panel. If you take a look there, you’ll see that each of the three clips are collected under a group. This group is currently named Video Group 1.
Just to be clear, because I know this can be confusing at times, the three clips you see in the Timeline panel are equal to the three layers you see in the Layers panel. The names correspond with one another. They are one and the same. Also, be aware that when you make a change in the Timeline panel, a corresponding change will take place in the Layers panel and vice-versa.
Activating a Clip
In the future, you’ll likely want to make a change to a clip. To edit something, such as the color, add an effect or to lengthen or shorten its duration, you’ll need to activate it. All this means is that you’ll need to select the clip you’d like to work on. You can do this by either clicking on the layer in the Layers panel or by clicking on the video clip right inside the Timeline panel. Typically, if you’re going to make some sort of adjustment to the color or something else like that, you’d double-click or right-click on the layer itself.In the screenshot below, I clicked on one of the video layers in the Layers panel. Notice how the clip in the Timeline panel is now highlighted.

In the above screenshot, the red box is what I added to accentuate the highlighted clip. You can see that it’s highlighted because it’s outlined in white.
Removing a Clip From the Group
As I mentioned above, by storing these video clips in a group, they’re currently going to play sequentially. That’s fine if that’s the way I want to view them. Oftentimes though, I want additional flexibility with when certain parts of the video plays, transitions and that sort of thing. The best way to add this flexibility is to remove the clips from the group.To remove a video clip from a group, all you need to do is to click and drag the layer from inside the group to outside of it. In my case, I’ll click on one of the layers and drag it up until I can see that it’s no longer held inside the group folder.

If you look at the screenshot above closely, you’ll see that I’m dragging one of the clips directly above the group folder. Once a thin line appears above the folder, I can let go. Let’s see how this affected the timeline.

If you look inside the Timeline panel, you’ll see an independent layer as well as a group with the remaining two clips. Now I can drag the one layer back and forth to dictate when it plays in comparison to the other layers.
Adding a Layer to the Group
Let’s say that I want to add that layer back to the group. That’s easy to do. I can either click and drag the layer in the Layers panel back on top of the group folder (or inside the group between layers somewhere) or I can simply click and drag that clip that’s sitting on its own timeline back into the group timeline.
Once I let go, each clip will be in the same group and they’ll all play sequentially once again.
Deleting a Clip
I wanted to throw this in here real quick. In order to delete a clip from the file you’re currently working on, all you need to do is to click on whichever clip you’re interested in removing, whether it be the clip itself in the Timeline panel or the layer in the Layers panel, and press Delete on your keyboard. In both cases, the clip will be immediately removed from the file.I think this was a good introduction into grouping and ungrouping video clips in Adobe Photoshop. In later posts, I’ll be getting into the nitty gritty of editing itself. It’s in these posts that I’ll introduce many more concepts of the Timeline panel. I want to wait until I’m doing something practical before I discuss those further topics.
Anyway, if you have any questions or concerns, please leave them in the comment section below. Thanks for reading!
