LukeLewis
Member
- Joined
- May 7, 2021
- Messages
- 134
- Reaction Score
- 0
- Points
- 21
- #1
There are many types of images that need to be corrected because of distortion. Photos that were taken with wide angle lenses, fisheye lenses and those images that were merged together to create panoramic photos. In each of these cases, either the lens itself caused the distortion or the merging together did. No matter the cause, there’s a very handy tool inside of Adobe Photoshop that can help correct the distortion. The best part of this tool is that it’s extremely easy to use. You mostly just need to learn some definitions.
In today’s post, I’d like to work through correcting the distortion of a photograph by taking advantage of the Adaptive Wide Angle filter in Adobe Photoshop. As I’m correcting the image, I’ll explain the process as well as some of the settings involved. By the time I’m finished with this post, you should know how to complete the process yourself. It’s super fast and easy and I think you’ll love it.

As you may have noticed, it looks like the center is somewhat bulging.
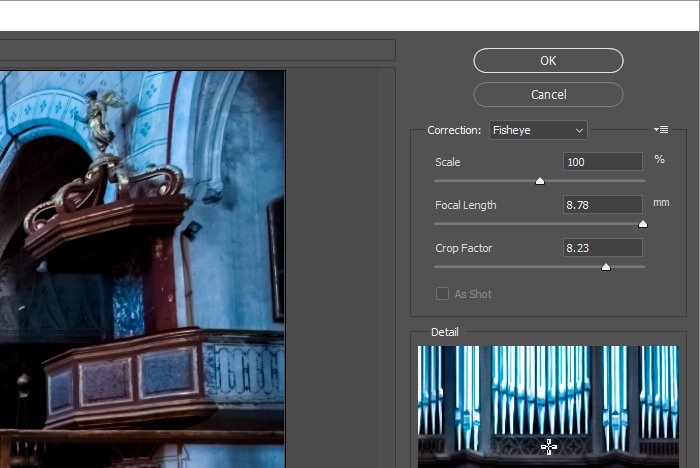
If you’ll notice, right below the OK and Cancel buttons is a drop-down menu. Inside of this menu are a few different options. It’s important to choose the option that coincides with the type of correction you need. I’ll explain these options below.
Fisheye: If you have a photo that’s very distorted because it was captured with a fisheye lens, this is the option to choose. This filter will “uncurve” any curvature that was caused by the lens.
Perspective: Picture taking a photo of a table that has long, individual legs. If you take the photo straight on, there won’t be much need for correction, but if you change your perspective by placing the camera on the ground and shooting upward, those legs will now be tilted and will require some correction, unless the distorted look is what you’re going for. If not, choose this option to correct objects that have been affected by extreme camera angles.
Panorama: If you’ve merged multiple images via the Photomerge feature in Photoshop, this is the option you should choose. The filter will read the meta data contained in the photograph and will know how to correct any distortion created by the merge.
Full Spherical: If you have taken a complete 360 degree panorama photograph and your image has a 2:1 aspect ratio and you’d like to correct the distortion found in the image, choose this option.
Auto: If Photoshop can detect the proper lens information (the meta data is available) and you choose this option, any distortion will be corrected automatically.
Below this drop-down menu are a few more options. They are:
Scale: Oftentimes, when an image’s distortion is corrected, it leaves transparent areas around the edge. Push this slider to specify a value in which to scale the image in an effort to remove those empty areas.
Focal Length: This value will be set automatically if Photoshop can detect the lens information in the image’s meta data. If that information ins’t available, specify the lens’s focal length here.
Crop Factor: This slider works in conjunction with the Scale slider. Push this slider to set a value for which Photoshop will crop the image.
As Shot: If you aren’t sure if your photo’s lens information is available to Photoshop, you’ll know after you take a look at this check box. If the information is available, this check box will be active and if the information isn’t available, this box will be grayed out.
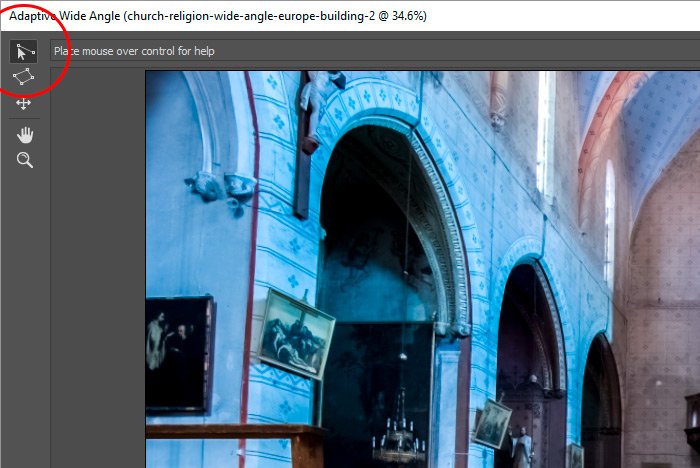
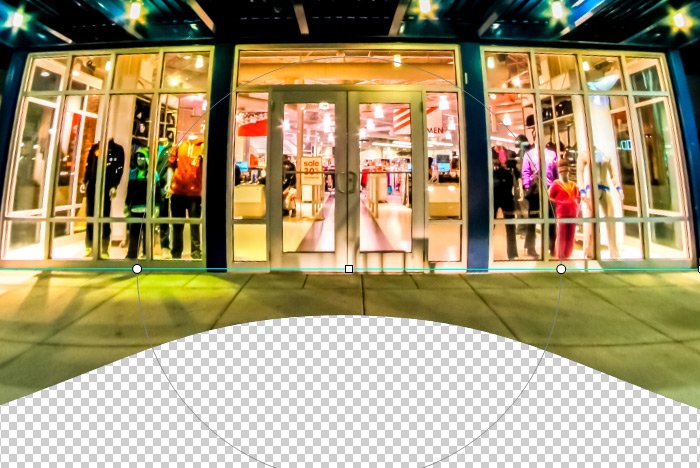
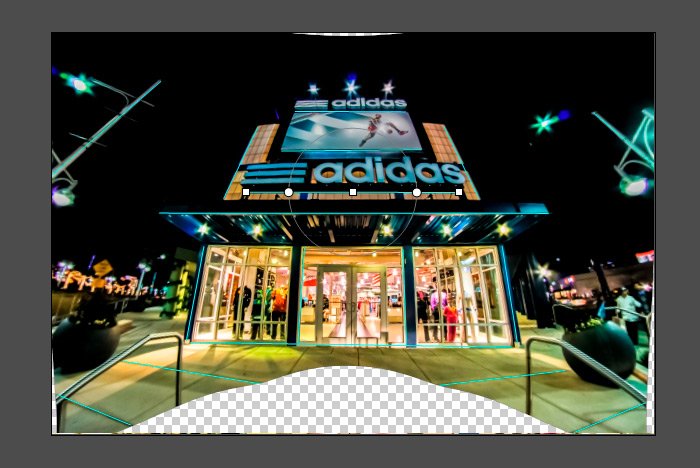
This tool pretty much draws lines. If your photograph is heavily distorted, you’ll likely see curved lines where straight ones should be. The task now is to draw lines that hug those curved lines in the photograph. As the lines are drawn, you’ll notice that they curve automatically to follow the curve in the image. This is the way things are supposed to go. So, every place you see a curved and distorted edge in your photo, draw a line over it. I did this in the demo image I’m using today, even though I didn’t have many curved lines in it.
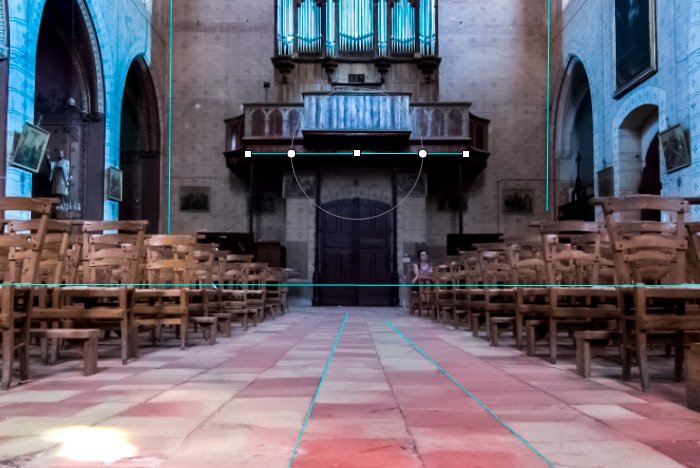
Here’s what’s going to happen. As a line is drawn over a curved edge, that curved edge will straighten out. The photo can get kind of funky looking until it’s all finished and you’ll quickly find out why those sliders are in existence over on the right. The good things is, as you’re drawing the lines, you’ll learn very quickly how this tool works and what it’s supposed to do.
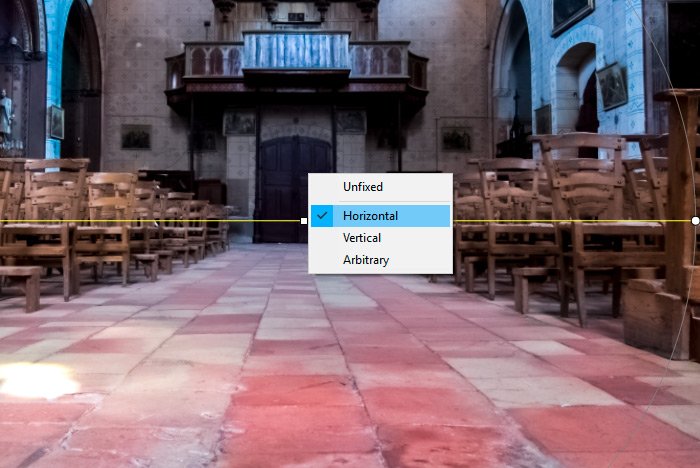
Photoshop will treat this line as a horizon line and will rotate the photo to follow its guide. It’s so easy to straighten a photo this way.
When the corrections are all finished, I’ll go ahead and click on the OK button to close this workspace out. After that, I’ll appreciate the corrections and continue work on the photo.

I hope I clearly explained how to use the Adaptive Wide Angle filter found in Adobe Photoshop, as well as what some of the sliders and interior options mean. If you have any questions regarding this post, please let me know in the comment section down below. Thanks for reading!
In today’s post, I’d like to work through correcting the distortion of a photograph by taking advantage of the Adaptive Wide Angle filter in Adobe Photoshop. As I’m correcting the image, I’ll explain the process as well as some of the settings involved. By the time I’m finished with this post, you should know how to complete the process yourself. It’s super fast and easy and I think you’ll love it.
The Demo Photo
I’ll be using a photo of the inside of a church for this post. While it isn’t immediately apparent that there’s some distortion in this photo, it’s there and it can benefit from some correction. Here’s the image.
As you may have noticed, it looks like the center is somewhat bulging.
Converting to a Smart Object
I know I’ve said this a million times already, but when working with filters, you need to first convert the layer into a Smart Object. To do this, I’ll select the layer in the Layers panel and right-click on it. Then, I’ll select Convert to Smart Object from the menu that appears. That’s all there is to it.Accessing the Adaptive Wide Angle Filter
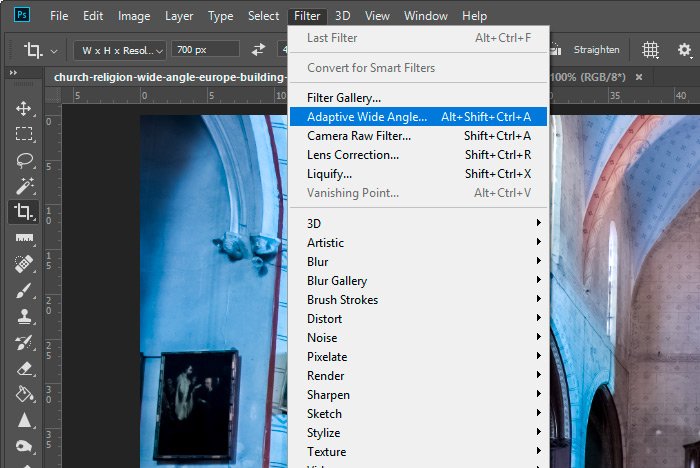
At this point, I can go ahead and access the Adaptive Wide Angle filter workspace. To do so, I’ll head up to the Filter > Adaptive Wide Angle menu item and click.
Working in the Workspace
The way this filter generally works is that it uses the meta data from the photograph to correct it. So, if the camera information, lens model and lens characteristics are available, the filter works fairly effortlessly. If that information isn’t available though, things are a bit trickier and the image will need to be corrected manually. Let’s take a look at the right side of the workspace now.
If you’ll notice, right below the OK and Cancel buttons is a drop-down menu. Inside of this menu are a few different options. It’s important to choose the option that coincides with the type of correction you need. I’ll explain these options below.
Fisheye: If you have a photo that’s very distorted because it was captured with a fisheye lens, this is the option to choose. This filter will “uncurve” any curvature that was caused by the lens.
Perspective: Picture taking a photo of a table that has long, individual legs. If you take the photo straight on, there won’t be much need for correction, but if you change your perspective by placing the camera on the ground and shooting upward, those legs will now be tilted and will require some correction, unless the distorted look is what you’re going for. If not, choose this option to correct objects that have been affected by extreme camera angles.
Panorama: If you’ve merged multiple images via the Photomerge feature in Photoshop, this is the option you should choose. The filter will read the meta data contained in the photograph and will know how to correct any distortion created by the merge.
Full Spherical: If you have taken a complete 360 degree panorama photograph and your image has a 2:1 aspect ratio and you’d like to correct the distortion found in the image, choose this option.
Auto: If Photoshop can detect the proper lens information (the meta data is available) and you choose this option, any distortion will be corrected automatically.
Below this drop-down menu are a few more options. They are:
Scale: Oftentimes, when an image’s distortion is corrected, it leaves transparent areas around the edge. Push this slider to specify a value in which to scale the image in an effort to remove those empty areas.
Focal Length: This value will be set automatically if Photoshop can detect the lens information in the image’s meta data. If that information ins’t available, specify the lens’s focal length here.
Crop Factor: This slider works in conjunction with the Scale slider. Push this slider to set a value for which Photoshop will crop the image.
As Shot: If you aren’t sure if your photo’s lens information is available to Photoshop, you’ll know after you take a look at this check box. If the information is available, this check box will be active and if the information isn’t available, this box will be grayed out.
Using the Constraint Tool
Once all the values on the right have been selected and set, I’ll move over to the left toolbar and click on the Constraint Tool. This is the only tool I’ll be discussing in this post because it covers most situations.
This tool pretty much draws lines. If your photograph is heavily distorted, you’ll likely see curved lines where straight ones should be. The task now is to draw lines that hug those curved lines in the photograph. As the lines are drawn, you’ll notice that they curve automatically to follow the curve in the image. This is the way things are supposed to go. So, every place you see a curved and distorted edge in your photo, draw a line over it. I did this in the demo image I’m using today, even though I didn’t have many curved lines in it.

Here’s what’s going to happen. As a line is drawn over a curved edge, that curved edge will straighten out. The photo can get kind of funky looking until it’s all finished and you’ll quickly find out why those sliders are in existence over on the right. The good things is, as you’re drawing the lines, you’ll learn very quickly how this tool works and what it’s supposed to do.
Leveling the Photo
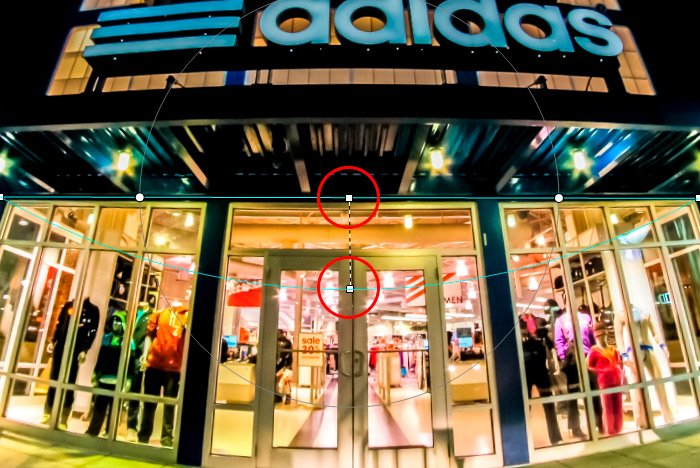
If you’re working on a landscape photo or a photo that needs to be leveled out or straightened, you can enact the solution right in this workspace. To straighten a distorted image, draw a line across the image from point to point, in a way that touches two level points. So if you’re working on a landscape shot, draw a line from one side of the landscape to the other where the land is supposed to be level. Then, right click on the line and select Horizontal from the available options.
Photoshop will treat this line as a horizon line and will rotate the photo to follow its guide. It’s so easy to straighten a photo this way.
When the corrections are all finished, I’ll go ahead and click on the OK button to close this workspace out. After that, I’ll appreciate the corrections and continue work on the photo.

I hope I clearly explained how to use the Adaptive Wide Angle filter found in Adobe Photoshop, as well as what some of the sliders and interior options mean. If you have any questions regarding this post, please let me know in the comment section down below. Thanks for reading!


