15Katey
Member
- Joined
- May 10, 2021
- Messages
- 130
- Reaction Score
- 0
- Points
- 23
- #1
I’ve got a fun little project to share with you today. I just thought of it a few minutes ago and I think you’ll enjoy reading about it. It has to do with creating a custom transition that goes from black to transparent. The unique part of this one is that I’m going to choose something in a photograph to highlight. I’ll keep that visible the entire time and the black will disappear around it. Don’t worry, you’ll see everything below and it’ll all make sense.
In today’s post, I’ll be creating an animation over a still photograph inside of Adobe Photoshop. I’ll first create a layer that’s filled with black on top of the photo layer. Then, I’ll select the butterfly in the bottom layer and fill that selection with white, right inside the black layer. I’ll use a blending mode to hide the white so the butterfly is visible again.
Next, I’ll create a timeline inside of the Timeline panel and then create an animation that will decrease the opacity of the black layer so it goes from solid to clear. Basically, the effect will consist of a butterfly hanging out by itself in a midst of black and then the garden behind will slowly be revealed. It’ll be cool, I think.
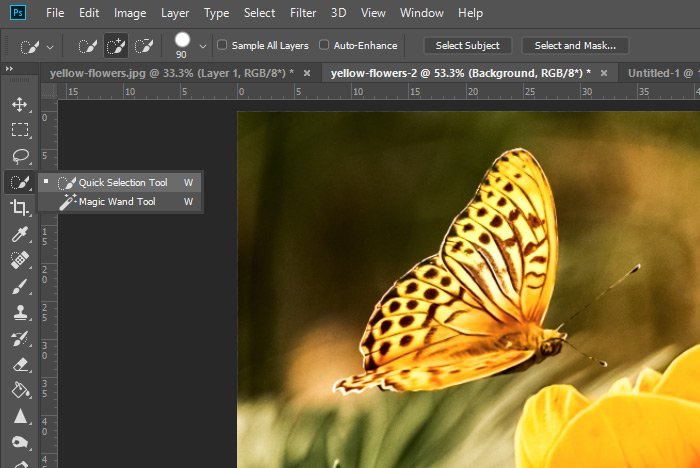
Next, I’ll hide the black layer by clicking on the little eye that sits to the left of it in the Layers panel. Then, I’ll select the photo layer to make it active and finally, I’ll use the Quick Selection Tool to select the butterfly.
If you’d like to learn how to make an incredible selection in Photoshop, please read this post:
Making Selections From the Select & Mask Workspace in Adobe Photoshop
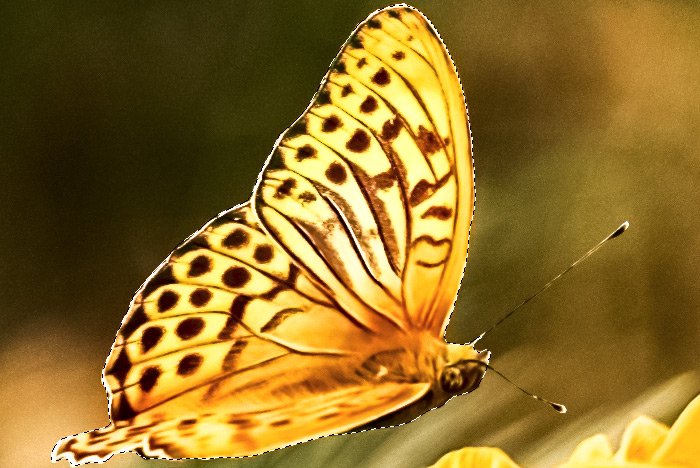
After I make the selection and fix it up a bit, I’ll have the good ol’ marching ants to look at. These marching ants will surround the selected parts of the butterfly.
Doing this will give me a white shape of a butterfly. To remove the marching ants, I’ll head up to the Select > Deselect menu and click.
And finally, I’ll apply the Multiply blend mode to the black layer to hide the white part of it. This will reveal the beautiful butterfly once again.
Pretty neat, right?
I’ll need to open the Timeline panel to accomplish this. To open the panel, I’ll go up to the Window > Timeline menu item and click.
After the Timeline panel has appeared, I’ll head down to it and click on the Create Video Timeline button that sits right at its center. That will create a 5:00 (five second) timeline for the black layer. Since the bottom photo layer is currently locked, that won’t be included in the layers that are shown in the panel. If I unlocked that layer, it would appear down there.
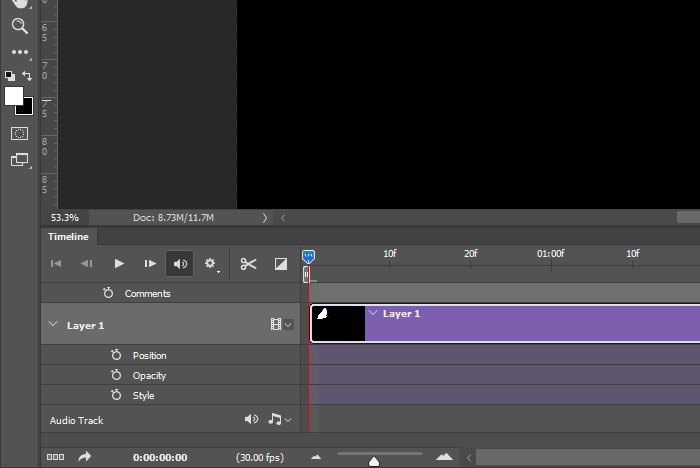
Now all I need to do is create the animation. That’s really easy.
I’ll first make sure the playhead is at zero, or the beginning of the timeline. I’ll also make sure the layer is expanded and the animation controls are showing. Then, I’ll click on the Opacity keyframe, which will place a keyframe onto the timeline itself.
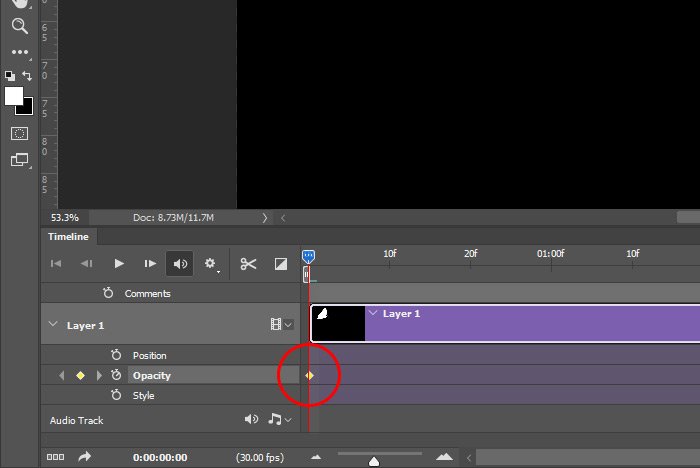
Finally, I’ll move the playhead to a spot on the timeline where I’d like the animation to stop. I think five seconds is good. A bit dramatic, but that’s the way I am. I’ll then head up to the Layers panel and set the Opacity to 0%.
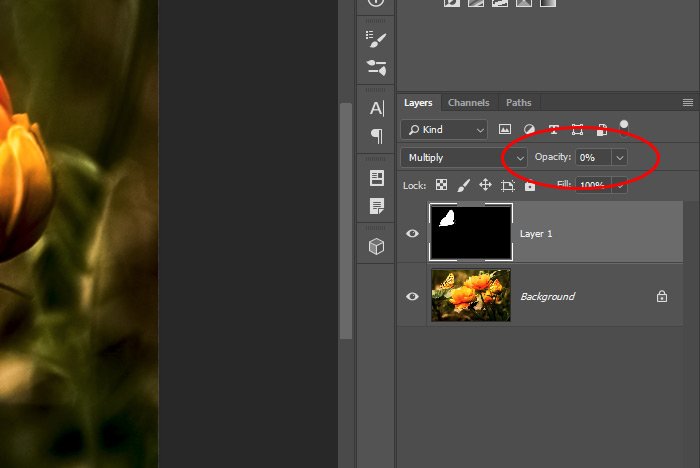
When I do this, the next keyframe will automatically appear on the timeline. And if I test out the animation by pressing the Play button, I’ll see the black fade into nothing. It’s a neat effect.
Just to let you know, I can export this animation and watch it in action. I did just that. Check it out!
It’s simple, but effective.
Most of this post consisted of selecting and getting the butterfly ready for the animation, but that’s okay. Creating an animation in Adobe Photoshop is a simple process. Now that I have the file exported, I can include that in another video project if I wanted to. There’s a lot to animations and video production and this is just a small piece. If you have any questions regarding this post, please let me know in the comment section below. Thanks for reading!
In today’s post, I’ll be creating an animation over a still photograph inside of Adobe Photoshop. I’ll first create a layer that’s filled with black on top of the photo layer. Then, I’ll select the butterfly in the bottom layer and fill that selection with white, right inside the black layer. I’ll use a blending mode to hide the white so the butterfly is visible again.
Next, I’ll create a timeline inside of the Timeline panel and then create an animation that will decrease the opacity of the black layer so it goes from solid to clear. Basically, the effect will consist of a butterfly hanging out by itself in a midst of black and then the garden behind will slowly be revealed. It’ll be cool, I think.
Today’s Demo Image
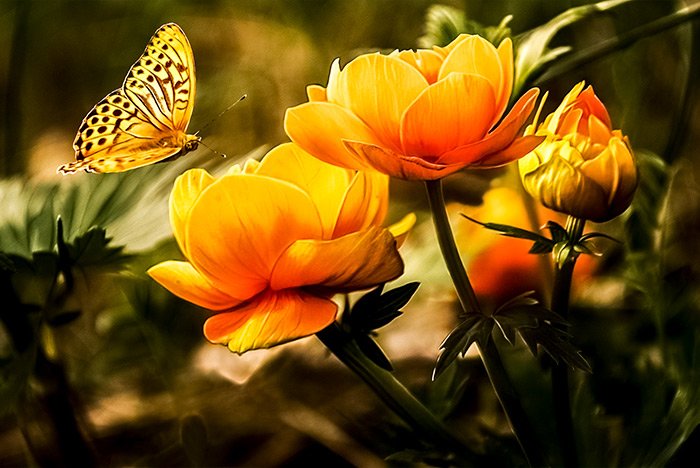
Here’s what I have to work with today. As you can see, there’s a pretty clear butterfly up there in the corner that I don’t think will be too difficult to select. Let’s see how it goes.
Creating a Black Layer & Selecting the Butterfly
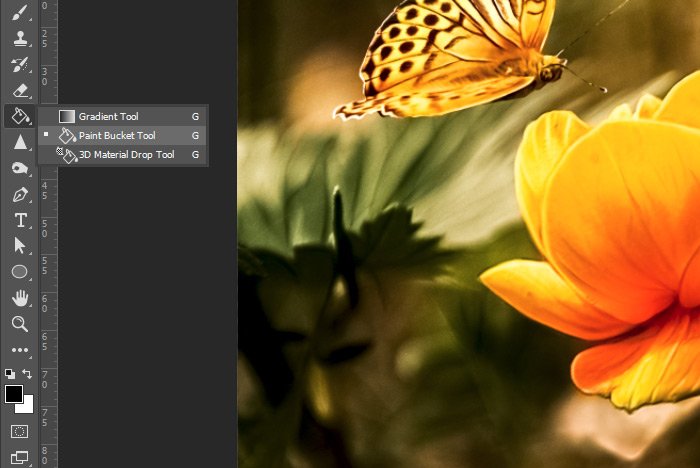
I already have the image opened up inside of Photoshop. To create the black layer that will sit on top of the photo, I’ll head down to the bottom of the Layers panel and click the Create New Layer icon. After that, I’ll use the Paint Bucket Tool to fill the empty new layer with black.
Next, I’ll hide the black layer by clicking on the little eye that sits to the left of it in the Layers panel. Then, I’ll select the photo layer to make it active and finally, I’ll use the Quick Selection Tool to select the butterfly.

If you’d like to learn how to make an incredible selection in Photoshop, please read this post:
Making Selections From the Select & Mask Workspace in Adobe Photoshop
After I make the selection and fix it up a bit, I’ll have the good ol’ marching ants to look at. These marching ants will surround the selected parts of the butterfly.

Filling the Selection with White & Applying a Blend Mode
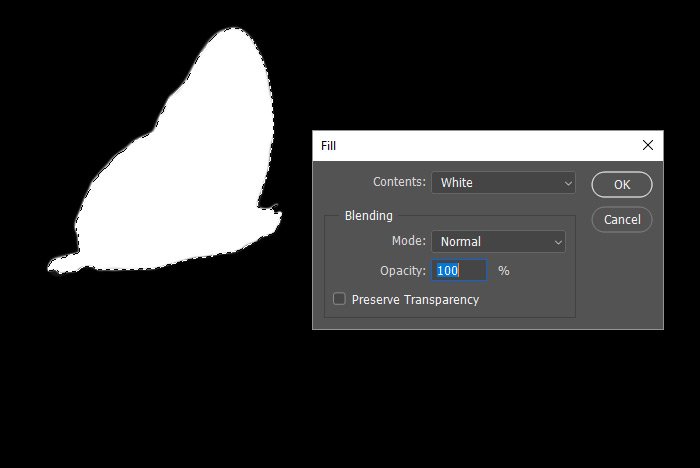
Now that I have a nice selection, I’ll go ahead and click on the black layer in the Layers panel to activate it. I’ll also make the layer visible again. After I do that, I’ll activate one of the selection tools from the left toolbar (any one of them) and I’ll right-click inside of the selection. From there, I’ll choose Fill from the menu that appears. When the Fill dialog pops up, I’ll choose White from the Contents drop-down.
Doing this will give me a white shape of a butterfly. To remove the marching ants, I’ll head up to the Select > Deselect menu and click.
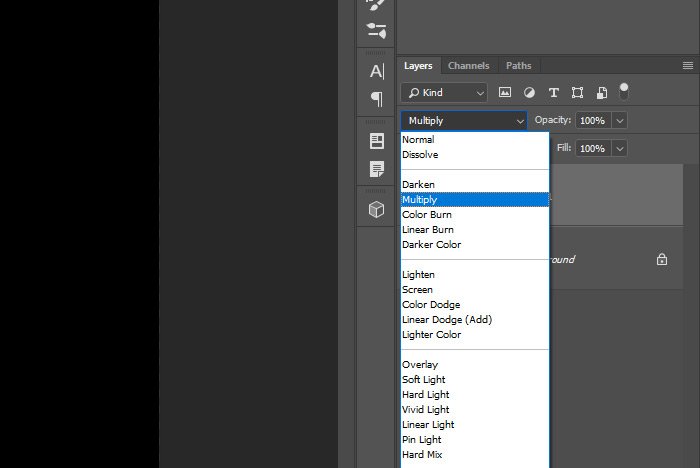
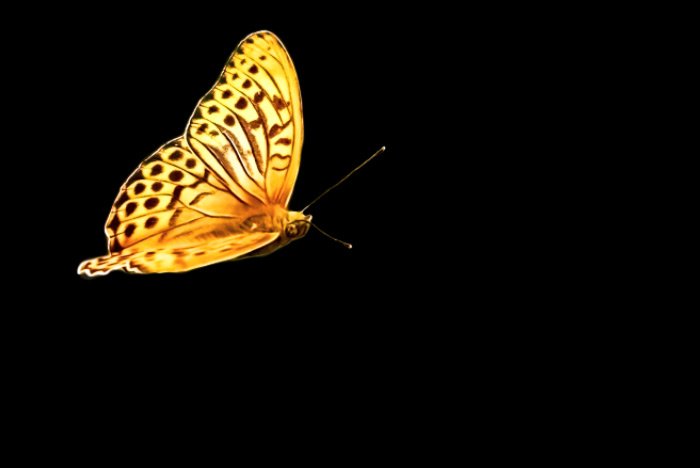
And finally, I’ll apply the Multiply blend mode to the black layer to hide the white part of it. This will reveal the beautiful butterfly once again.


Pretty neat, right?
Animating the Black Overlay
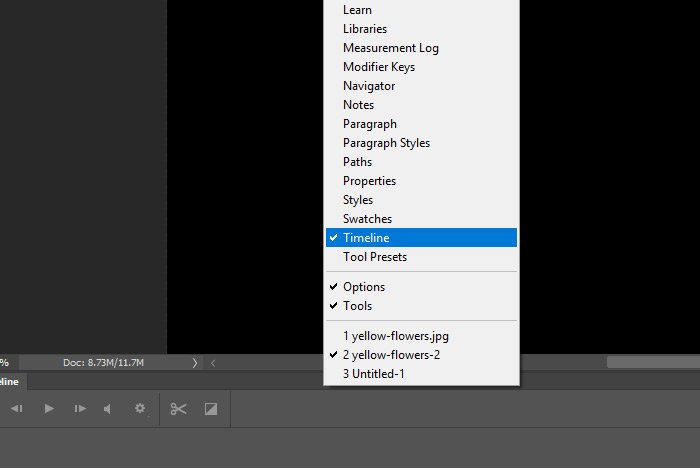
Okay, this is the fun part. Now that I have a butterfly that looks like it’s hanging out in the abyss, I’d like to create a transition that removes the black overlay from the image.I’ll need to open the Timeline panel to accomplish this. To open the panel, I’ll go up to the Window > Timeline menu item and click.

After the Timeline panel has appeared, I’ll head down to it and click on the Create Video Timeline button that sits right at its center. That will create a 5:00 (five second) timeline for the black layer. Since the bottom photo layer is currently locked, that won’t be included in the layers that are shown in the panel. If I unlocked that layer, it would appear down there.

Now all I need to do is create the animation. That’s really easy.
I’ll first make sure the playhead is at zero, or the beginning of the timeline. I’ll also make sure the layer is expanded and the animation controls are showing. Then, I’ll click on the Opacity keyframe, which will place a keyframe onto the timeline itself.

Finally, I’ll move the playhead to a spot on the timeline where I’d like the animation to stop. I think five seconds is good. A bit dramatic, but that’s the way I am. I’ll then head up to the Layers panel and set the Opacity to 0%.

When I do this, the next keyframe will automatically appear on the timeline. And if I test out the animation by pressing the Play button, I’ll see the black fade into nothing. It’s a neat effect.
Just to let you know, I can export this animation and watch it in action. I did just that. Check it out!
It’s simple, but effective.
Most of this post consisted of selecting and getting the butterfly ready for the animation, but that’s okay. Creating an animation in Adobe Photoshop is a simple process. Now that I have the file exported, I can include that in another video project if I wanted to. There’s a lot to animations and video production and this is just a small piece. If you have any questions regarding this post, please let me know in the comment section below. Thanks for reading!
