15Katey
Member
- Joined
- May 10, 2021
- Messages
- 130
- Reaction Score
- 0
- Points
- 23
- #1
I’m sure you’ve seen the slice effect somewhere out there. It looks like something, either a picture or a graphic or some text, has been sliced right in half with a sword. Basically, there’s a gap through the center of the object and that’s what gives it the slice effect. It’s actually not so much a gap where some material from the object was removed, but a gap caused by part of the object moving away from the other. It’s pretty neat and I think learning how to go about creating this effect would help tremendously if you’re interested in graphic design. Somewhere along the lines, you’re bound to be asked to pull something like this off.
In today’s post, I’d like to demonstrate how to effectively slice text in half in Adobe Photoshop. For this project, I’ll be taking advantage of Smart Objects, the Rectangle Tool and vector masks. The first time around, this type of project should take about ten minutes to complete, once you’ve established the text font, color and overall look you’re going for. Once you know what you’re doing though, the process should take about 30 seconds to complete. There are a few new ideas in this post, so be sure to read through to the end.
Pretty neat, right?
Here’s what I have so far.
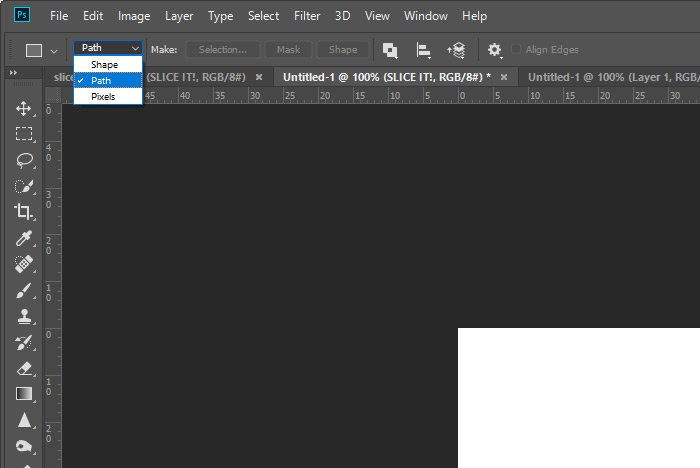
From there, I’ll look up at the options bar and make sure the Path option is chosen in the first drop-down.
And now, I’ll draw out the rectangle.
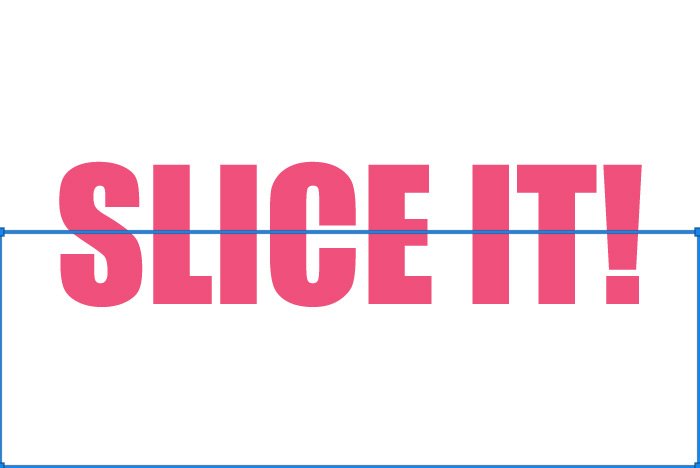
While this path doesn’t need to be perfectly aligned with the edges of the document, there are times when paths need to be precisely shaped. In cases like this, I recommend using guides because paths can snap to guides when they’re being drawn. That’s just a quick tip for anyone who’s interested.
At this point, I need to reshape the path somewhat. I think you’ll see why in a moment. To reshape the path, I’ll use the Direct Selection Tool.
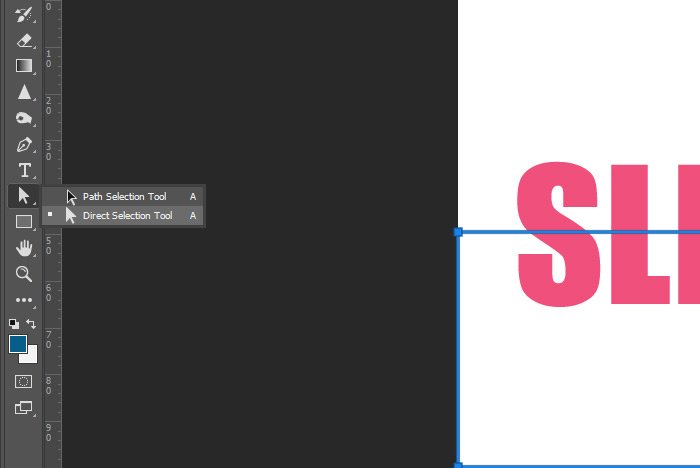
The way I’ll do this is to click and drag over just the upper left anchor point. That will keep only that one active. Then, I’ll hold down the Shift key on my keyboard to lock the left edge in vertically (so it doesn’t wander) and I’ll click and drag that anchor point down a bit so the top horizontal line is sloping downward. Then, I’ll do the same thing to the other side, but this time, I’ll drag that corner upward. Here’s my result.
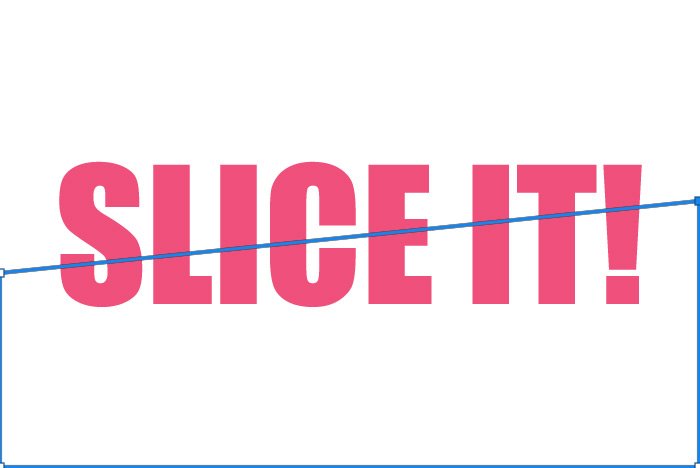
Again, these lines don’t need to be exact. I’m just trying to keep things neat as I move through this project.
This will seemingly undo what I did earlier to make the top part of the text disappear. The entire word will be showing once again, but in reality, it’s two halves of the word. Take a look at the Layers panel for a moment.
Do you see how the masks are inverse from one another? If I activate the Move Tool again and click to select one of the masked text layers and then nudge one of them, I’ll see the effect take shape. For this example, I’ll nudge straight up and down a few times.
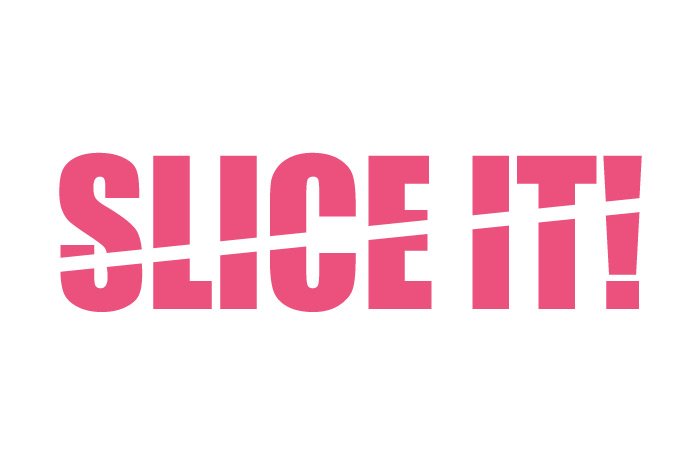
And that’s it! I’d say that’s a really cool and very easy effect to pull off. Depending on what kind of effect you want, you can make all different types of shapes with the Rectangle Tool or other shape tools. I just changed up the path outline a bit and make this.
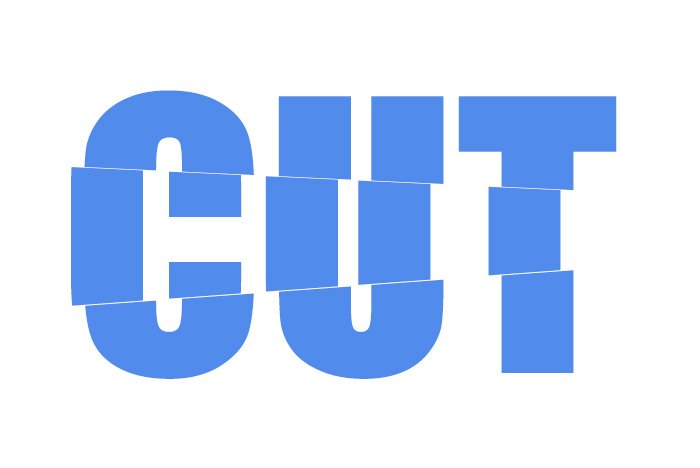
The sky’s the limit. And if I ever wanted to edit the actual text, I could double-click on the layer in the Layers panel, edit the text and then save that file out. That would update the text in the working file.
I hope I clearly explained how to use the text tools, Smart Objects and vector masks to create interesting effects in Adobe Photoshop. If you have any questions regarding this post, please let me know down in the comment section below. You may also ask any question you wish in the discussion forum. Thanks for reading!
In today’s post, I’d like to demonstrate how to effectively slice text in half in Adobe Photoshop. For this project, I’ll be taking advantage of Smart Objects, the Rectangle Tool and vector masks. The first time around, this type of project should take about ten minutes to complete, once you’ve established the text font, color and overall look you’re going for. Once you know what you’re doing though, the process should take about 30 seconds to complete. There are a few new ideas in this post, so be sure to read through to the end.
The Big Slice
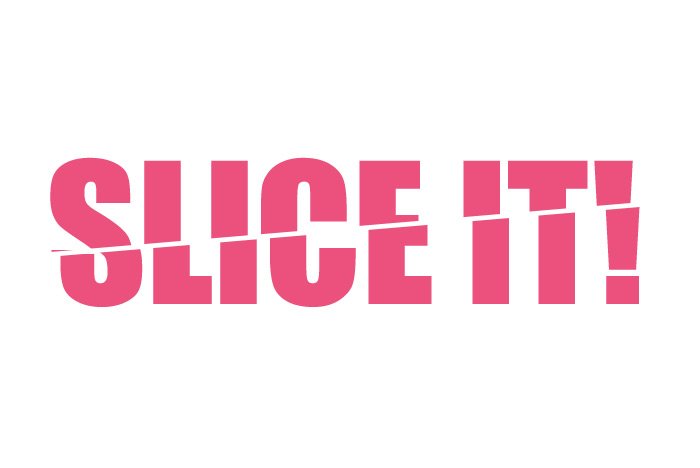
I thought I’d give you the resulting image up here, just to wet your whistle. This is what this graphic will look like when I’m finished with it.
Pretty neat, right?
Writing Out the Text
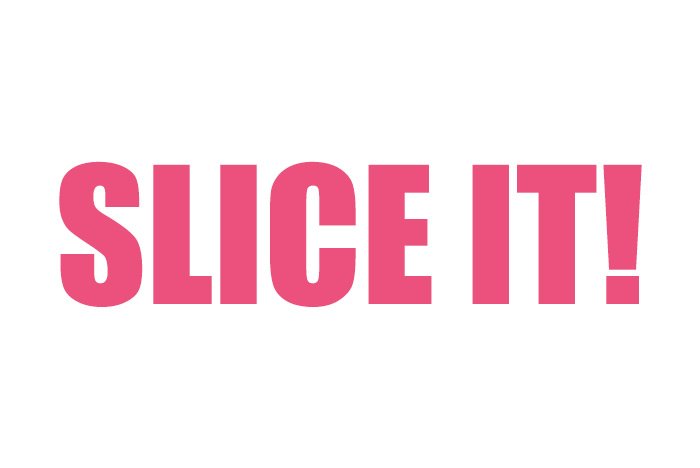
For this project, I created a document in Adobe Photoshop that measured 700 pixels wide and 468 pixels high. This is the size I generally use for this website because it fits well with the theme I’m using. I left the background white and I wrote out the words “Slice It!” with the Impact font sized to 176pts. Obviously, the color is some sort of pink. I then centered the text by selecting the text layer in the Layers panel and then selecting the entire document by activating the Rectangular Marquee Tool and using the keyboard shortcut of Ctrl+A. Once the area was selected, I changed to the Move Tool and used the alignment options in the options bar up top to center the text vertically as well as horizontally.Here’s what I have so far.

Converting to a Smart Object
In order to make this text editable in the future, if need be, I’m going to convert the text layer to a Smart Object. To accomplish this, I’ll simply right-click on the layer in the Layers panel and choose Convert to Smart Object from the menu that appears.Drawing a Path
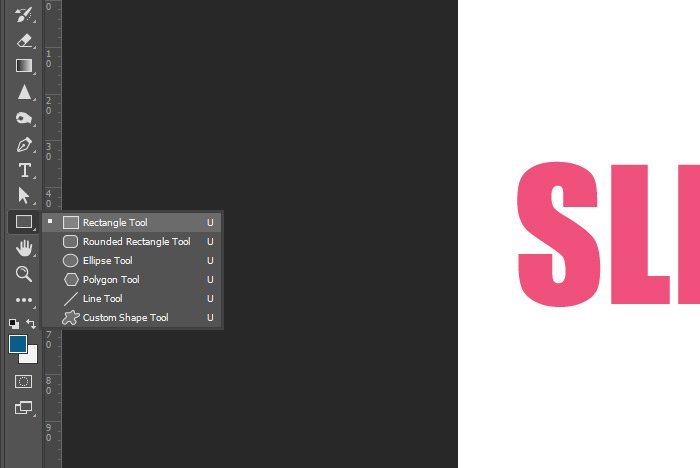
Next, I’m going to use the Rectangle Tool to draw a path over half the image. I’ll go to the left vertical toolbar and click on the Rectangle Tool.
From there, I’ll look up at the options bar and make sure the Path option is chosen in the first drop-down.

And now, I’ll draw out the rectangle.

While this path doesn’t need to be perfectly aligned with the edges of the document, there are times when paths need to be precisely shaped. In cases like this, I recommend using guides because paths can snap to guides when they’re being drawn. That’s just a quick tip for anyone who’s interested.
At this point, I need to reshape the path somewhat. I think you’ll see why in a moment. To reshape the path, I’ll use the Direct Selection Tool.

The way I’ll do this is to click and drag over just the upper left anchor point. That will keep only that one active. Then, I’ll hold down the Shift key on my keyboard to lock the left edge in vertically (so it doesn’t wander) and I’ll click and drag that anchor point down a bit so the top horizontal line is sloping downward. Then, I’ll do the same thing to the other side, but this time, I’ll drag that corner upward. Here’s my result.

Again, these lines don’t need to be exact. I’m just trying to keep things neat as I move through this project.
Applying a Vector Mask
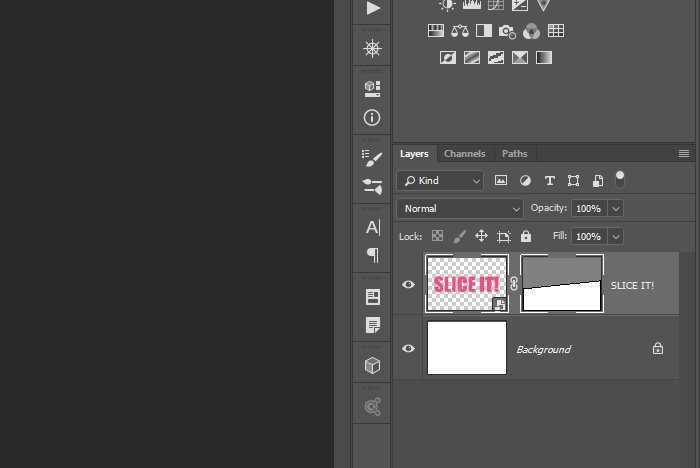
The trick here is to make half of this text disappear, so I’ll use a vector mask to accomplish that. To apply a vector mask, I’ll hold down the Ctrl key on my keyboard and click on the Add Layer Mask icon that’s located at the bottom of the Layers panel. This will make the top half of the word disappear and will add a mask to the layer on the Layers panel.

Duplicating the Layer
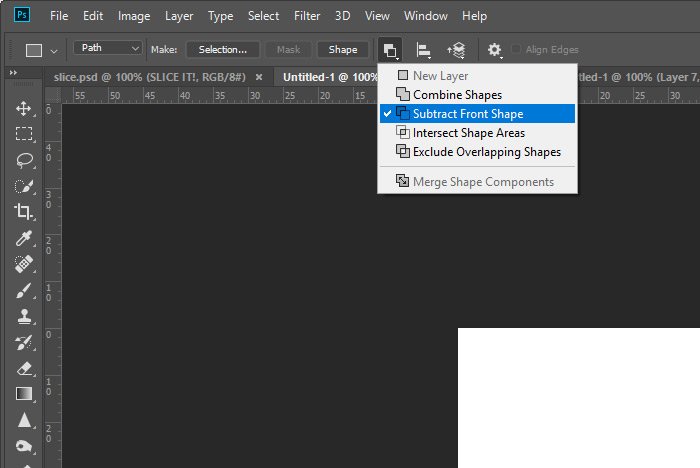
I hope you see where this is going now. All I have left to do is to duplicate the masked text layer and reverse the mask. To duplicate the layer, I’ll click once on it in the Layers panel to select it and then I’ll use the keyboard shortcut of Ctrl+J to make the duplicate. After that, I should have two of the same exact layers, which doesn’t really help me much. What I really need is two layers that are inversely masked. So, to invert the mask, I’ll choose one of the layers and then, while the Rectangle Tool is active, head up to the options bar and click on the Path Operations icon. After that, I’ll click on the Subtract Front Shape option.
This will seemingly undo what I did earlier to make the top part of the text disappear. The entire word will be showing once again, but in reality, it’s two halves of the word. Take a look at the Layers panel for a moment.

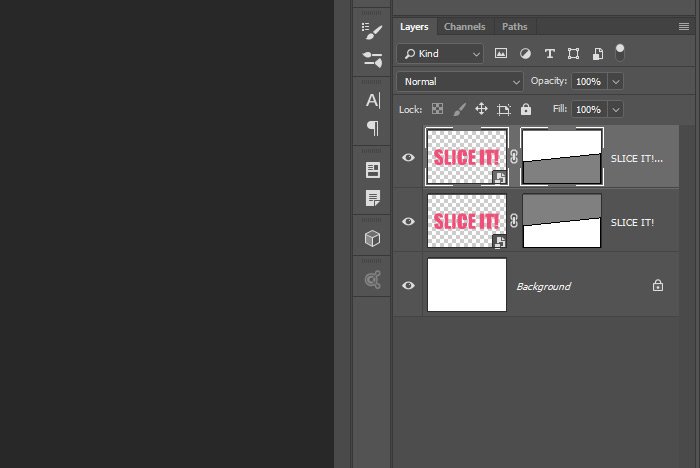
Do you see how the masks are inverse from one another? If I activate the Move Tool again and click to select one of the masked text layers and then nudge one of them, I’ll see the effect take shape. For this example, I’ll nudge straight up and down a few times.

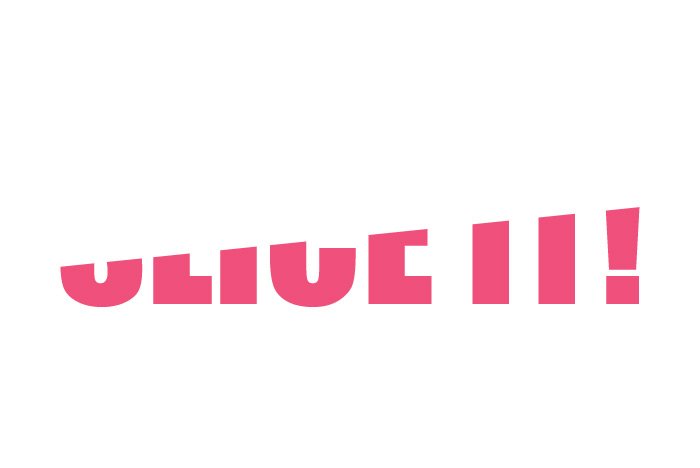
And that’s it! I’d say that’s a really cool and very easy effect to pull off. Depending on what kind of effect you want, you can make all different types of shapes with the Rectangle Tool or other shape tools. I just changed up the path outline a bit and make this.

The sky’s the limit. And if I ever wanted to edit the actual text, I could double-click on the layer in the Layers panel, edit the text and then save that file out. That would update the text in the working file.
I hope I clearly explained how to use the text tools, Smart Objects and vector masks to create interesting effects in Adobe Photoshop. If you have any questions regarding this post, please let me know down in the comment section below. You may also ask any question you wish in the discussion forum. Thanks for reading!

