WendyMay
Member
- Joined
- May 11, 2021
- Messages
- 142
- Reaction Score
- 0
- Points
- 21
- #1
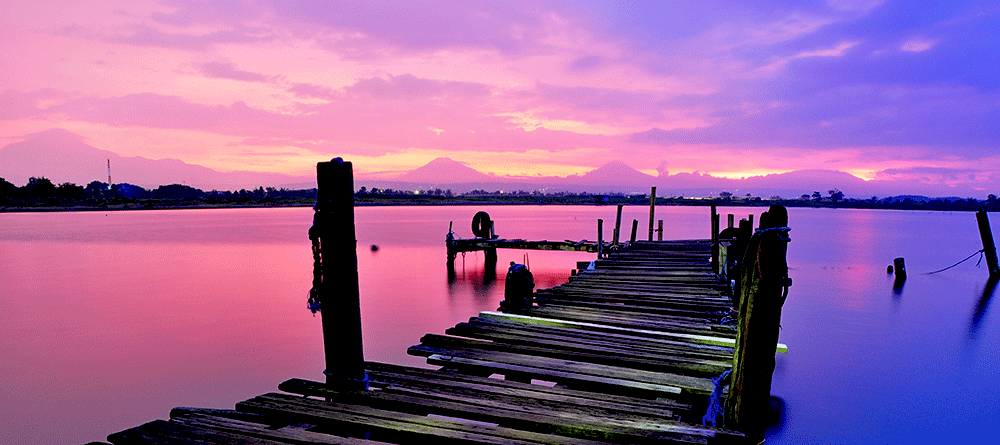
In today’s post, I’m going to edit a photo I took yesterday up in the Sugarloaf area of Maine. We had mixed sun and clouds during much of the day, which led to some challenging situations. I think the photo I’ve chosen as an example for this post is good – it’s overexposed due to the slow shutter speed I chose to capture movement in the water, which will lend itself well to the adjustments the basic panel in Camera Raw offers.
Now, I want you to know that I’m not going to stray from the basic panel. For the purposes of this post, I want to see how much better this one panel can make my photograph look. I may change views a few times, but that’s not going to affect the editing of the image.
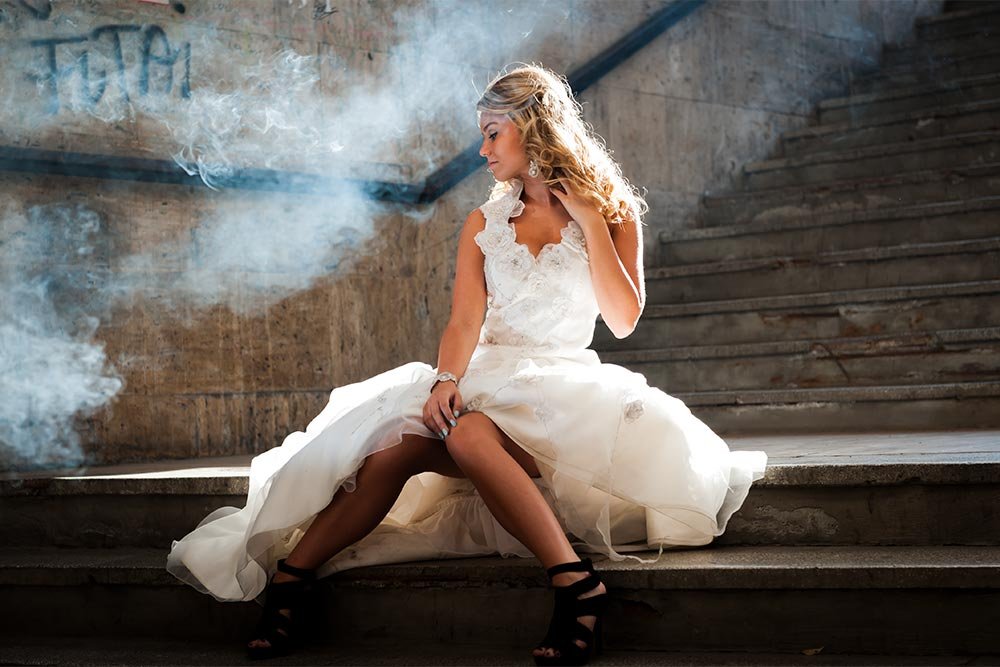
Original Image
The first thing I’m going to do is to open my collection of photos in Adobe Bridge. Once I’ve got them all showing as thumbnails, I’m going to open the photograph I’d like to edit by clicking the “Open in Camera Raw” icon in the upper toolbar. Once I’ve got it open, I can see what I’m working with inside of Camera Raw.NOTE: If you’d like a larger view of any example image in this post, simply right click on it and choose “Open Image In New Tab.”
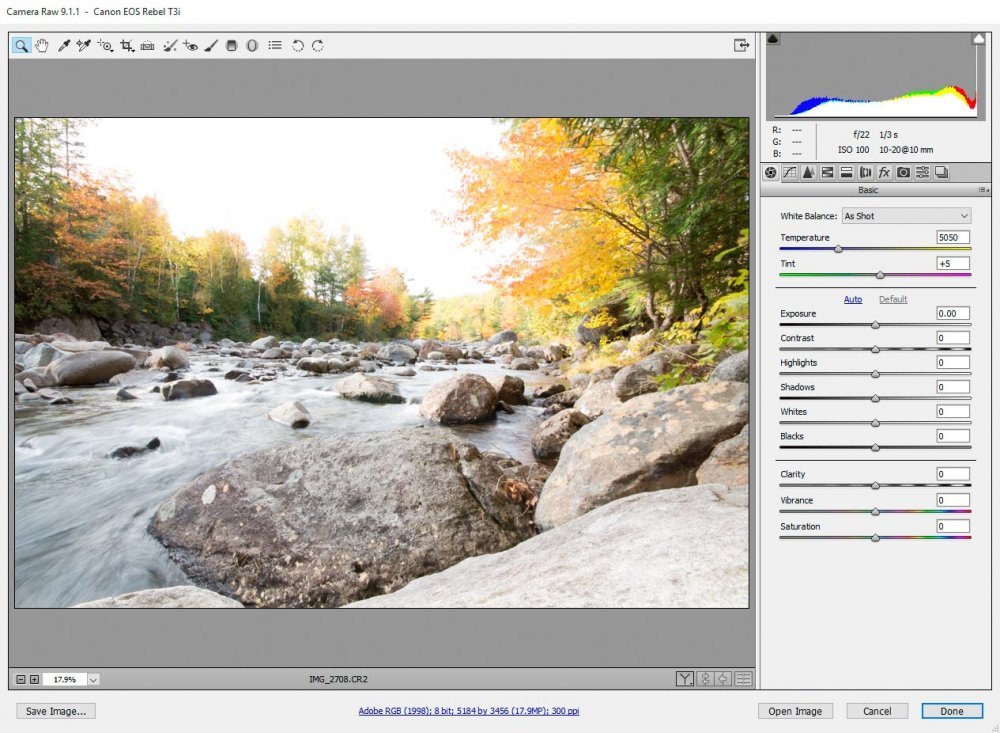
As you can see from looking at the above screenshot, we’ve got a serious overexposure problem. The reason this photo is overexposed is because I was alternating shutter speed settings in an attempt to capture some water movement. Since I was using a wide angle lens and was shooting with a slow shutter speed at 10mm, I wasn’t able to close down the aperture enough (due to the large minimum aperture) to stop all that light from getting to my camera’s sensor. I continued to shoot because, since I was capturing raw images, I knew I would have the ability to quiet down all that light later on in Camera Raw. Raw images have a much larger dynamic range that JPEGs do. It’s a challenging situation, but with some clever edits, I think the photo will come out okay.
Adjusting White Balance
If you take a look at my post that talks about white balance in photography, you’ll find that my photo’s white balance is off as well. When shooting in raw, cameras don’t compensate for what type of light is being received by the sensor. They simply capture what they think is available, whether it looks good or not. There are a multitude of methods to correct off white balance, but in this case, since Camera Raw offers some presets, I can get a guide as to what’s going on. But in the end, I’m going to use my eye and instinct of what I know looks good.Since it was cloudy when I took this shot, I’m going to switch the drop-down selection from “As Shot” to the “Cloudy” preset, just to give me an indication of what Camera Raw would like to do with the image.
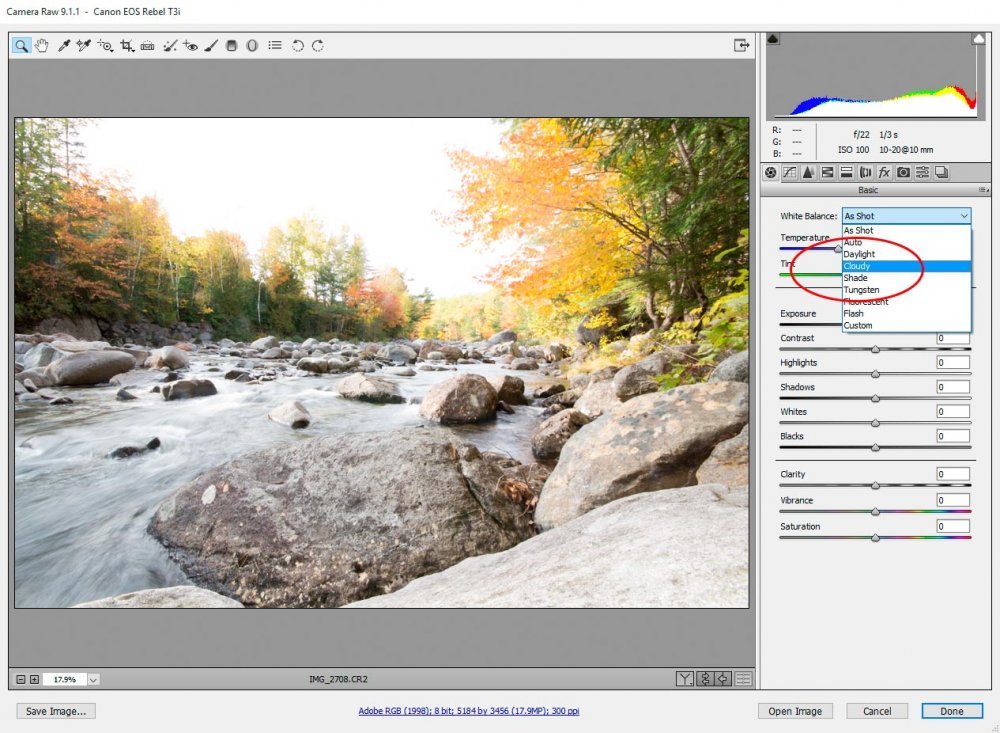
As suspected, Camera Raw warms up the photo by moving the white balance slider to the right. Since I knew I’m going to make a few more edits down the line that will dampen down the orange, I’m going to warm it up a bit more.
I do want to let you in on something – don’t ever think that once you make an edit in Camera Raw, you should, for some reason, keep that edit. As you go down the line, moving sliders here and there, you’ll often need to go back and re-evaluate previous decisions. I may discover that I need to adjust my white balance once or twice more, after I make some exposure and color edits.
Since “Tint” looks good in this photo, I’m going to leave it alone. If I found that the color was oddly green or magenta in some way, I could use that slider to adjust.
Adjusting Exposure
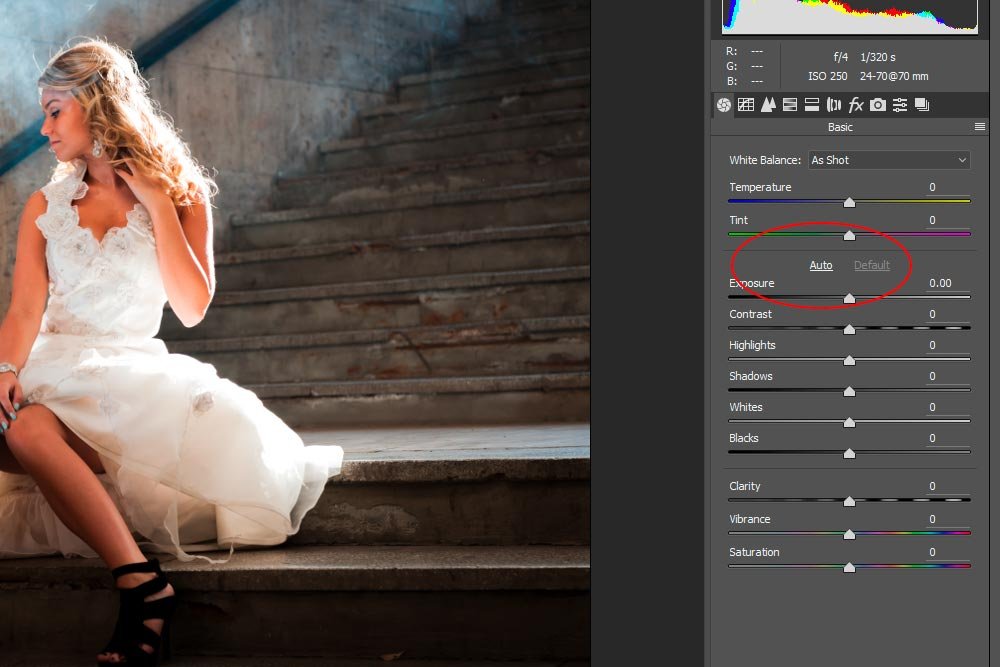
As I mentioned above, exposure is the big issue with this photograph. With that in mind, I know I’m going to have to move the “Exposure” slider to the left a good bit. Before I do that though, I like to click the “Auto” link, just to see what Camera Raw wants to do. By doing this, Camera Raw automatically adjust the sliders below to what it considers the correct settings. If the image looks good after clicking this, many folks leave things alone and move on. Since I’m going for a more dramatic outcome, I know I’m going to have to click the “Default” link to get the settings back to where they were. I’m merely clicking auto for guidance and curiosity.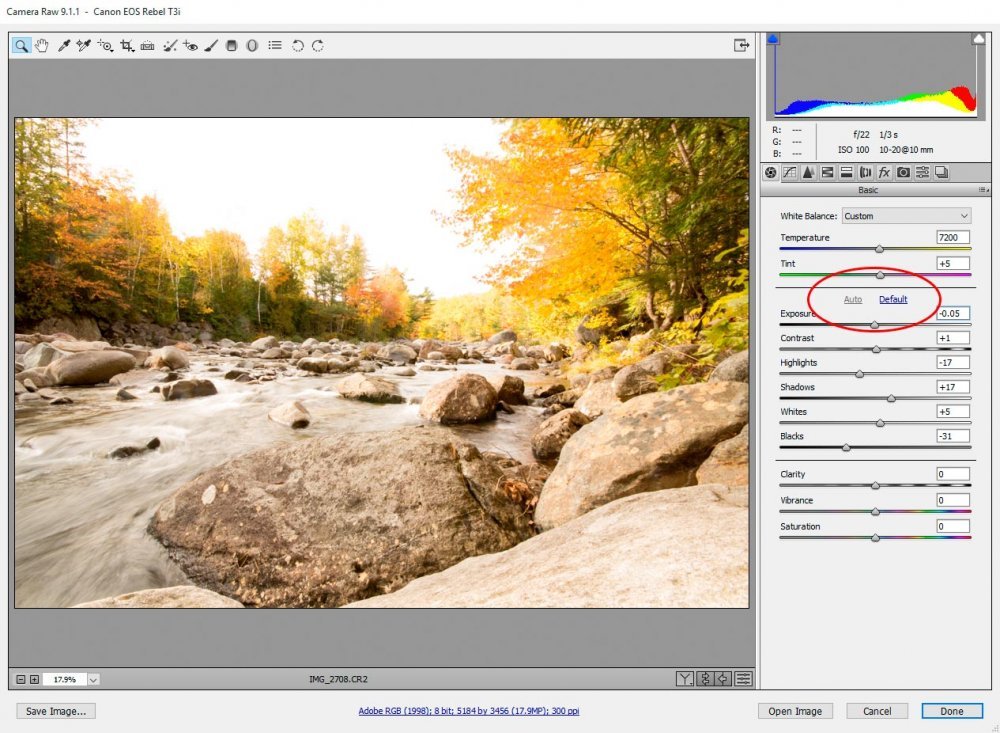
If you look at the histogram in the above screenshot, you’ll see that it’s still leaning to the right. Apparently, Camera Raw didn’t lessen the exposure as much as it should have. Once I click default to reset the sliders, I can manually adjust exposure and straighten out the histogram to make it more balanced. If you’re not sure how histograms work when it comes to photography, you should check out my post on the topic.
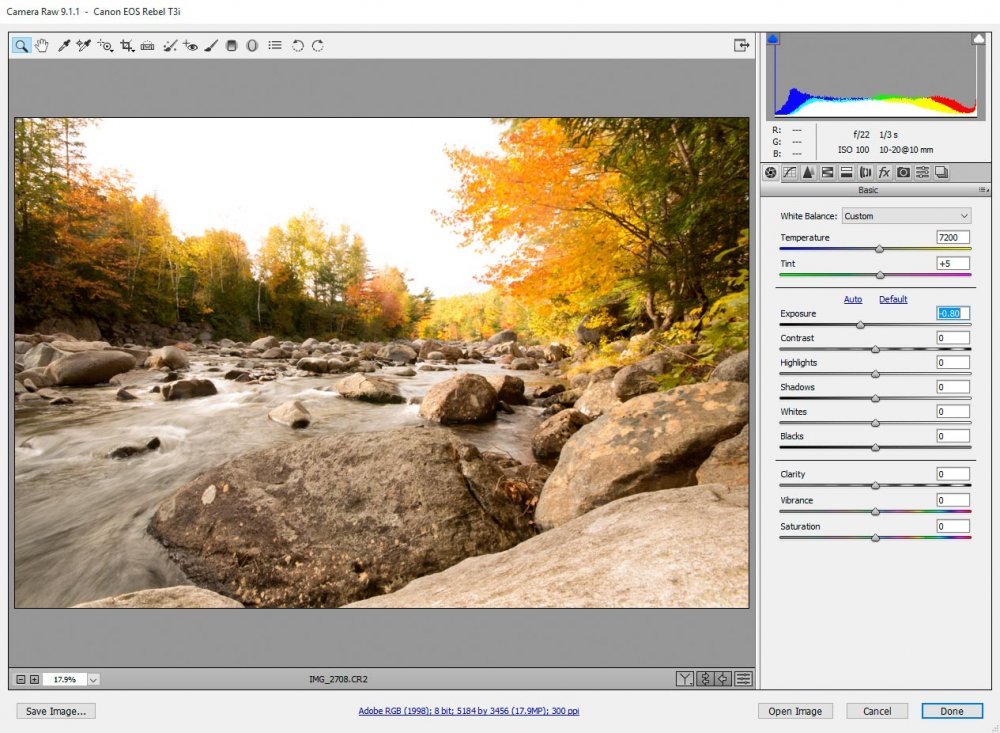
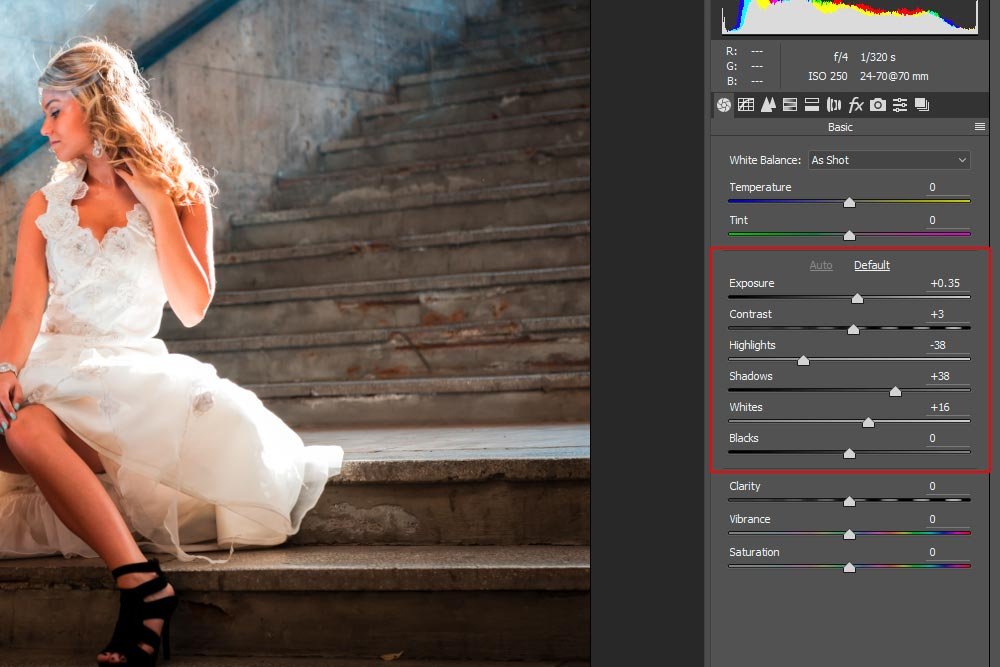
As you can see in the screenshot above, the exposure looks much better. The histogram is more balanced, but we’ve got a few warnings in it. If you look at the arrows on either side if the upper corners of the histogram, you’ll see that we’ve got a “shadow clipping warning” and a “highlight clipping warning.” These are evidenced by the vertical blue and white lines on the dark and light sides of the histogram. If I click one of these (the highlight warning is more visible), we can see what’s blown out. Obviously, the sky is way too white. Since I’m aware of this, I’m going to leave things as is.
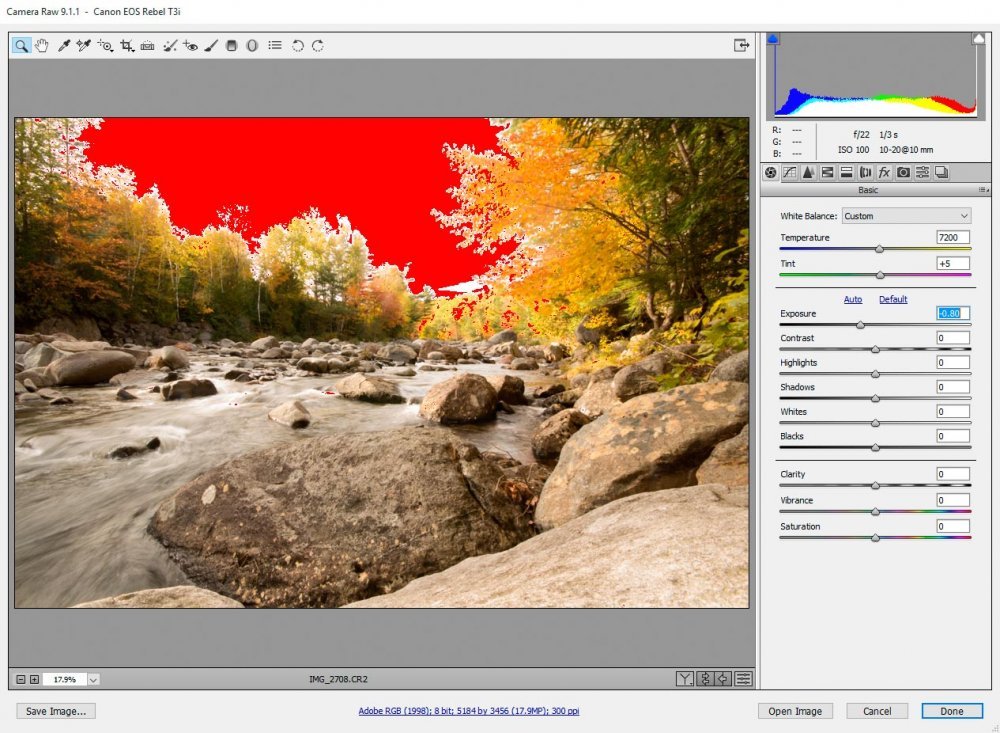
If this were a different type of photo, I may adjust for the areas that are clipped.
Adjusting Contrast
Contrast is a tricky beast. What is does is, with greater contrast, makes your highlights brighter and your shadows darker. Lesser contrast does the opposite. It sort of dulls things out. So setting contrast with too much gusto may force you to make reactive changes later down the line. It’s good that the folks at Adobe decided to place the “Contrast” slider above the highlight and shadow sliders, because if we can adjust contrast now, we can make minor edits later on.From my experience, I know that adjusting the contrast too much to the right here will really overcompensate for any lack of contrast in my photo, so I’m going to move it over just a tiny bit.
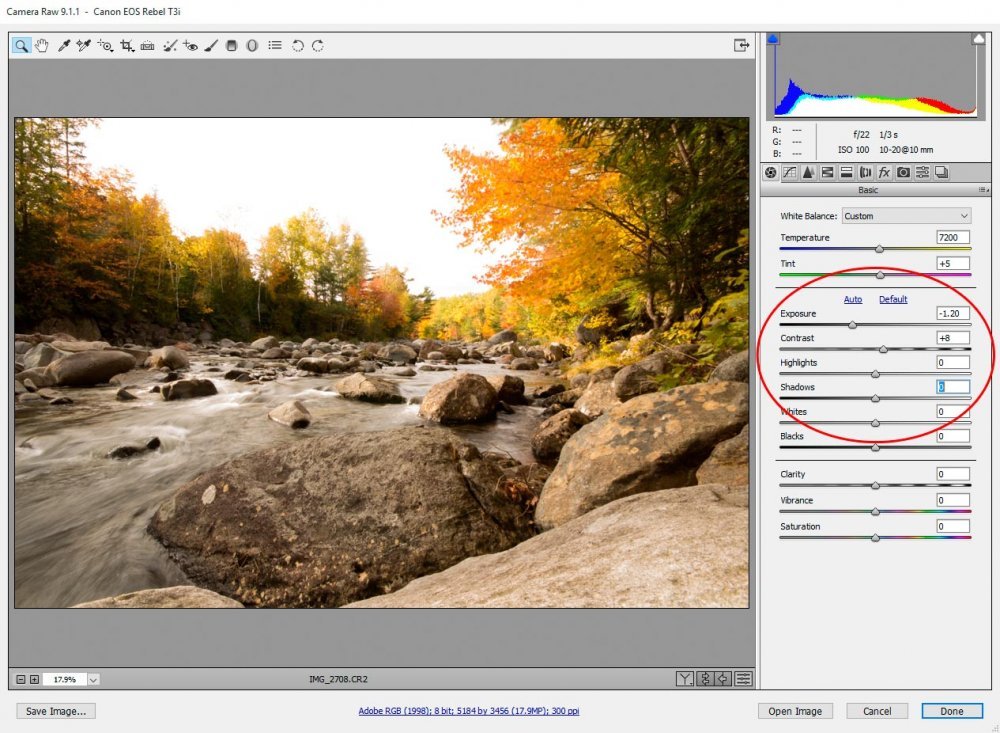
Adjusting Highlights & Shadows
If we look at the screenshot with the red sky above, you’ll notice that, beyond the overblown highlights in that area, nothing else is very offensive. Since that’s the case, I’m going to leave the highlight slider as it stands.Regarding shadows, we got a lot of details hiding out in trees and far rock line. If I move the shadow slider to the right and increase visibility to +75, all that detail becomes apparent. I think it looks a lot better with the detail in view.
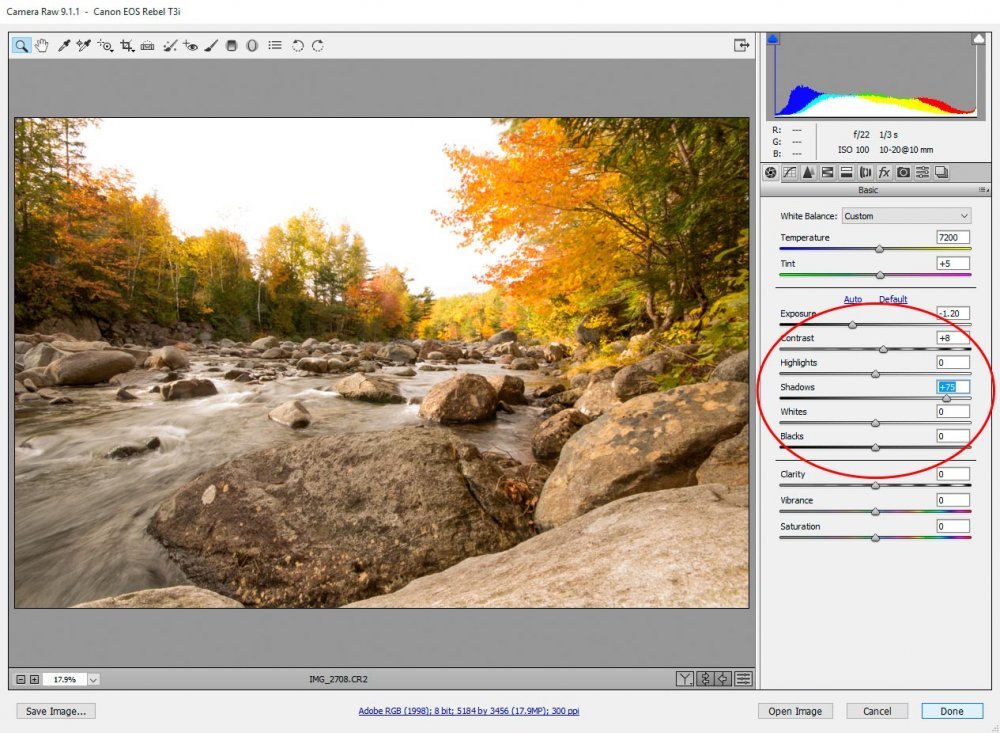
Adjusting Whites & Blacks
In Adobe Camera Raw, you’ll find that adjusting whites and blacks oftentimes gives you the same results as adjusting highlights and shadows. In my case though, I decided to move the white slider to the left (-45) to give the distant leaves on the trees some more detail and the black slider to -15 to offer some contrast that I lost by increasing the visibility of the shadows. This really is a case of looking at the photo and editing as you see fit. This type of creativity and exploration is part of what makes this type of work so much fun.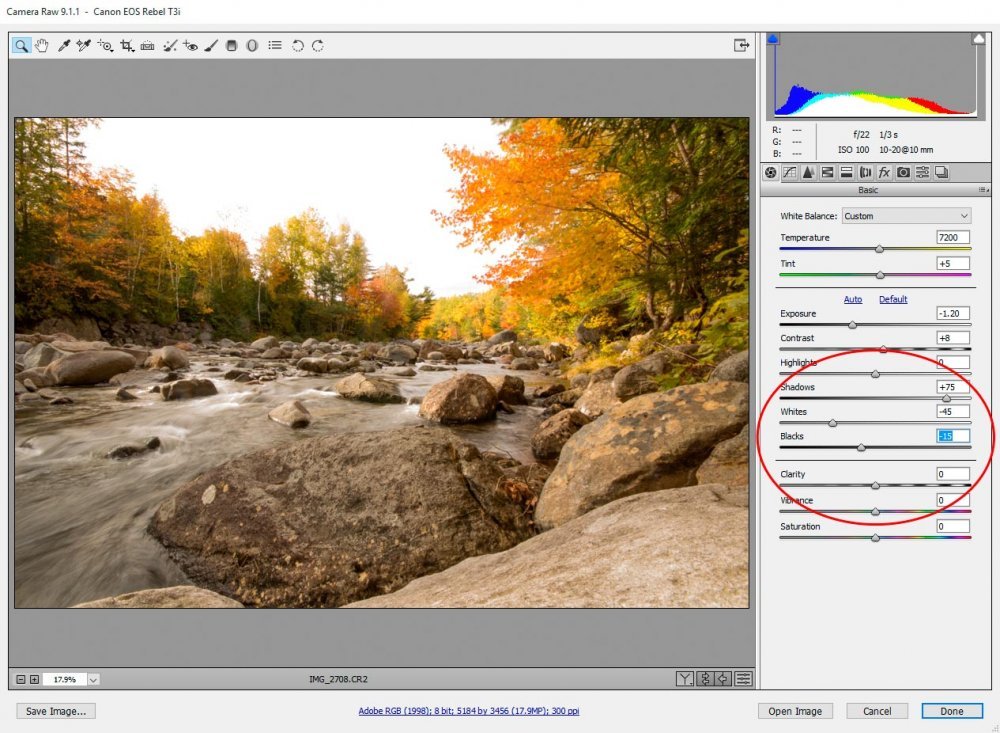
Adjusting Clarity, Vibrance & Saturation
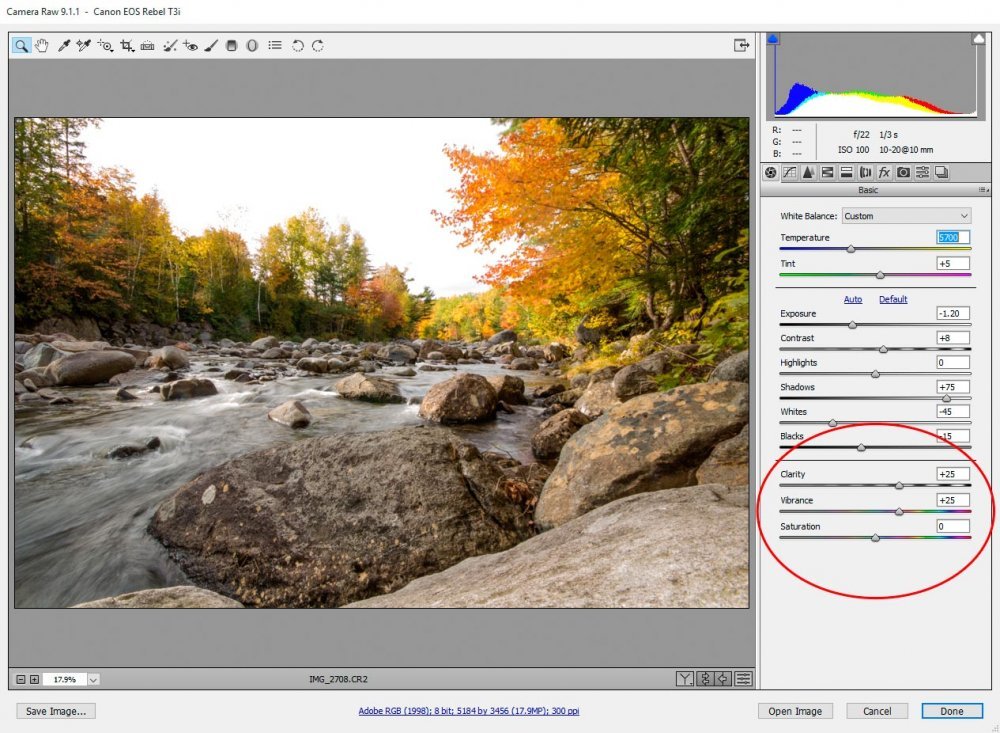
As I’m editing, I’m noticing that my image is looking a bit too warm for my taste. I’m going to head back up to the “Temperature” slider and lower the setting from 7200 to 6400. This will give my photo a more realistic look. I want to do this now because the next three edits are going to magnify anything I’ve already done.The “Clarity” tool in Camera Raw is one of my favorite. By moving the slider to the right, it can make a ho-hum photo look so much better. In my case, I increase the clarity to +25 and the edges of the leaves and the rocks in the river come alive.
The “Vibrance” and “Saturation” sliders are related. One adds color at a slower rate to your photo and the next adds it faster. I rarely use the saturation slider because, in general, adding some vibrance is all I need. And even then, I need to be careful I don’t go overboard. It’s not too difficult to throw a photo out of the realm of looking “normal.” In my case, I increased the vibrance to +25.
After adjusting these last few settings, I decided to bring the white balance temperature down from 6400 to 5700. As I said above, you may need to revisit some previous setting to achieve the results you’re looking for.
Comparing Before & After Shots
I’m going to write an entire post about how to compare before and after shots, but for the purposes of what I’m attempting to accomplish here, I’ll tell you that by hitting “Q” on your keyboard, you’ll have the ability to cycle through various before and after comparison combinations. The first time I did this, I was blown away with its coolness. Now, I merely use it as another tool. It is fun though.My favorite view is the split screen comparison view. It really gives me what I’m after as it relates to seeing if my changes make the photo look better or worse than it did originally.
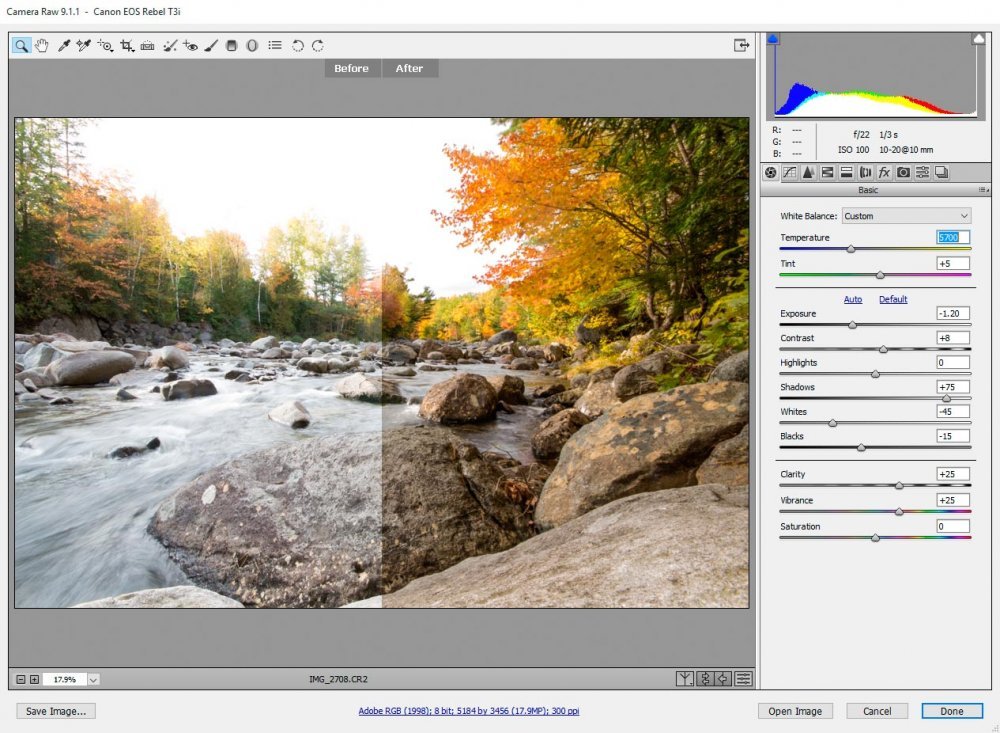
I think I did a good job. My goal was to lessen the exposure of this image and bring back some color so the photo is usable. By limiting myself to the “Basic” panel, I knew I wasn’t going to add any neat effects or make the photo look drastically different. All I wanted to do was to correct the deficiencies the camera produced.
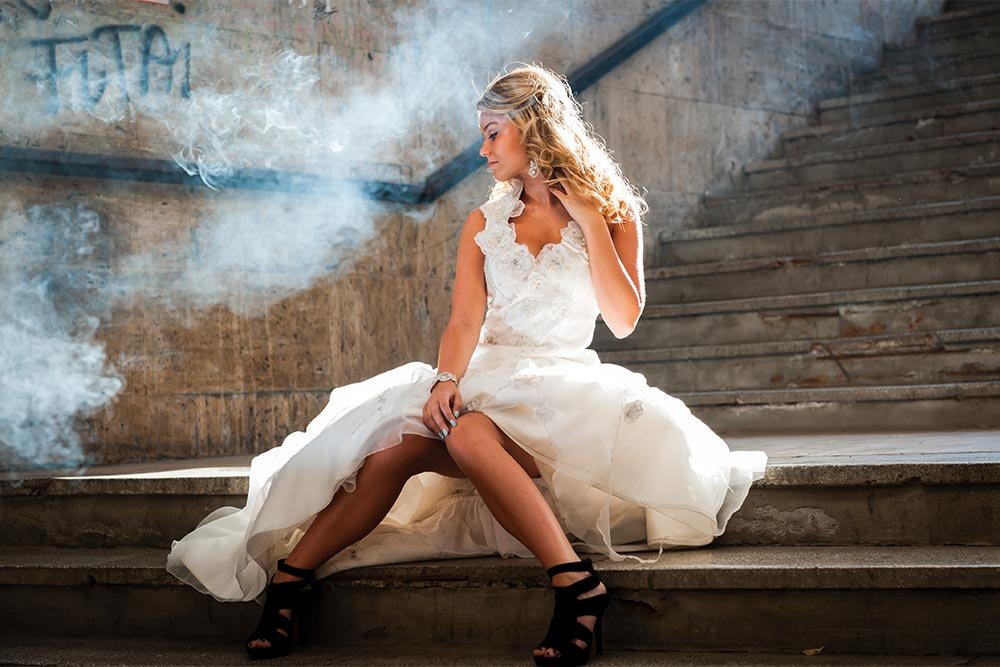
Final Image
Here is the final image. I think it looks pretty good. Later on, I may go back in and edit with some of the other panels, but for now, this is a totally workable photo to use where I wish.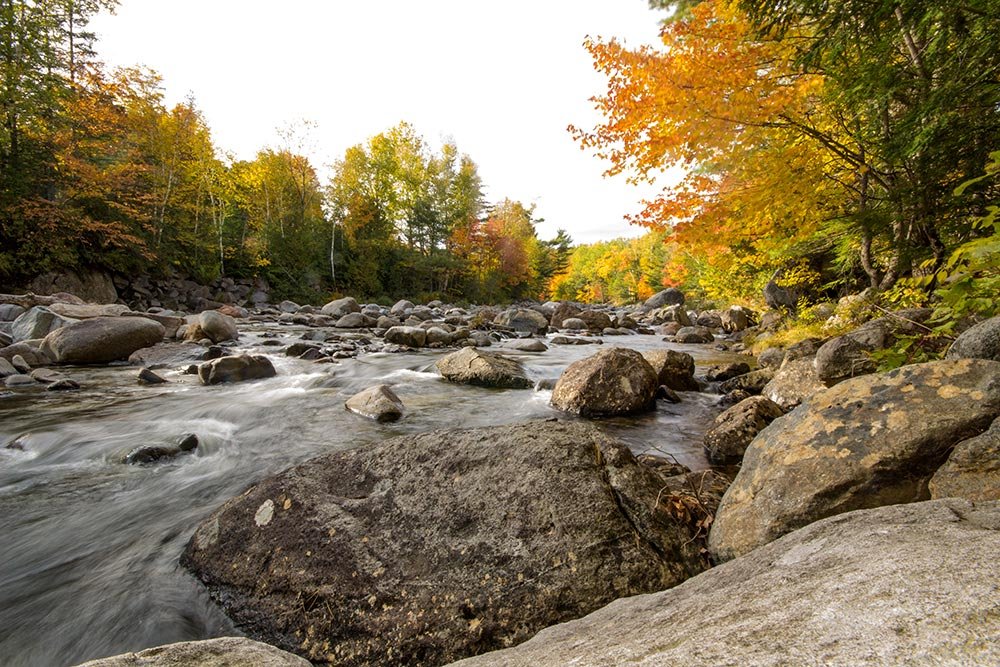
If you’ve enjoyed today’s post and found it helpful, please share it with a friend. Thanks!

