15Katey
Member
- Joined
- May 10, 2021
- Messages
- 130
- Reaction Score
- 0
- Points
- 23
- #1
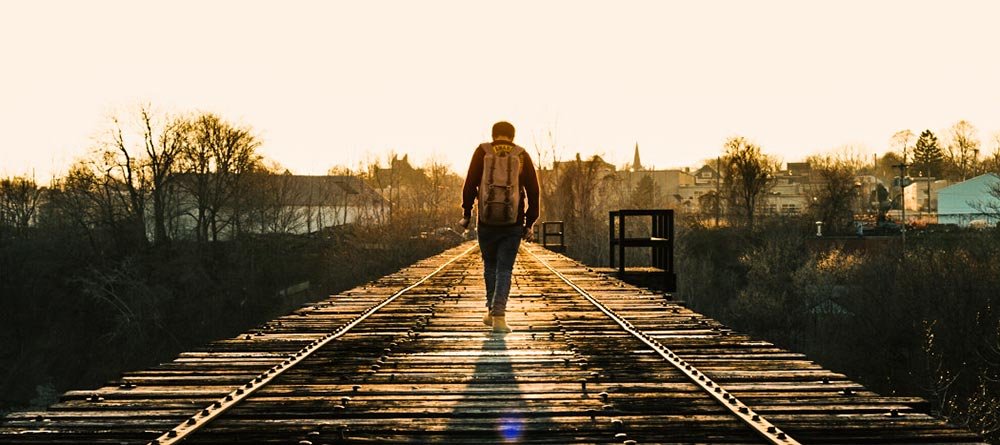
I talk a lot about adjusting the levels of various aspects of photographs on this site. So far, I’ve primarily used Adobe Lightroom and Camera Raw to cover these subjects. What I’d like to do today is to enter into the realm of Photoshop. After all, Photoshop is the most popular photo editing software on the planet. And if you weren’t aware, it’s got a ton of editing features when it comes to making images look great.
In today’s post, I’ll merely scratch the surface of what Photoshop’s capable of. I’ll discuss how we can go about using the Brightness and Contrast adjustment sliders inside of the Properties panel to tweak how a few photos appear. I’ll use three sample photos to exemplify my changes.
Opening Images & Fitting To Screen
Since my goal is to create screenshots for this post that are as clearly viewable as possible, I’ve fit my images to the workspace as best I could. To do this (fit to screen), I selected the tab I was interested in fitting and pressed the Ctrl+0 keys on my keyboard. I could have just as easily double-clicked on the Hand Tool over in the left vertical toolbar. That would have accomplished the same thing. Here is what I have now.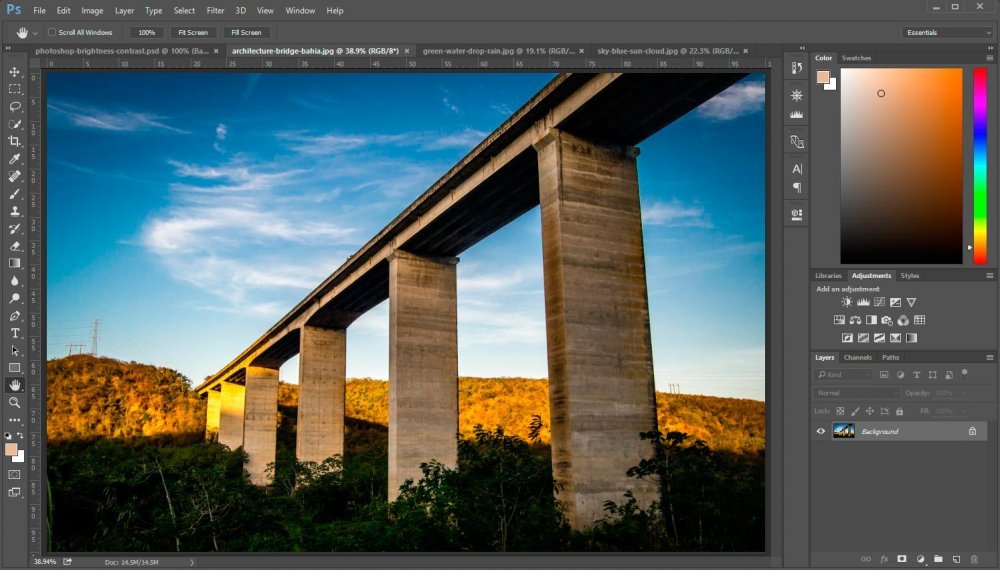
Open the Adjustments Panel
My Adjustments panel is already open because I’ve been toying around with this feature. If you’re following along and yours isn’t open, go ahead up to the Window menu and click Adjustments. This will open the correct panel in the right side of your screen.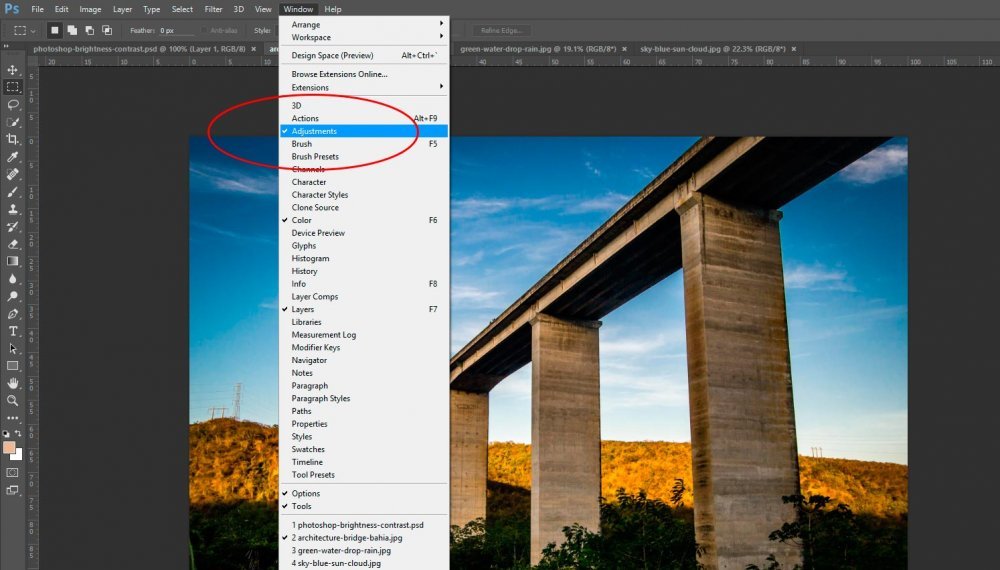
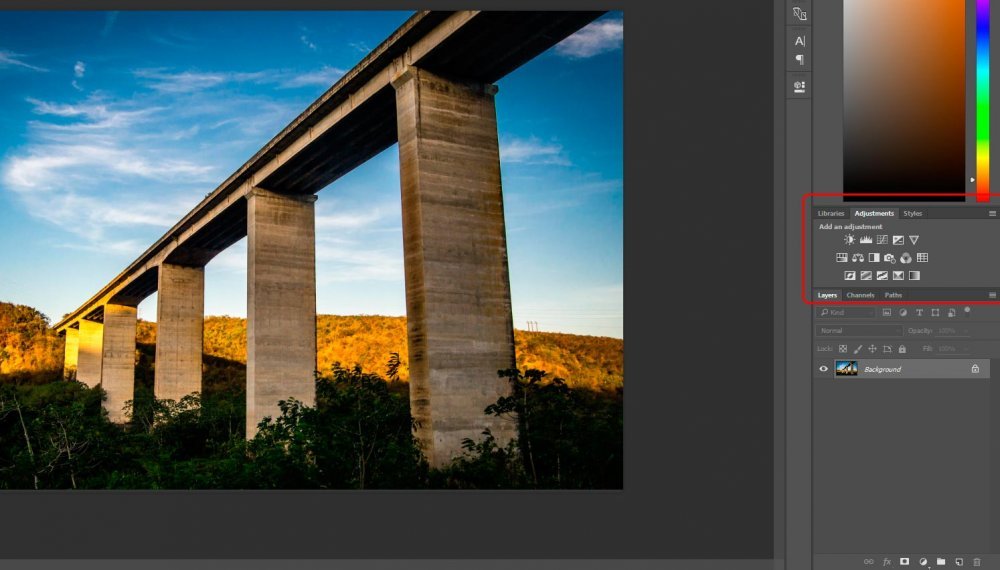
Now, if you look inside this panel, you’ll notice a bunch of small icons. The very first one (if you roll over it) creates a new brightness/contrast adjustment layer.
Creating an Adjustment Layer
The best part about using the sliders in the Adjustment panel is that, when clicked on, they create a new layer. This layer is called an Adjustment Layer. These adjustment layers are non-destructive, so we’re able to do anything we want to them and we won’t ruin our original image in any way. The original, in many cases, sits all the way at the bottom of the Layers panel, under any adjustment layers we create.I’ll go ahead and click the Brightness/Contrast icon in the Adjustments panel. After I do that, I should see a new layer appear in the Layers panel.
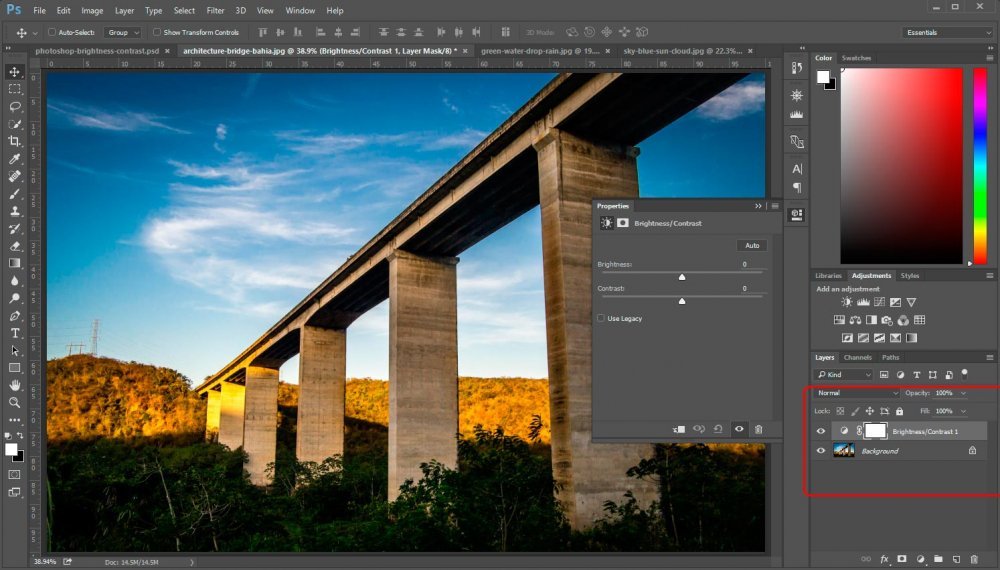
If you take a look at the screenshot above, you’ll see that two things happened after I clicked the icon. Like I predicted, a new layer appeared above my base layer (the image). Also, the Properties panel popped open – it now covers part of the photograph. It used to be a simple icon that was resting peacefully in the right-side vertical toolbar.
Making Adjustments
I went ahead and moved both the Brightness and Contrast sliders up a bit. I know this sort of made the photograph look worse than it did before, but I wanted to show you how it works.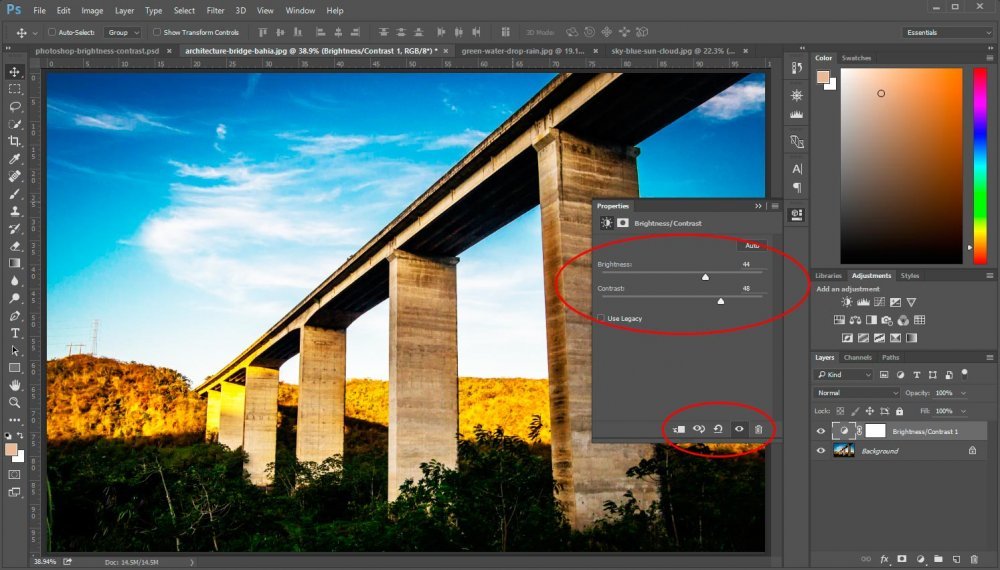
If you take notice inside the screenshot above, you’ll see that I circled two areas in red. The larger circle surrounds the sliders. That’s fairly easy to understand. If I move the Brightness slider to the right, it adds brightness. If I move it to the left, it decreases brightness. The same is true for the Contrast slider. If I move that one to the right, it increases contrast and if I move it to the left, it decreases it.
Working With the Adjustment Layer
I already talked about the larger red circle I created in the screenshot above, but I have yet to discuss the smaller one.Inside the smaller red circle are a few icons. I want to go over a few of them. I’ll list them below.
The eyeball with the curved arrow icon brings us back to the state of the photo before the adjustment layer was added. This icon needs to be held down for it to work. Once it’s unclicked, it stops working.
The semi-circular arrow icon undoes any adjustments you made with that particular layer. If you moved the sliders in any direction, you’ll reset all of them (inside this layer) to their original state.
The eyeball icon brings us back to the state the photo was before the addition of the adjustment layer. It’s a toggle switch. It’s sort of like the first icon I discussed, but you don’t have to hold it down. Just click it once and it hides any changes you made to the layer. Click it again and those changes become visible once more.
The trash can icon deletes the entire adjustment layer. It just gets rid of it.
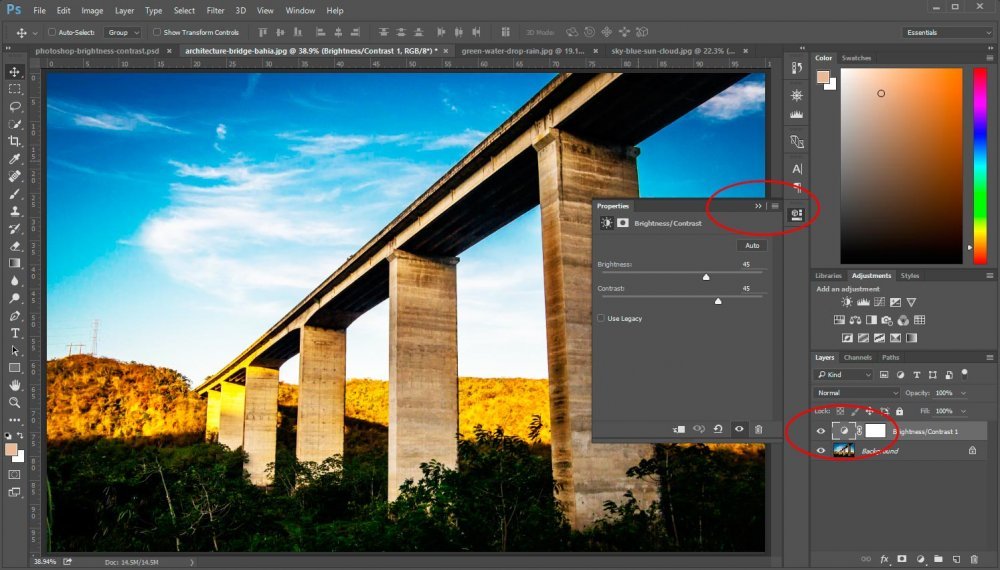
If you want to hide the changes you made to the layer another way, you can simply click the small eyeball icon that’s to the left of the layer name in the Layers panel. This method works just like it would with any other layer. Click it once and the layer is hidden. Click it again and it is visible.
Lastly, if you want to hide the Properties panel (that has the Adjustment features inside of it), you can simply click on the small right-facing double white arrows that are located at the top of the panel. If you’d like to open the panel up again for any adjustment layer, you can double-click the small sun icon that’s located right inside of the adjustment layer itself. I’ll circle both of these areas in the screenshot below.
Adjusting Opacity
One of the many tricks professional editors use is to make lots of adjustments and then to lessen their opacity. This is the wonderful thing about layers – your creativity with them is limitless.As an example, I’ll push both sliders in this first example image all the way to the right. This should exaggerate the effect.
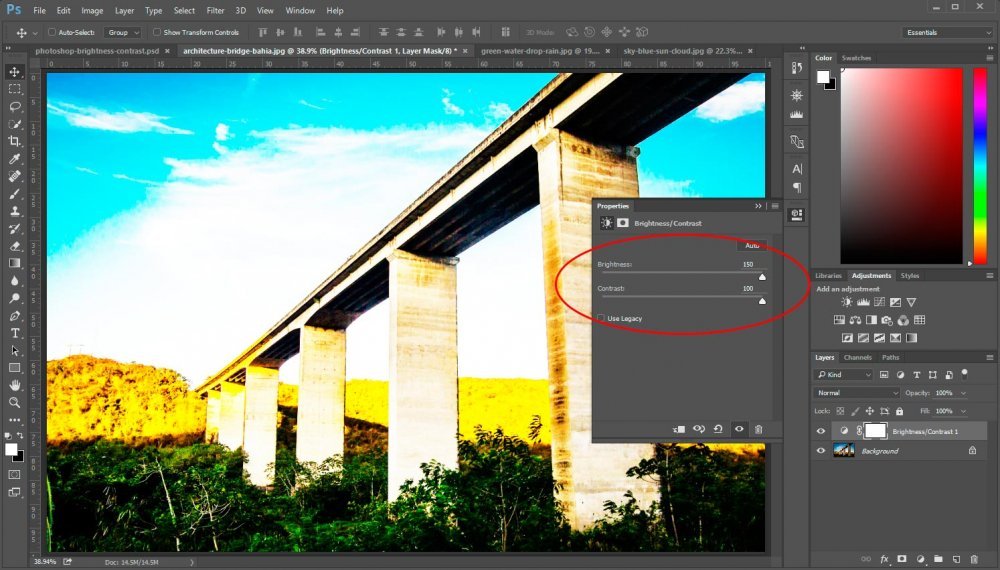
Now I’m going to move the Opacity slider that’s located at the top of the Layers panel to 50%. This will half the effect of the Brightness and Contrast sliders.
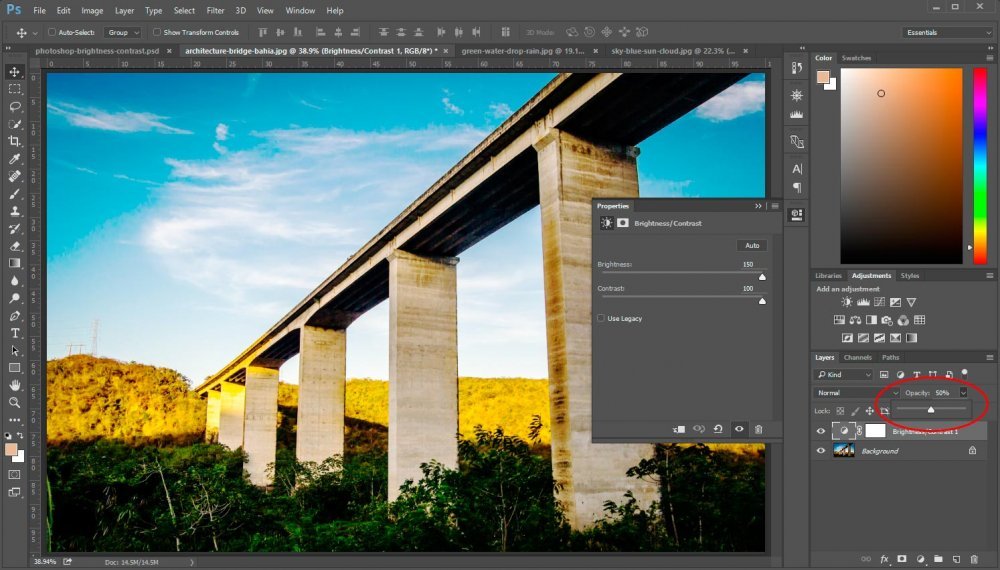
Now, I’m going to move the Opacity slider that’s located at the top of the Layers panel to 50%. This will half the effect of the Brightness and Contrast sliders.
I’m sure you can think of some instances where this would be helpful.
Adjusting the Remaining Photos
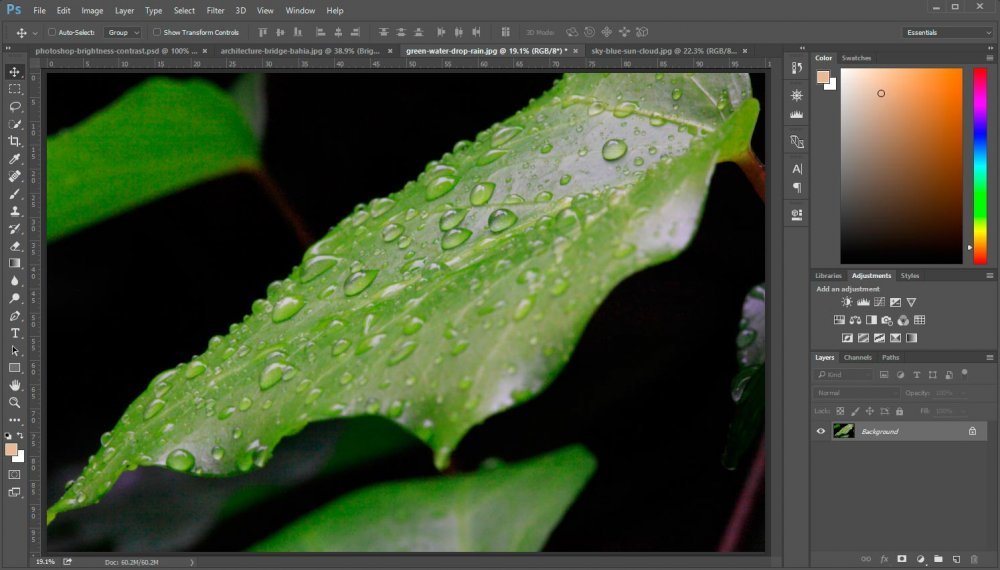
I’ll use this section to demonstrate the changes I would make using the Brightness and Contrast sliders to alter the look of my remaining two photos. I’ll show you the before shots and the after shots.This is the original look of the first photo.
This is the adjusted look of the first photo. Notice the new layer in the Layers panel and the sliders in the Adjustment panel.
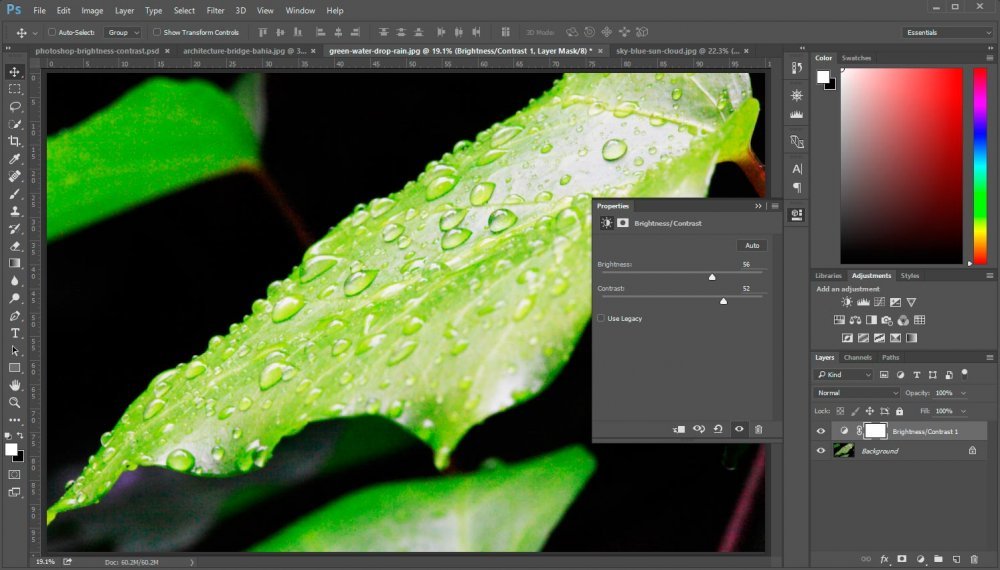
I’d say that just by editing this one area, the photo looks a lot better.
Now, I’ll do the same thing for the second photo. Here is the original.
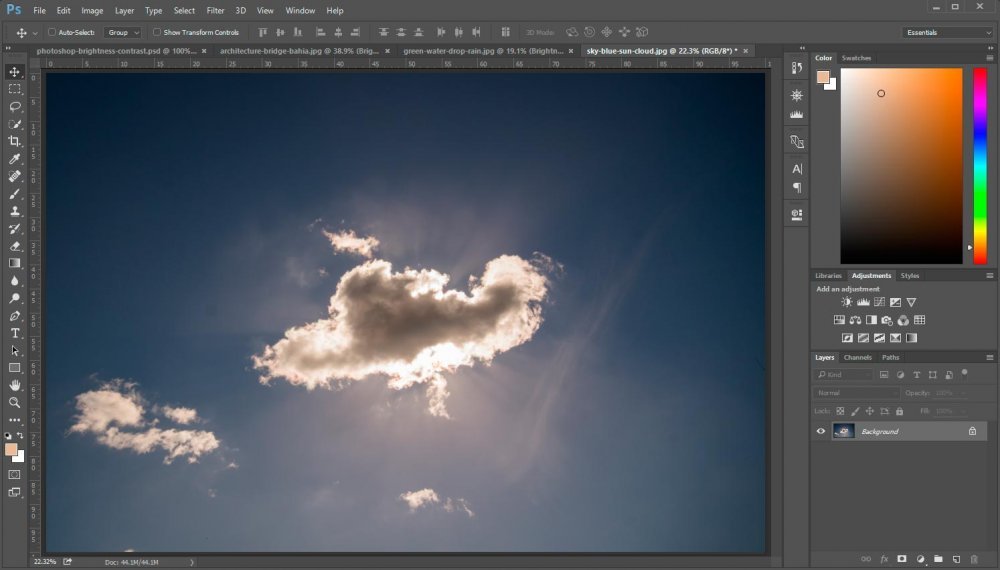
Here is the after shot.
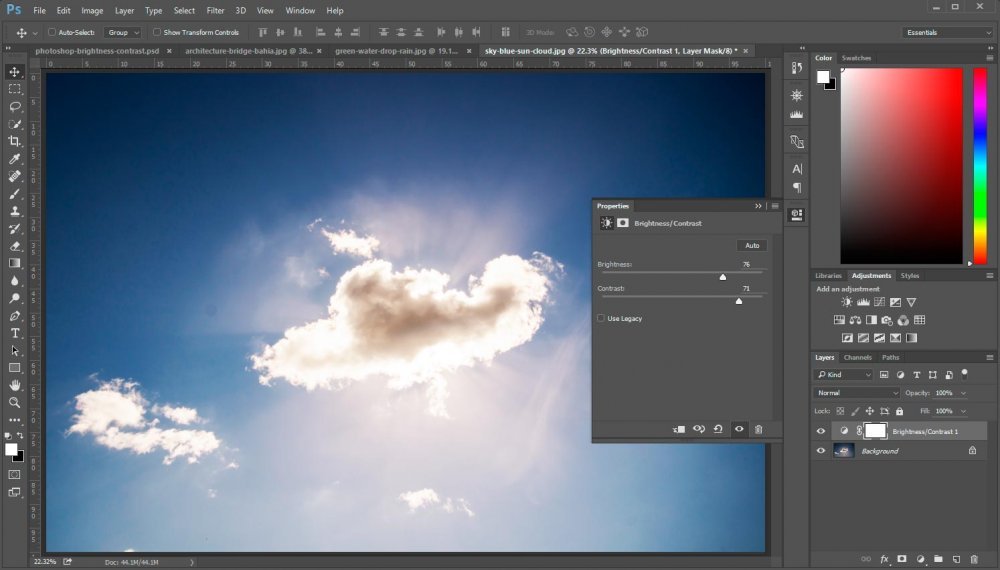
Again, this photo looks a lot better than it did originally. For both of these cases, if I wanted to undo these adjustments, I could simply delete the adjustment layer or click on the small trash can icon that’s located at the bottom of the Properties panel.
——
If you’ve enjoyed today’s post and found it helpful, please share it with a friend. Thanks!
