CraigHardy
Member
- Joined
- May 11, 2021
- Messages
- 223
- Reaction Score
- 2
- Points
- 18
- #1

Vignettes are fun border effects that can be applied to photos to enhance the focus of interest. Oftentimes, photographers and editors will apply vignettes to portraits, landscape shots and photos that need something special accentuated. Oftentimes, the vignette will subtly draw the eye inward with a soft transition, but I’m increasingly seeing them as more dominant areas of the photo with more defined edges. Either way, vignettes can truly enhance the look of a picture and it’s helpful to know how and when to use them.
How to Add & Adjust a Border Vignette in Camera Raw
In today’s post, I’ll be demonstrating where to find the vignette controls in Adobe Camera Raw. Then, I’ll apply a vignette and adjust it by pushing the various sliders in different directions. I’ll explain what a vignette is, what each slider does and how the different settings can affect the look of a photo.Vignette Controls
If you launch a photo into Camera Raw and click the Effects tab, you’ll see the controls that reside in the Post Crop Vignetting section. The reason it’s called post crop is because any vignette that’s applied to a photo will shrink or expand with that photo, no matter how it’s cropped in Camera Raw. It’s fluid, which is important to remember because as you crop, in general, the photo area becomes smaller. Any vignetting that’s applied will remain as a certain percentage of the area of the photo. A good rule to follow is that you should do any cropping necessary before applying a vignette. That will save time later on if you have to go back and readjust the vignette to better fit the cropped image.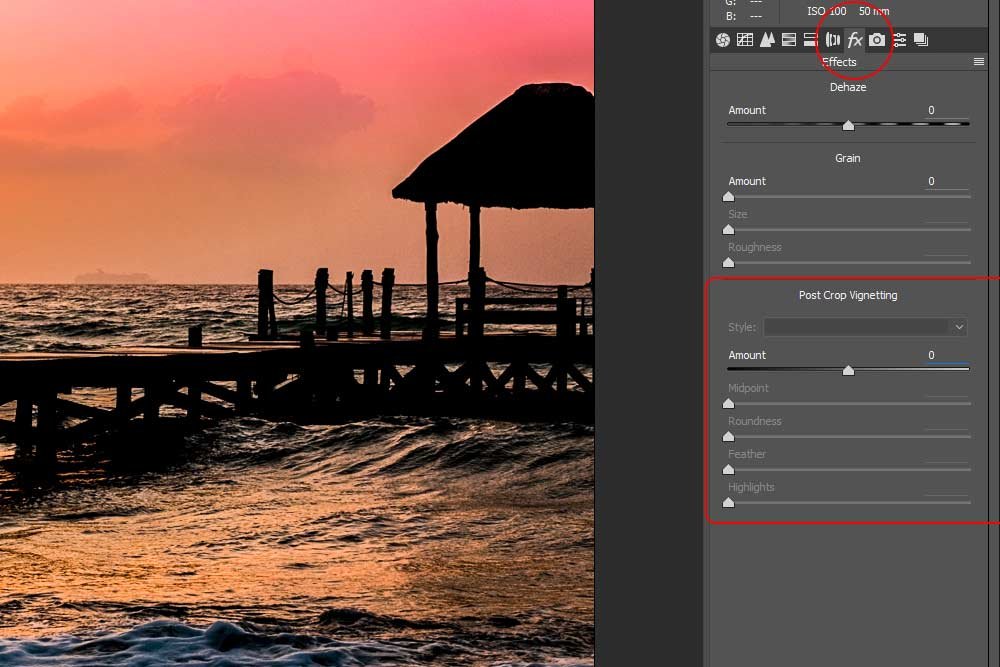
If you look at the above screenshot, you’ll notice that I circled the Effects tab and outlined the vignette sliders. This is where I’ll be working for this post.
Post Crop Vignette Controls
Currently, there are eight available controls for this area. Three of them can be found in a drop-down menu and five can be found as sliders. I’ll cover what each one does below.Drop-Down Menu
Highlight Priority: Vignettes usually apply to the entire edge of an image. If Highlight Priority is selected from the drop-down menu, parts of this uniform vignette will be removed in favor of the highlights involved. So, if there is a bright street light towards the top of an otherwise evenly toned photo, the vignetting around the street light will be removed, creating, in my opinion, a more interesting effect. One thing to be aware of, though, is that there may be some unexpected changes in colors towards the more dark areas of the photo’s edges. In general, this type of option is recommended for use with photos where the highlighted areas are critical to the presentation of the photo itself.Color Priority: This option takes the photo’s color hues into consideration while applying the vignette. In the above option, the vignetting was only affected by the highlights in the photo, while with this option, all areas can potentially be affected. If you experiment with Color Priority, you’ll find that there’s more transparency around the edges, with some of the more bold colors making their ways through. A word of warning, though, is that while Color Priority is selected, there may be a reduction of photo detail around the areas of highlights.
Paint Overlay: The Paint Overlay option simply blends the original colors that are found in the image with either pure black or pure white. While this option can reduce contrast and while many editors find this characteristic unappealing, it can be effective if a soft effect is sought after.
Sliders
Amount: If you push this slider to the left, the edges and corners of the image will appear darker (black). If you push this slider to the right, the same areas will appear lighter (white).Midpoint: This slider controls how large the area the vignetting will be applied to is. If the slider is pushed to the left, the area affected will be smaller, resulting in a more prominent and thicker vignette around the image. If pushed to the right, the area inside the vignette will be expanded and the edge effect will become thinner.
Roundness: This slider controls the shape of the vignette. If the slider is pushed to the left, the vignette will take the shape of a rounded edged square, while if the slider is pushed to the right, the vignette will take the shape of a circle.
Feather: This slider controls the softness of the border effect. If the slider is pushed to the left, the vignette becomes hard and more defined, while if the slider is pushed to the right, the edge becomes more soft and feathered, which will blend with the photo.
Highlights: This control can only be used when Highlight Priority or Color Priority are selected from the above drop-down box. When either of these are selected, this slider controls the strength of the highlights that will show through the vignette. If this slider is pushed to the left, no highlights will be visible through the vignette and if pushed to the right, all highlights will be visible.
Examples of Different Vignettes
In this section, I’ll display a few different examples of various vignette drop-down and slider settings. While I won’t show all possible scenarios, the photos below will give you a good idea of what one can accomplish while using this feature.This first image is an example of a dark, oval vignette. I’m using:
Highlight Priority
Amount: -100
Midpoint: 0
Roundness: 0
Feather: 50
Highlights: 0

This next image is an example of a light, round vignette. I’m using:
Color Priority
Amount: +100
Midpoint: 75
Roundness: +50
Feather: 20
Highlights: Unavailable

This final image is an example of a darker, semi-transparent, rounded square edged vignette. I’m using:
Paint Overlay
Amount: -50
Midpoint: 25
Roundness: -50
Feather: 0
Highlights: Unavailable

While these examples are somewhat limited, I think I displayed enough variety for you to take the bull by the horns and experiment with this important feature found inside Adobe Camera Raw. If you have any questions, please leave them in the comment area below. I look forward to hearing from you. Thanks!
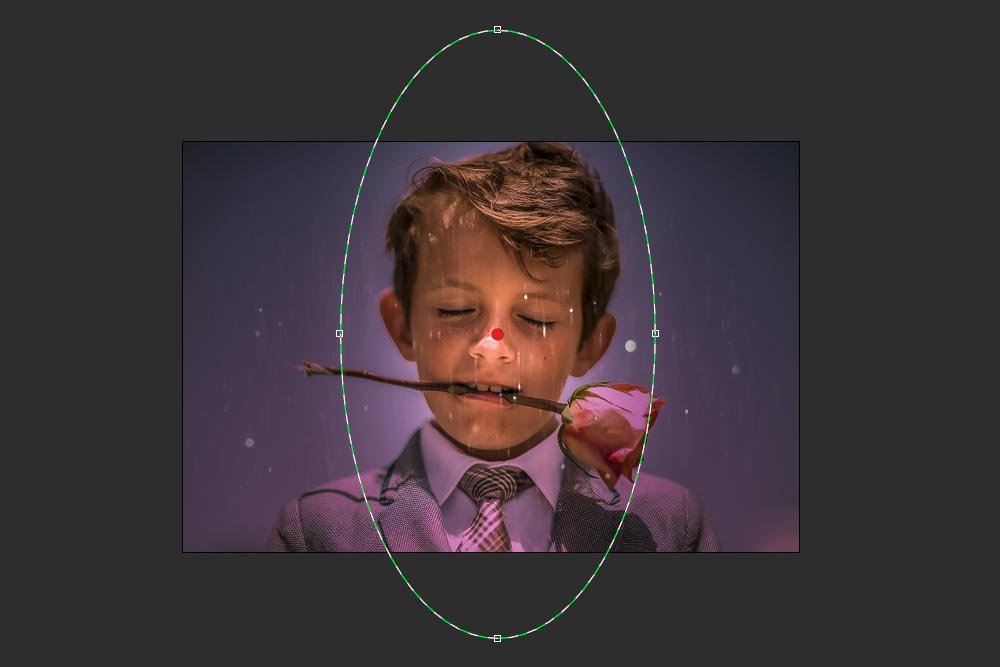
PS – If you’re interested in the settings I used for the lead-in photo for this post, they were:
Highlight Priority
Amount: -68
Midpoint: 50
Roundness: -45
Feather: 100
Highlights: 100


