EmeraldHike
Member
- Joined
- May 10, 2021
- Messages
- 133
- Reaction Score
- 0
- Points
- 21
- #1
When it comes to adjusting white balance in Adobe Lightroom, many of the sliders and controls look remarkably similar to how they look in Camera Raw. I’d even go so far as to say that if you read or watch a tutorial that covers this topic specifically for Camera Raw, you’d be pretty much set to do the same thing in Lightroom. There are, however, a few important differences between the two applications.
In today’s post, I’ll be walking through a quick project that covers some of the more interesting aspects of adjusting the temperature and white balance in Lightroom. If you don’t use Lightroom, but still want to read my posts that cover the same topic for Camera Raw, you can do so here:
Can You Fix Photo White Balance With Adobe Camera Raw?
Adjusting White Balance of Multiple Photos In Adobe Camera Raw
If you’d like to read up on white balance when it comes to photography, I have a post that discusses that:
What Is White Balance In Photography?
Even if you’re familiar with the topic, I suggest you read the previous post. It’s got a lot of good information.
Demo Photo of Rose
I took the following photo at Washington Oaks Gardens State Park in Palm Coast, Florida. There’s a wonderful rose garden in the park and honestly, I’m not sure anyone could take enough pictures of the flowers. There are so many and most of them are multi-colored.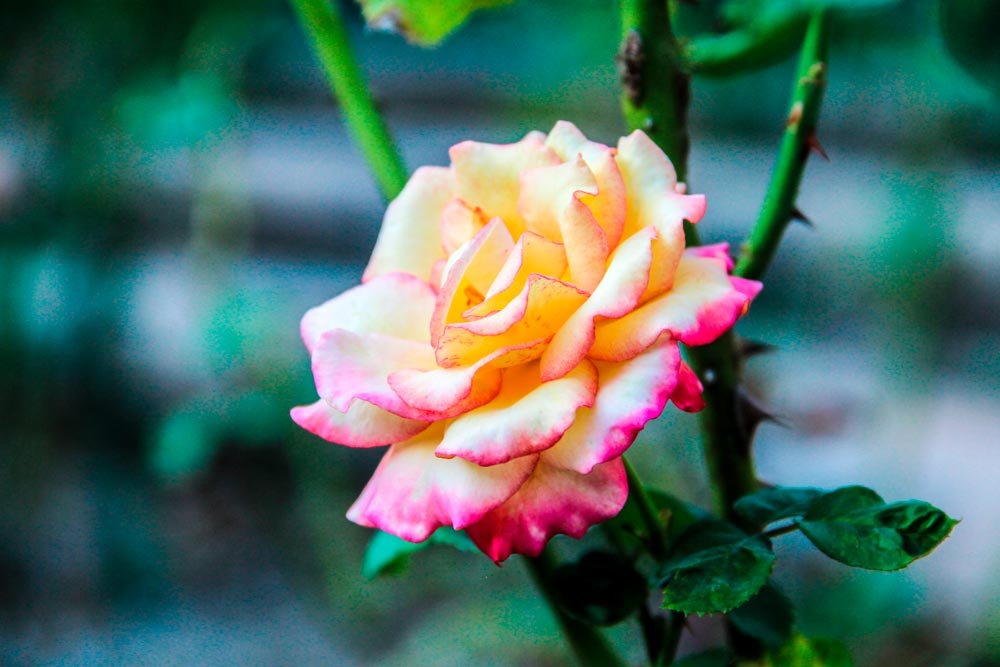
Now, I’ve gone ahead and quickly adjusted some of the basic sliders to give this photo a bit of contrast. Nothing crazy, but something that will show the alterations I make to the white balance more clearly.
Temperature & Tint Sliders
I thought I’d start at the very beginning. This is for those who aren’t very familiar with Lightroom at all. If you’ve already launched the application and have some photos imported, head into the Develop module by clicking Develop up in the top menu. From there, select a photo of your liking from the filmstrip panel at the bottom of the program.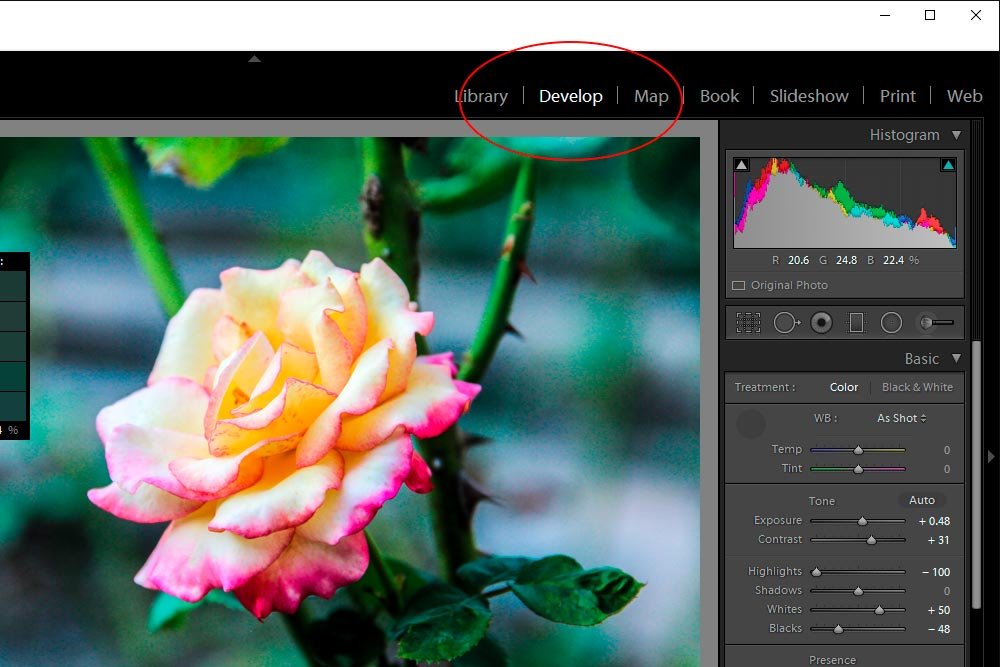
After that, focus your attention on the Temperature and Tint sliders in the right panel.
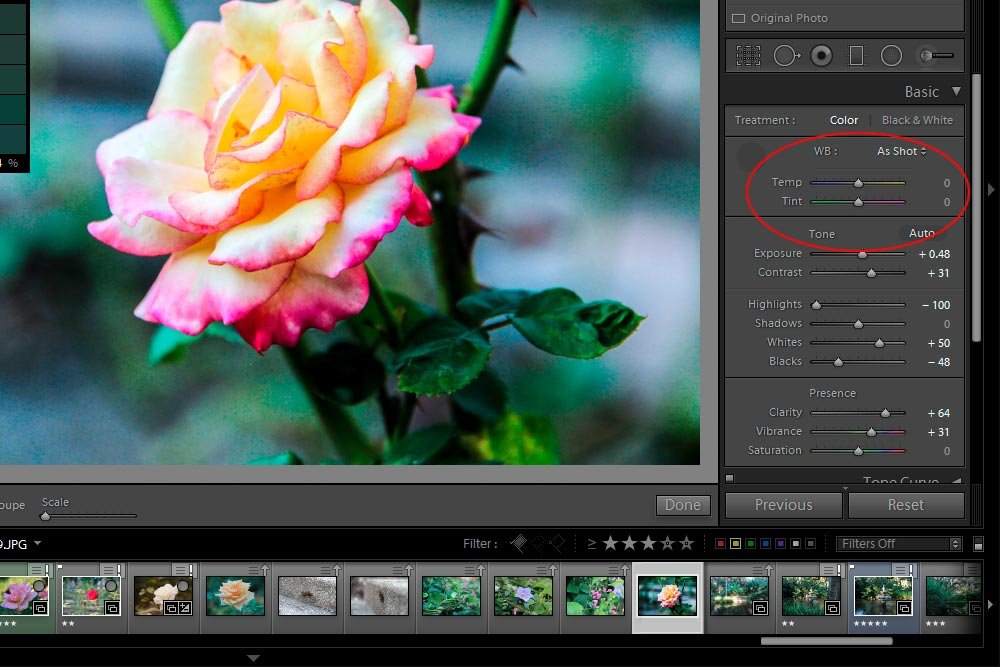
These two sliders control the white balance of your photos. If you slide both of them back and forth a few times, you’ll quickly discover what they’re capable of. The Temperature slider alters the temperature of a photo from cool to warm and the Tint slider alters the tint of a photo from green to magenta. Between the use of both of these sliders, much can be accomplished when editing photos. I’d even go so far as to say that white balance is one of the most important areas of photo editing in general. That’s probably the reason it’s located so prominently (at the top) in the Basic panel.
White Balance Selector Tool
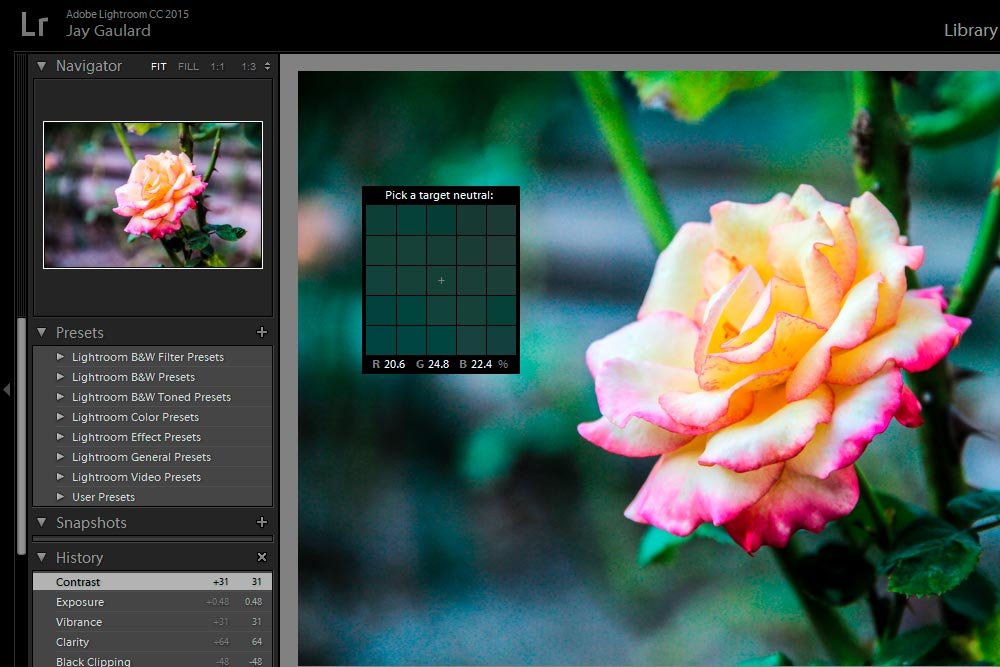
If you play inside the White Balance area for a while, you’ll most likely discover that randomly moving sliders in an effort to correct and set this aspect sometimes feels like you’re at the casino. You may get lucky, but you also may not. Unless you’ve got something specific in mind, moving sliders oftentimes isn’t the most productive method for changing the temperature and tint of a photograph.Adobe Lightroom has a really cool feature. It comes in three parts. The first part is a selector tool. This looks like a a dropper – I’ve got it circled in red in the screenshot below. The second part is the color identifier, for lack of a better name. In the below screenshot, you can see this box hovering over the photo. Lastly, we have a preview, which can be found in the upper left corner. To enlarge this preview thumbnail, I clicked and dragged so the left column is wider than it normally is.
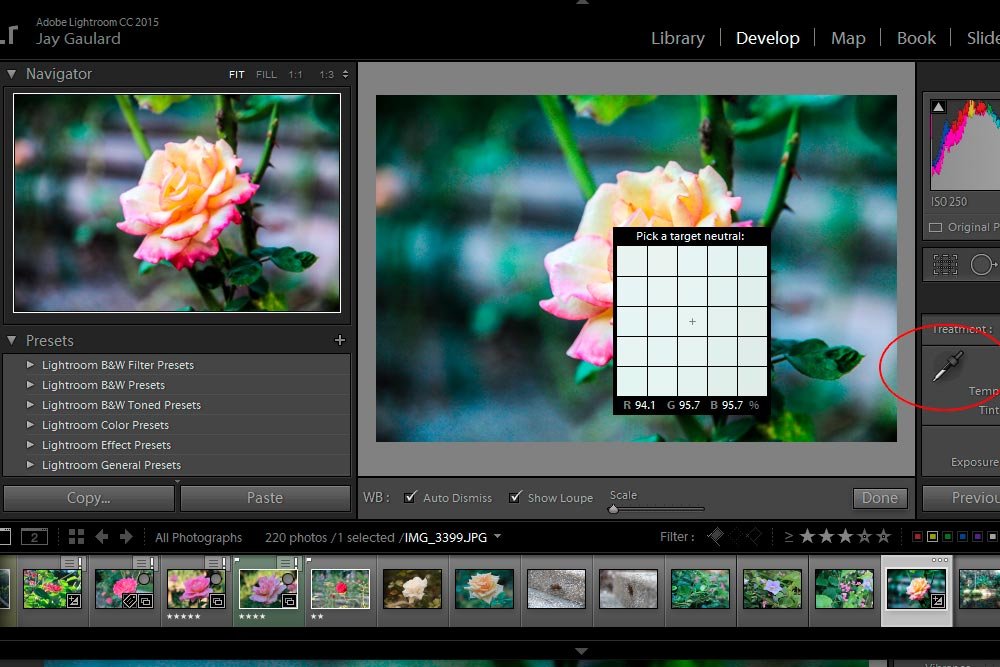
Basically, if you click on the dropper and then move it around the photo, you’ll see the color identifier box change colors. That’s based on the point that you’re hovering over with the dropper. As you move the dropper, the colors change, which in turn, change the white balance of the preview thumbnail. The reason I said this is a cool feature is because instead of simply and continuously clicking with the dropper to view and apply a new white balance, all you need to do is hover. When you see something like the white balance you’re after in the preview, you can click to apply it. After that, you can finesse the sliders to fine tune the temperature and tint.
Many of the photos you take might not have the white balance you want to see. To first correct this area, you need to find a neutral color in the photo, such as white or gray. Once you do, you can hover over there area to make sure it’s actually neutral (via the color identifier box – the RGB values are displayed – the more equal the values are, the more neutral the color is). While hovering, look at the preview and when happy, click to apply. I’ll do this below. My goal is to warm the photo up a bit. Right now, it’s too cool for my liking.
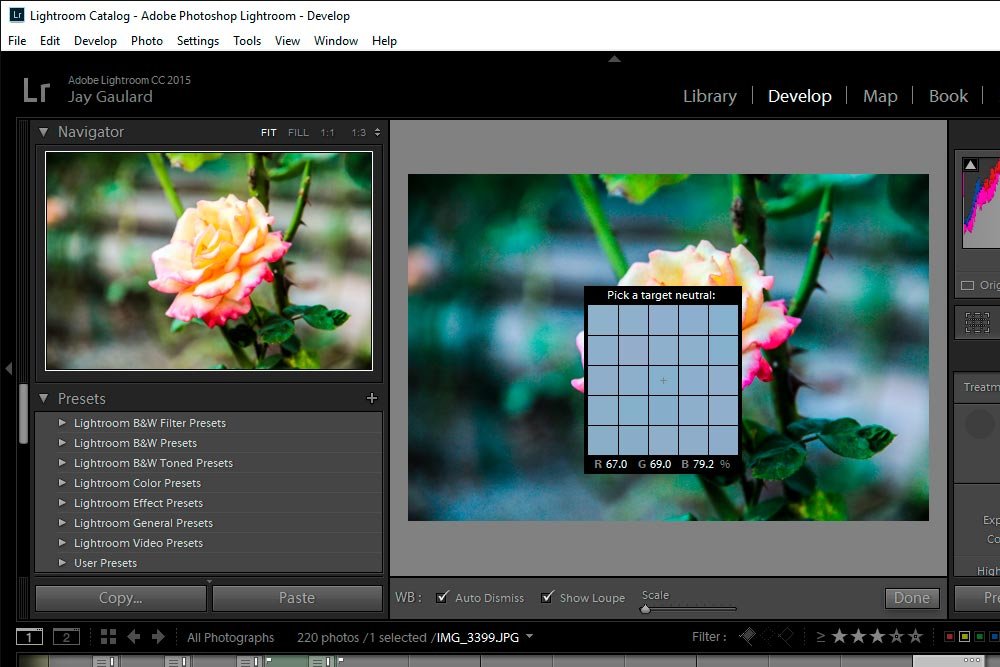
Even though the area I hovered over with the white balance selector is bluer than a neutral color would be, I was happy with it because the preview was nice and warm. I was going for a specific look here. Now, if I wanted to adjust further, I could do so with the sliders. This is the new white balance corrected photo.
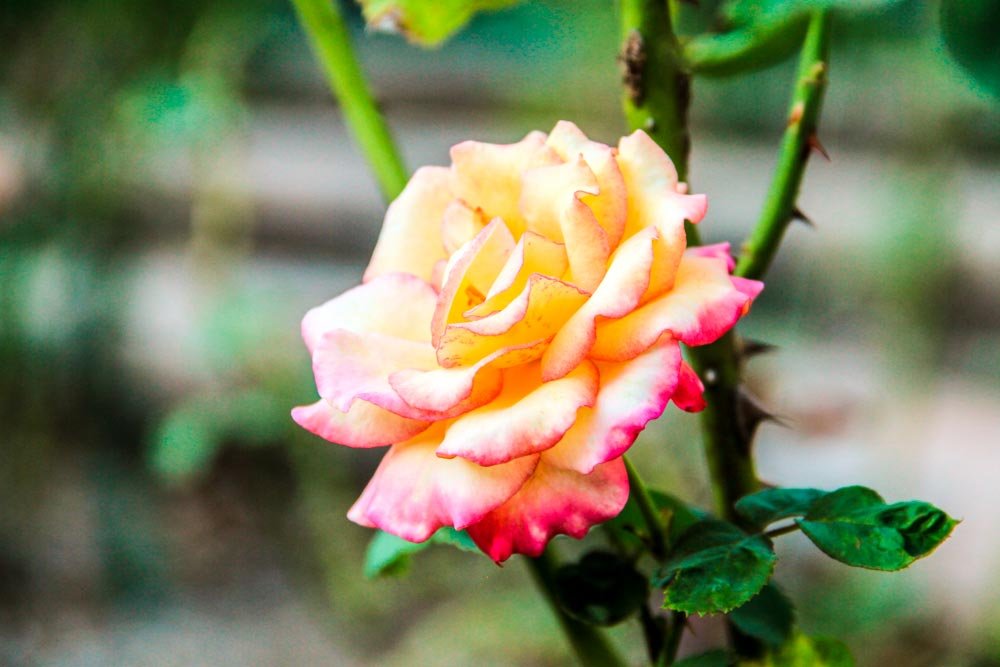
When correcting a photograph’s white balance, you can base your decision around what you know should be white. For instance, if you’re a wedding photographer, the dress is most likely going to be white. You can click that with the White Balance Selector Tool. If you’re a portrait photographer and your model is wearing something white or gray, you can click on that. You can also use white balance cards. Those are a huge help.
Remember, there is usually a correct white balance. This value may or may not be to your liking. As a photographer and editor, you’ll need to experiment to find exactly what you’re looking for. The good news is that adjusting white balance happens to be extremely fun. It’s far reaching and gets many oohs and aahs.

