LukeLewis
Member
- Joined
- May 7, 2021
- Messages
- 134
- Reaction Score
- 0
- Points
- 21
- #1
Cameras have ranges. They have trouble capturing extremes in both directions. For example, if you were trying to take a photo of something and there was pure black and pure white in the scene, your camera would have difficulty with accurately representing that in the final photo. The same is true when it comes to color. Trying to take a photo of a warm scene and a cool scene at once is a Herculean effort. It’s for this reason that a few brilliant people invented post-processing applications, such as Adobe Camera Raw and Photoshop. With these tools, we can help our photos along and change things up so we’re looking at our photos just as we looked at the original scene. Well, we can add a bit of extra love too, but I won’t mention that right now.
In today’s post, I’m going to show you a really neat trick that helps isolate areas of a photo. For this trick, you’ll need both Adobe Camera Raw and Adobe Photoshop. Camera Raw is used for the actual editing and Photoshop is used to parse out what is what. The primary use of Photoshop is to take advantage of layers and layer masks. Once you see how this type of workflow operates, I’m sure you’ll use it for a lifetime. It’s fast, easy and effective and it can be used in so many situations.
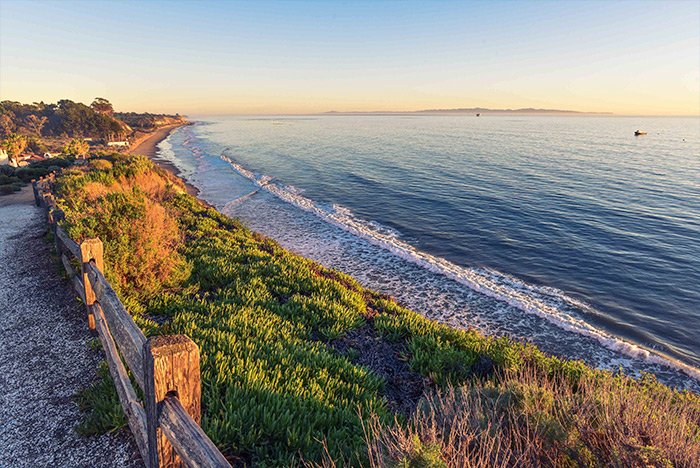
I just opened the image into Camera Raw from Adobe Bridge. I changed up the colors somewhat and made things a bit more warm. I don’t want to go crazy or anything, but I would like to make the grassy area, wooden fence post and parking lot look more friendly. I think it can use some tweaking. For this, I’ll push the Temperature slider in the Basic panel to the right and then I’ll head into the Split Toning panel and add some saturation to the red/orange colors. To learn how to make these types of adjustments, please review these posts:
Use Split Toning For Simple Color Correction in Adobe Camera Raw
How To Make A Photo “Pop” With Adobe Camera Raw
This is the output of the first version. The warmer one.
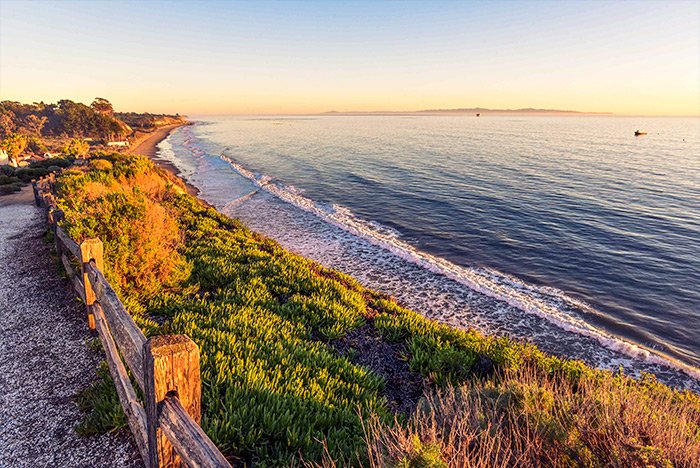
As you can see, the warmth I added was applied to the entire photo. I’m not concerned with that as I’ll correct it later on. Right now, since Camera Raw closed out after I transferred the photo to Photoshop, I’ll return to Bridge to launch the same exact photo into Camera Raw again. This time though, I’ll push the Temperature slider to the left and the Split Toning sliders towards the blues to add a cool appearance to the image. When I’m finished, I’ll move this version into Photoshop as well. Take a look at this one. This time, when I make the edits, I’ll be looking at how the water and the sky look.
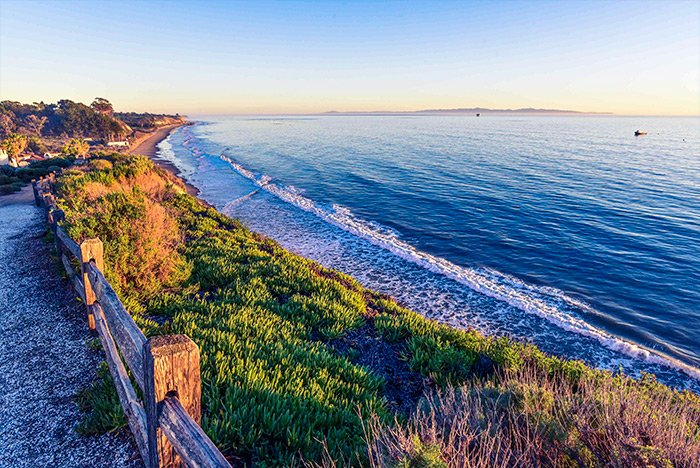
As you can see, I didn’t do anything too drastic at all. When I made the warm adjustments, I ignored the cooler areas of the image and when I made the cool adjustments, I ignore the warm areas. That’ll give me good separation in just a moment.
Here’s a tip for you. While dragging images like this from one tab to another, holding down the Shift key makes sure to situate the one being dragged exactly in the center of the new workspace. Since these both are identical in size and shape, they end up right on top of one another, aligned and everything.
From here on out, the job is easy, as if it weren’t easy before. I’ll click the cool layer in the Layers panel, which should be on top, and then head down to the bottom of the Layers panel and click on the Add Layer Mask icon. This will add a layer mask to the cool photo layer. Take a look.
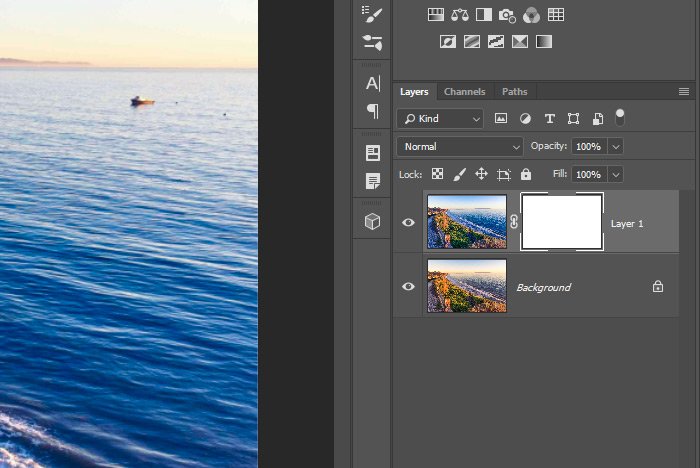
Then, with the Brush Tool sized appropriately (about 600 pixels wide because the image is so large) and the color set to black, I’ll begin brushing the cool away from any place in the photo I’d like to see warmth. It doesn’t matter if I screw up because I’m dealing with a mask. I could always just swap the color to white and fix what I messed up.
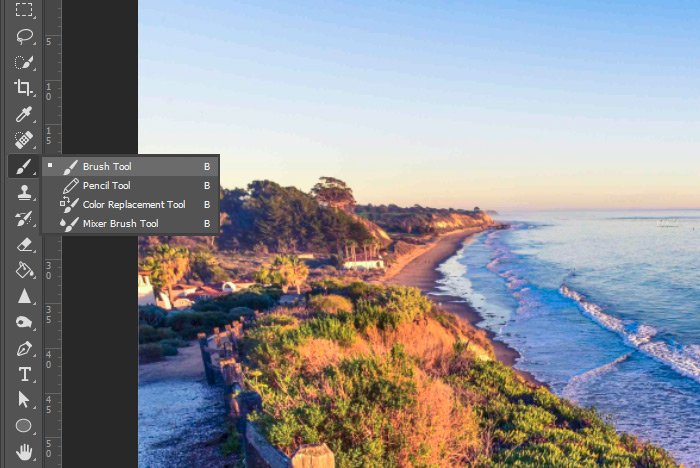
This is what the mask thumbnail looks like after I did the painting.
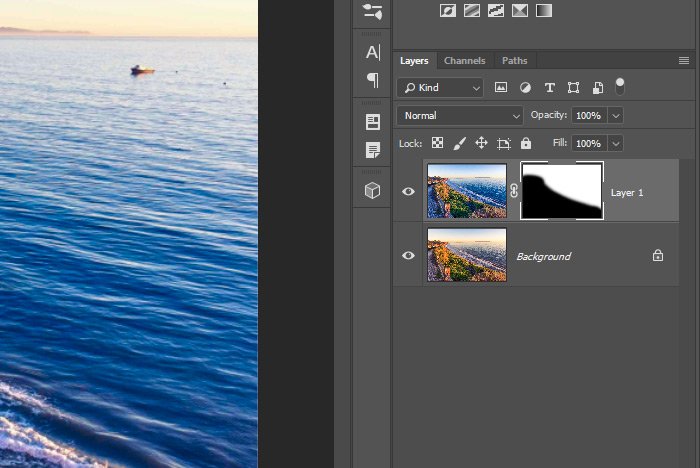
Basically, the black is where the cool photo is being hidden and the white is where the cool is exposed. In the black areas, the warmer image should be showing through from the background. Let’s take a look at the final image.
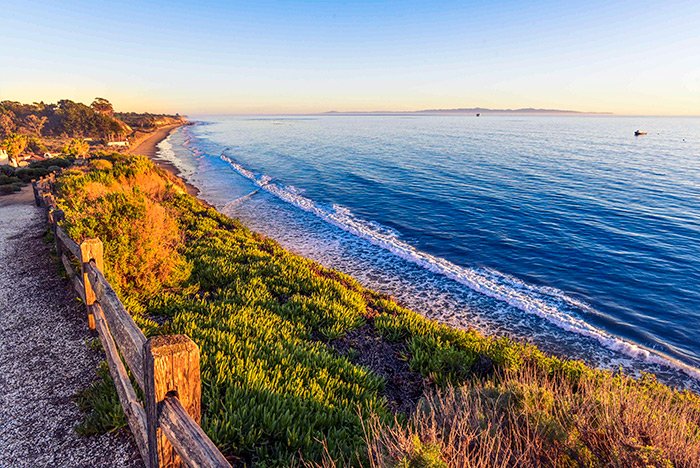
Looks pretty good, right? I obviously could have gone much further with the colors, but I felt this looked pretty good. If I wanted to edit the combined image in Camera Raw again, all I would need to do is to hold down the Ctrl or Shift key on my keyboard and select both layers in the Layers panel. Then, I’d right-click on the layers and choose Convert to Smart Object from the menu that appears. Finally, I’d go to the Filter > Camera Raw Filter menu item and click. Camera Raw would open with the image in it, I’d make my edits and then return to Photoshop by pressing the OK button.
I think this will help if you’re into doing something like this. I hope I clearly explained how to edit one image twice in Adobe Camera Raw and then move both of those images into Photoshop. From there, I explained how to use a layer mask to hide a portion of one image to reveal that portion of the other, allowing for some amazing color combinations. If you have any questions about this post, please let me know in the comment section down below. Thanks for reading!
In today’s post, I’m going to show you a really neat trick that helps isolate areas of a photo. For this trick, you’ll need both Adobe Camera Raw and Adobe Photoshop. Camera Raw is used for the actual editing and Photoshop is used to parse out what is what. The primary use of Photoshop is to take advantage of layers and layer masks. Once you see how this type of workflow operates, I’m sure you’ll use it for a lifetime. It’s fast, easy and effective and it can be used in so many situations.
Today’s Demo Photo
This is the photo I’ll be working with. I chose this particular one because it’s got two distinct areas that aren’t being displayed to their full potentials. The area to the left is warm, while the area to the right is cool. I’d like to bring both of these feelings out simultaneously. The camera didn’t do a very good job at that.
Making Adjustments in Camera Raw
The entire point of this post is to show you how to bring out specific colors from a photograph. The way I’m going to do this is to adjust the image once in Camera Raw and then move it over to Photoshop. Then, I’ll open the photo again in Camera Raw, adjust it so the colors look totally different and open that version in Photoshop as well. In Photoshop, I’ll have two files open. They’ll appear different, due to the opposing color casts. It’s there I’ll take advantage of a layer mask to hide and reveal certain areas of color. You’re going to love it.I just opened the image into Camera Raw from Adobe Bridge. I changed up the colors somewhat and made things a bit more warm. I don’t want to go crazy or anything, but I would like to make the grassy area, wooden fence post and parking lot look more friendly. I think it can use some tweaking. For this, I’ll push the Temperature slider in the Basic panel to the right and then I’ll head into the Split Toning panel and add some saturation to the red/orange colors. To learn how to make these types of adjustments, please review these posts:
Use Split Toning For Simple Color Correction in Adobe Camera Raw
How To Make A Photo “Pop” With Adobe Camera Raw
This is the output of the first version. The warmer one.

As you can see, the warmth I added was applied to the entire photo. I’m not concerned with that as I’ll correct it later on. Right now, since Camera Raw closed out after I transferred the photo to Photoshop, I’ll return to Bridge to launch the same exact photo into Camera Raw again. This time though, I’ll push the Temperature slider to the left and the Split Toning sliders towards the blues to add a cool appearance to the image. When I’m finished, I’ll move this version into Photoshop as well. Take a look at this one. This time, when I make the edits, I’ll be looking at how the water and the sky look.

As you can see, I didn’t do anything too drastic at all. When I made the warm adjustments, I ignored the cooler areas of the image and when I made the cool adjustments, I ignore the warm areas. That’ll give me good separation in just a moment.
Masking in Photoshop
At this point, I have two tabs open in Photoshop, one with the warm image and one with the cool image. With my mouse, I’m going to click right on one of the images (in this case, the cool one), and, while holding down the Shift key on my keyboard, drag the image up to the tab of the warm image file. Once I see the tab activate, I’ll continue holding down my mouse button and drag the image down into the center of the workspace. I’ll let go then.Here’s a tip for you. While dragging images like this from one tab to another, holding down the Shift key makes sure to situate the one being dragged exactly in the center of the new workspace. Since these both are identical in size and shape, they end up right on top of one another, aligned and everything.
From here on out, the job is easy, as if it weren’t easy before. I’ll click the cool layer in the Layers panel, which should be on top, and then head down to the bottom of the Layers panel and click on the Add Layer Mask icon. This will add a layer mask to the cool photo layer. Take a look.

Then, with the Brush Tool sized appropriately (about 600 pixels wide because the image is so large) and the color set to black, I’ll begin brushing the cool away from any place in the photo I’d like to see warmth. It doesn’t matter if I screw up because I’m dealing with a mask. I could always just swap the color to white and fix what I messed up.

This is what the mask thumbnail looks like after I did the painting.

Basically, the black is where the cool photo is being hidden and the white is where the cool is exposed. In the black areas, the warmer image should be showing through from the background. Let’s take a look at the final image.

Looks pretty good, right? I obviously could have gone much further with the colors, but I felt this looked pretty good. If I wanted to edit the combined image in Camera Raw again, all I would need to do is to hold down the Ctrl or Shift key on my keyboard and select both layers in the Layers panel. Then, I’d right-click on the layers and choose Convert to Smart Object from the menu that appears. Finally, I’d go to the Filter > Camera Raw Filter menu item and click. Camera Raw would open with the image in it, I’d make my edits and then return to Photoshop by pressing the OK button.
I think this will help if you’re into doing something like this. I hope I clearly explained how to edit one image twice in Adobe Camera Raw and then move both of those images into Photoshop. From there, I explained how to use a layer mask to hide a portion of one image to reveal that portion of the other, allowing for some amazing color combinations. If you have any questions about this post, please let me know in the comment section down below. Thanks for reading!
