CraigHardy
Member
- Joined
- May 11, 2021
- Messages
- 223
- Reaction Score
- 2
- Points
- 18
- #1

If you’ve ever put multiple images together in a layout of some sort, this post may be of great help to you. What I’m talking about here are, perhaps, layouts for postcards, magazines, newspapers, etc…the types of things that you’ve well specified, but haven’t yet obtained the final images for. In cases like this, it’s oftentimes helpful to put the entire project together with placeholder images and then replace those images, or swap them out for the real ones, later on. This type of thing is totally doable and very simple. It’s actually just a few more steps than you would have taken otherwise.
In today’s post, I’m going to show you how to place specifically sized photos into a project as Smart Objects. Then, I’ll demonstrate how to replace those Smart Objects with other images. The new images will need to be of the same dimensions as the originals, but the neat thing is, they’ll follow any transformations given to those originals. Don’t worry, I’ll explain exactly what I’m talking about down below. Let’s just say – if I place one picture in a project as a Smart Object and then transform it multiple times, I can replace that picture with another and the same transformations will be applied to the new one with no additional work on my part. It’s really cool.
Beginning the Project
To kick things off, I’m going to create an empty document with the dimensions of 1000×667 pixels. This is what I typically use for this blog. Next, I’m going to head up to the File > Place Embedded menu item and select it.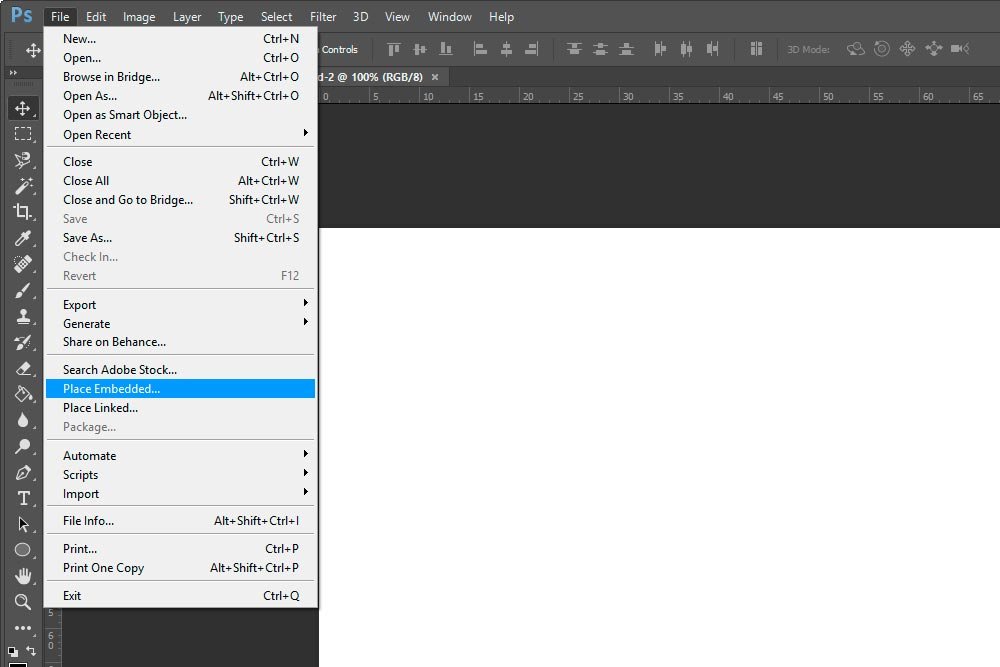
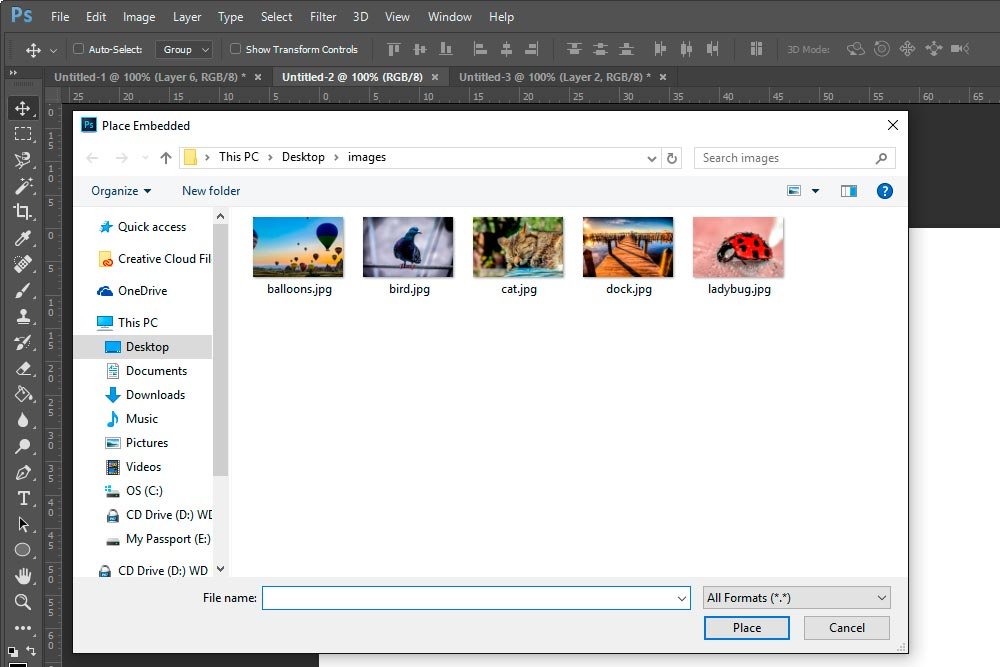
When I do that, I can navigate to the folder that holds my images. Now, I want to let you know that I’ll be working with 5 images today. I’ve already sized all of them to 1000×667 pixels. I’ll be placing 4 images in the document initially and then I’ll use the final image for the replacement demonstration.
Placing an Image
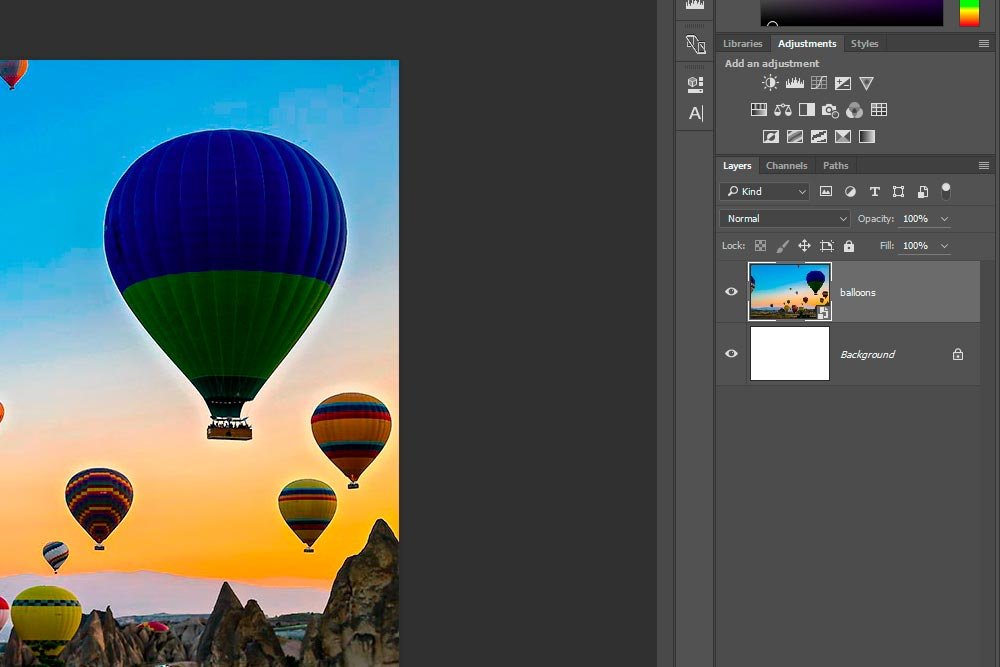
When I select an image from the folder and click Place, it’ll appear in my new document. It’ll also be placed as a Smart Object and will be transformable. Take a look at the layer in the Layers panel. You can see the small Smart Object icon in the layer. Actually, when you initially place the image, the Smart Object icon won’t be visible in the Layers panel. It’s not until you hit Enter on your keyboard to accept the placement that the icon appears. This screenshot is right after I placed the image. Take notice of the image layer in the Layers panel. There’s no icon.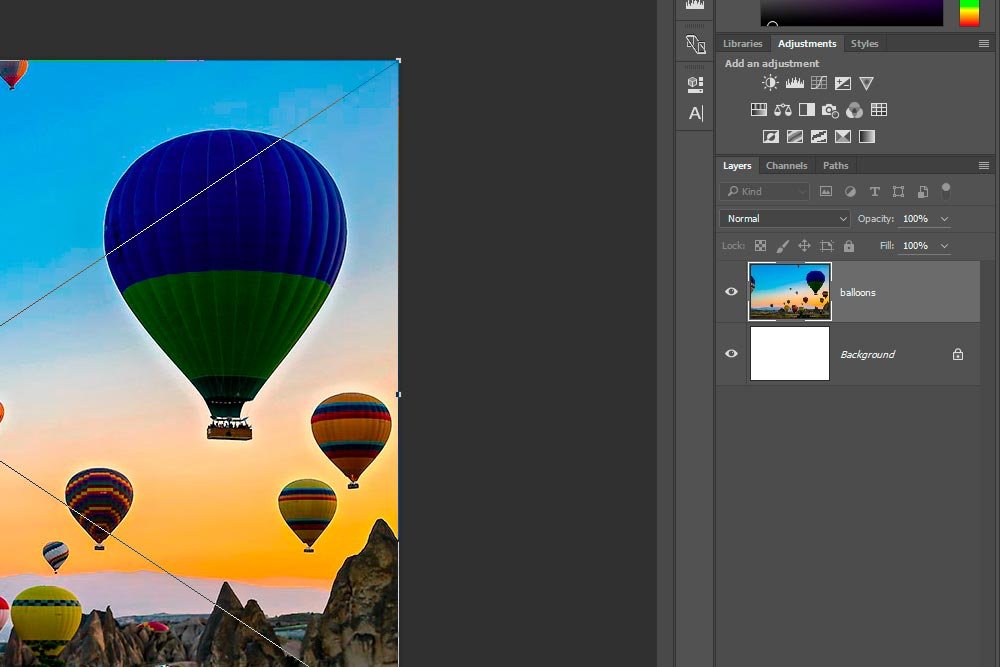
And this screenshot is after I hit Enter on my keyboard to accept the placement. Now the Smart Object icon appears.
From here, I’ll go through this step and few more times until 4 images are placed in my document.
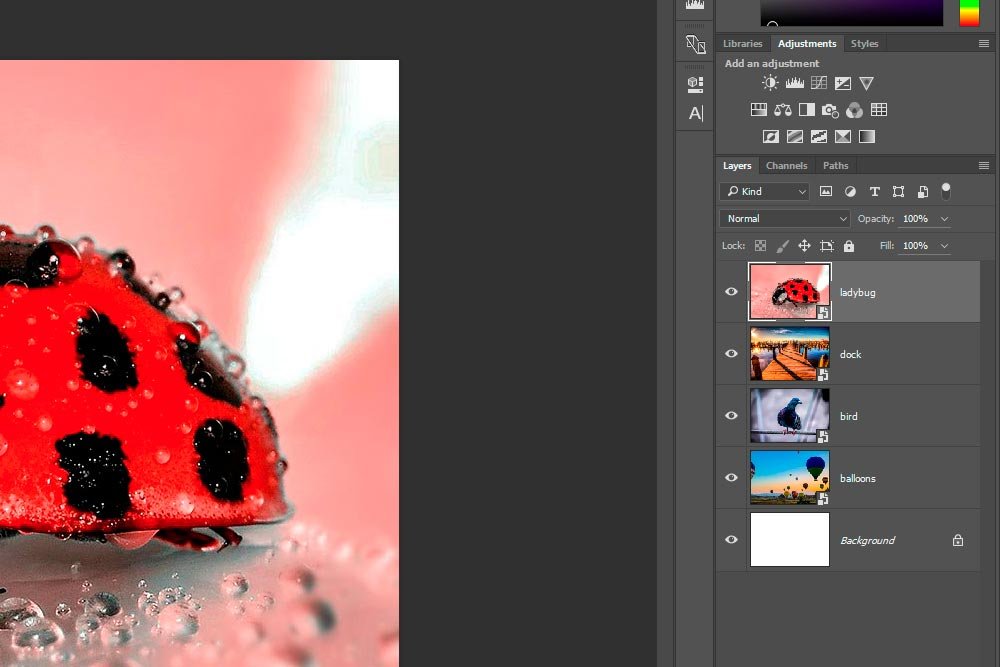
Now, if you aren’t familiar with how awesome Smart Objects are, I suggest you read my posts on the topic. It’s worth it to get caught up on this stuff because Smart Objects are the cat’s meow and can help your editing out immensely.
What are Smart Objects in Adobe Photoshop?
Converting Multiple Layers into a Smart Object in Adobe Photoshop
Editing RAW Files as Smart Objects in Adobe Photoshop
The Difference Between Duplicate Smart Objects in Adobe Photoshop
Creating My Layout
I’m going to do a bit of transforming to these Smart Objects now. I’m going to reduce their sizes by 50% and arrange them in the corners of the document. I’ll also add some thin white lines to separate each of the pictures. There’s nothing special about this step. I’ve done a lot of transforming on this blog, so if you want to read up on it, please feel free.Using the Transform & Free Transform Tools in Adobe Photoshop
As a small tip, the fastest method for transforming these layers is to select all of them at the same time, hit Ctrl+T on your keyboard to turn on Free Transform mode and then type 50% in the Width and Height fields in the option bar. When that’s done, simply hit Enter on your keyboard. This will resize everything, making life much easier.
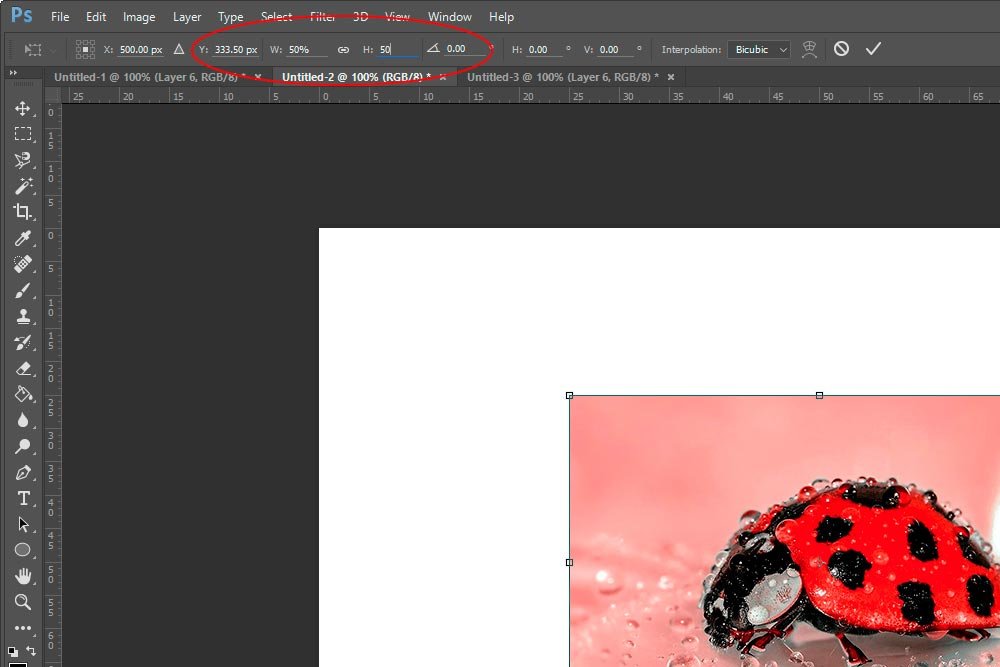
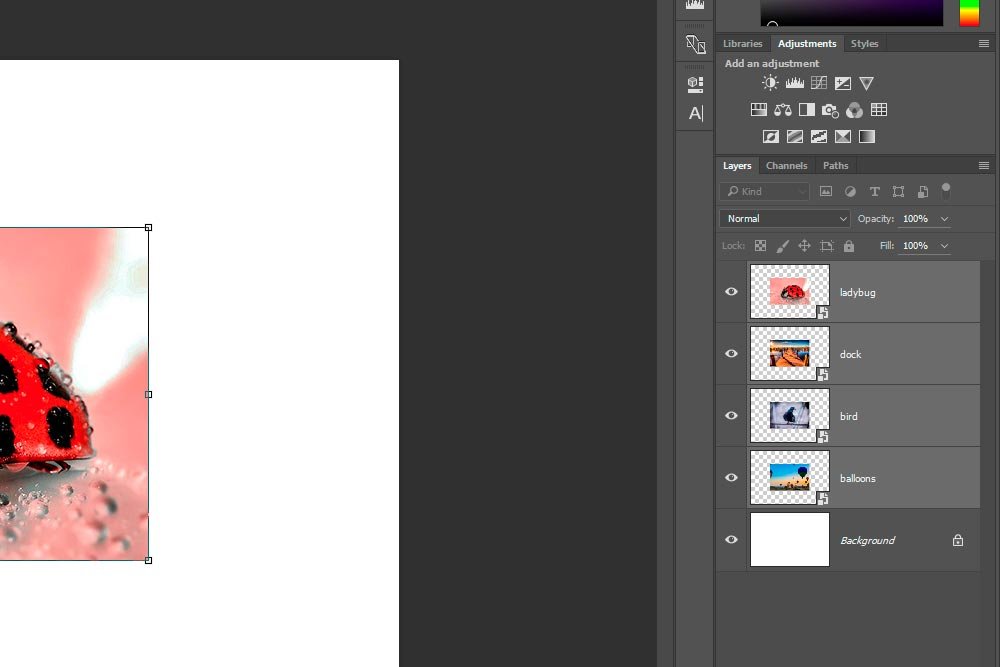
I’ll then arrange the images like I mentioned above and add the white lines. Here’s what I have so far.

Replacing a Smart Object
So far, what I’ve done in this project has been setup. The real power comes in this section. I currently have four Smart Objects that have been “placed” in my document. What this means is that each of these Smart Objects can be considered a placeholder. Since I initially placed the photos as Smart Objects and then transformed them and repositioned them, if I want to replace any or all of the Smart Objects with the same initially sized photo or photos, I could do that. Any new photo will be positioned in the same spot as the one I’m replacing and will appear as a Smart Object with the same transformation properties. In this project, all I’ve done is resized the layers, but if I had done many more transformations, they would all apply to the new Smart Object as well. This is why this method is so valuable. It’s a time saver.I’ve decided that I don’t like the bird image. I have another image that’s 1000×667 pixels and I’d like that in my layout instead. To swap out the bird and bring in my new image, I’m going to first select the layer I’d like to replace over in the Layers panel, then head up to the Layers > Smart Objects > Replace Contents menu item and select it.
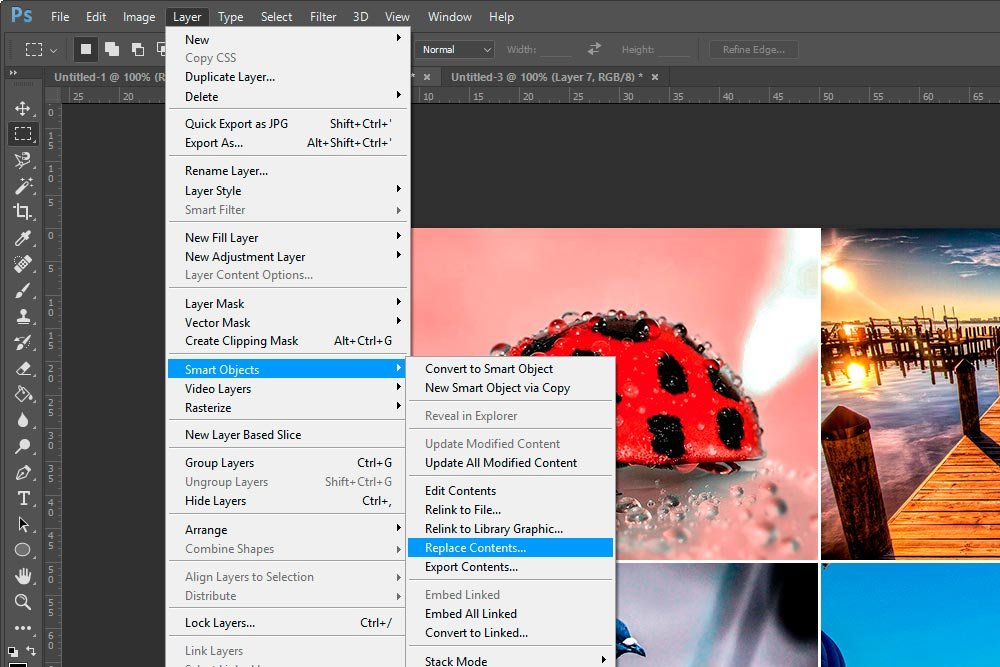
When I do that, the folder with my images pops up again, allowing my to select the cat photo.
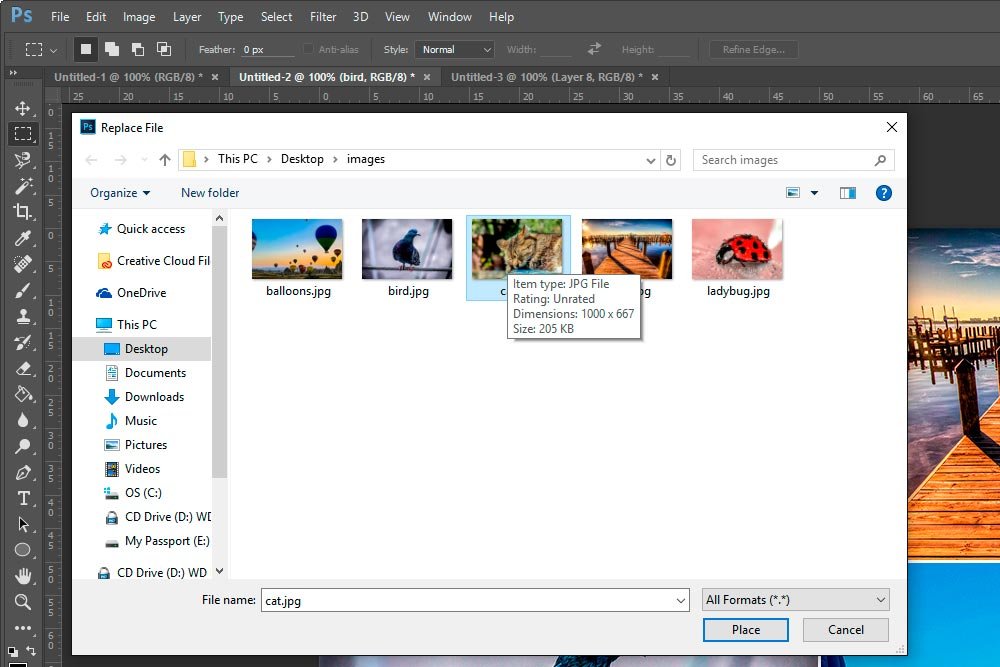
Once selected, I can click Place and watch what happens.

Check that out – the bird is gone and the cat has arrived.
And if I take a look at the Layers panel, I can see that the Bird layer has been replaced with the Cat layer. The best part is, the Cat layer has been automatically resized and is positioned exactly where the Bird layer was. That’s pretty awesome.
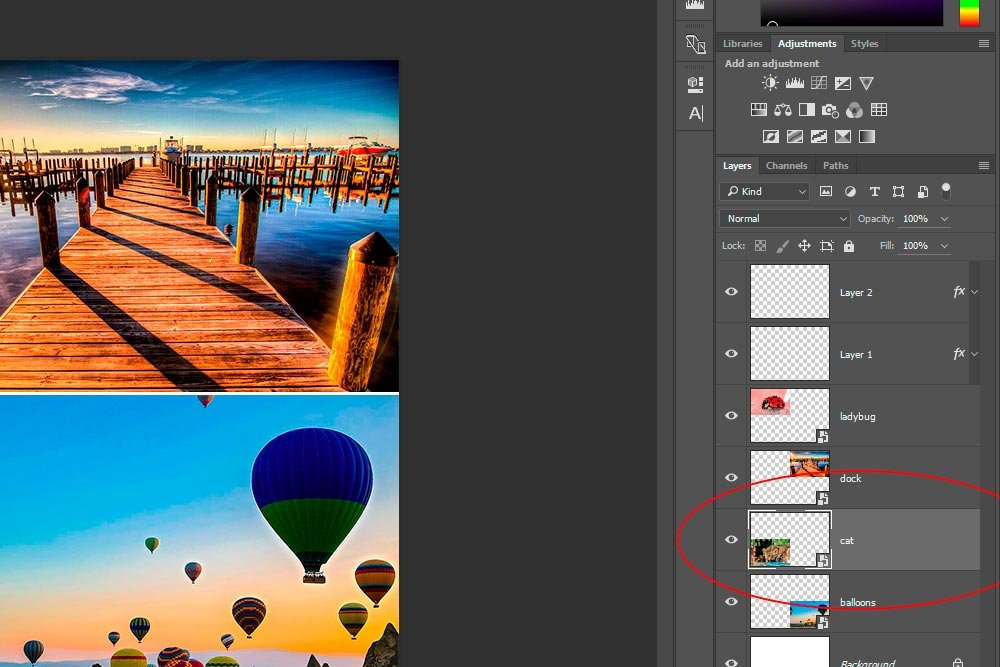
I’m sure you can see the benefit of this. With this method, you can prepare layouts far ahead of time, with no need of the final, high resolution images. When you get the images, you can easily swap out the placeholder photos with the new ones.
——
If you’ve enjoyed today’s post and found it helpful, please share it with a friend. Thanks!
